Sharing Views to Users
In Zoho Analytics, you can easily share your data, reports, and dashboards to any user privately. All the views shared will be accessible online from anywhere, anytime, to the shared user and there is no need for mailing them as attachments. The shared views will always have the current data and reflect the latest changes made.
- How do I share views?
- Can I share multiple views together?
- Can I share the folder in my Workspace?
- Can I share selected columns from my data table?
- Can the users share the report created by them with other members of the organization (Admins and Users)?
- How can I collaborate with my users?
- Can I share views to users who are in my Contacts list?
- How many users can I share my reports with?
- Can I filter the data while sharing?
- What does applying "Apply Parent Table Filter Criteria" option do?
- Can I apply dynamic filtering while sharing?
- How do I share views in viewer mode?
- What is a variable?
- What are the default variables?
- How to create a variable?
- Can I notify my users about the shared views?
- Can I edit the permission I have given?
- Can I remove sharing from a view?
- Can a user remove/unsubscribe a shared workspace?
1. How do I share views?
2. Can I share multiple views together?
Yes, you can share multiple views together. In the Explorer tab, select the required views and then share. When sharing multiple views together, you will not be able to apply filter criteria.
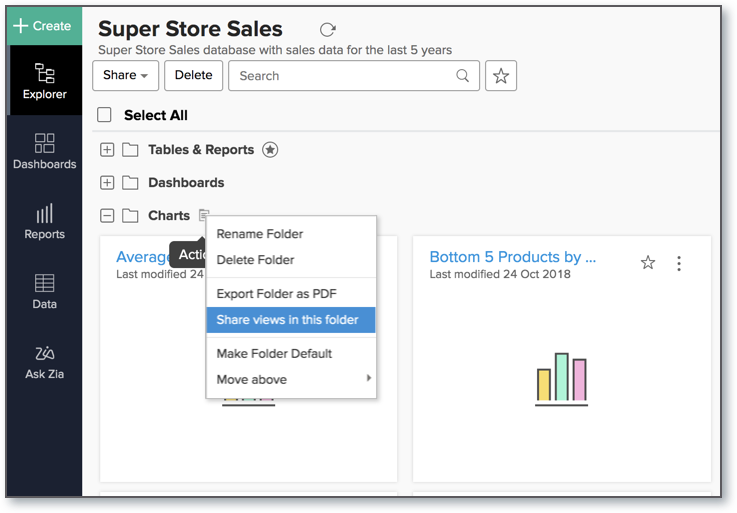
3. Can I share the folder in my Workspace?
Yes, you can share the folder in Zoho Analytics. To share views in a folder, click the Action icon that appears on mouse hover near the corresponding folder name and select Share views in this folder.
4. Can I share selected columns from my data table?
Yes, you can share selected columns from your table to users. This enables you to control what data your users get to see and create reports upon. This will particularly be helpful in case you have sensitive data in your table.
You can share selected columns from your table by following the below steps:
- Open the view to share.
- Set the Sharing operations as stated before.
- Click Apply Permissions & Filters link. The Apply Permissions & Filters dialog will open.
- Click the All Columns link under Read Access and then select the columns to be shared.
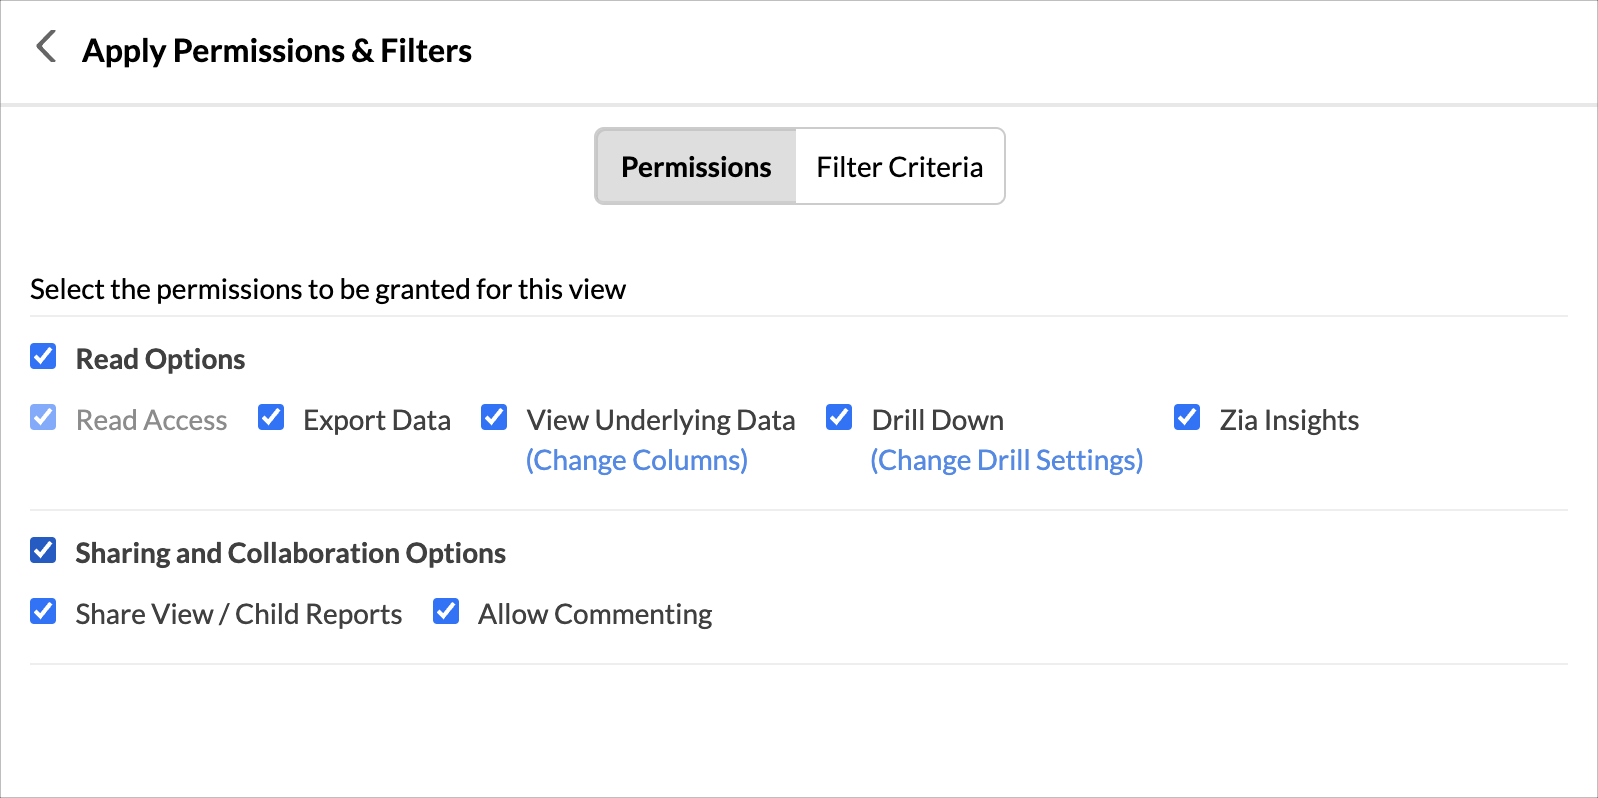
- Click OK to confirm the selected columns. Now, share the table to your users. The Shared users will be able to access only selected columns for viewing and report creation.
5. Can the users share the report created by them with other members of the organization (Admins and Users)?
Yes, the users can share the created views with administrators or other users if the Share View/ Child reports permission is provided by the administrators. Refer to the sharing views section to learn more.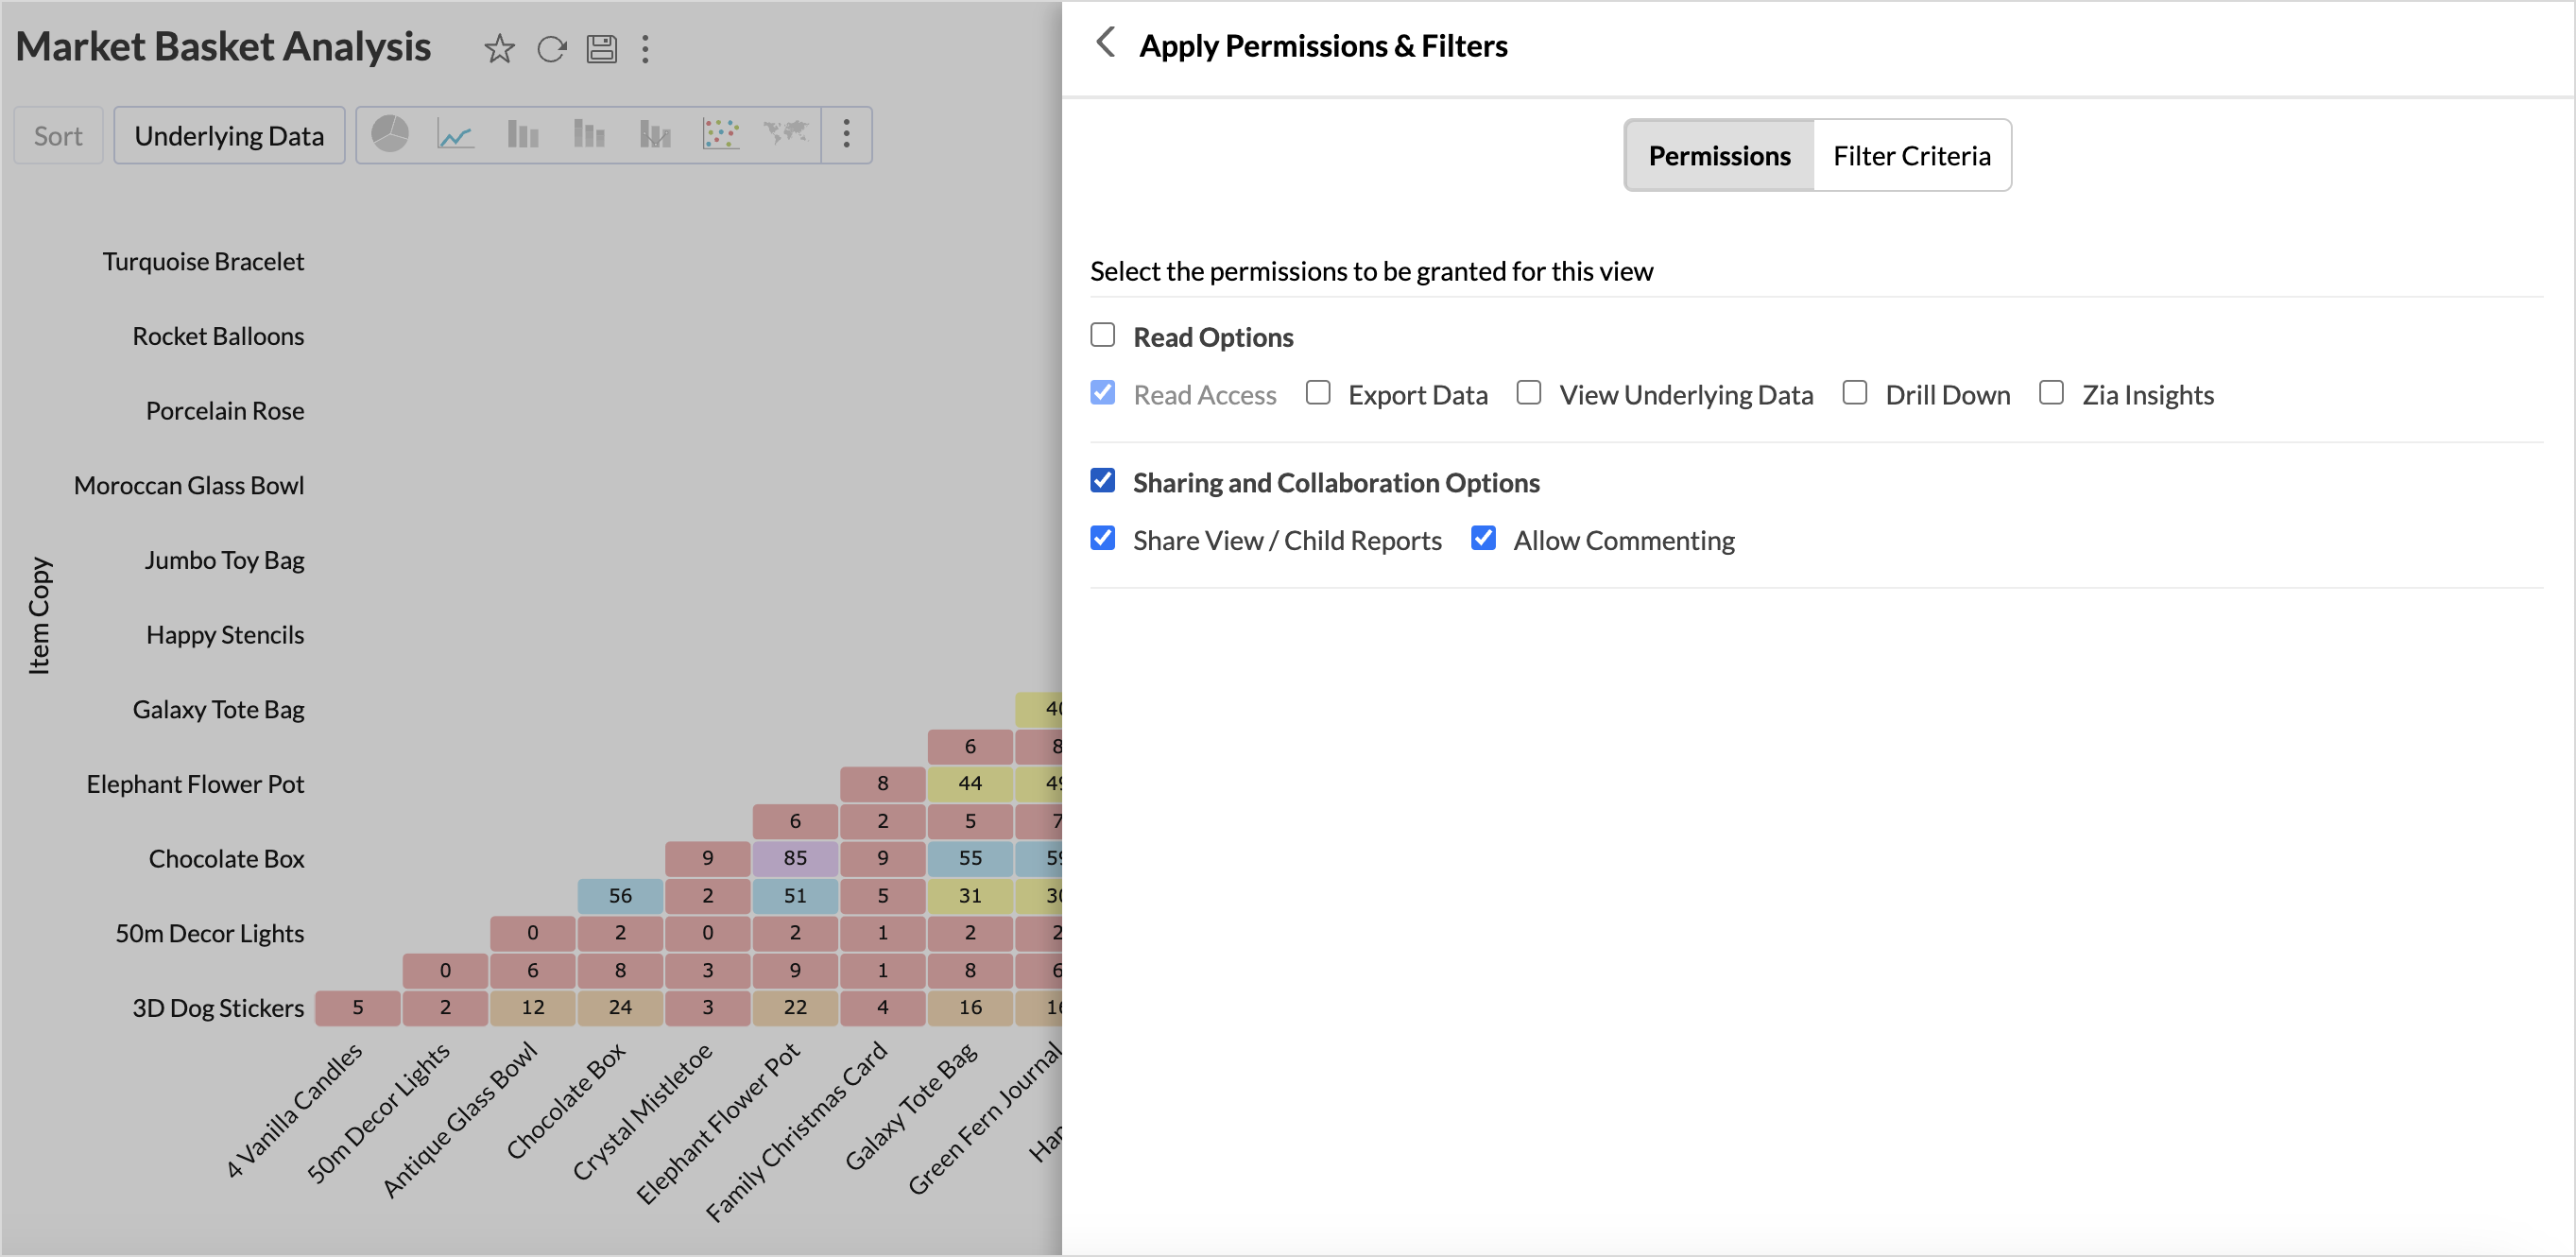
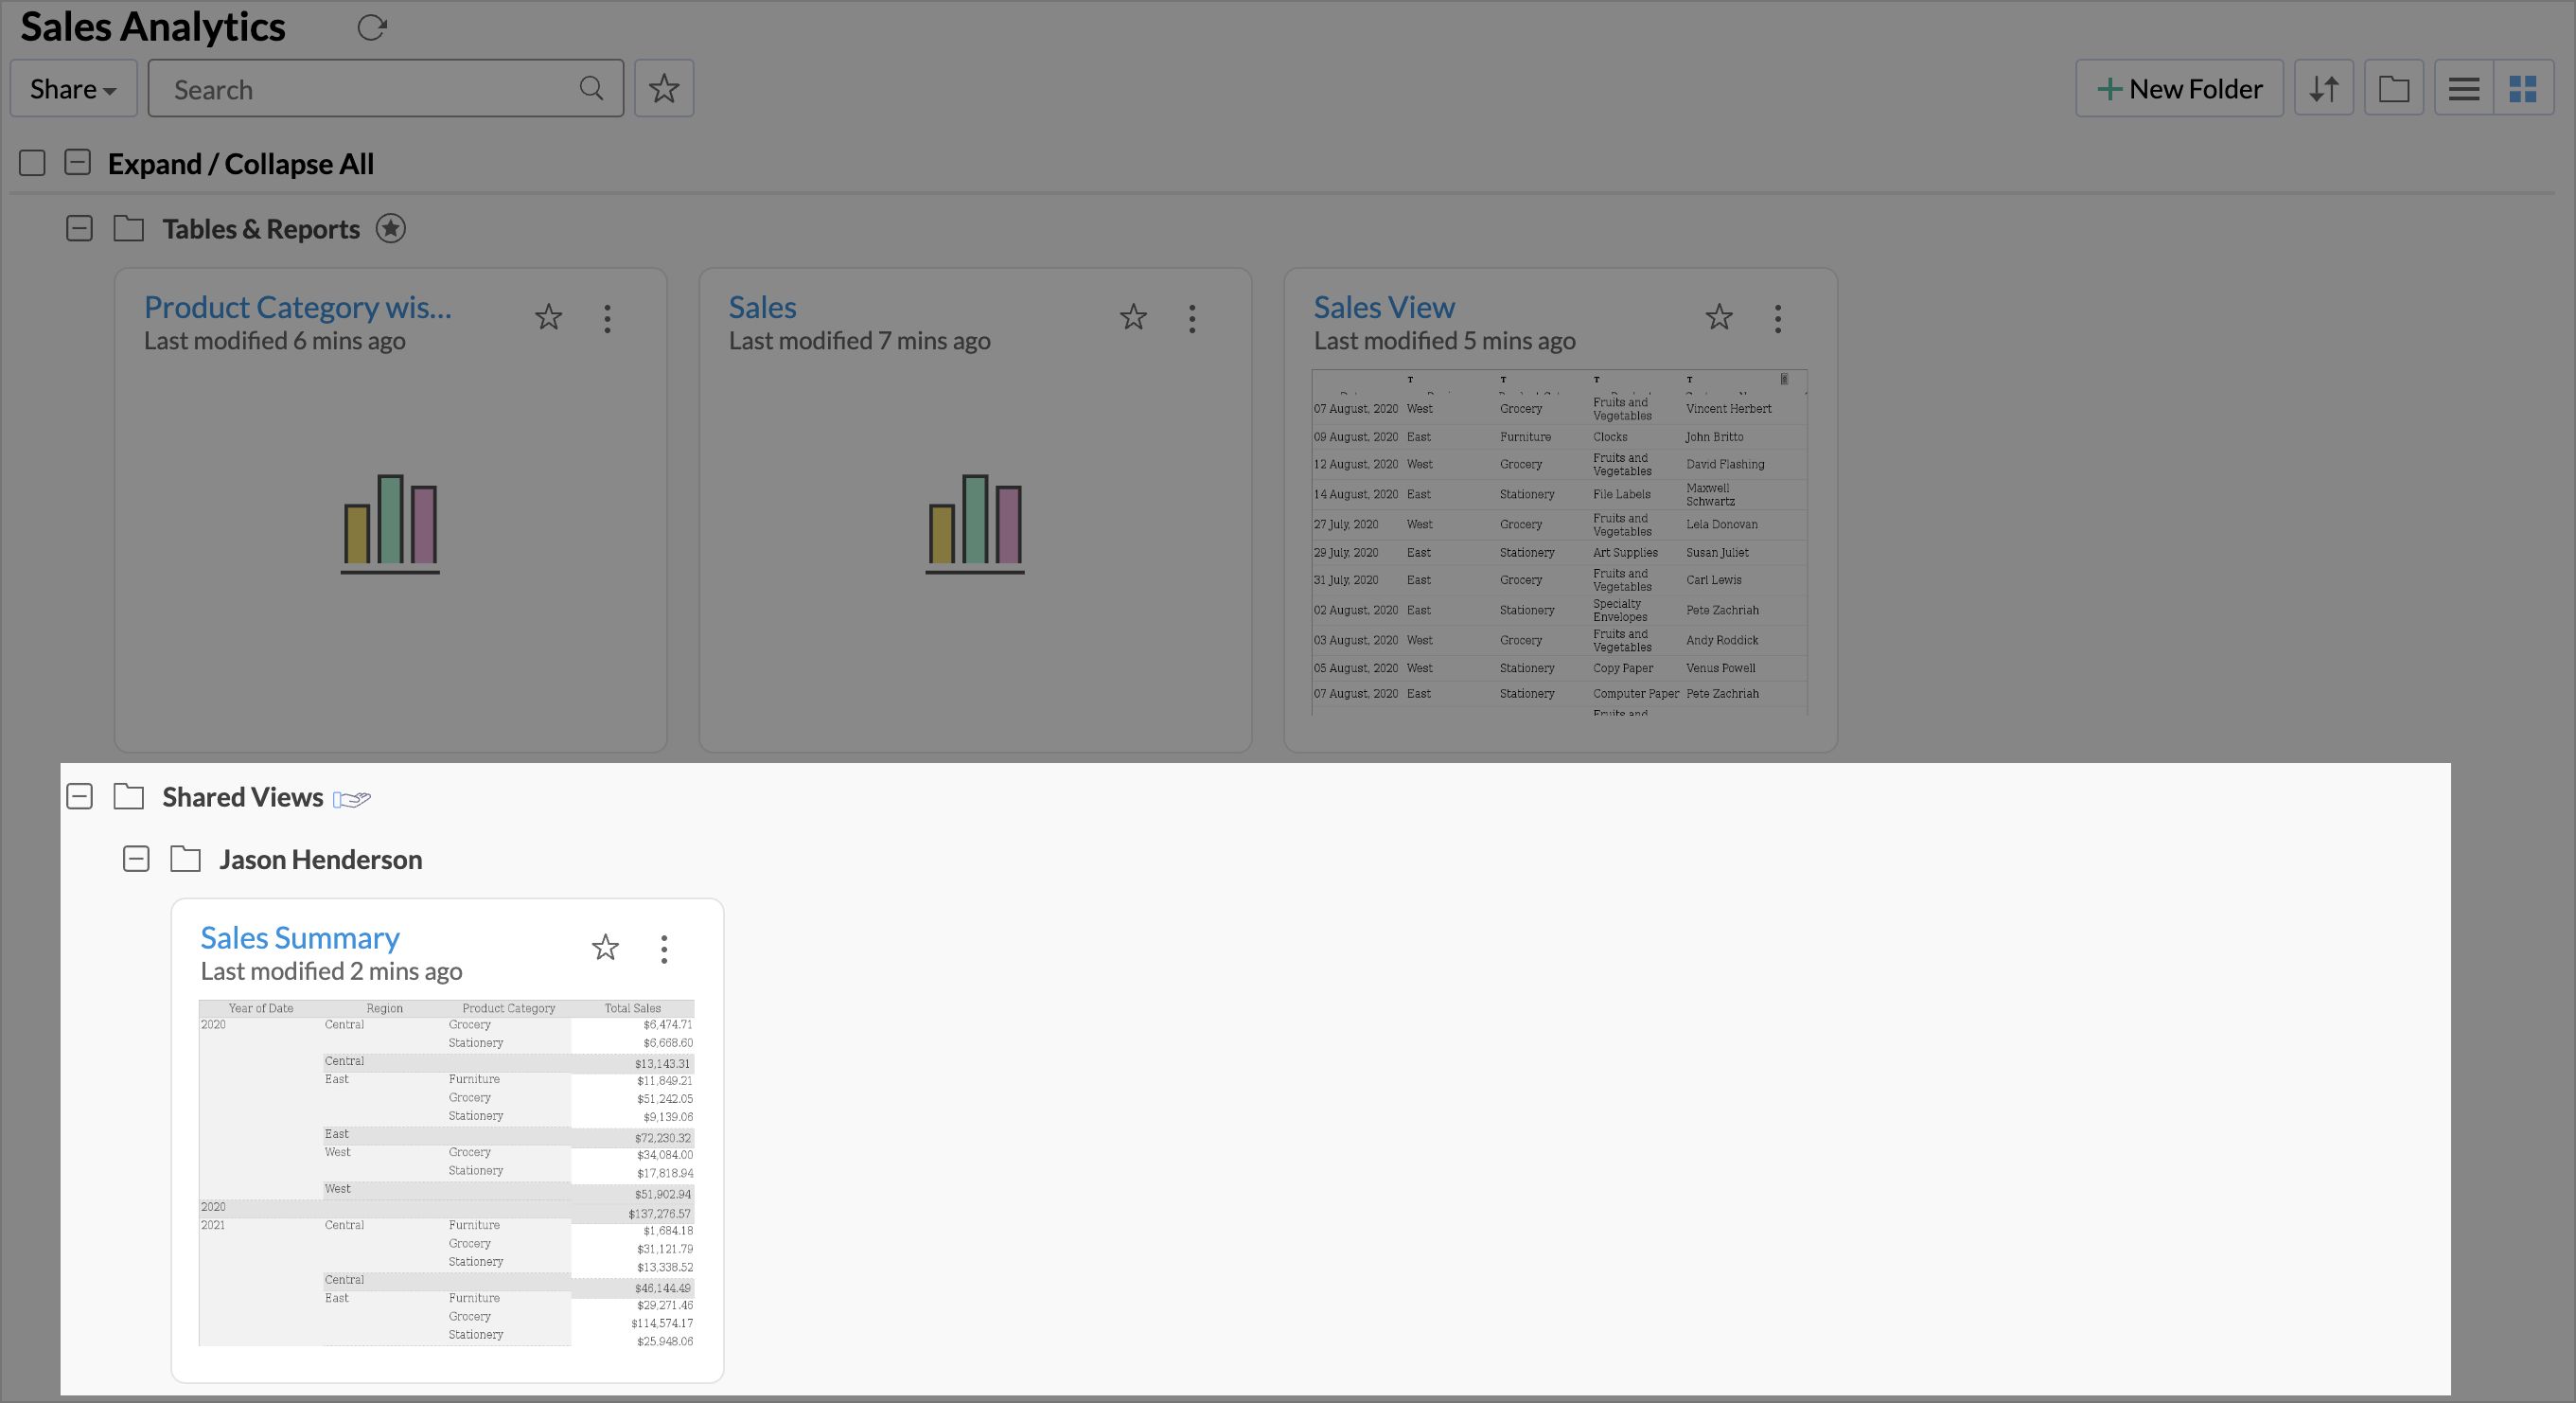
For the administrators, the views shared by the Users will be listed under the Shared Views folder with the name of the user who shared the report.
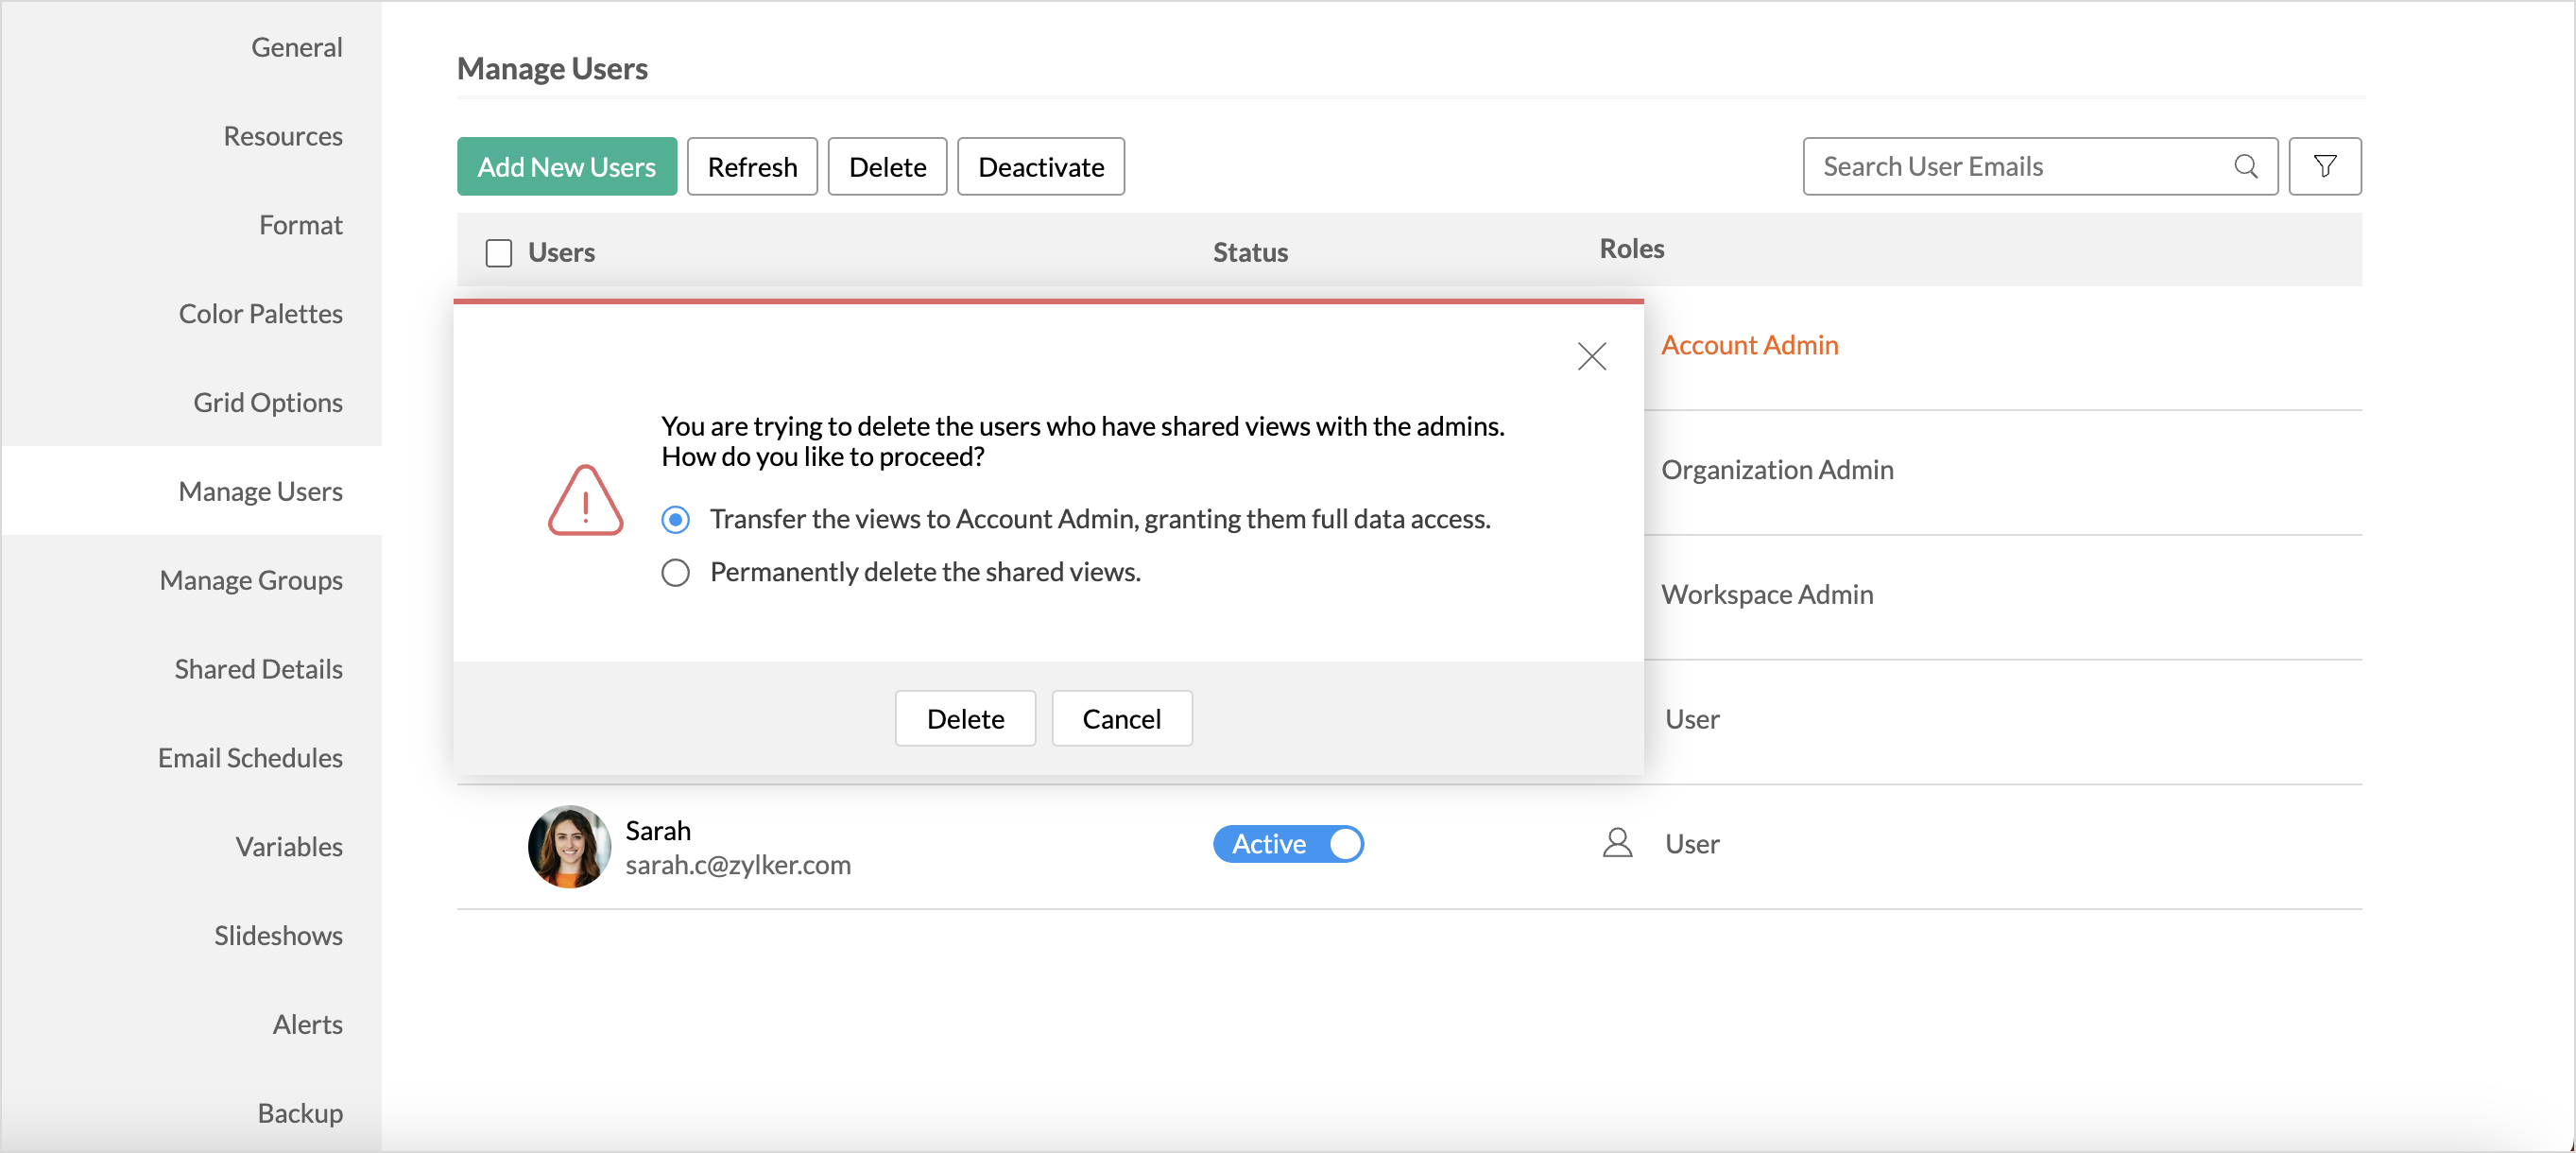
On trying to remove a user from the organization, the administrator can decide on what to do with the views shared by the user. The administrator can choose one of the below options
- Transfer the views to Account Admin, granting them full data access.
- Permanently delete the shared views.
6.How can I collaborate with my users?
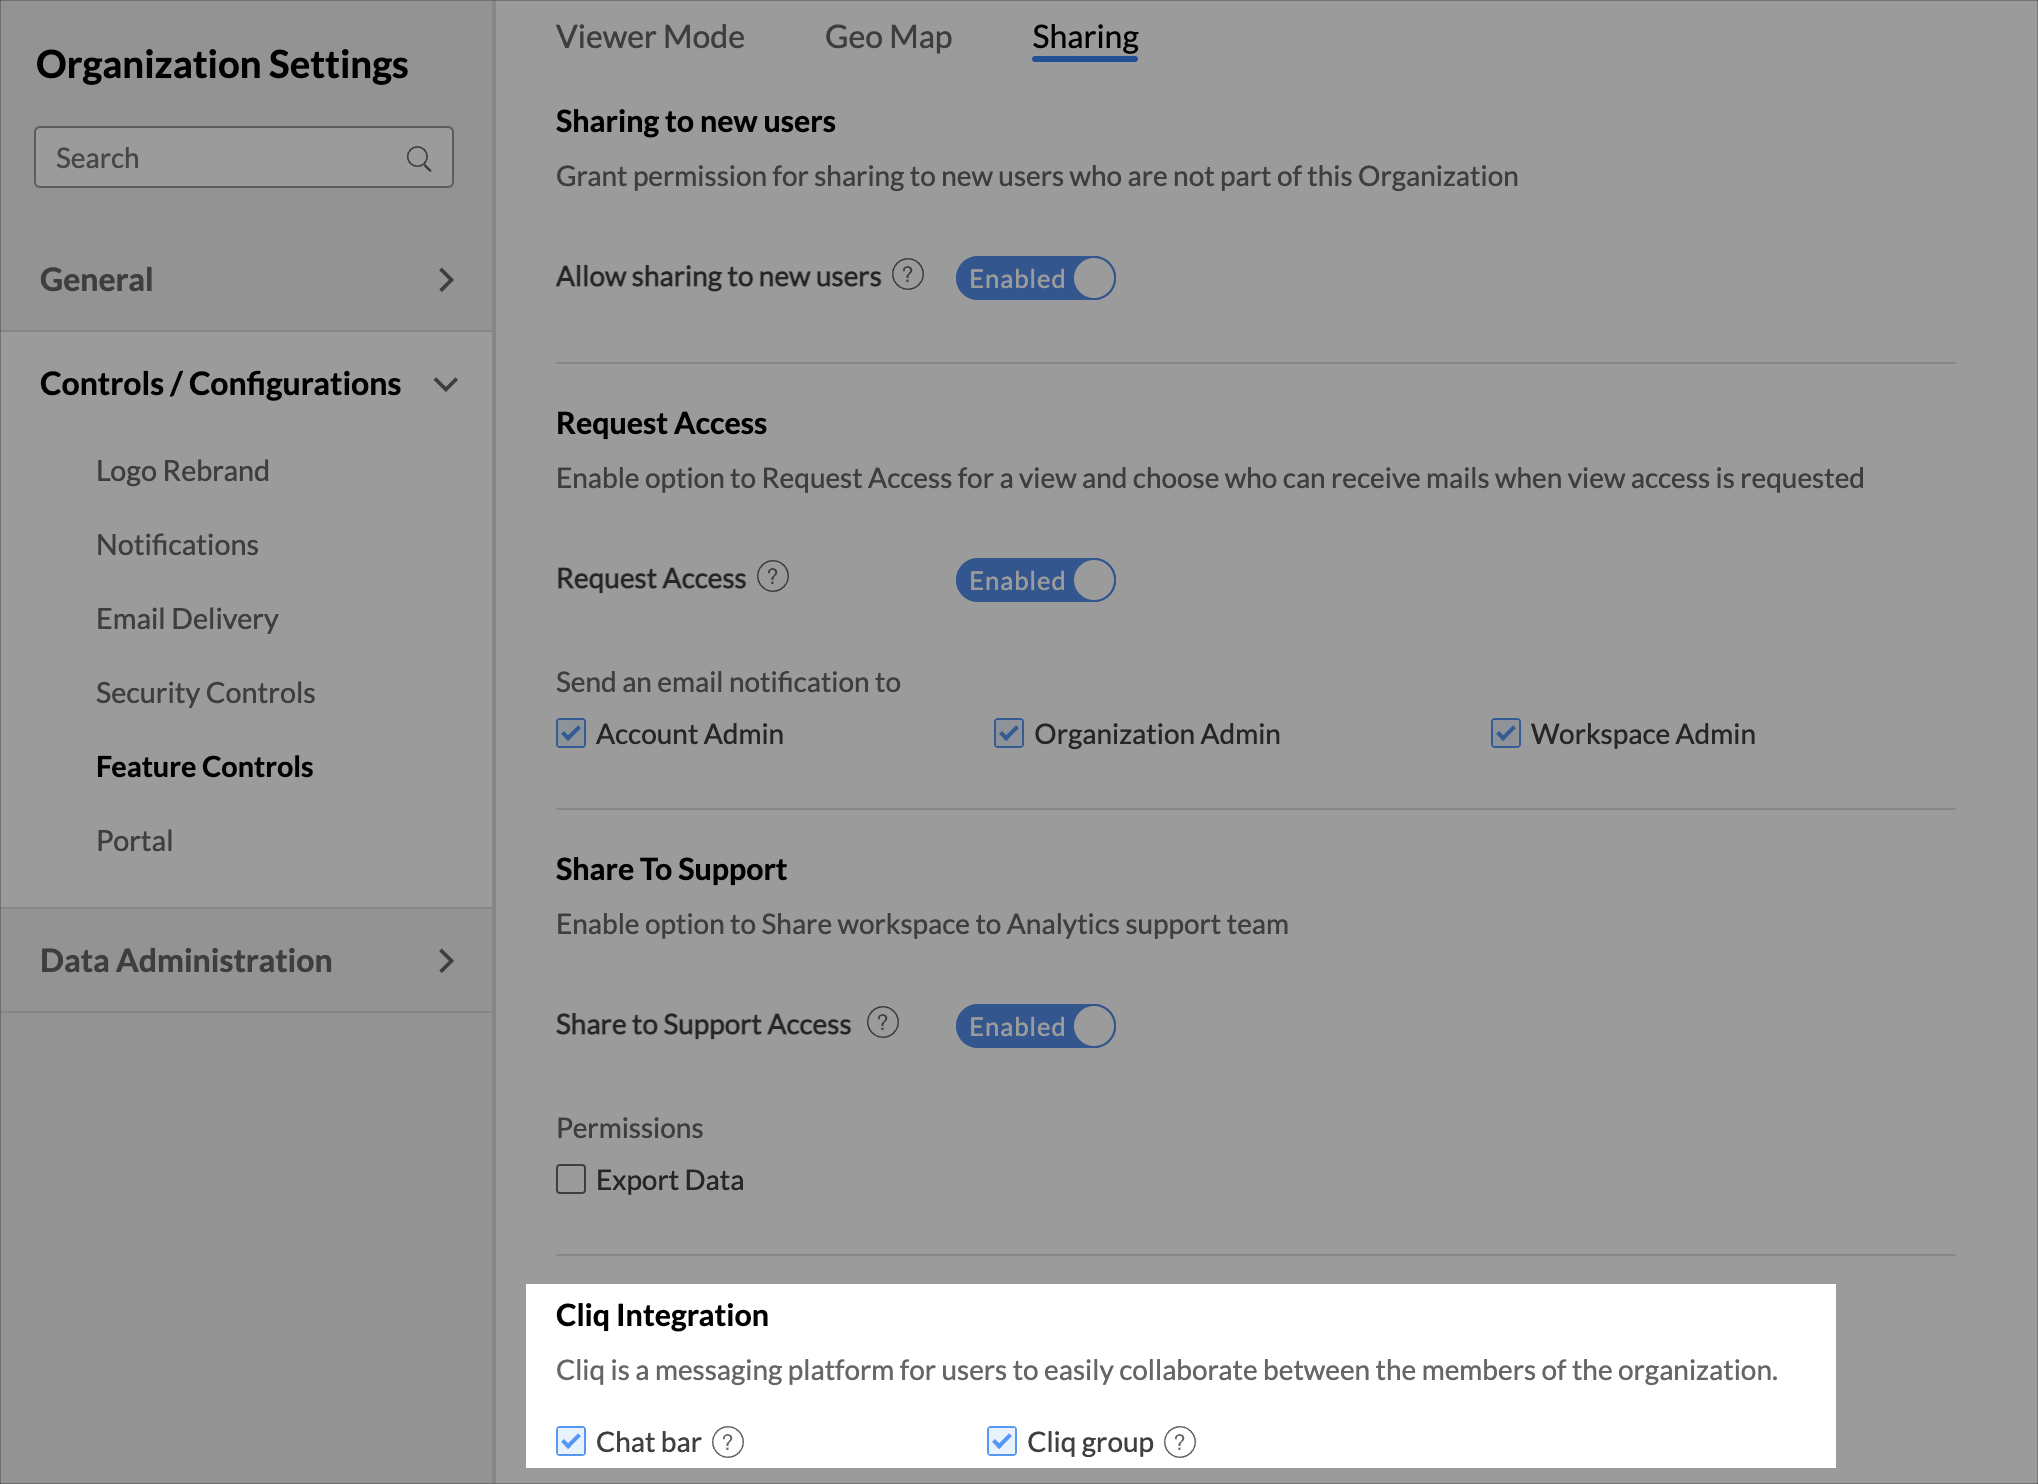
You can easily collaborate with users in your group using cliq group. To create a cliq group for your Workspace Group, you need to enable this in the Organization Settings page. For more details, refer here.
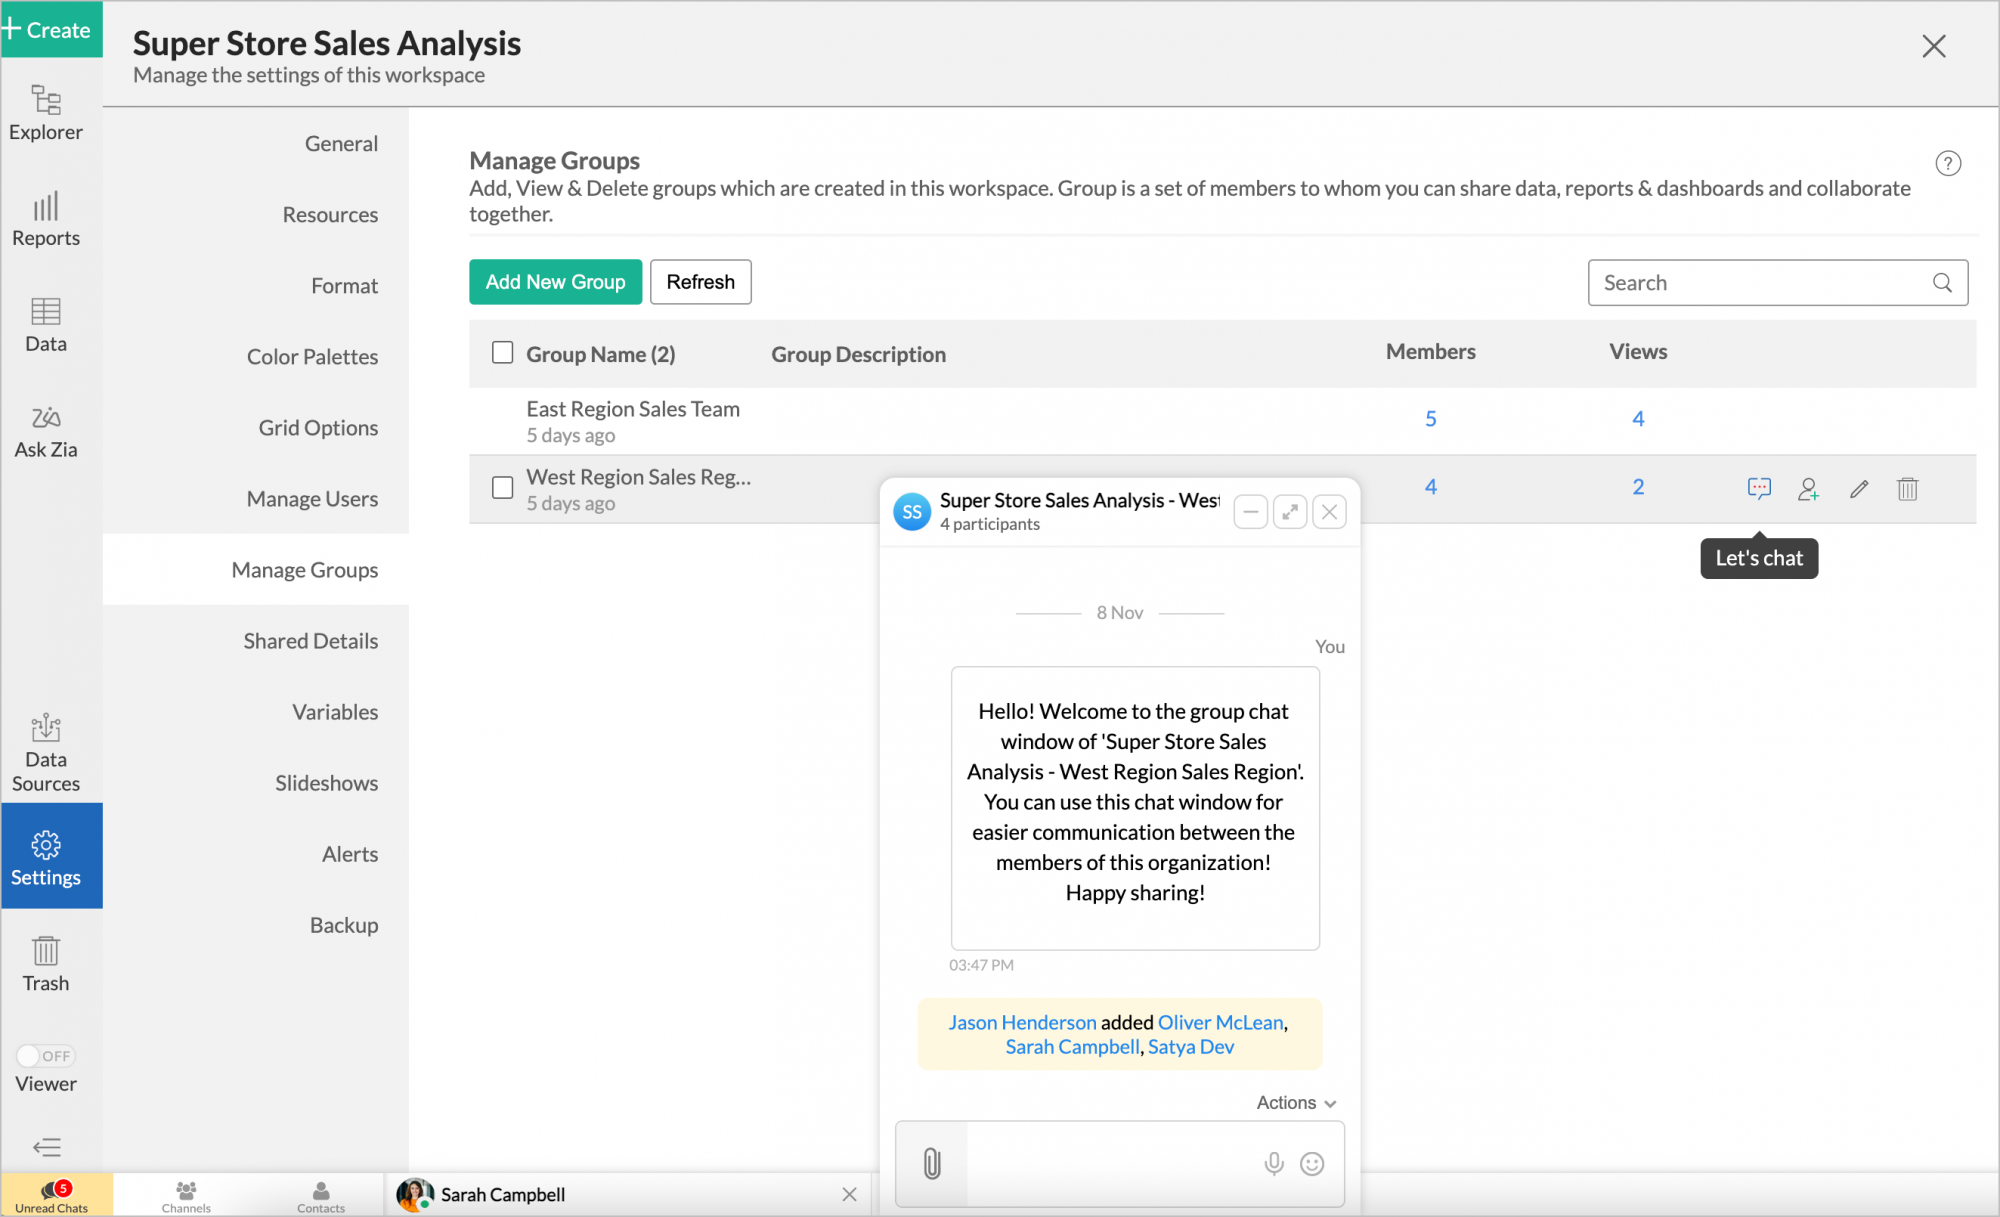
Once you have enabled this option, follow the below steps to create a Cliq group.
- From Explorer, click the Settings tab.
- Open the Manage Groups tab.
- Hover the mouse over the group for which you want to create a group.
- Click the Cliq icon that appears.
- A Cliq group will be created. Now you can continue conversing with your group members.
7. Can I share views to users who are in my contacts list?
Yes, you can share view to your contacts. Click Add Users From link. The Contacts dialog will open, listing your Zoho Contacts, Google Contacts, and Shared Contacts.
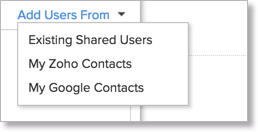
You can share views to users in any of these lists.
8. How many users can I share my reports with?
You can share your view with users allowed for your account. For more details refer our Pricing Page.
9. How to apply filter criteria while sharing a view in Zoho Analytics?
Zoho Analytics allows you to apply filter criteria while sharing a view, report, or dashboard with users. This enables row-level security (RLS), ensuring that each user sees only the data they are permitted to access. Instead of creating multiple reports for different users, you can share the same report with different filter criteria, controlling row-level access dynamically per user.
To apply filter criteria while sharing:
- Open the view you want to share.
- Click Apply Permissions & Filters link.
- Open the Filter Criteria tab in the Share dialog.
- Specify the condition in the Specify Filter Criteria text box.
Defining Filter Criteria
Zoho Analytics provides a flexible way to define filter criteria to enforce row-level access. You can define it similar to a WHERE clause in a SQL SELECT statement. You can also use SQL built-in functions supported by ANSI, Oracle, MS SQL Server, MySQL, DB2, Sybase, Informix, and PostgreSQL dialects.
- Simple filter criteria format:
(<Table name.column name / SQL expression / SQL function call> <relational operator> <value / column / expression / variable>) - Example of a simple criteria:
year("Sales"."Date") = 2011 (uses the built-in ANSI/MySQL date function) - Combining expressions using AND, OR, and NOT for complex row-level security rules:
(("Sales"."Region" = 'South' AND "Sales"."Sales" > 10000) OR ("Sales"."Region" = 'West' AND "Sales"."Sales" < 8000)) - This criteria will:
- Include only South region sales records with sales greater than $10,000.
- Include only West region sales records with sales less than $8,000.
- Exclude all other records from the shared view.
Building the Criteria Expression
- You can type column names directly or click the required column from the Columns pane.
- Click the Preview link to validate and verify your filter criteria before sharing.
Applying Filter Criteria Across Multiple Tables
For reports built on data spanning multiple joined tables, you can define row-level access criteria using columns from all related tables.
Example: For a chart displaying sales by salesperson (joining Sales and Sales Person tables), to filter salespersons who made sales less than $1,000 in Fairfax city:
(("Sales Person"."City" = 'Fairfax') AND ("Sales"."Sales" < 1000))
10. What does the "Apply Parent Table Filter Criteria" option do?
The Apply Parent Table Filter Criteria option lets you control whether the row-level access restrictions defined in the parent table are applied to its dependent views. This helps enforce consistent row-level security (RLS) across shared dashboards and reports.
When you share a table (parent table) with specific filter criteria - essentially defining row-level access for a user — you can extend the same row-level security to any dependent views shared with that user, such as dashboards containing embedded reports.
Follow the steps below to apply parent table filter criteria:
- Open the view you want to share.
- Click the Apply Permissions & Filters link.
- Open the Filter Criteria tab.
- Select the Apply Parent Table Filter Criteria checkbox. The parent table's row-level access criteria will now be applied to the associated reports and dashboards.
Note:
- If you specify an additional share filter criteria while sharing the report, the parent table's row-level security filter and the report's filter criteria will be combined using the AND condition.
- For dashboards, the row-level access filter criteria defined in the parent table will be joined with the filter criteria specified for both the report and the dashboard, using the AND condition.
11. Can I apply dynamic filtering while sharing?
Yes, Zoho Analytics supports dynamic filtering while sharing using Variables. You can use predefined system variables or create custom variables to control the data each user can access. To learn how to apply dynamic filtering using variables, click here.
12. How do I share views in viewer mode?
Viewers are users who can only view reports created by other users. Viewers cannot create their own reports or share them with others. To share views in viewer mode, you need to set the role as Viewer to the corresponding users in your account.
Follow the below steps to set the user role as Viewer.
- Open the Account Setup page.
img class="new_img" style="height:auto;width:350px;" alt="" src="/sites/zweb/images/analytics/setup.png"> - Click the Manage Users tab.
- All users will be listed. Hover the mouse over the user whose role you want to be set as Viewer.
- Click the Change Role link that appears.
- The Change Role dialog will open. In the Role field, select the user role as Viewer.
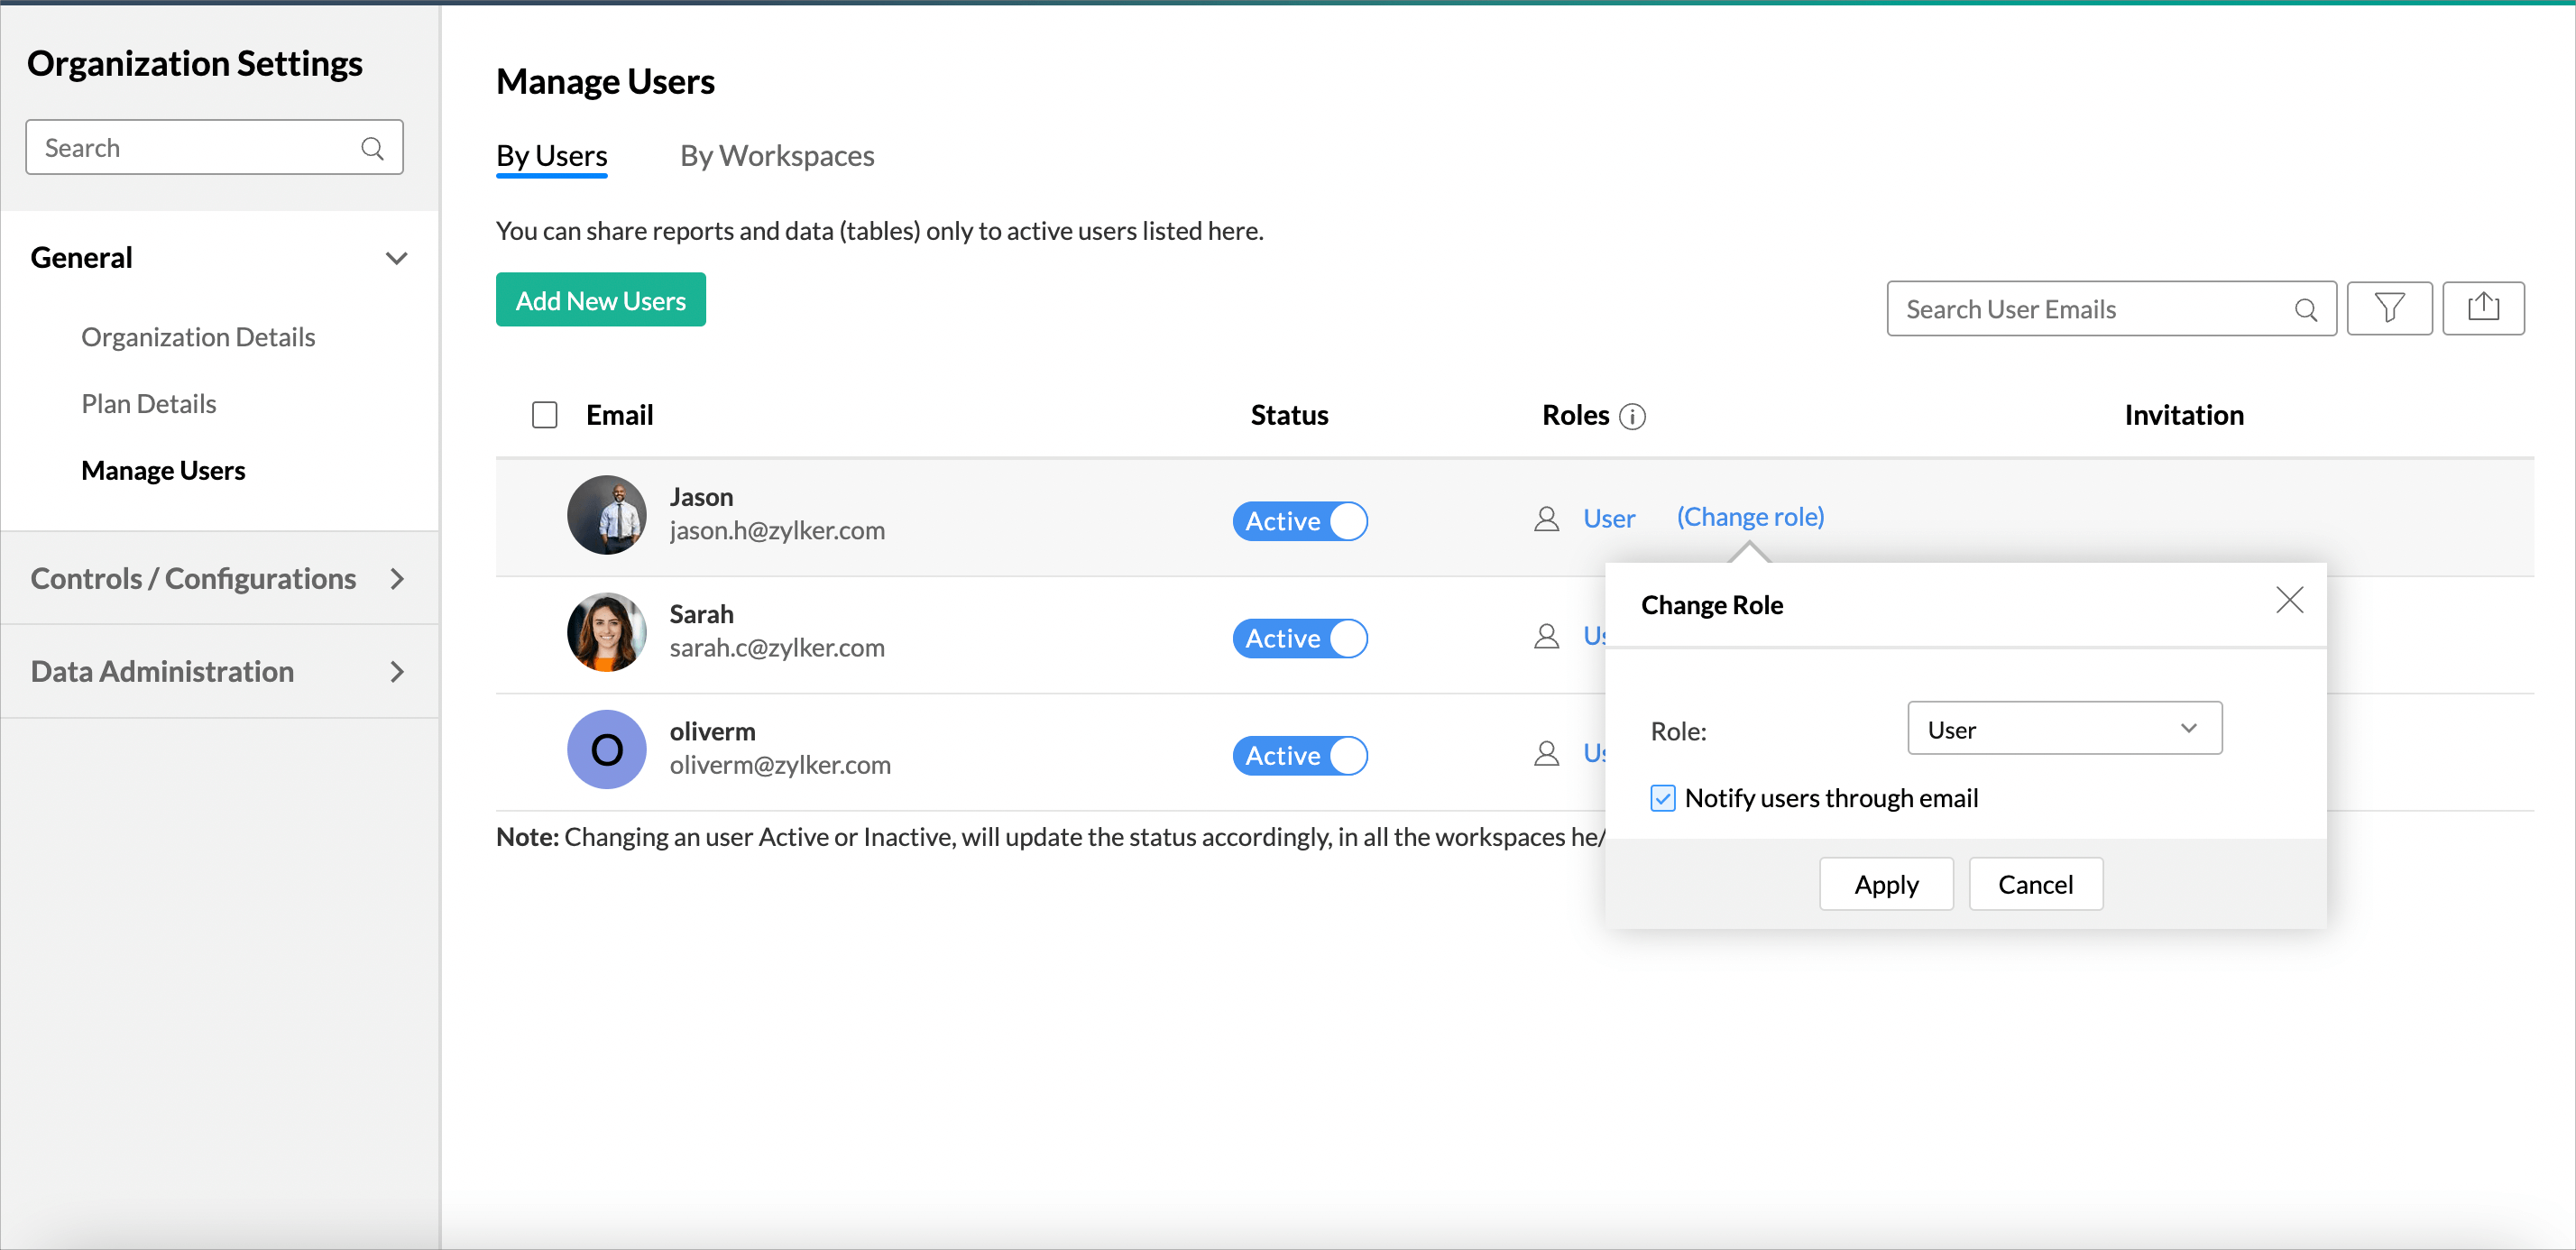
- Click Apply. The user will be set as Viewer. All views shared with them will be in Viewer mode.
13. What is a variable?
Variables are placeholders that help the Account Administrator and the Workspace Administrators to assign dynamic values for individual users of the Workspace. Zoho Analytics provides a set of default variables. You can also create your own custom variable.
You can further use these variables in the Sharing filter criteria to filter reports dynamically.
Refer to the above question to know how to use the variable in filter criteria.
14. What are the default variables?
Zoho Analytics provides a set of predefined system variables that you can use in your filter criteria. They are listed below.
| System Variable Name | Description |
| System.login.email | Returns the email id of the user who has logged in |
| System.login.firstname | Returns the first name of the user who has logged in |
| System.login.lastname | Returns the last name of the user who has logged in |
| System.login.fullname | Returns the full name of the user who has logged in |
15. How to create a variable?
You can create variables from the Workspace Settings tab. Refer to our help document for more details on this.
16. Can I notify my users about the shared views?
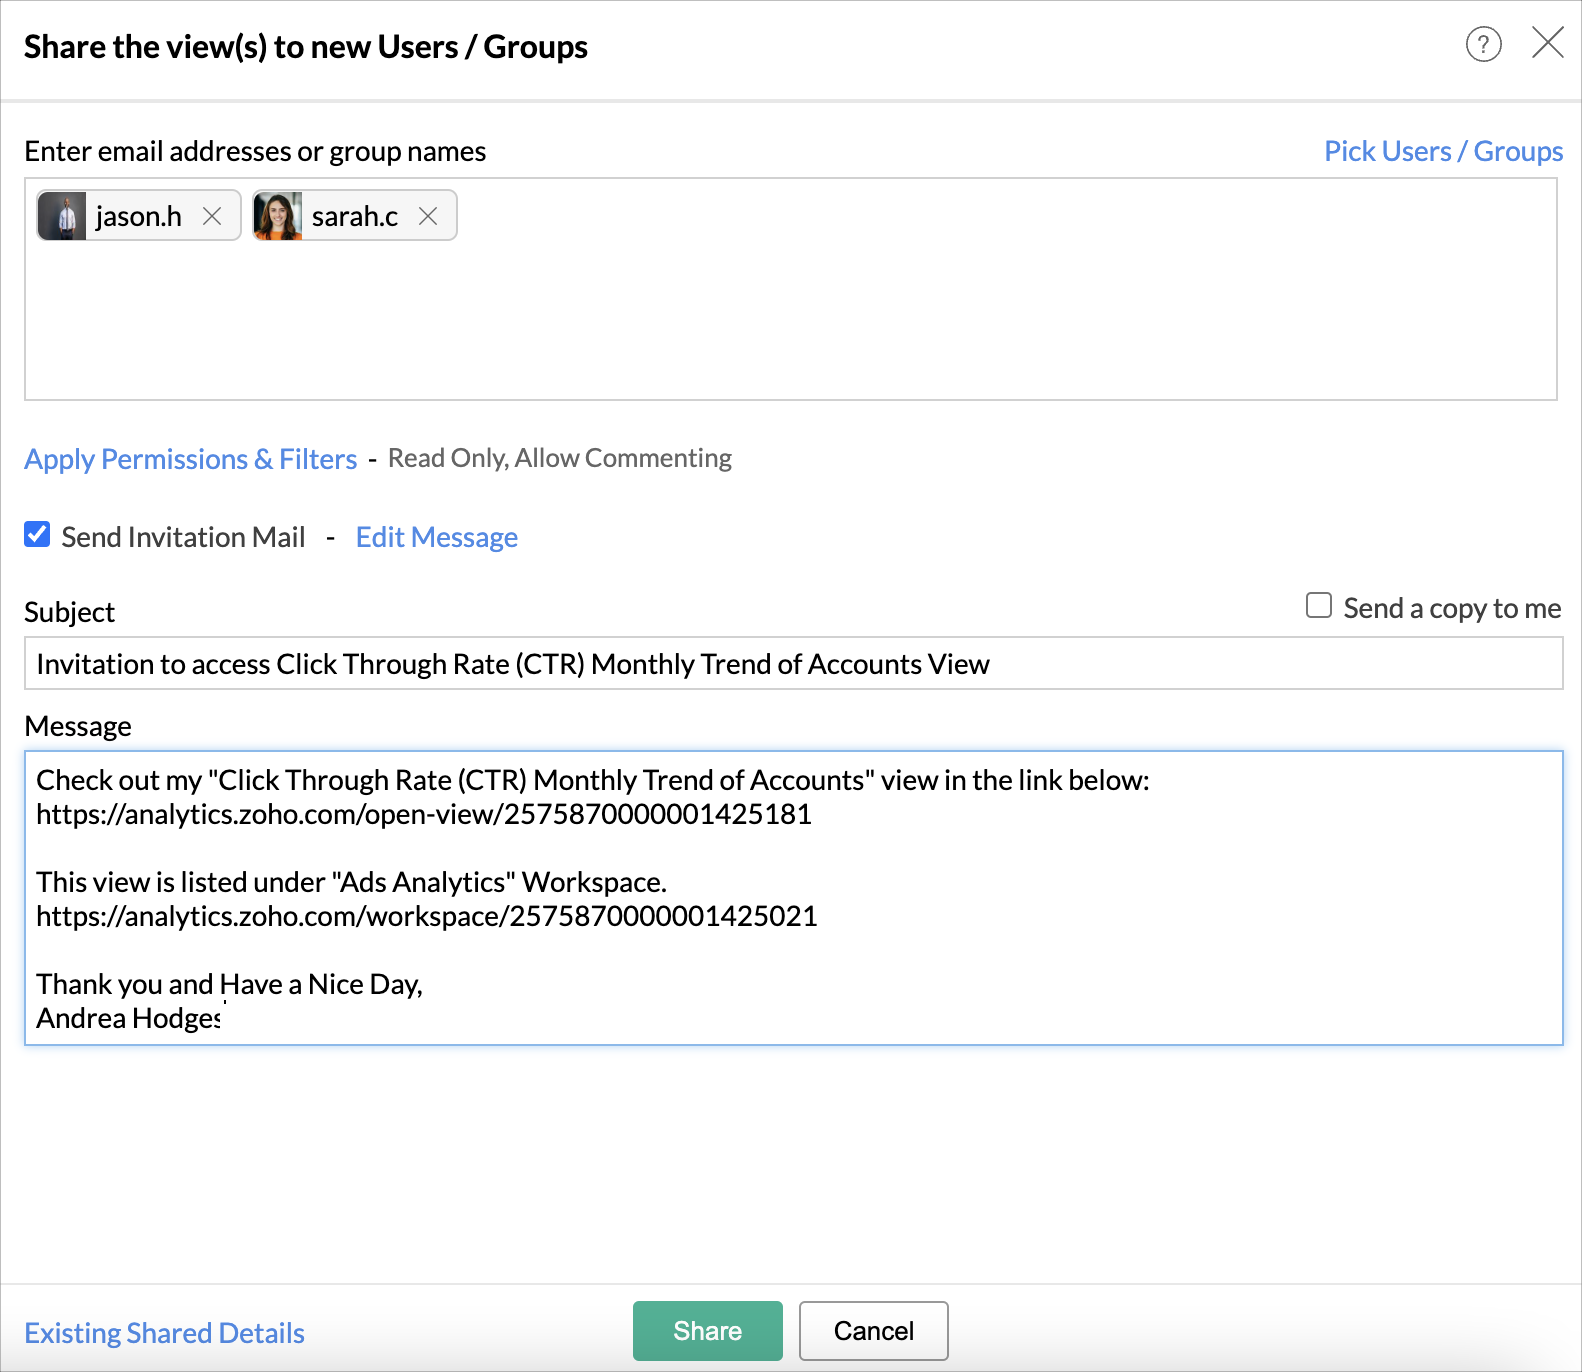
Yes, you can notify the Shared User using the Send Invitation Mail tab. You can edit the message on notification mail by clicking the Edit Message link and modying the message in the given field.
You can also choose to send a copy of the notification mail to you.
17. Can I edit the permission I have given?
Yes, you can edit the permission that you have given. Select the views for which you want to edit the permission and then click Share > Edit Shared Details.
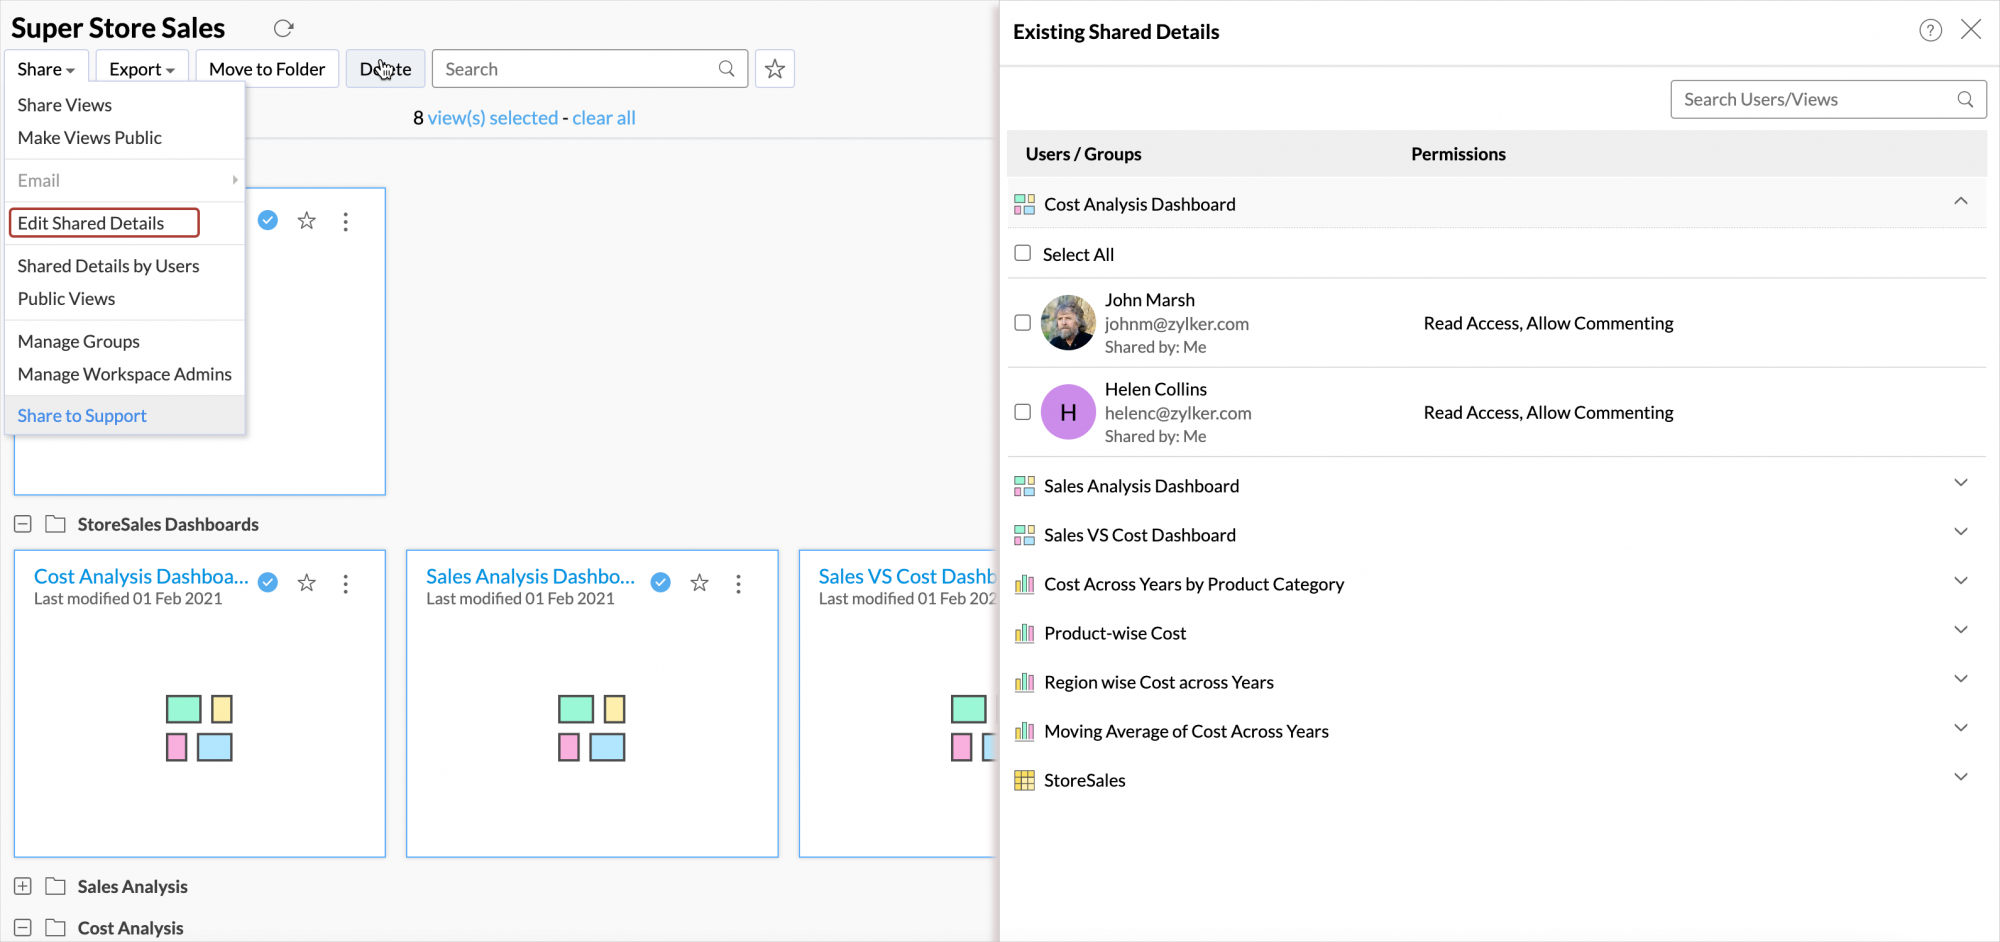
The Existing Shared Details dialog will open. You can choose to remove sharing or edit the permission by clicking the corresponding icons that appear when hovering the user.
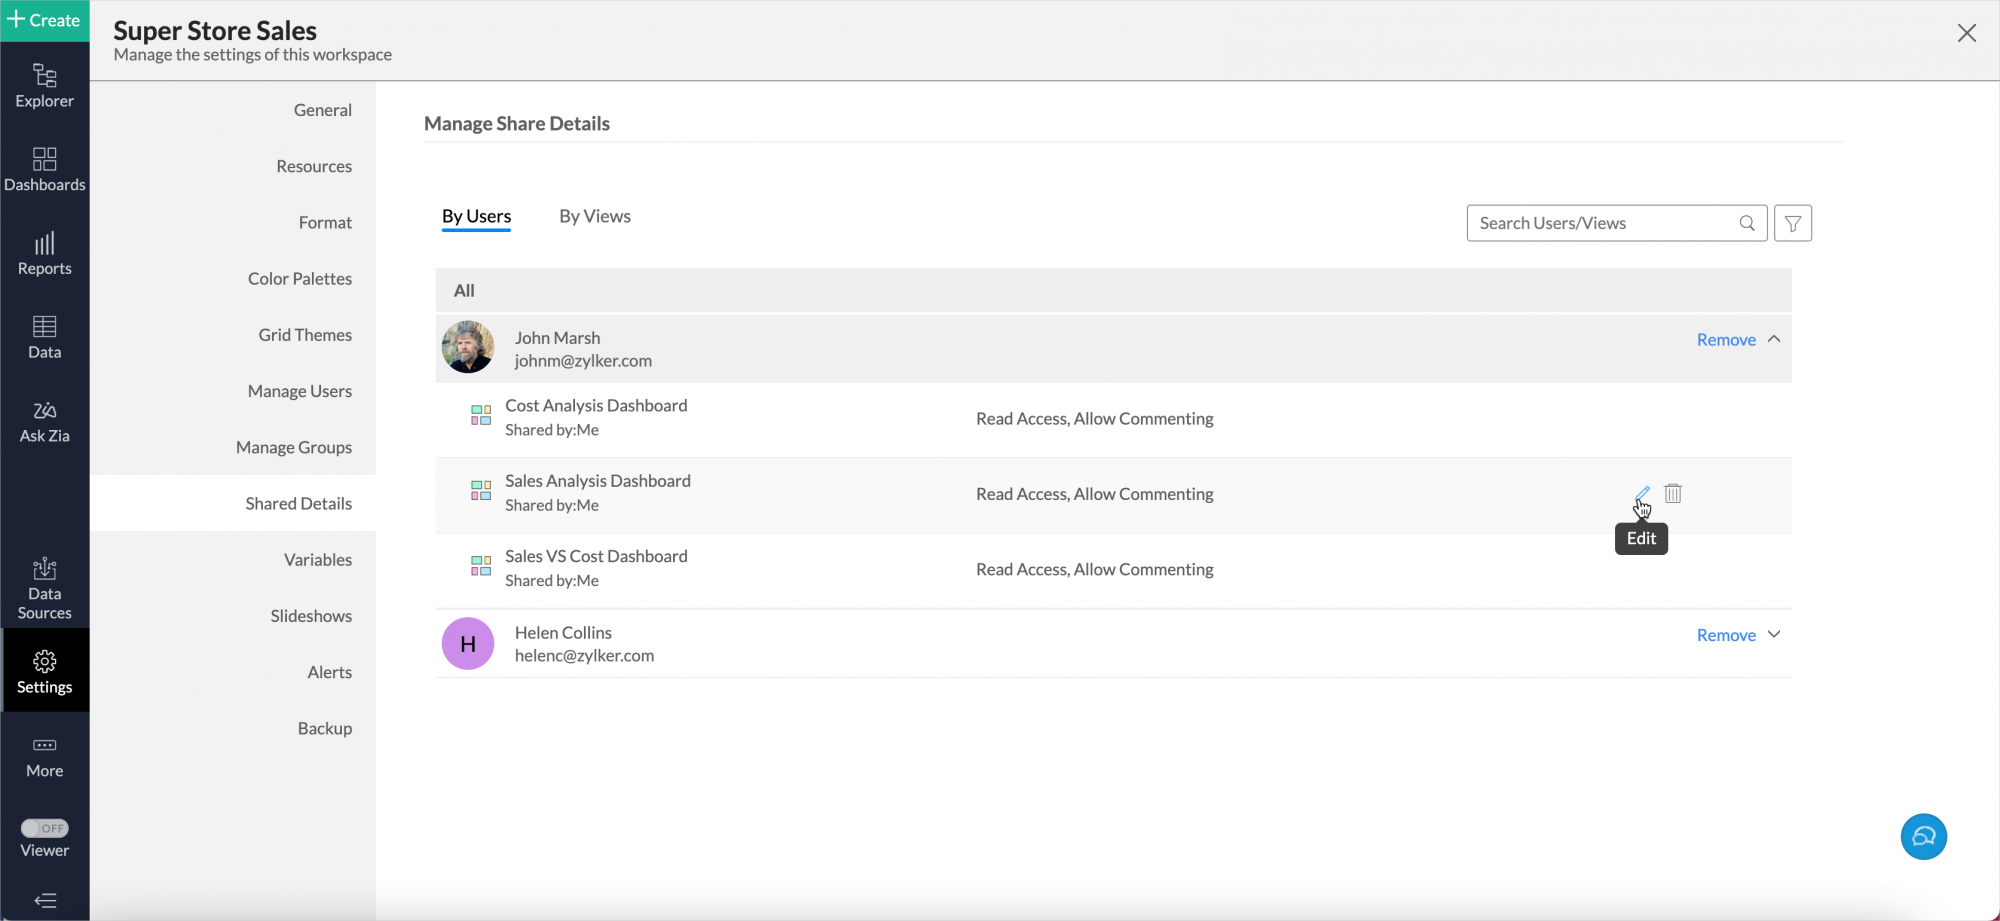
You can also edit the permission from the Shared Details tab of the Workspace Settings.
18. Can I remove sharing from a view?
Yes, you can remove sharing. Open the Existing Shared Details as specified in the above question and then click the Trash icon corresponding to the view you want to remove sharing.
19. Can a user remove/unsubscribe a shared workspace?
Yes, a user can remove/unsubscribe a shared workspace from their account. The following are the steps to unsubscribe from a shared workspace.
- From Home page, click the More Actions icon of the corresponding workspace.
- Click Unsubscribe Workspace.

- An Alert Message will be displayed to confirm the action. Click Yes.
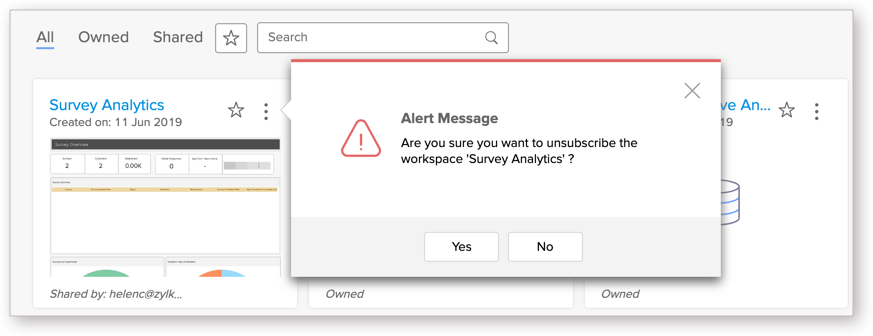
User will be unsubscribed from the corresponding workspace and will no longer be able to access the views in the workspace. To access them again, they need to request the Administrator to share the views again.