Employee Setup
Employees are all those who are part of the organization. The Employees module enables you to enter and store employee data. This Employees report displays Employee Name, ID number, Email Address, Branch, Role, and their eligibility to raise Safe Entry request. You can add employee records individually or import the complete data
Employee Form
There are two parts to this form. The first one covers the basic details like name, email, branch, etc. Please note that the phone number field is encrypted.
Second part is the work information. This captures whether an employee is eligible to raise safe entry requests. If an employee is marked as No, any entry requests raised will automatically be rejected.
Mark as emergency contact: This captures if an employee needs to be marked as emergency contact and if yes, what type of contact should the employee be marked as.
Roles - Roles are the backbone of the application and define the level of access an employee has to the application. The following are the various roles your employees will assume:
- Employee - This is the fundamental level of profile. Employees in this role will only be able to raise entry requests, asset requests, add travel history, view communications, and opt for volunteer programs.
- Front Desk Staff - Employees in this role are responsible for the check-in/check-out of employees and visitors at the branches to which they belong.
- Service Agent - Employees in this role work on the asset requests that are raised.
- Maintenance Staff - Employees in this role work on building maintenance requests.
- Employee Entry Approver - Employees in this role approve, reject, or revoke employee safe entry requests, accordingly.
- Visitor Entry Approver - Employees in this role approve, reject, or revoke employee safe entry requests, accordingly.
- Asset Request Approver - Employees in this role approve or reject employee asset requests, accordingly.
- Maintenance Audit Approver - Employees in this role approve or reject employee maintenance audit tasks, accordingly.
- Branch Manger - Employees in this role supervise the branch to which they assigned. They will be able to perform the above mentioned operations at their own branch.Note: All the above roles are limited to the branch to which they belong. They will not be able to view data from other branches.
- Admin - Employees in this role oversee operations at all branches. This roles enables admins to perform actions within the app work on par with the app owner. They have access to setup modules, dashboards, and other modules.
To add employees individually:
- Navigate to the Employees page.
- Click the plus icon. The form will be displayed.
- Enter the Employee details.
- Click Submit. The record is added to your Employees report in the Employee page.
To edit employee details:
- Navigate to the Employee Setup page.
- Click the record to open.
- Click Edit. The form will appear with the current data.
- Modify the data.
- Click Update. The record is updated in the Employee Setup page.
To edit multiple records, select the records that need to be edited, and select the parameter that has to be modified and update the same.
The detail view of the record allows you to view the complete details, along with additional details on the employee that are pulled from other reports.
Import employee data
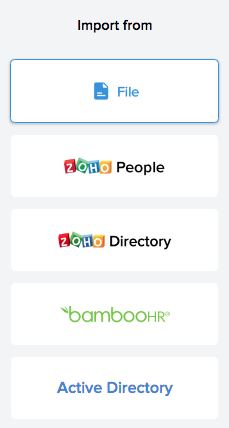
You can also import all your employee details into the app from various sources. Import your data from the following locations or services:
- From file: Import from a File that is stored in a local drive or in a cloud service, or copy and paste the data.
- Zoho People: Import from your Zoho People application.
- Zoho Directory: Obtain users from Zoho Directory and import the file here.
- BambooHR: Fetch employee details from BambooHR.
- Active Directory: Sync with Active Directory, obtain users, and import the data here.
Import from File
To import from file:
- Click Import Data in the Employees module. The Import Data window will appear.
- Select Import from File option.
- Select the location of the file.
- Select the file or copy and paste data.
- Click Next.
- Specify if the first row will be the field names.
- Assign the appropriate field type for each column. For instance, if your first field in Name field, select name. (Ignore if it is selected by default.)
- Click Import Data. The data will be imported and records will be displayed.
Points to remember while importing employee data:
When you are uploading a file, the fields above must be the arranged in columns as shown below:
| Employee ID | Name | Branch | Role | Approver Type | Staff Type | Phone | Extn | Eligible to Raise Entry Request | Mark as Emergency Contact | Type |
When adding Branch, Roles, Approver or Staff type, you need to ensure only those values that are already available in the app are added and that the spellings are also right. If not, the import will fail.
Mandatory fields like ID, Name, Email, Branch, Role, Approver Type, Staff type, and Eligible to Raise Safe Entry must have values.
Import from Zoho People
To import from Zoho People:
- Navigate to Zoho People.
- Generate the authtoken (the authtoken will not be stored in the app).Note: To perform this integration, the user needs Admin privileges with access to Settings.
- Navigate back to your Employee Setup in BackToWork.
- Click Import Data in the Employees module. The Import Data window will appear.
- Select Import from Zoho People option.
- Enter the authtoken in the field provided.
- Click Fetch Data to add Active Employees in the organization from the Employee form and to share the app with them. Users will be assigned Employee Role and Branch will reflect the work location in Zoho People.
- Reassign employee roles if needed.
- This syncing of data while importing records is a one-time action. When you have another set of new employee records to import from your Zoho People account, you need to perform the integration again. When syncing the data from Zoho People, Zoho BackToWork will exclude the existing employee data from being imported again, and will import only new data.
Import from Zoho Directory
To import employees from Zoho Directory:
- Navigate to Zoho Directory. Zoho Creator will be displayed alongside other products.
- Select Creator. You or the super admin will be able to view the list of Creator apps.
- Select BackToWork app from this list.
- Select the User role and the permission set for the role. On completing this, the app will be shared with the intended users or the employees of your organization.
- Export shared users from Zoho Directory. The exported template must be in the format specified in the spreadsheet template made available for importing data.Note: To perform this integration, the user needs administrative privileges in ZDirectory.
- Navigate back to your Employee Setup in BackToWork app.
- Select Import from Zoho Directory option.Note:
- Ensure that the specifications of Roles (Admin, Approver, Branch Manager, Staff, and Employee), Approver Types (Employee Entry Approver, Visitor Entry Approver, Asset Request Approver, and Maintenance Audit Approver), and Staff types (Maintenance Staff, Service Agent, Front Desk Staff) are free of any errors.
- Ensure that the values under Branch are values that are present in the app.
- Upload this file to import employees.
Import from BambooHR
To import employees from BambooHR:
- Fetch the API Key and subdomain for your BambooHR account. Refer link for details on how to fetch the API Key and subdomain.Note:
- To obtain the API key, the user needs Admin privileges in BambooHR.
- The API Key and subdomain values will not be stored in the app.
- Add the fetched values in the fields provided.
- Click Fetch Data to add Active Employees from the directory and to share the app with them. Users will be assigned Employee Role and Branch will reflect the work location in BambooHR.
- Reassign employee roles if needed.
- This syncing of data while importing records is a one-time action. When you have another set of new employee records to import from BambooHR service, you need to perform the integration again. When syncing the data from BambooHR, Zoho BackToWork will exclude the existing employee data from being imported again, and will import only new data.
Import from Active Directory
To import employees from Active Directory:
- Navigate to ZDirectory.
- Sync with Active Directory using the sync tool. Refer link to learn about syncing.
- Select Creator from the apps listed in ZDirectory. You will be able to view the list of Creator apps.
- Select BackToWork app from this list.
- Select the User role and the permission set for the role. On completing this, the app will be shared with the intended users or the employees of your organization.
- Export shared users from Zoho Directory. The exported template must be in the format specified in the spreadsheet template made available for importing data.Note: To perform this integration, the user needs administrative privileges in ZDirectory.
- Navigate back to your Employee Setup in BackToWork app.
- Select Import from Active Directory option.Note:
- Ensure that the specifications of Roles (Admin, Approver, Branch Manager, Staff, and Employee), Approver Types (Employee Entry Approver, Visitor Entry Approver, Asset Request Approver, and Maintenance Audit Approver), and Staff types (Maintenance Staff, Service Agent, Front Desk Staff) are free of any errors.
- Ensure that the values under Branch are values that are present in the app.
- Click Import Data to to this file and import employees.
Archived Employees
The Archived Employees report houses employees who are temporarily deactivated from using the app or made dormant users of the app. The employees are moved from Employees report to this folder. To move, hover on the record, click the ellipsis, and click Remove Employee. The employee is removed and moved to the Archived Employees report. Following this the app will be unshared but the requests raised by the employee and all data of the employee will be retained. To remove the retained requests, the admin or the super admin needs to navigate to the respective reports and delete those requests.
To add that employee again, go to Archived Employee, click the ellipsis and Add Employee again. The employee will be activated, and the app will be shared.