Configure Zoho Settings for Google Calendar Interoperability
After configuration of your Google role account in your Google server, you will be required to set up the availability address space of Zoho Calendar in your Google server. This will allow the Google Calendar users to view the free/busy status of the Zoho Calendar users.
Create a Zoho role account
Using the Zoho role account, Zoho will create an availability address space in the Google server through which the Google users will be able to view the free/busy status of the users on the Zoho Calendar and communicate with them. The following points should be noted while creating a Zoho role account:
- The Zoho role account created here is only used for sharing the availability status with both the users.
- Zoho Calendar should be enabled for this Zoho account.
Once the Zoho role account is created, note down the credentials to be entered in Zoho Settings in the Mail Admin Console.
Note
- Any Zoho account can be used as a role account.
- If domain aliasing is used, the user should use the alias domain for the role account so that the email lands in the folder for the requester.
Configure Zoho role account in Zoho settings
After creating the Zoho role account, Zoho Calendar should be added as an availability address space in the Google server. To set up the availability address space:
- Log in to Zoho Calendar using your primary domain.
- Navigate to the Admin Console from the User profile section.
- Navigate to Interoperability from the left menu and choose Configure in the Google Workplace option.
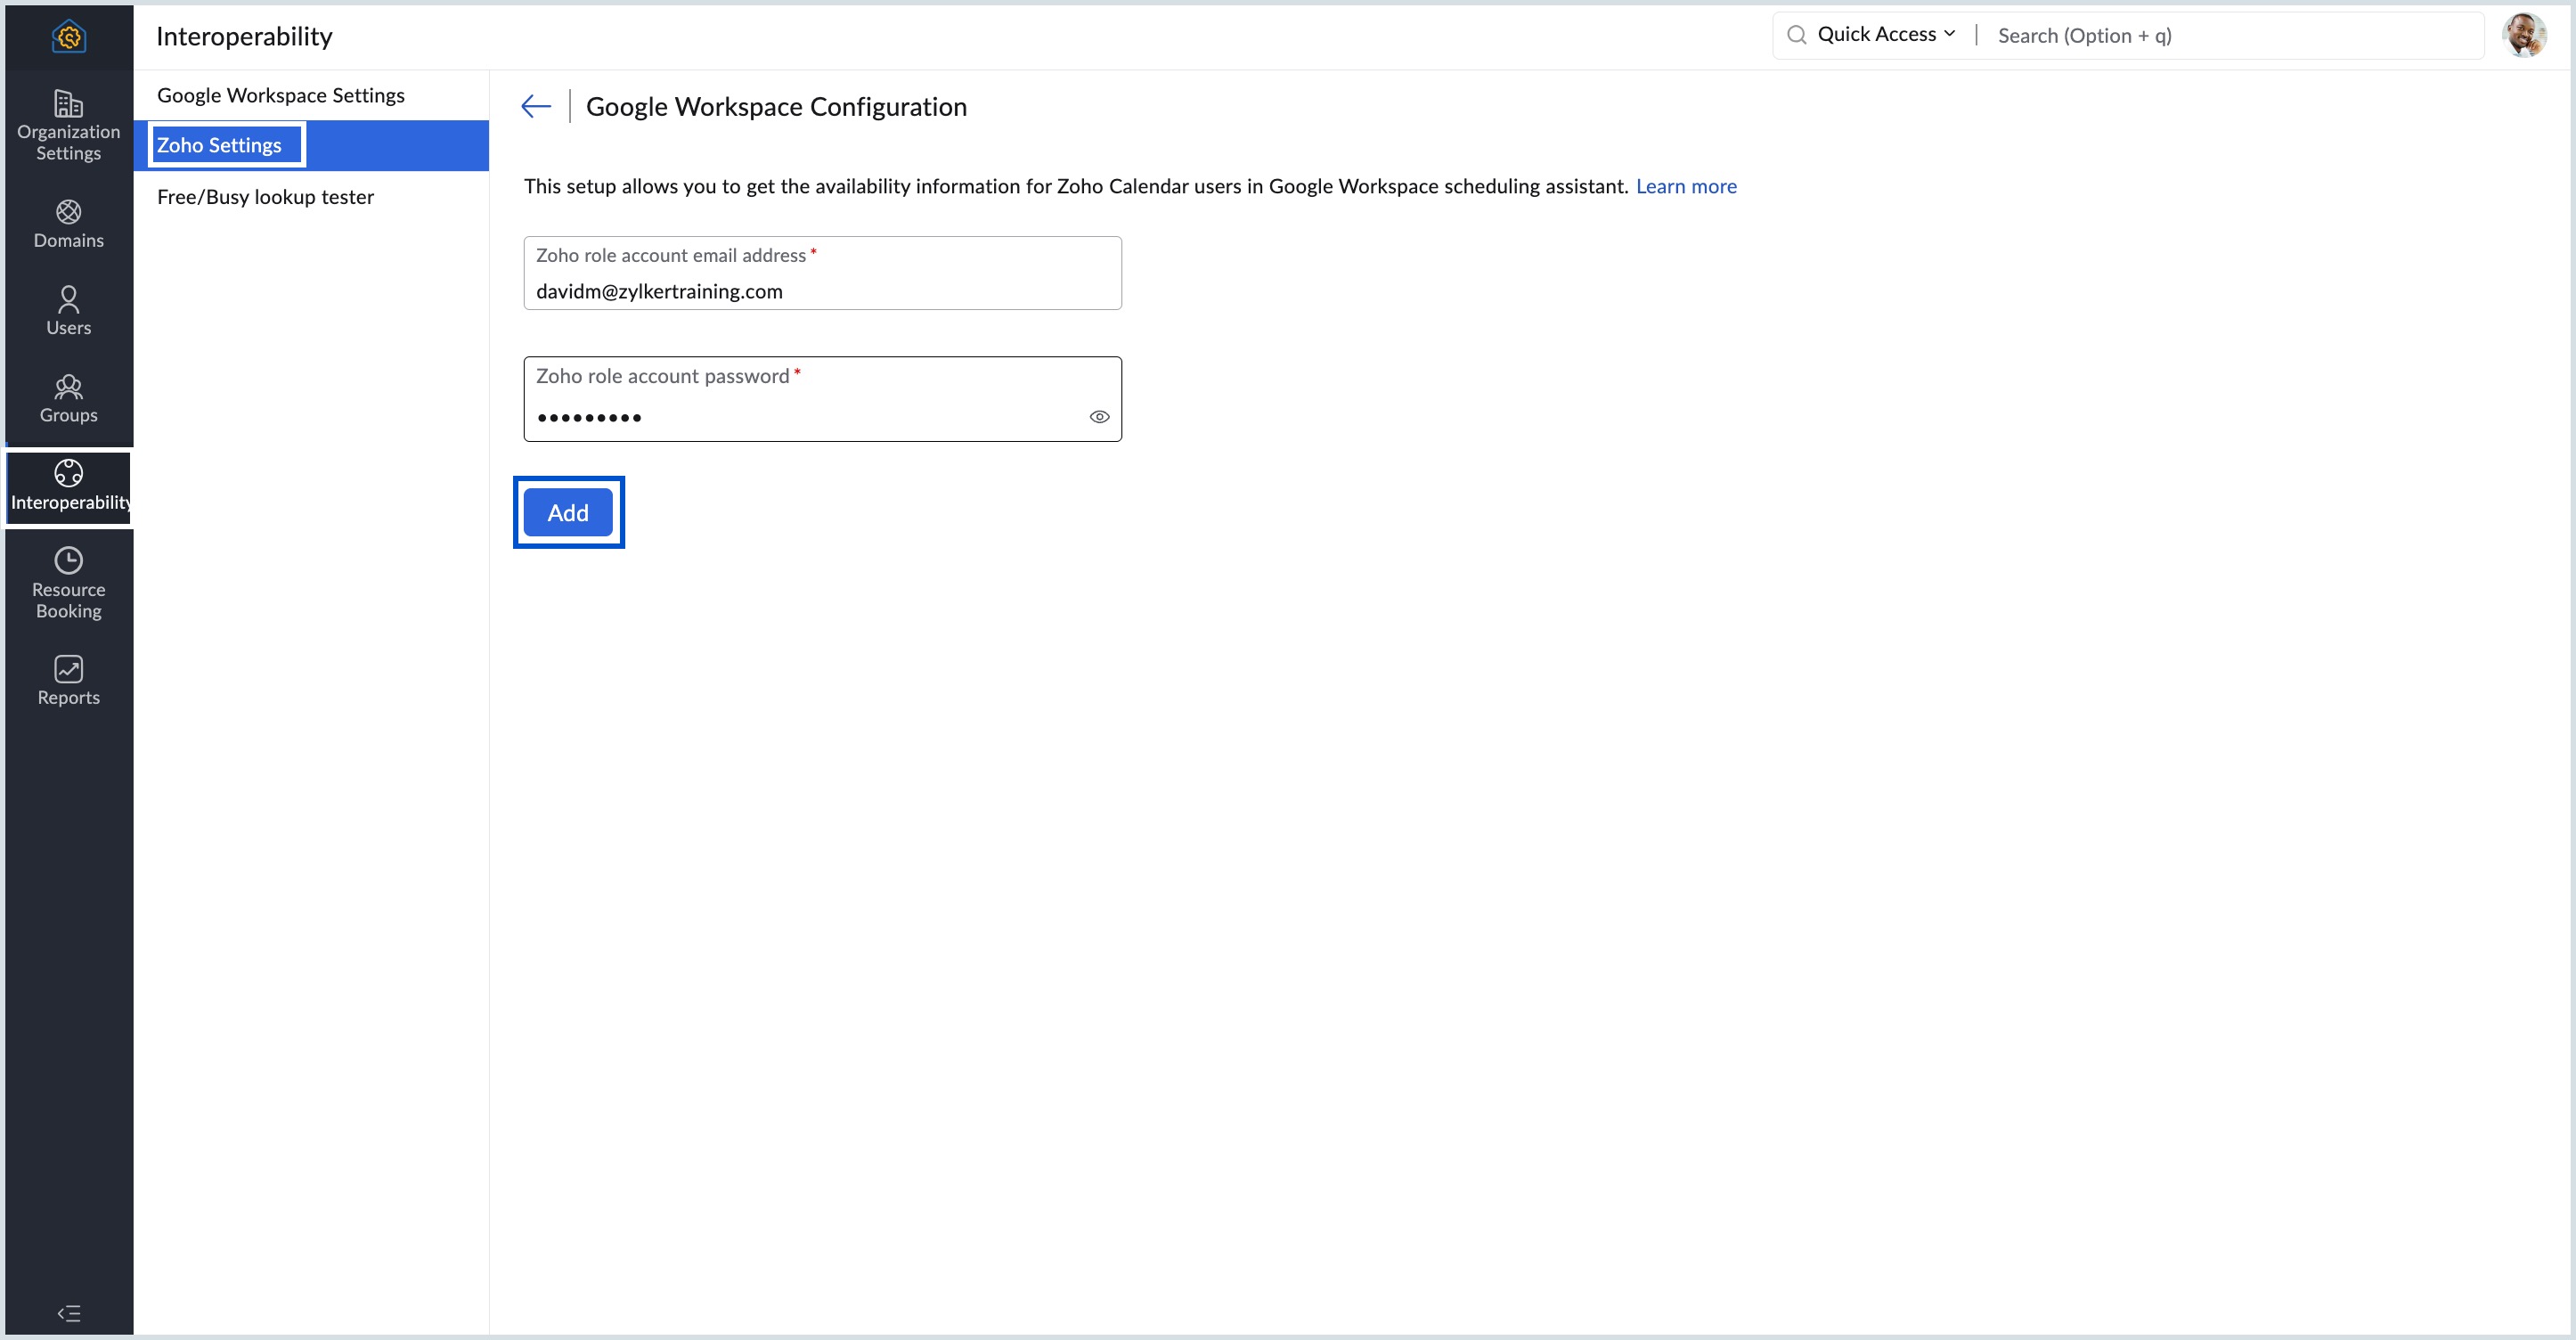
Go to Zoho Settings, enter the Zoho role account email address and Zoho role account password in the Zoho user credentials, and click on Add.
Note
If you do not remember your account password or app-specific password, you can still continue to sign-in. Leave the password field empty and Passwords will be auto generated. The generated password will also be displayed in the Zoho settings page.
- The Zoho role account is configured.
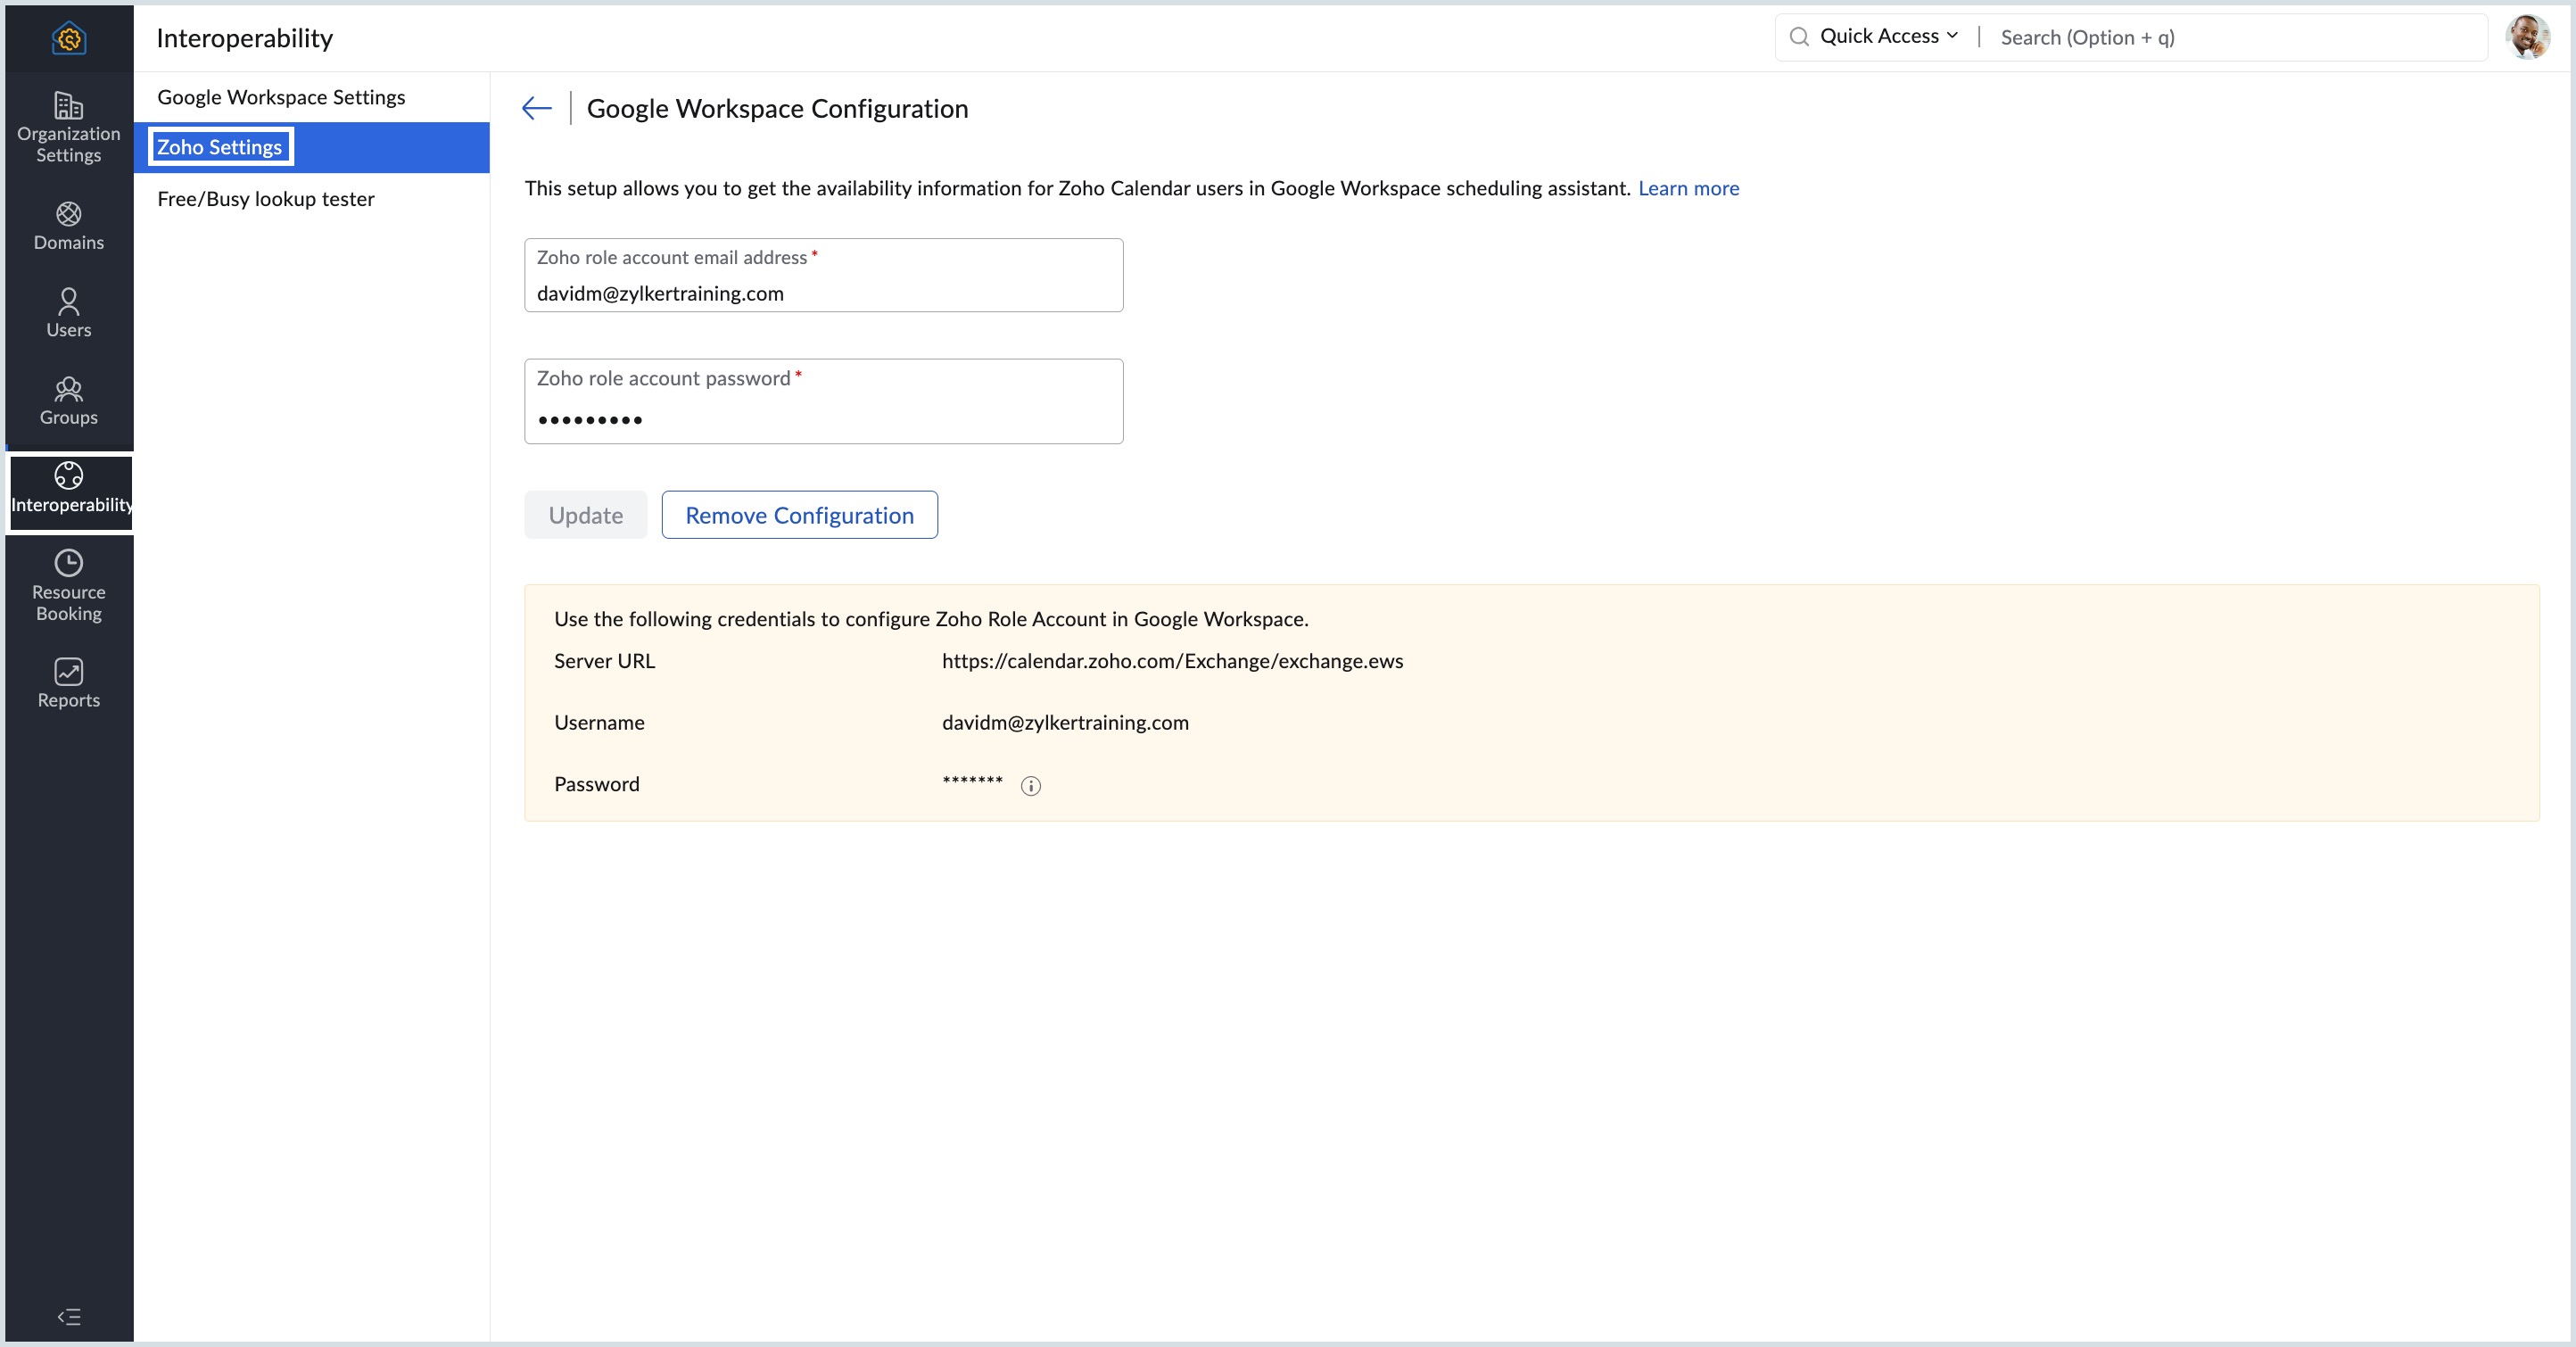
- Use the credentials displayed on the screen to configure the Zoho Role Account in Google Workspace.
- Navigate to the Google Workspace Admin Console and go to Apps > Google Workspace > Calendar.
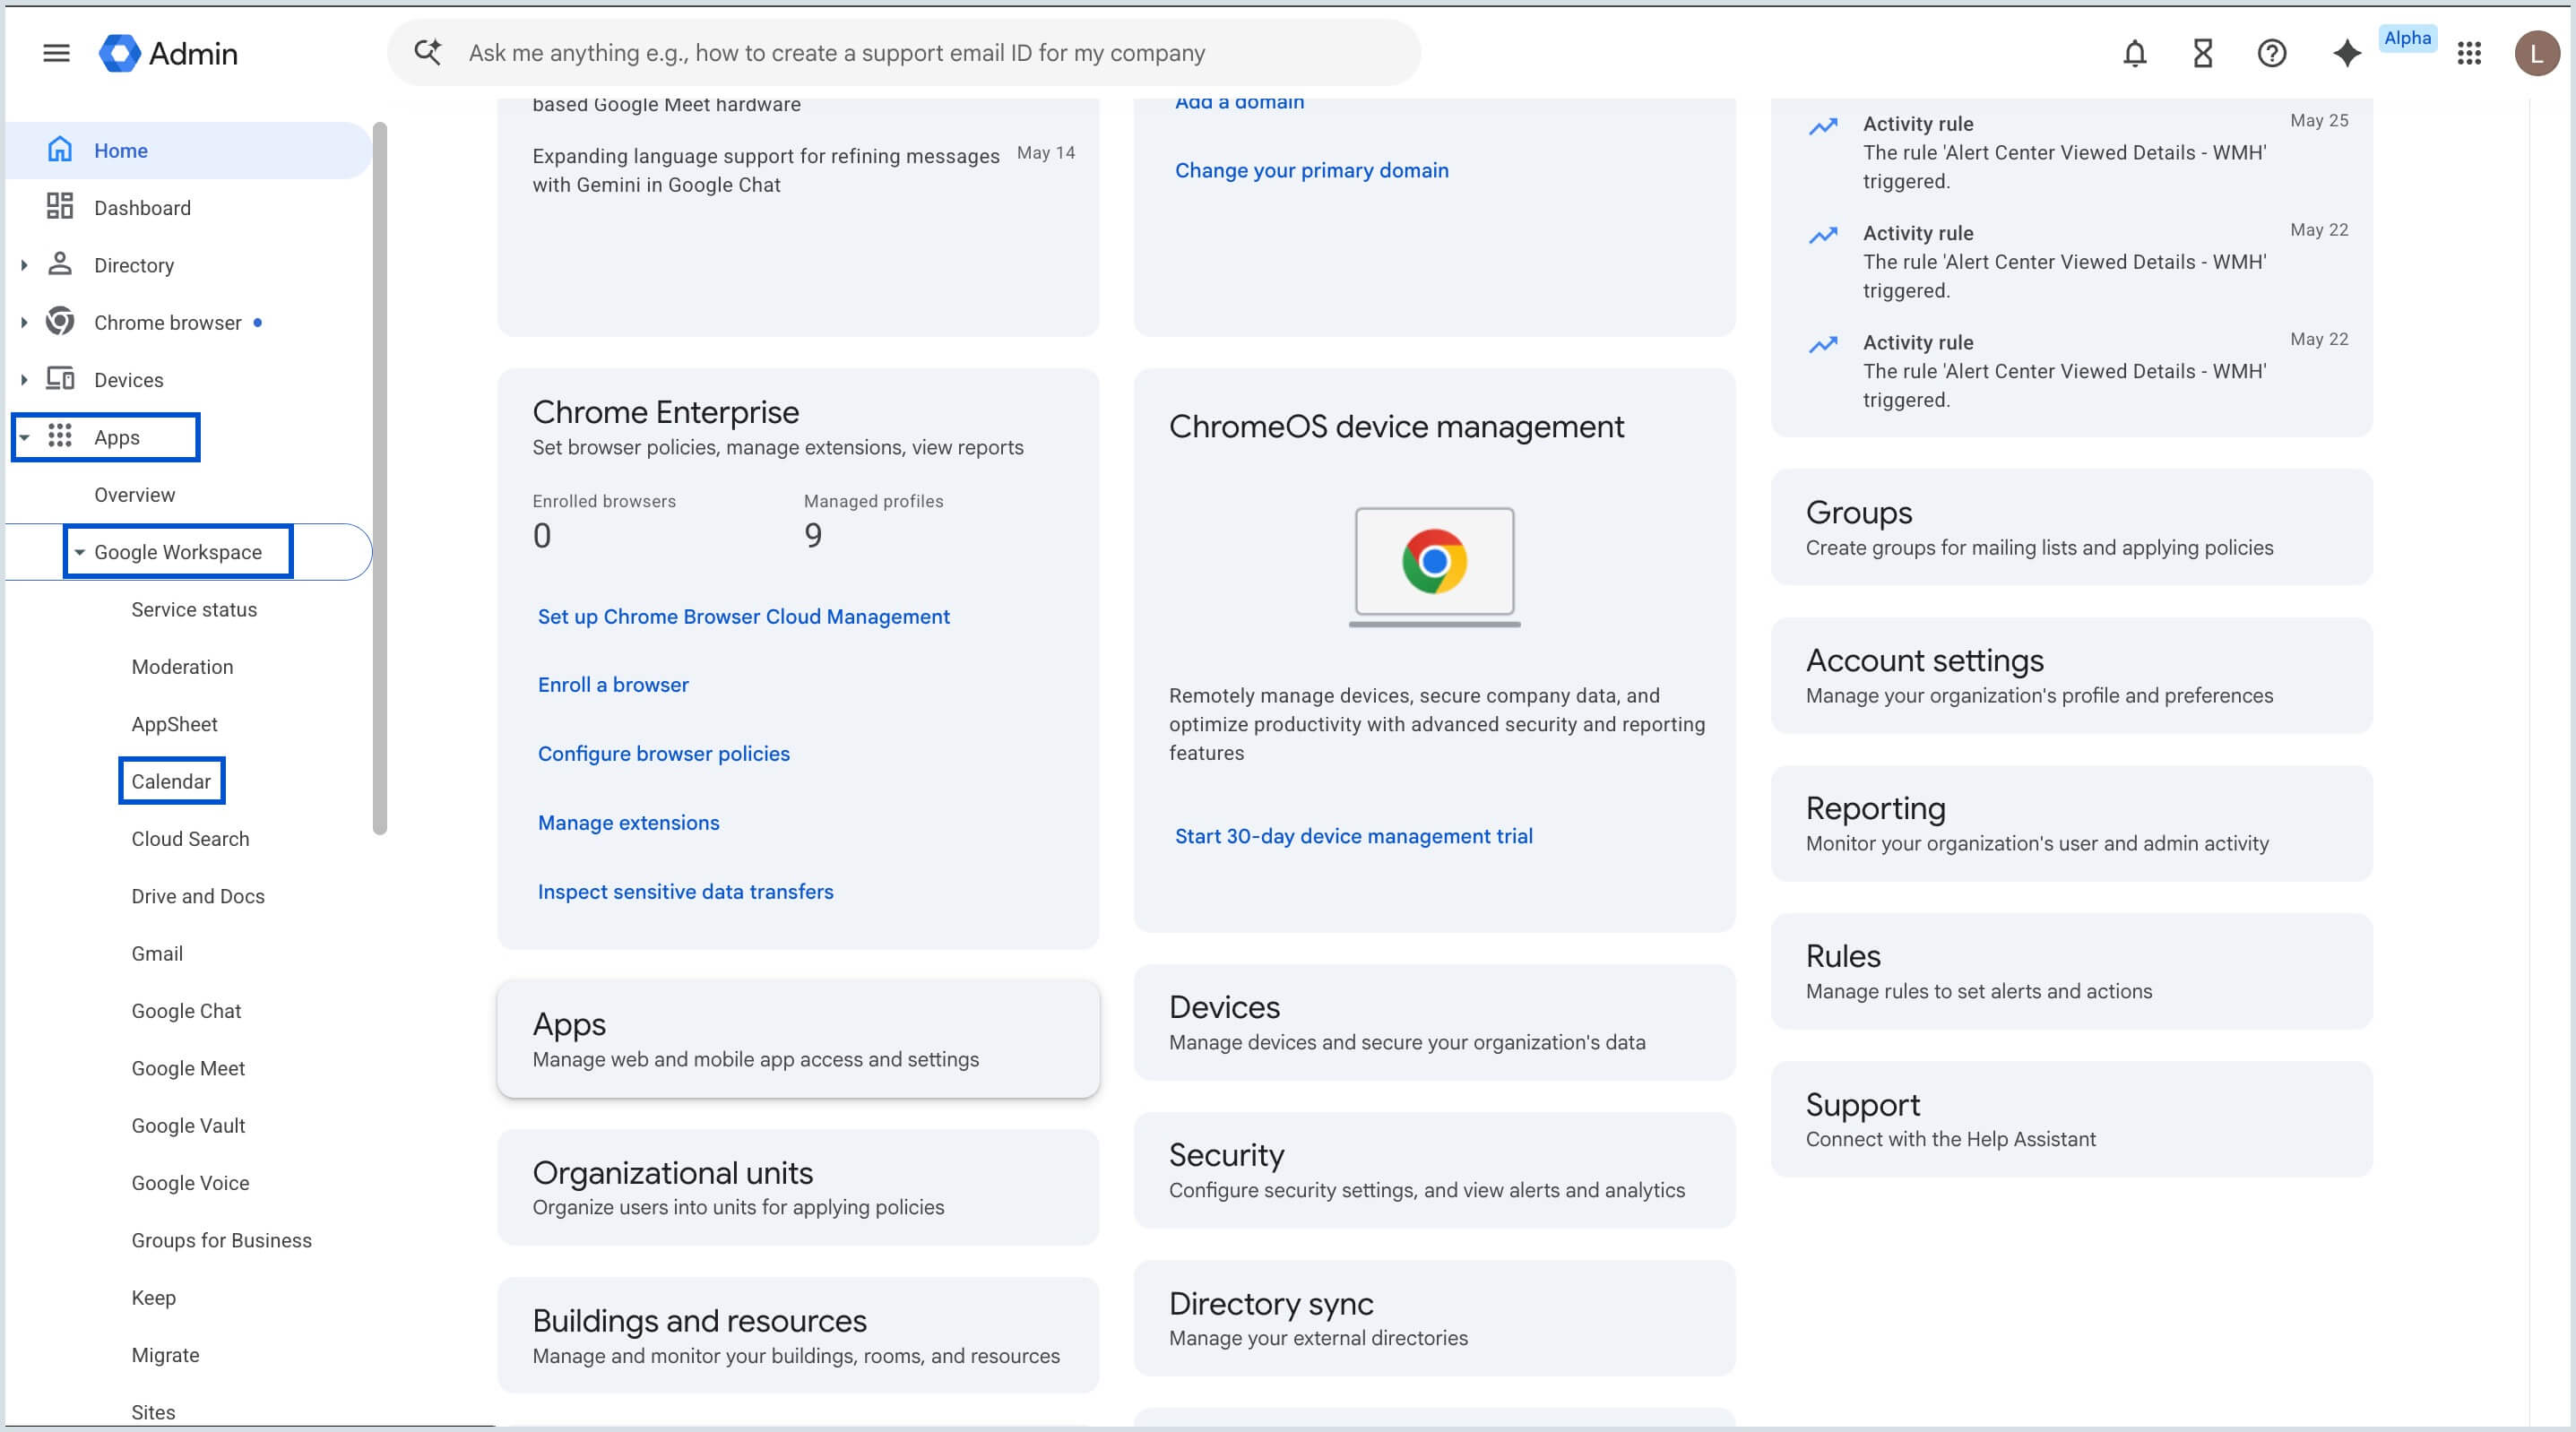
- Open the Calendar Interop management.
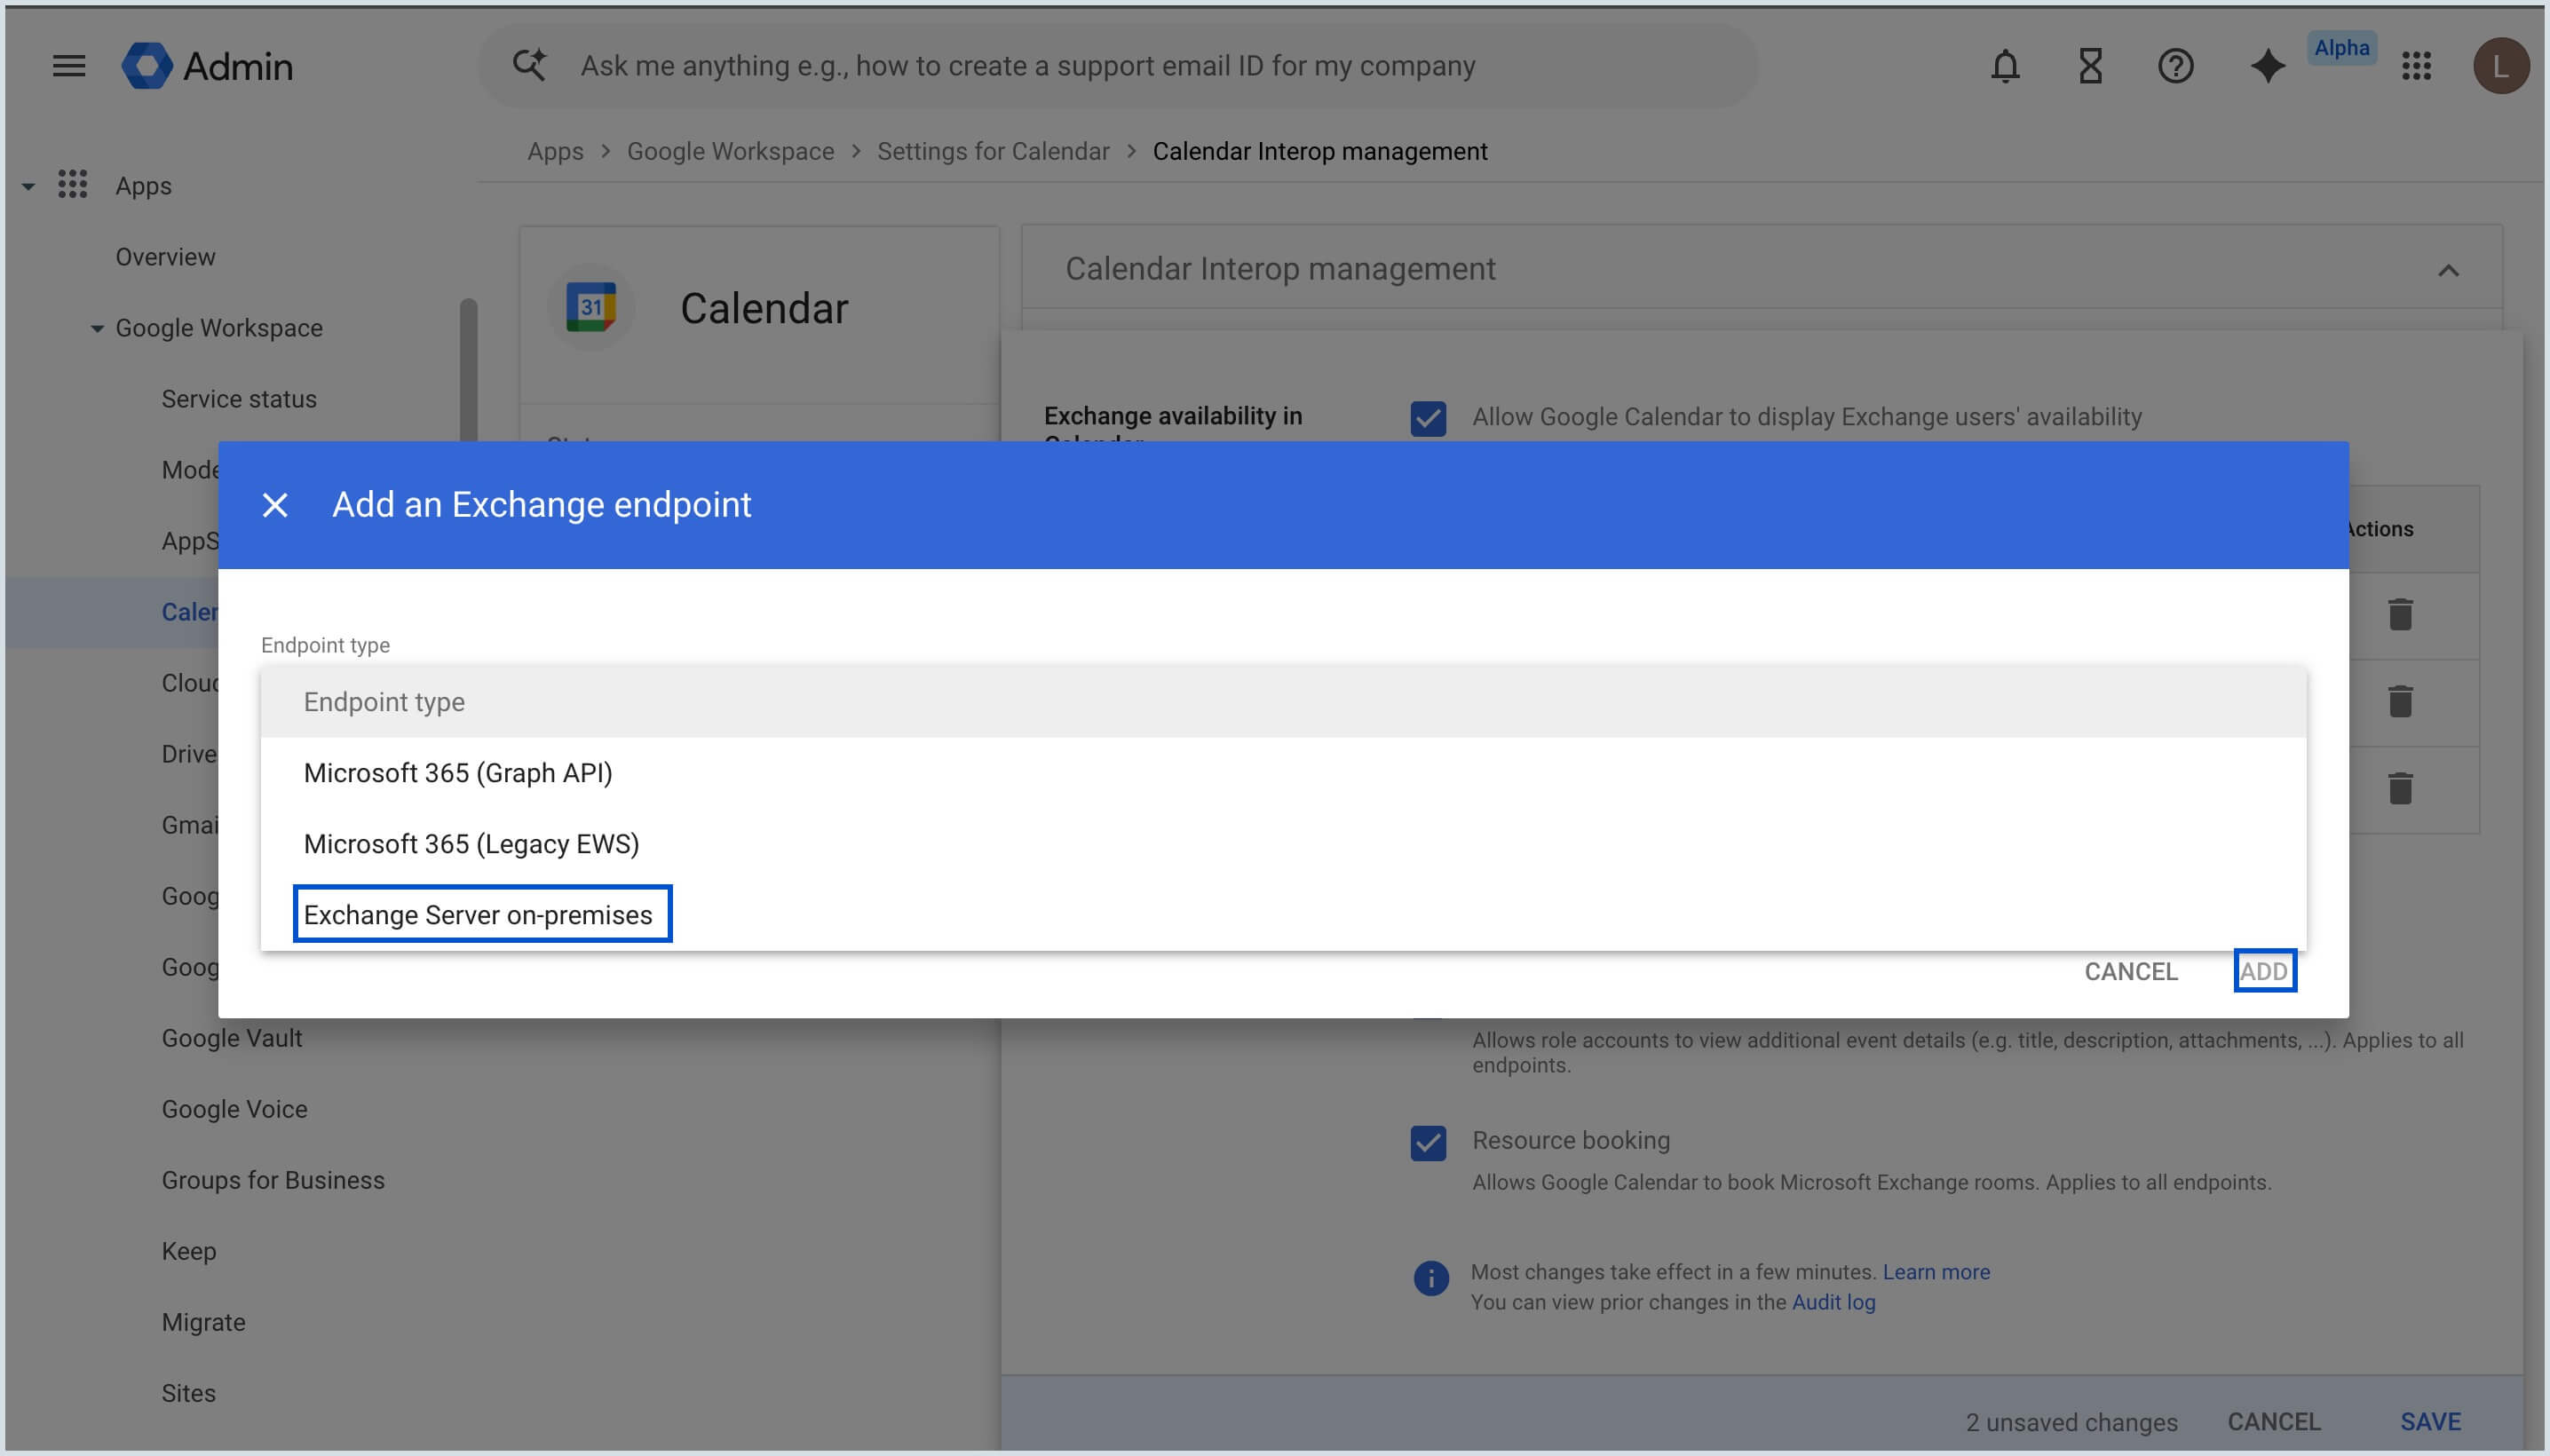
- Click Add an Exchange endpoint.
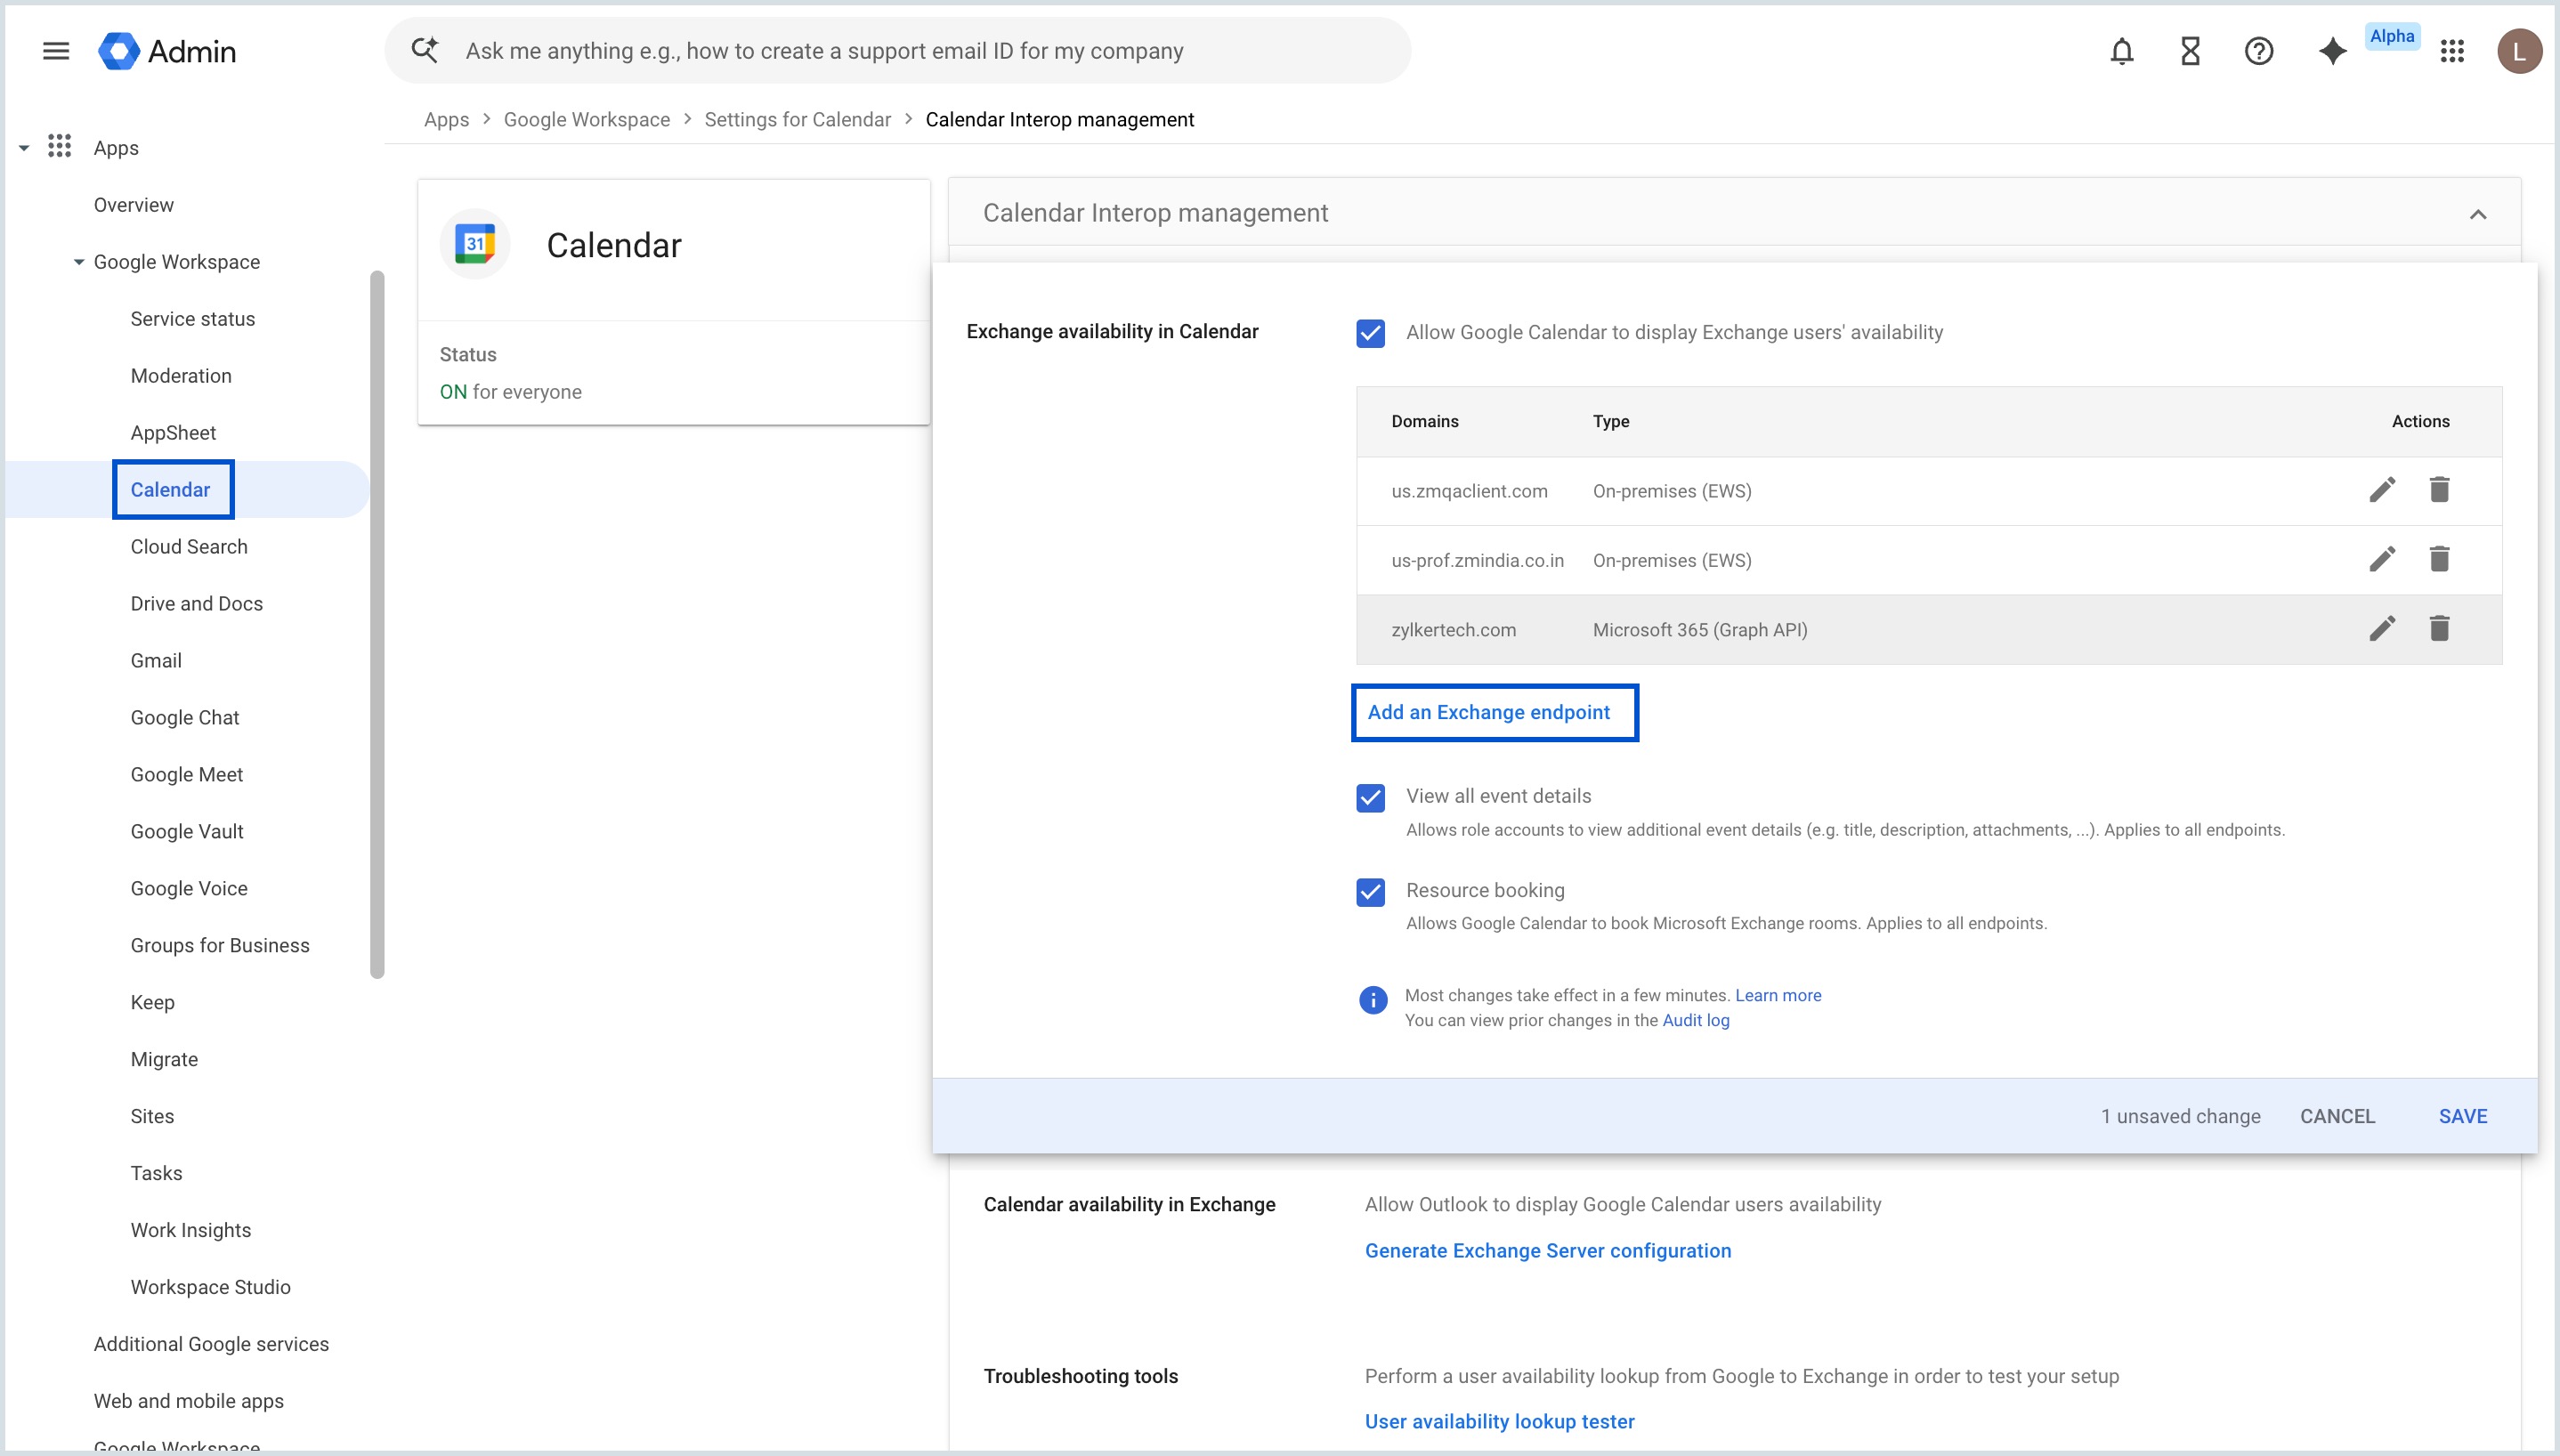
- From the Endpoint type drop-down, select Exchange Server on-premises, then click Add.
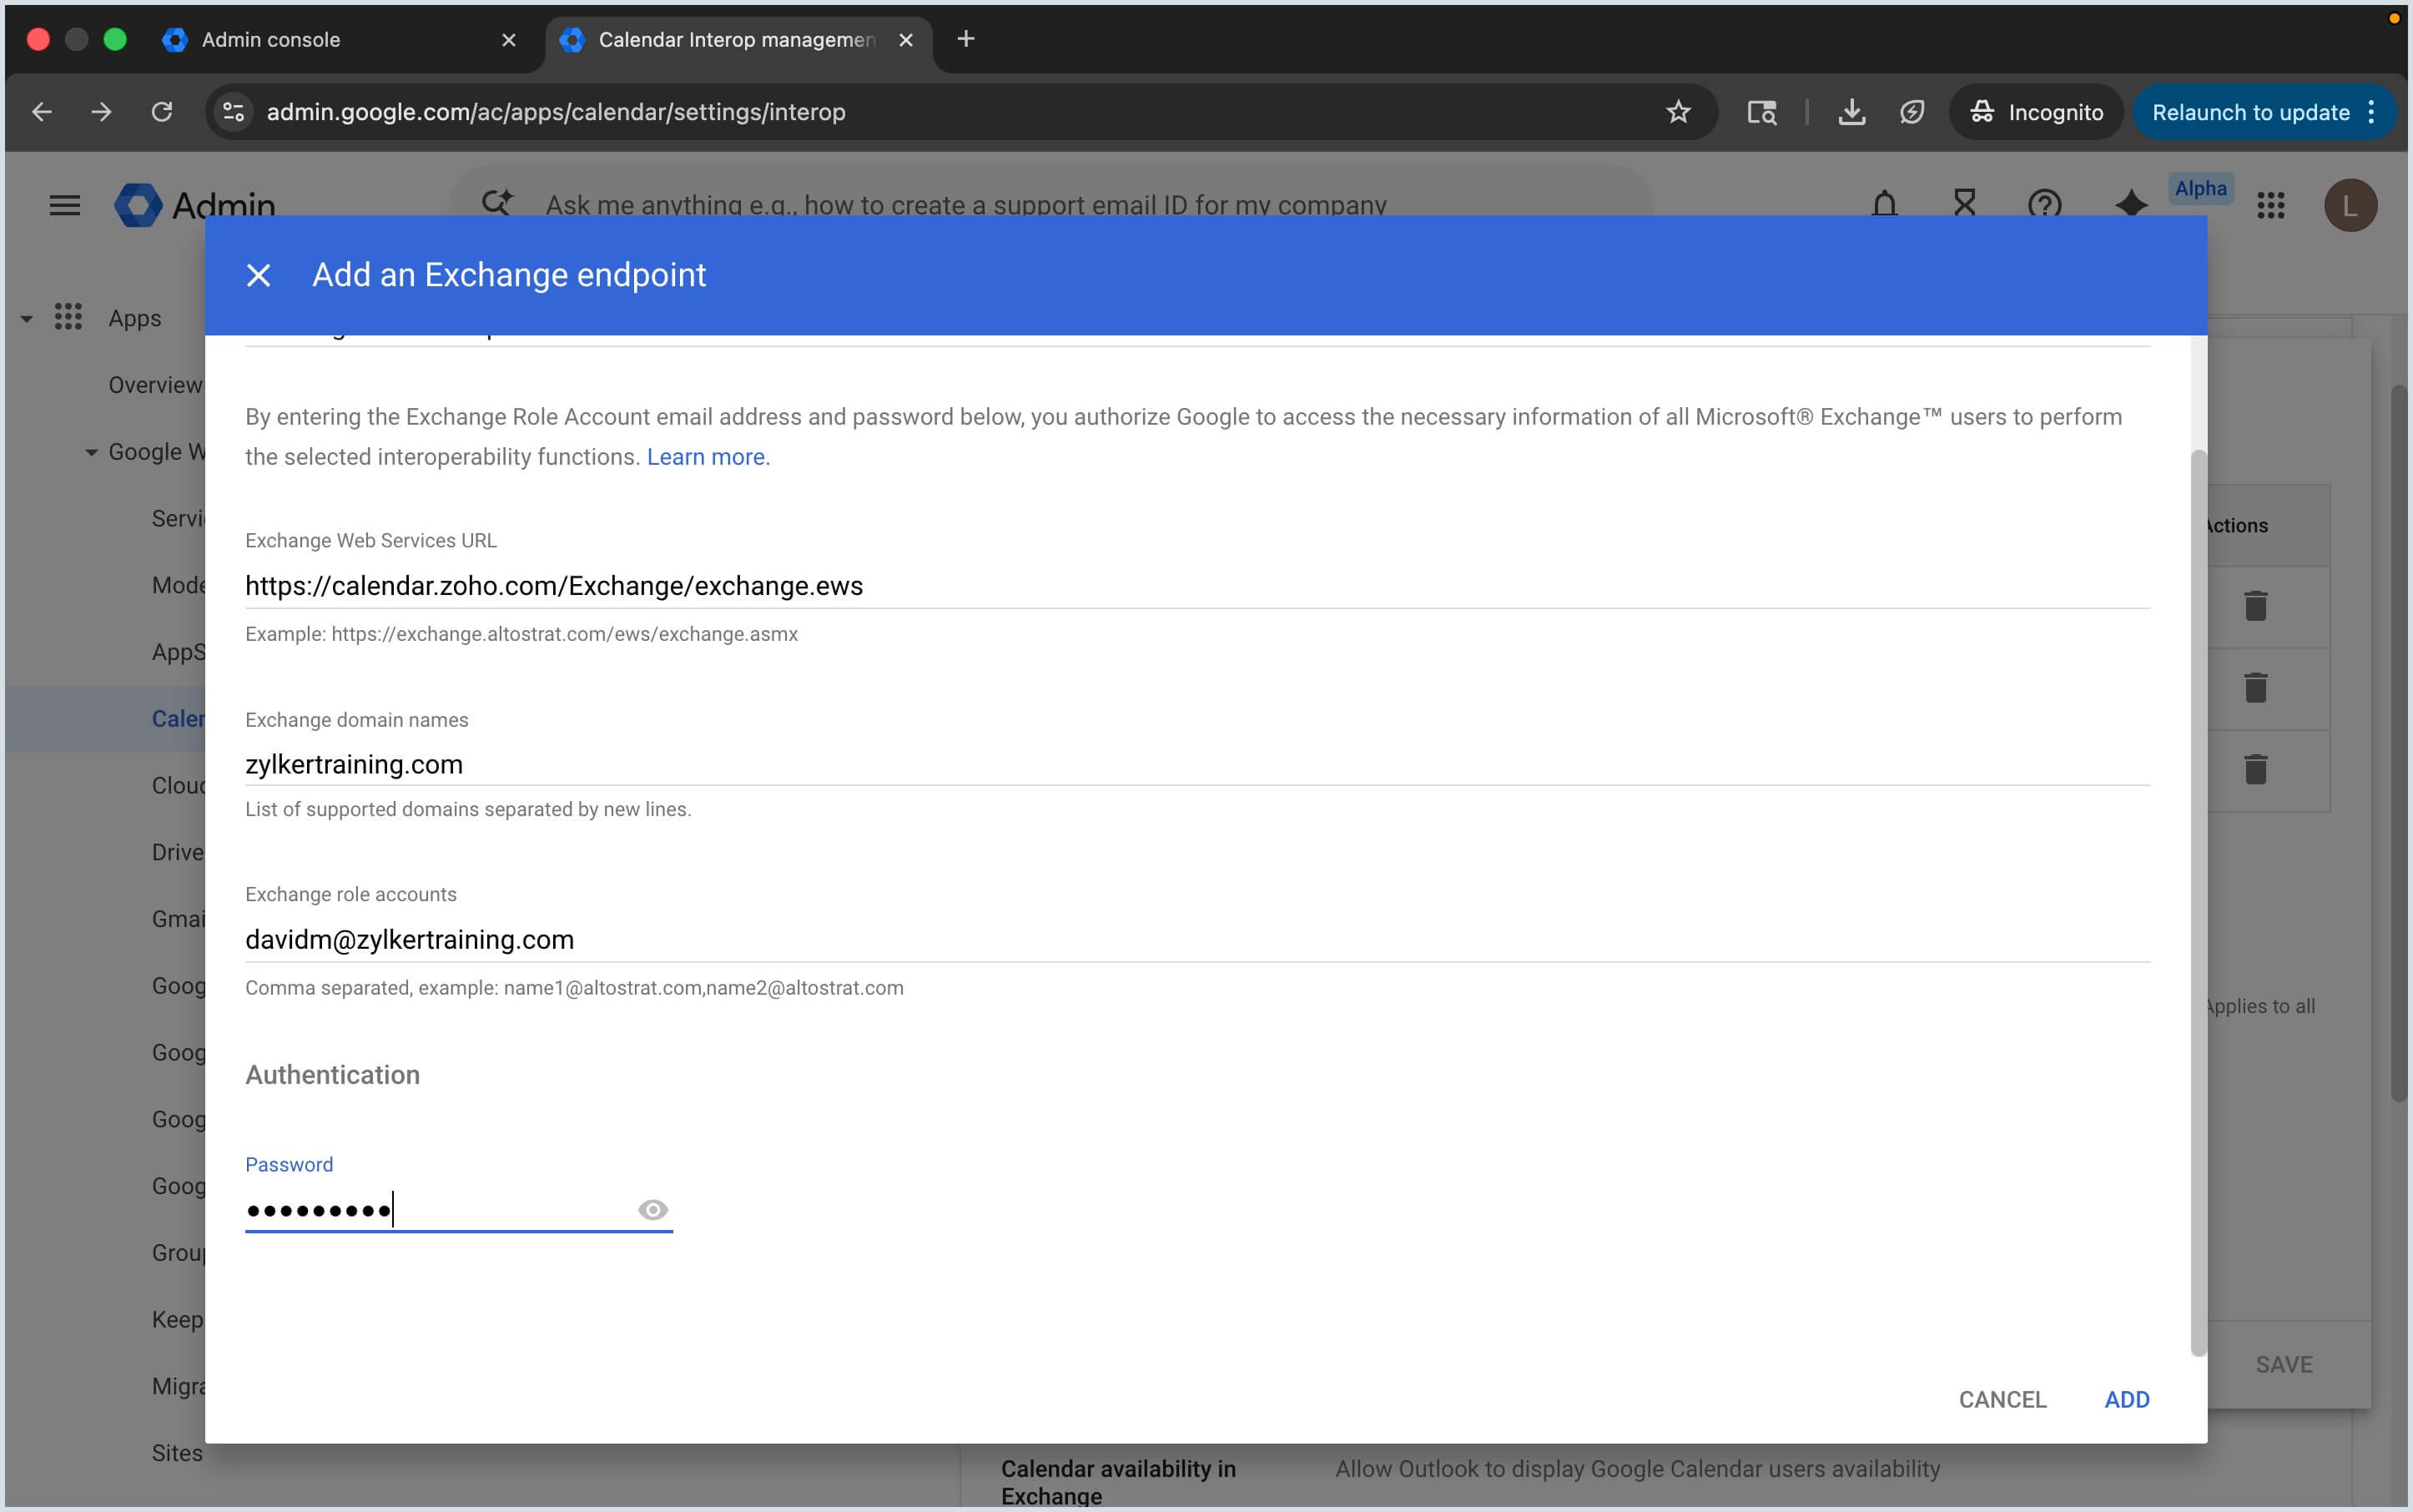
- Enter the Web server URL and the Google role account address generated during the Zoho Role Account configuration.
- Click ADD to create the endpoint.
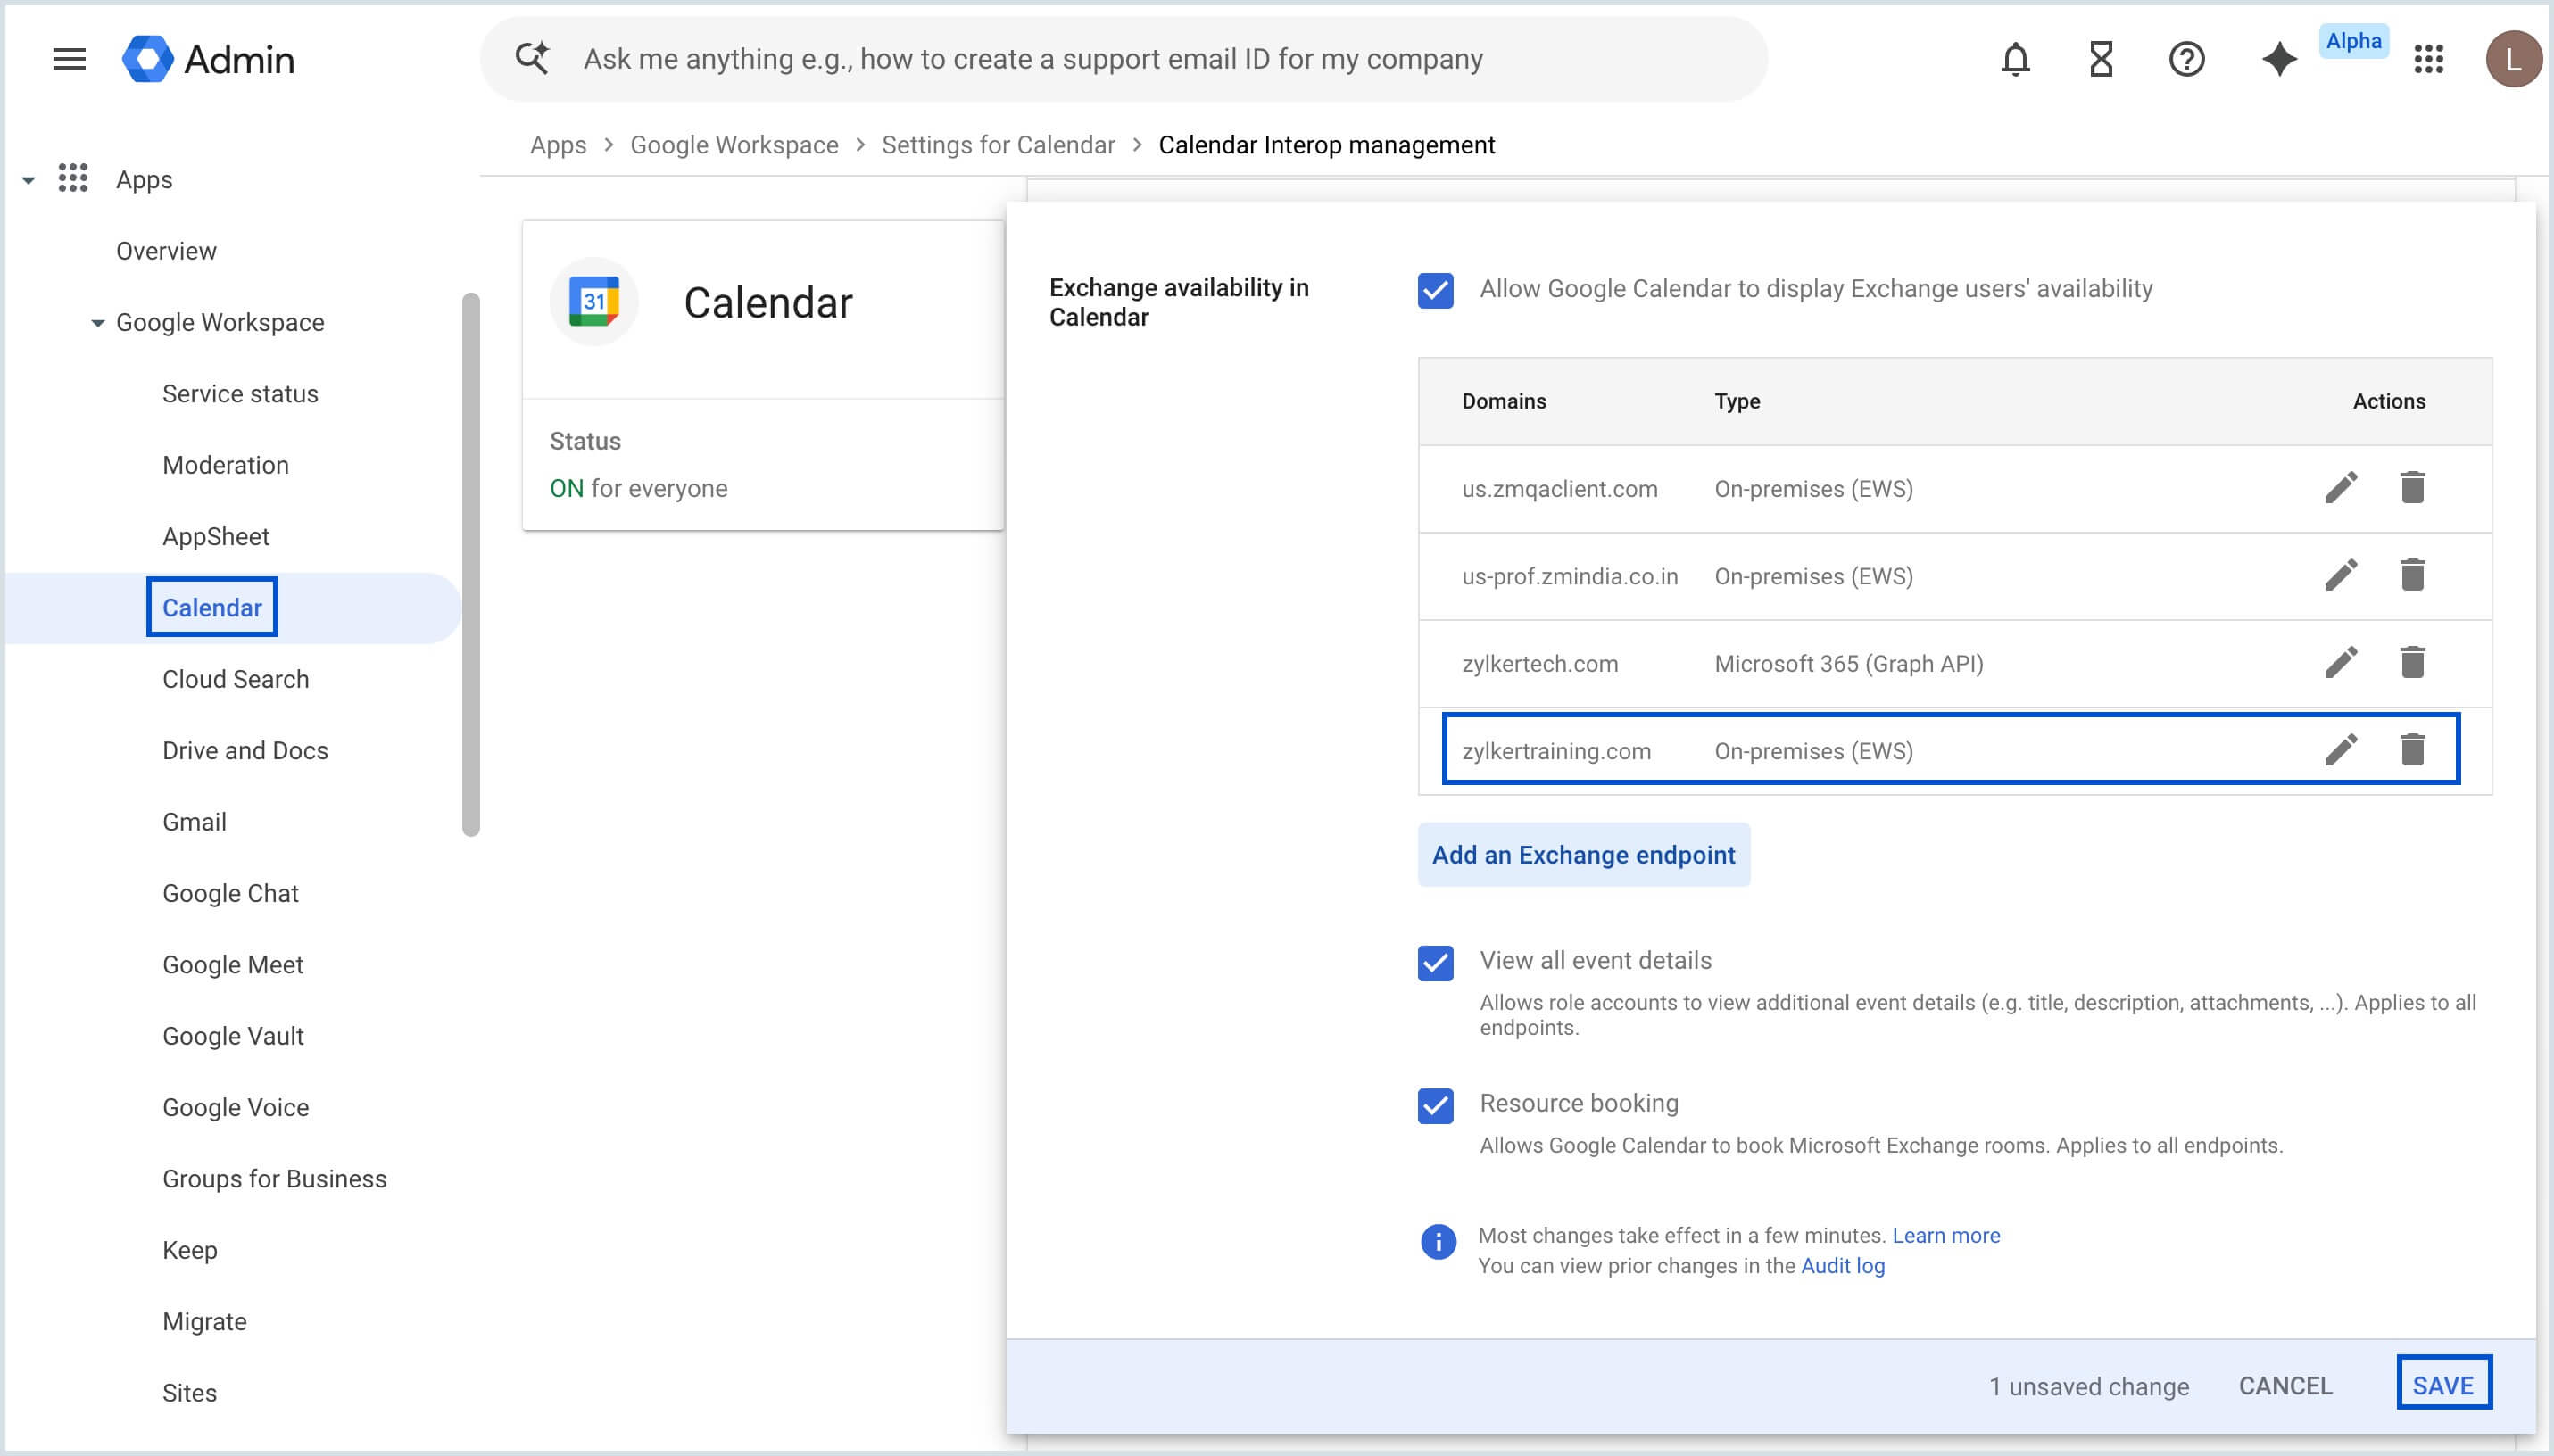
- After adding the Exchange endpoint, click Save to apply and activate the interoperability settings.
To verify if the availability address space is configured successfully, you can perform tests in the Free/Busy lookup tester and derive results.