Manage Users
The Users page allows you to:
- Add users
- Set permissions for users
- Activate/deactivate users
- Delete users
- Bulk deactivate or delete users
Additionally, you can also view and manage your subscription details from the Users tab.
Add Users
You can add users to your account by specifying their email address. The number of users you can add to your account depends on your subscription plan.
To add a user to your account,
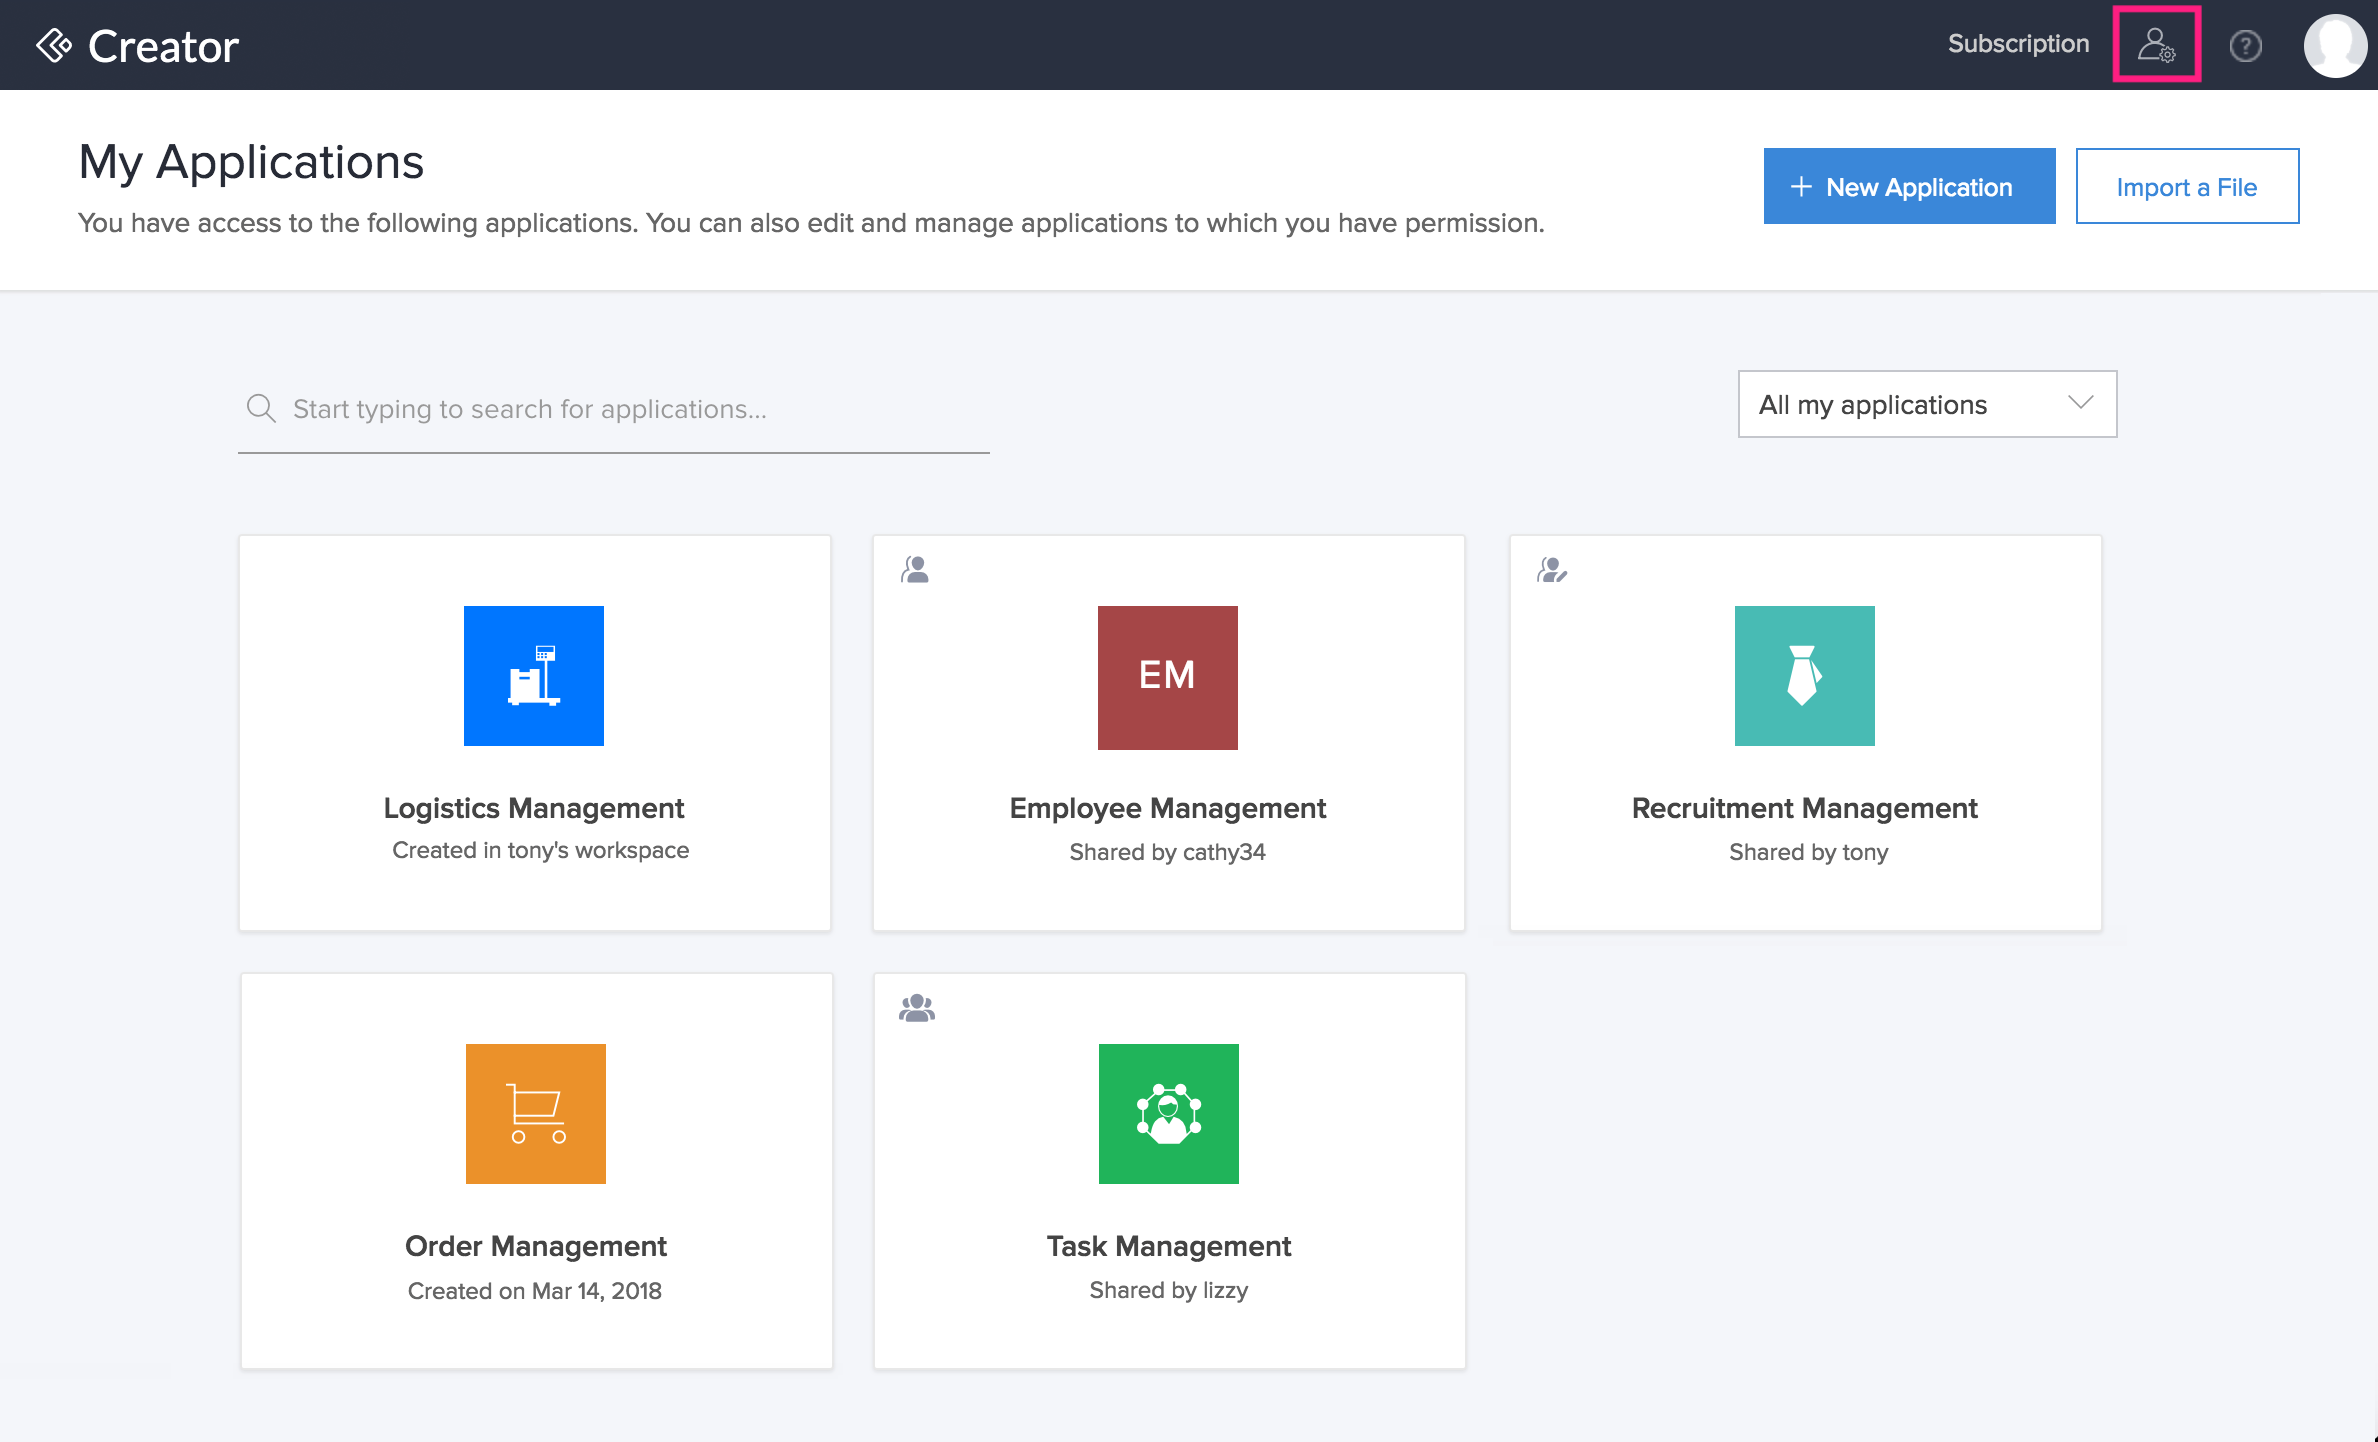
- Go to your Zoho Creator Home.
Click the Setup icon near the top-right corner of the Home page. You'll be taken to the Account Setup page.
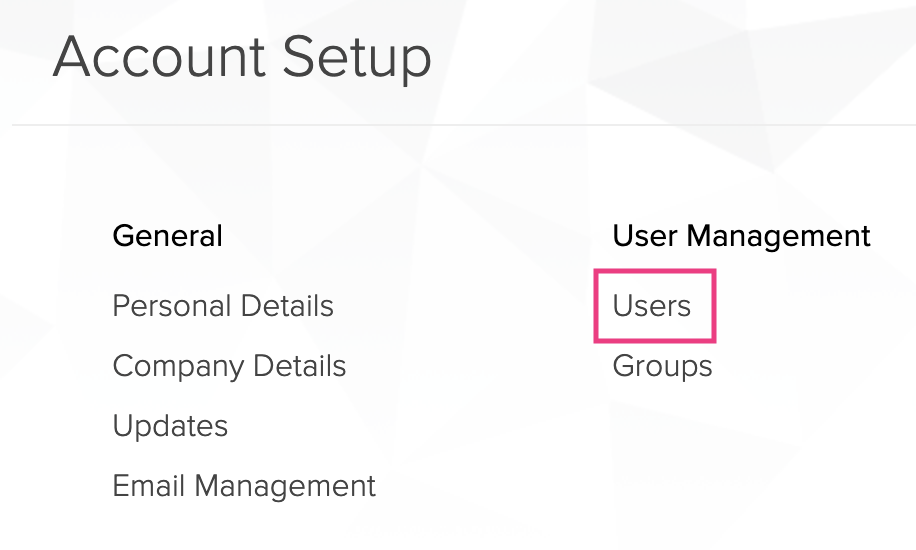
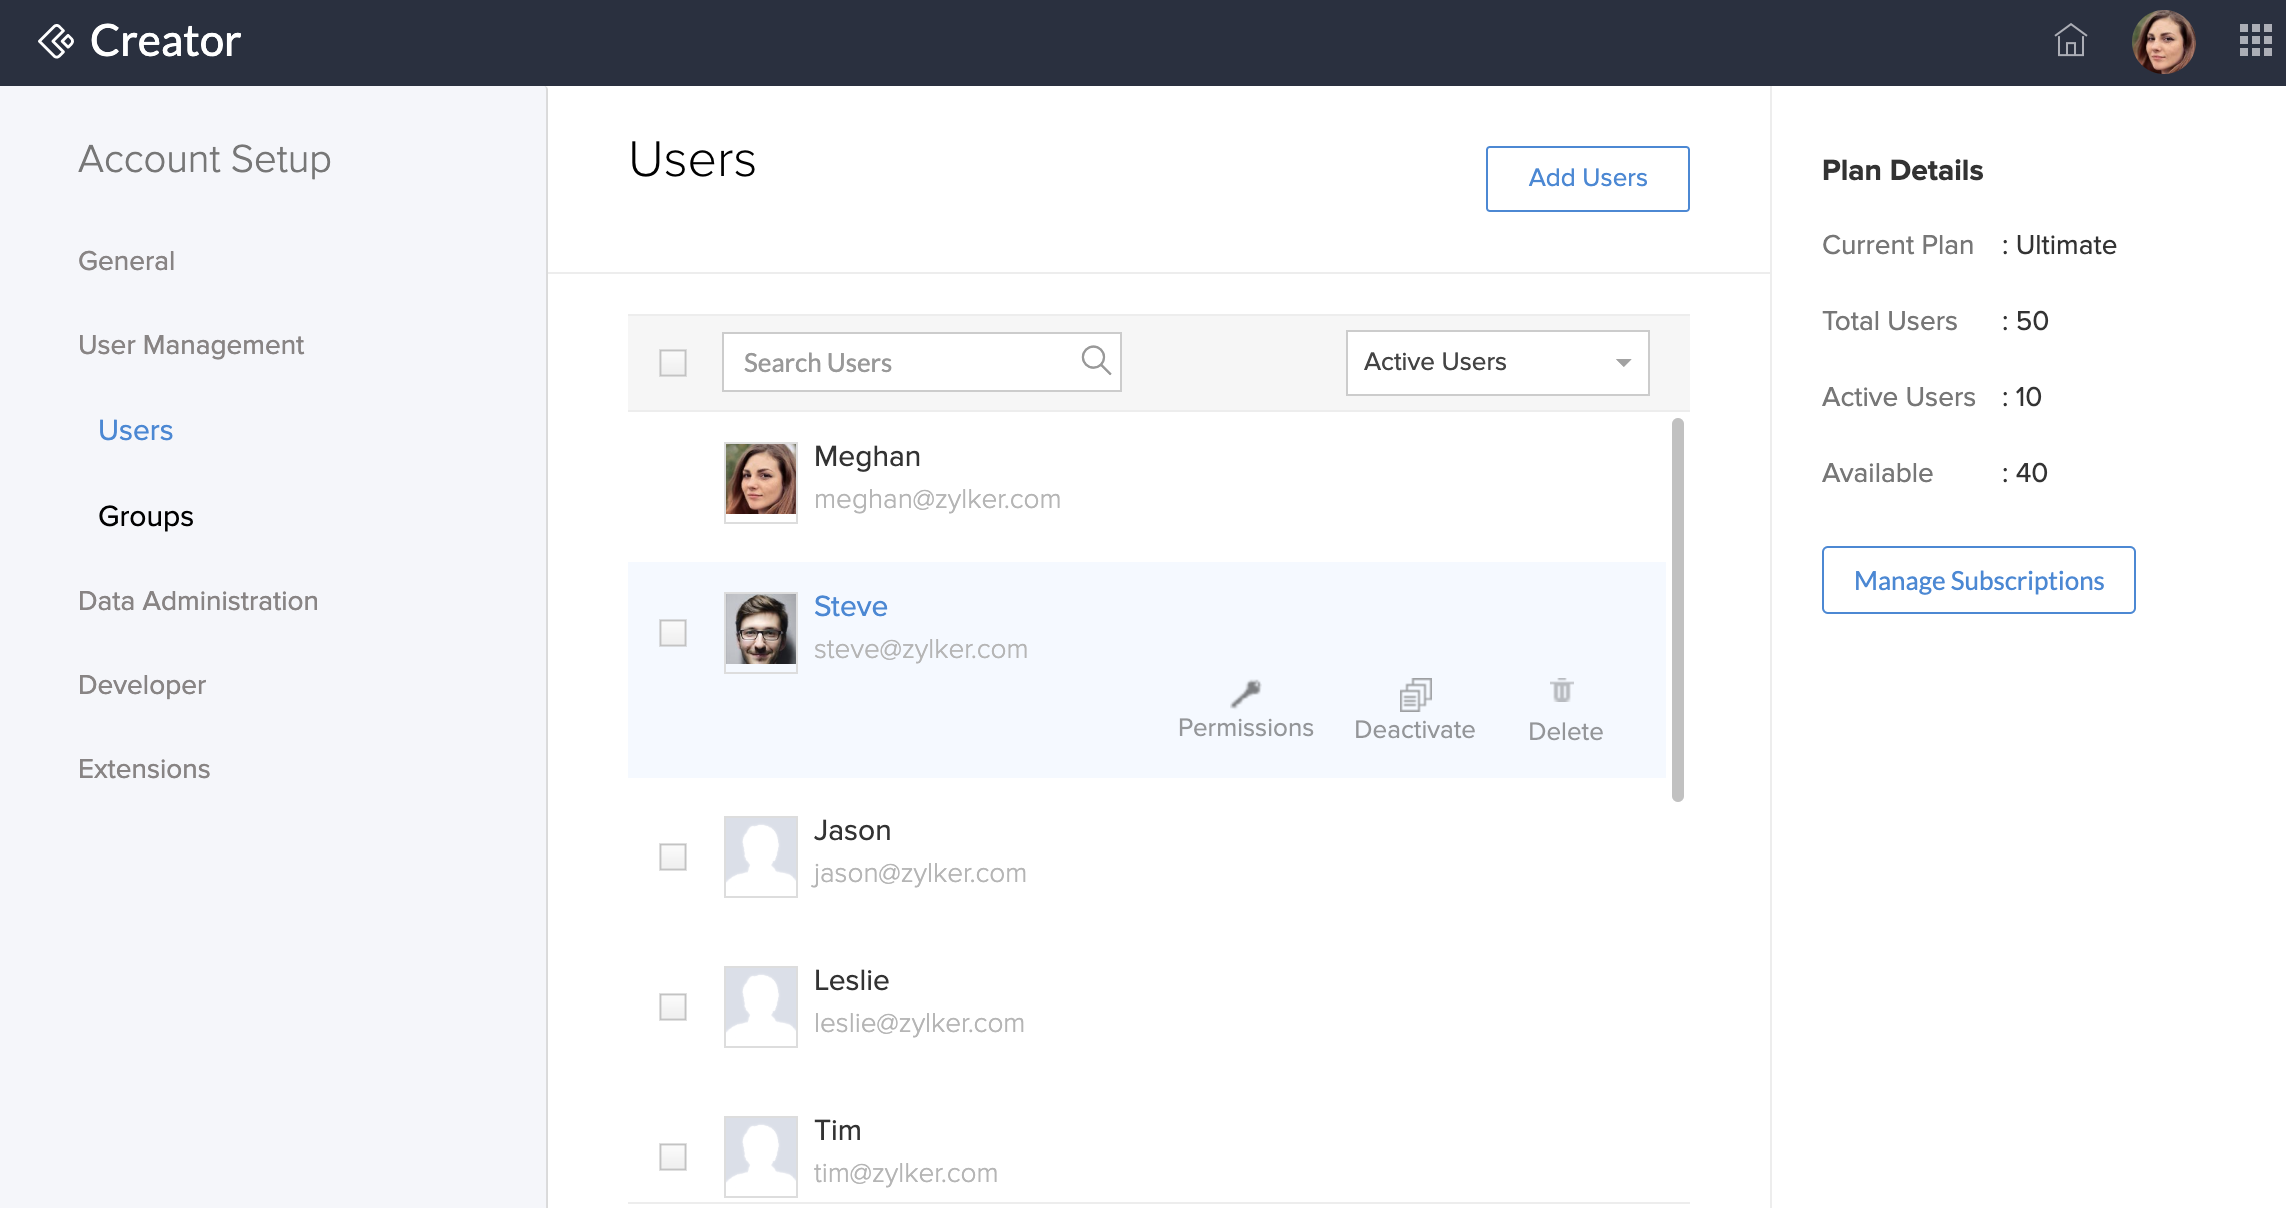
Select Users from the User Management category. The Users tab will appear.
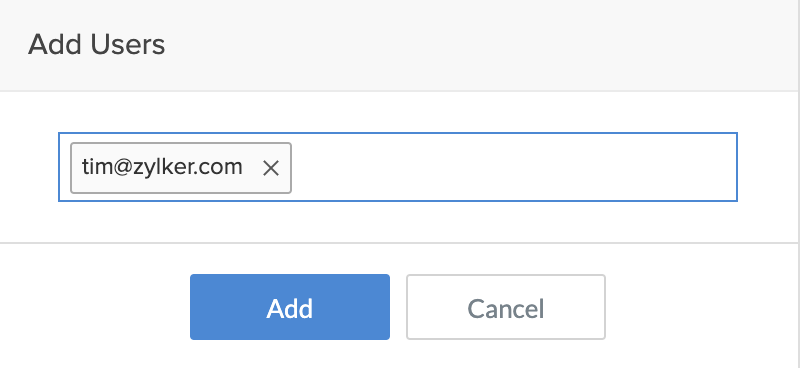
Click Add Users at the top right corner of the Users tab. A popup window will appear.
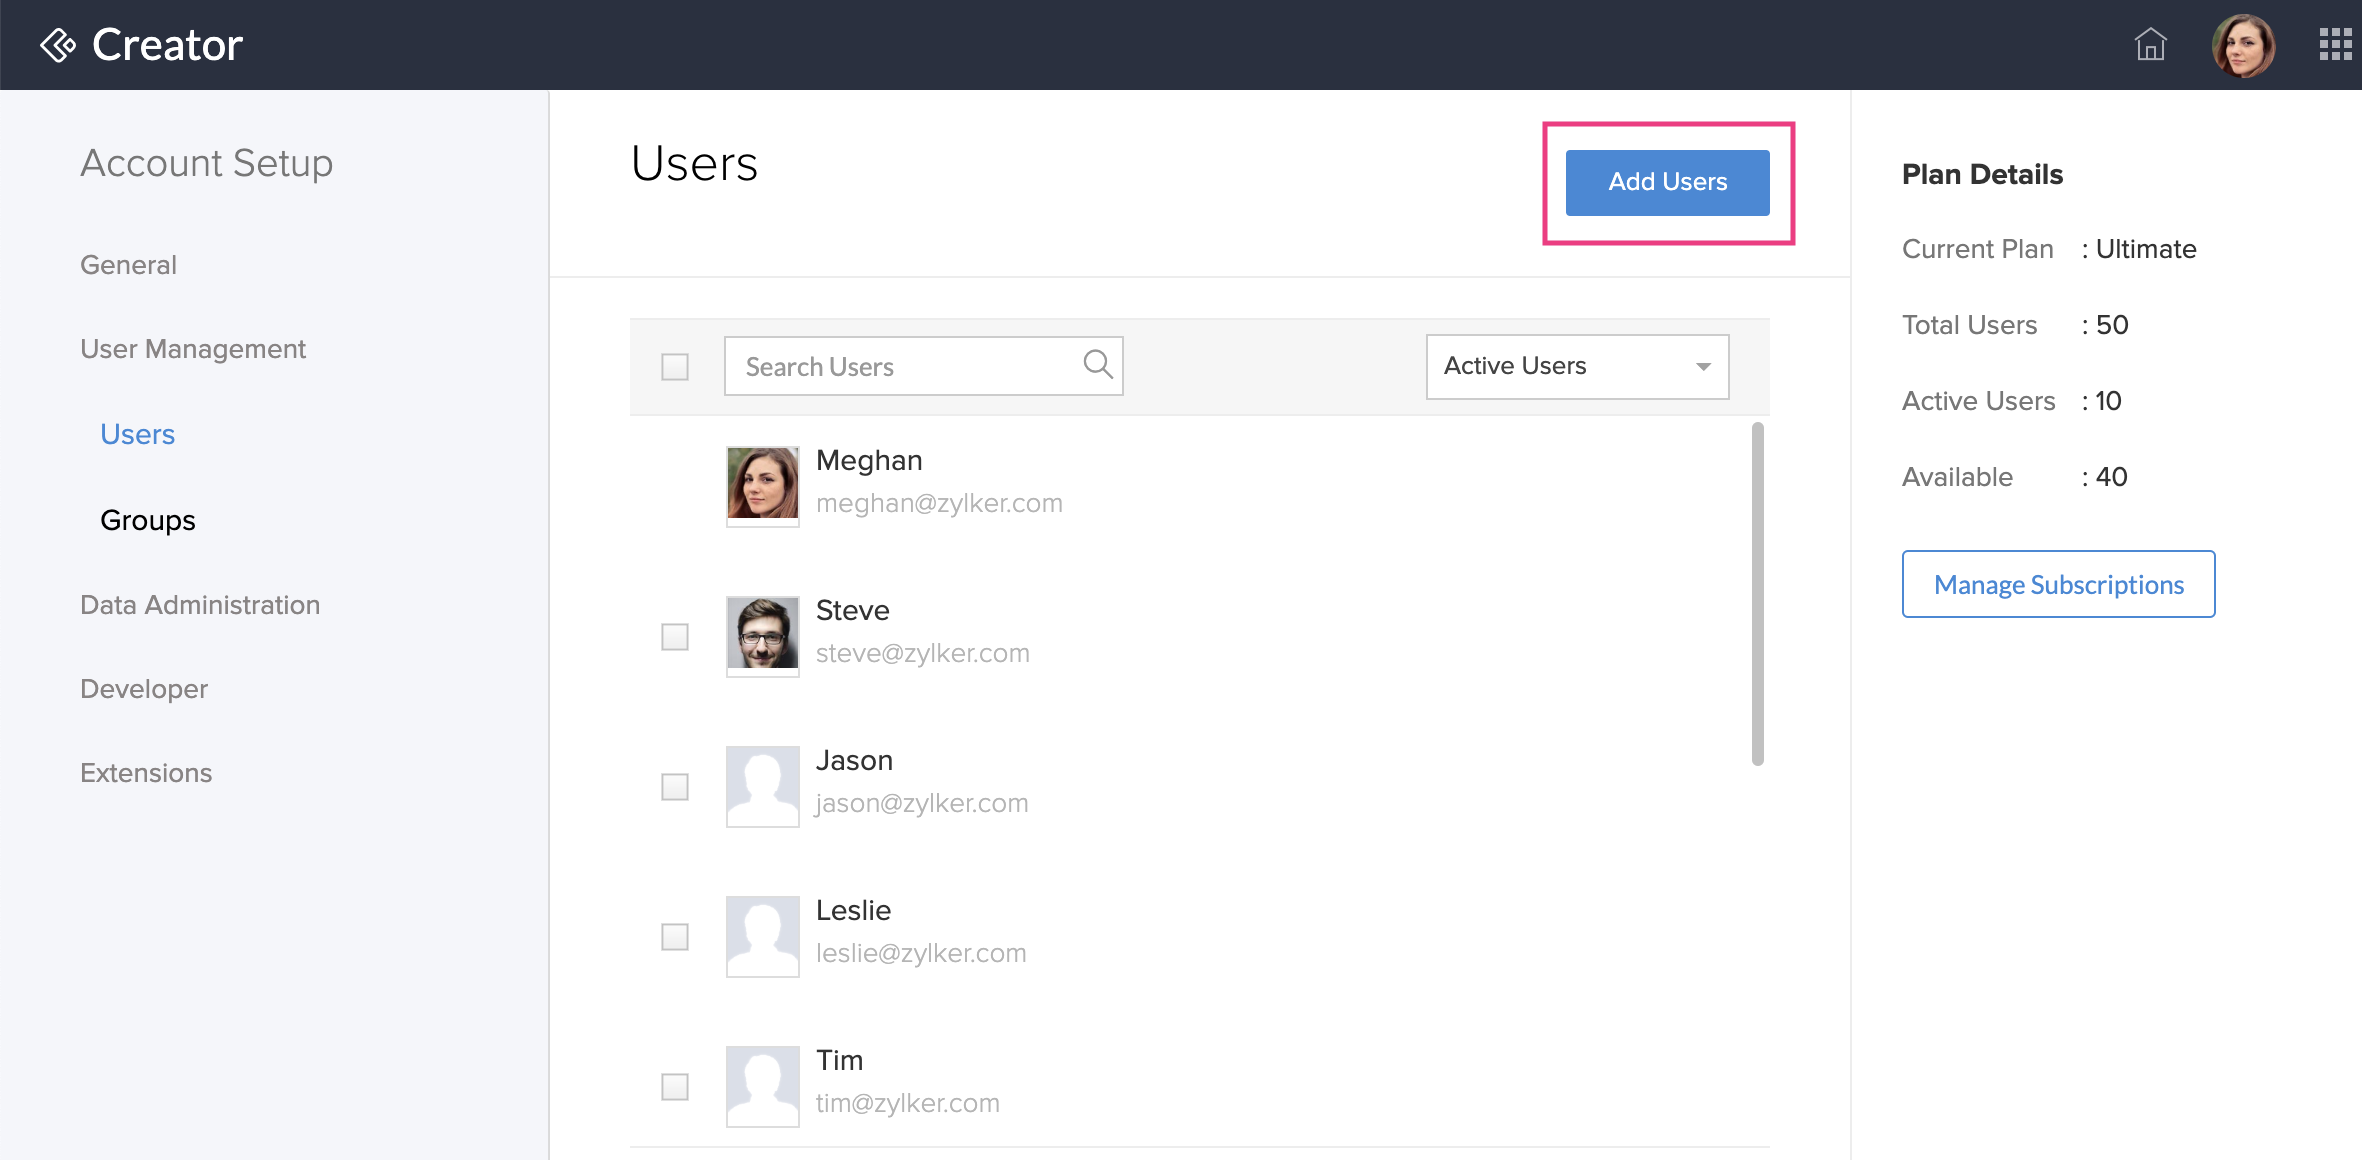
Enter the user's email address in the Add Users popup and click Add.
- Once a user is added, an automated email invitation is sent to the user's email address provided by the administrator. The user clicks Access link in the email to accept the invitation. This request must be accepted within seven days of receiving it.
- After accepting the invitation, the user completes the following procedure, whichever is applicable:
- The Users tab displays the added users. You can set permissions, deactivate, or delete the user anytime from your account.
User is new to Zoho and does not have a Zoho account
To access the Creator application, the user must:
- Click the access link in the invitation email. The Signup page will appear.
- Sign up for a Zoho account.
- Click the Continue signing in button.
- Access and confirm the link received in the confirmation email.
User already has a Zoho account
To access the Creator application, the user must:
- Click the access link in the email.
- Click the Continue signing in button.
- The user will log in to the Zoho Creator account using their login credentials.
Set permissions for a User
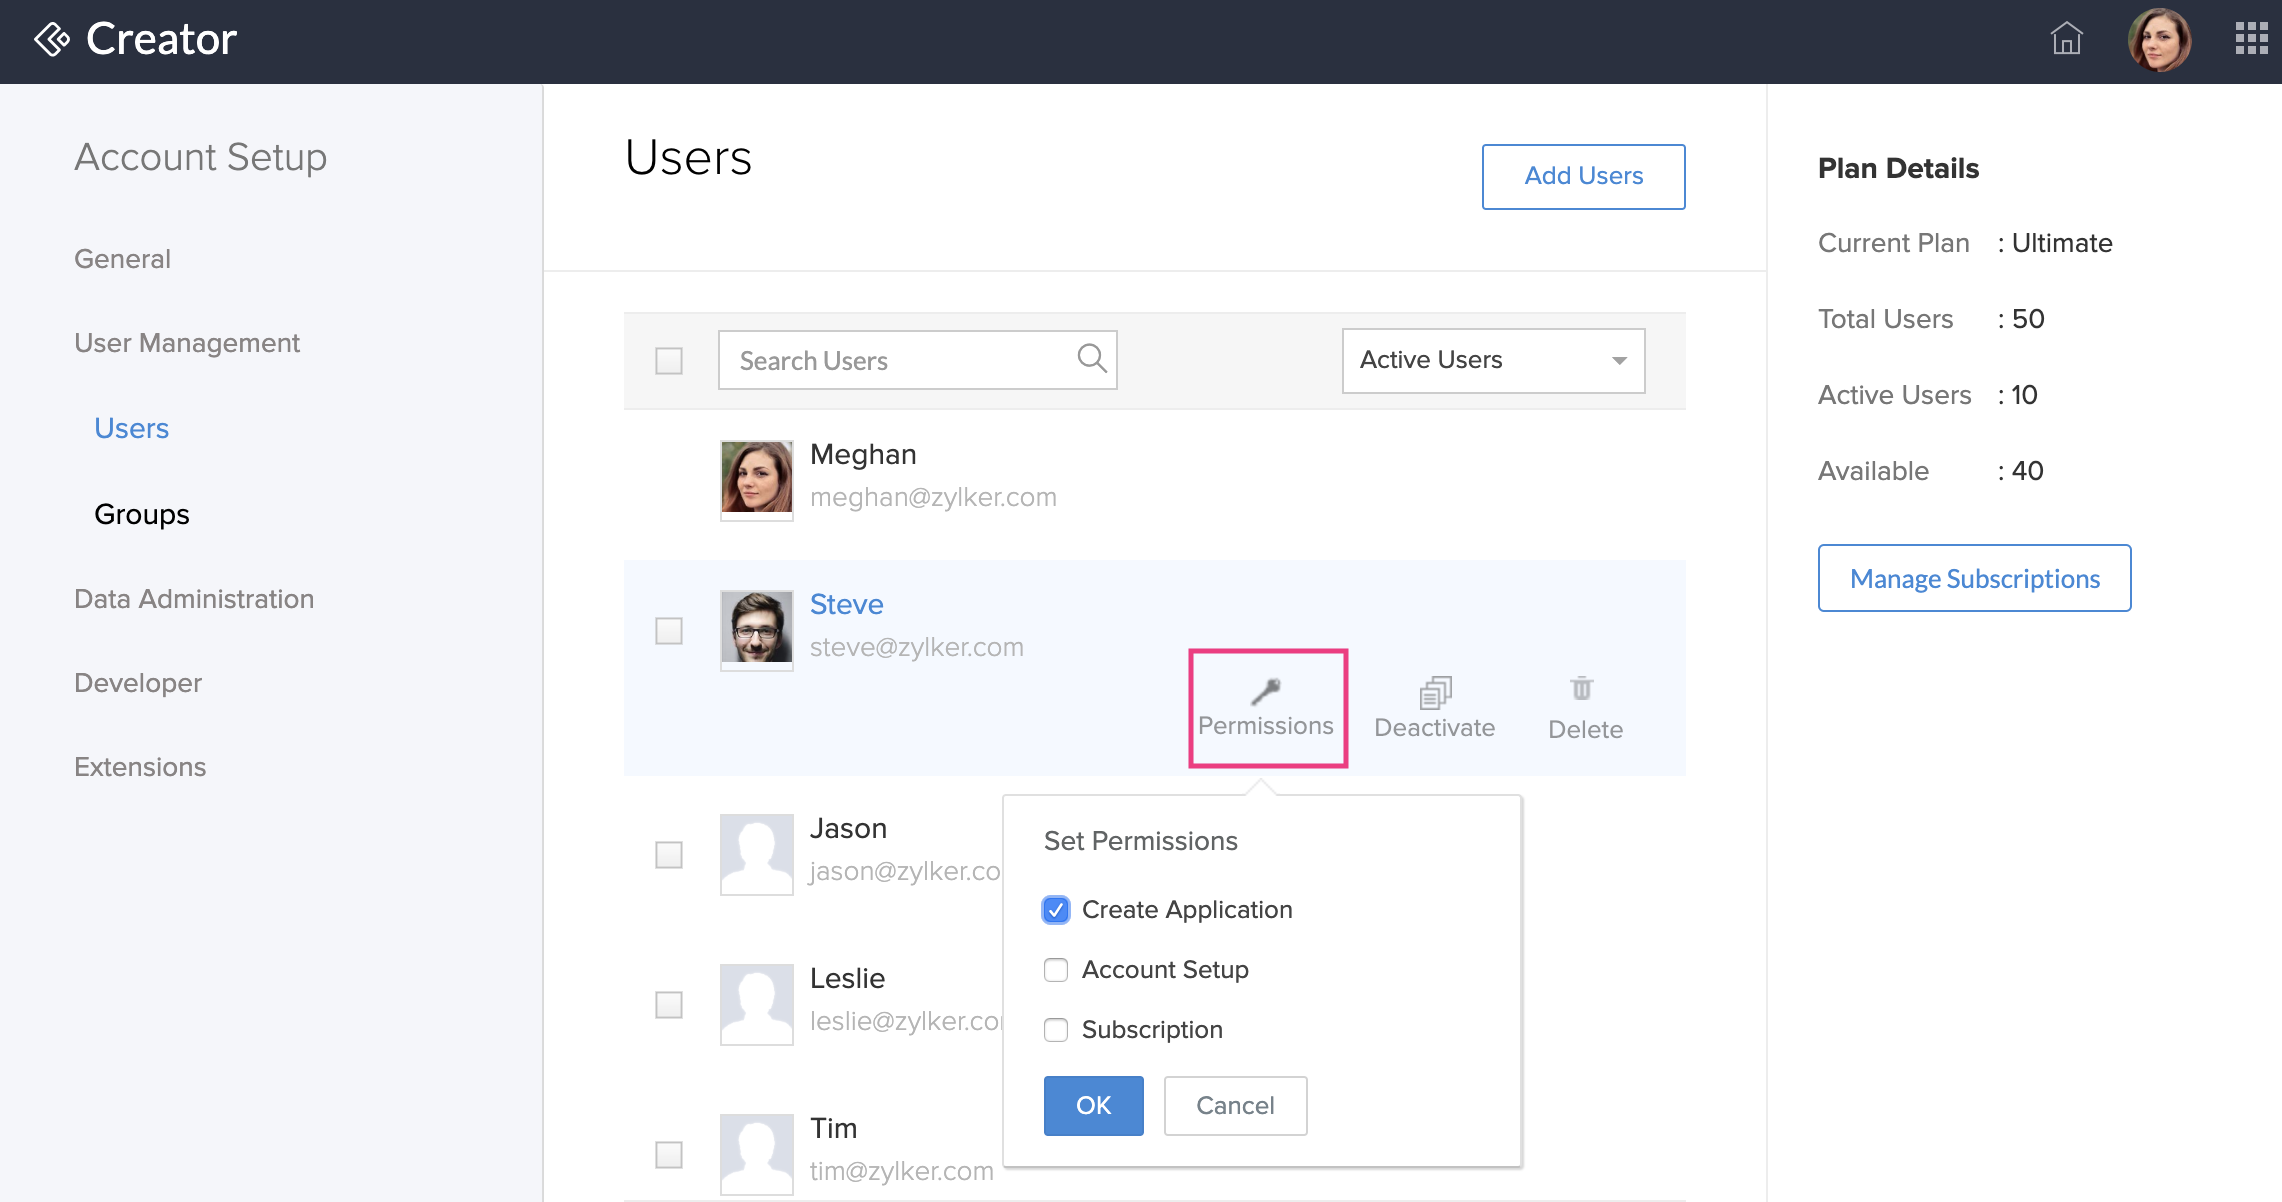
Added users can only access your (application owner's) workspace. They cannot perform any actions unless you explicitly grant them permissions. You can grant the following permissions to users:
| Permission | What it does? |
| Create application | Allows users to create applications in your workspace. |
| Account setup | Allows users to access your account setup section. |
| Subscription | Allows users to view your subscription details. |
To set permissions for your users,
- Hover your cursor on the added user and click Permissions.
Choose the required permissions and click OK.
Activate/deactivate Users
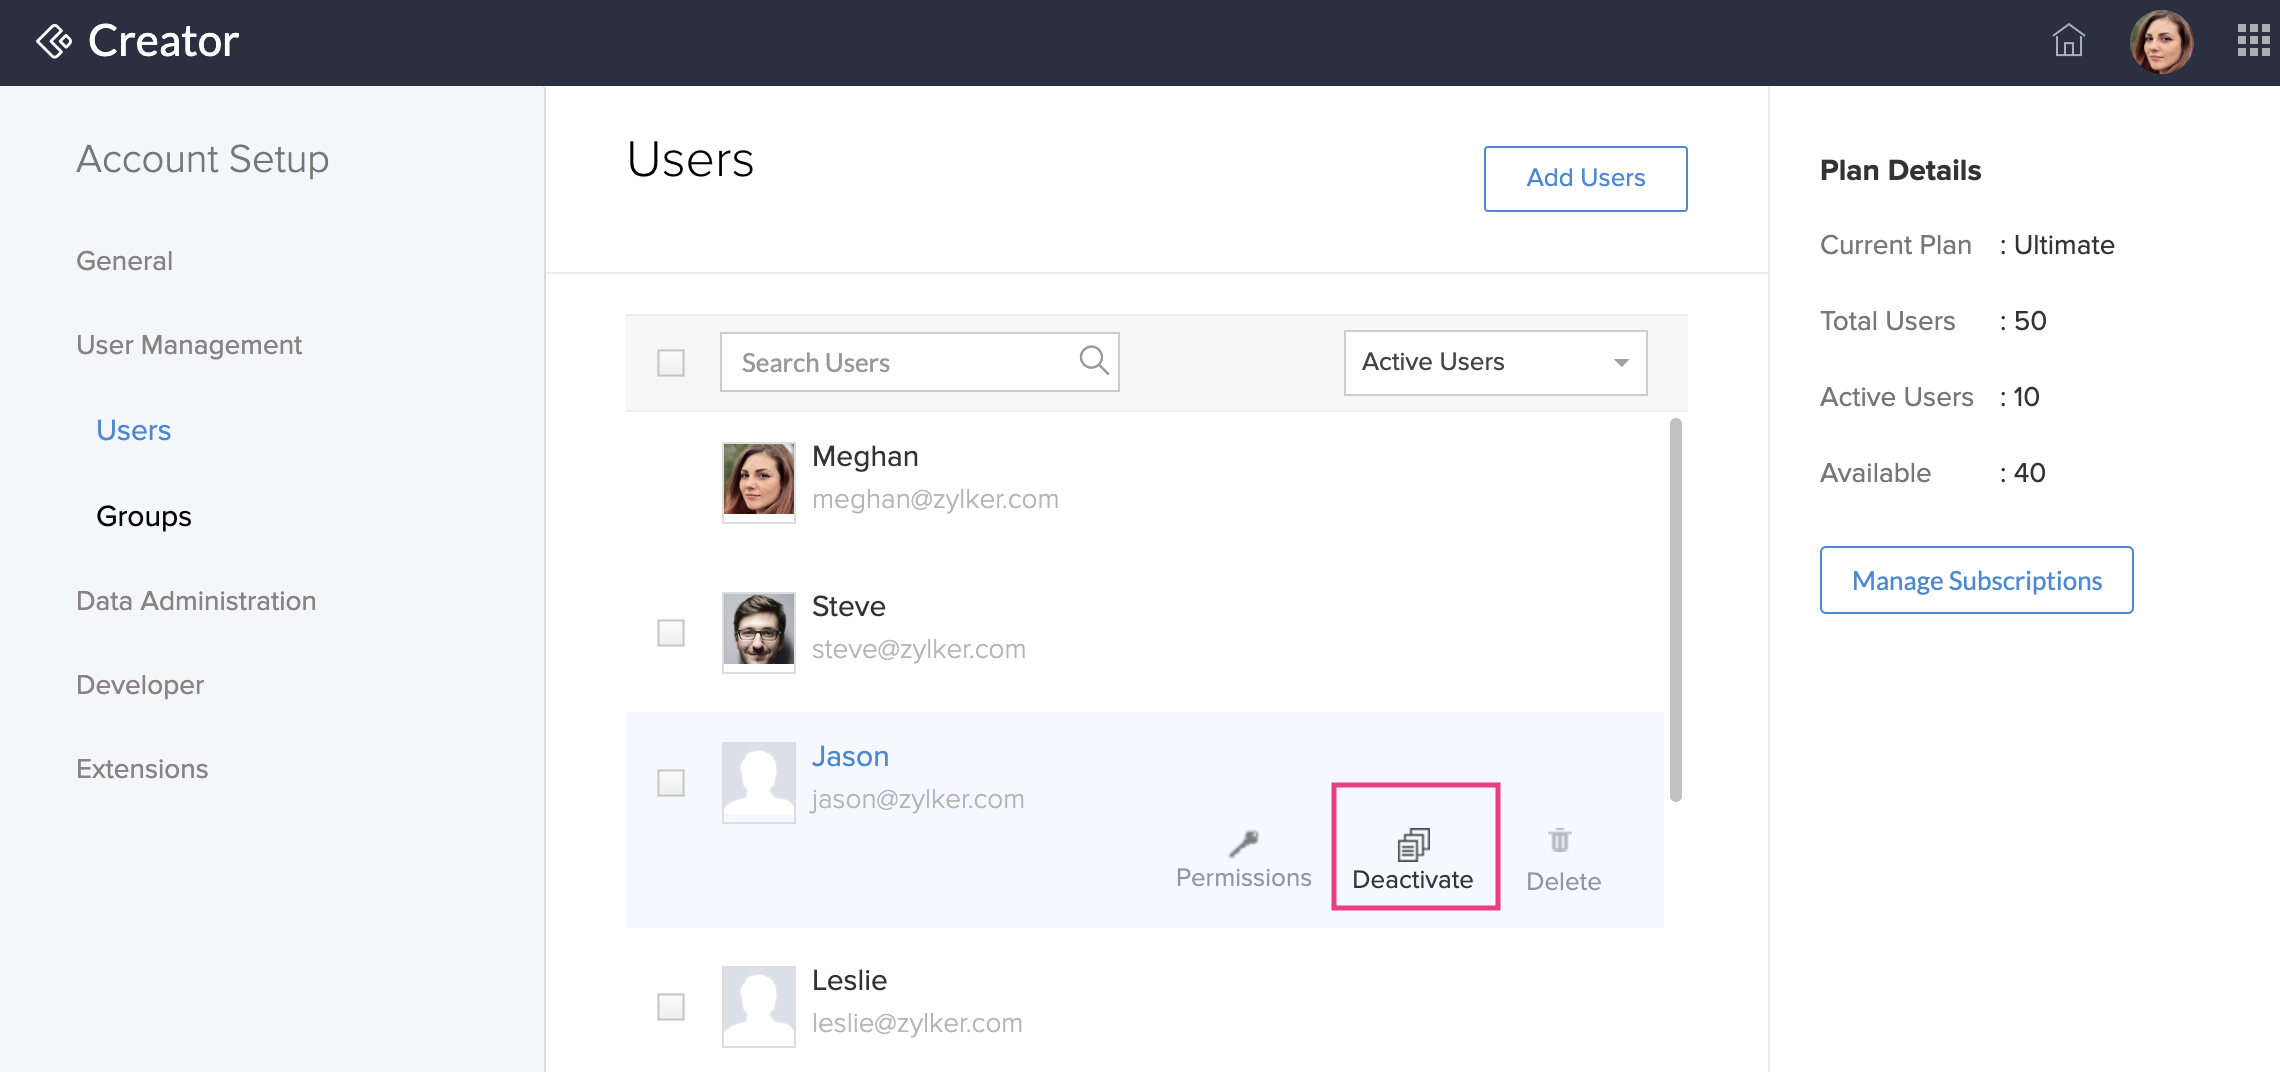
By default, a user's status will be Active. You can share your application only with users whose status is Active. To deactivate a user,
Hover your cursor over the required user and click Deactivate.
Select Inactive Users in the dropdown.
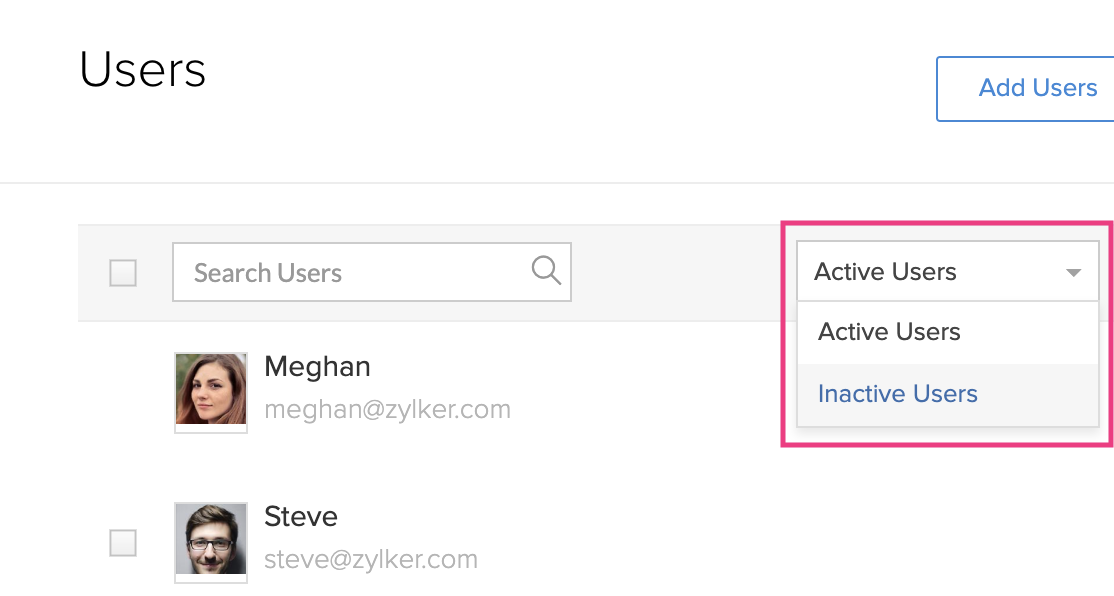
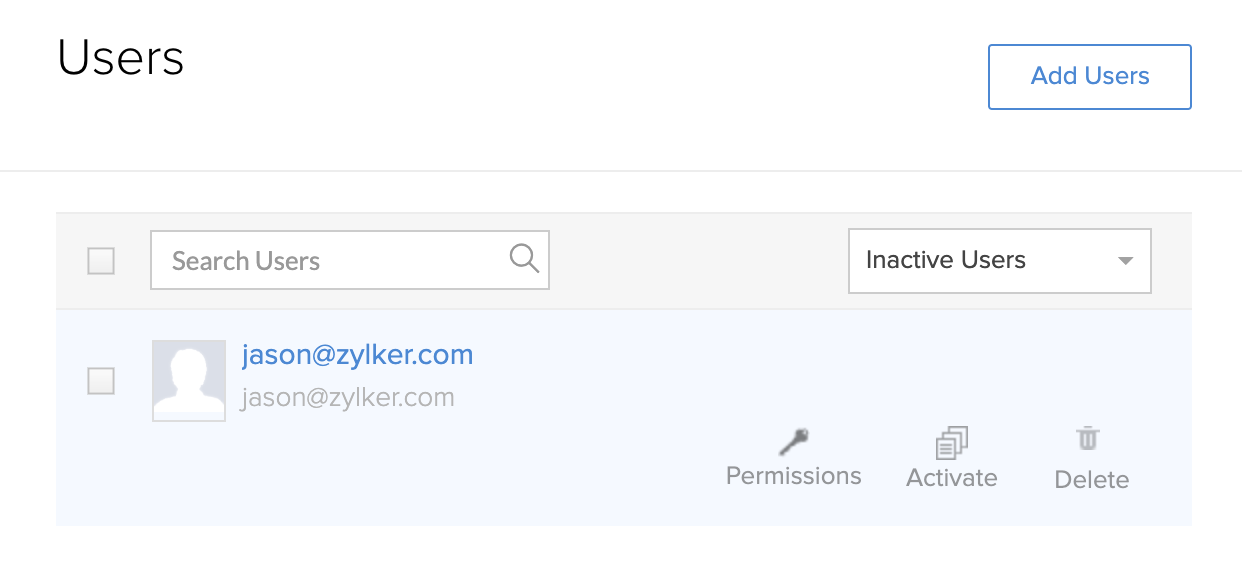
The deactivated user will be listed under Inactive Users tab.
Note:
- When you deactivate a user with authorized connections, those third-party connection authorizations will be revoked and the connection, if used within apps, will become unauthorized.
- To prevent disruptions to your application's functionality, the super admin or admins must reactivate the user within 30 days. On clicking review, you can view a filtered list of connections authorized by the selected user, for which authorization has to be done. You can switch or reauthorize these connections.
- Once reactivated, the user can resume using the connections normally. If the user is not reactivated, the authorization will be permanently revoked, and the tokens will be lost.
- We recommend keeping the respective user informed to ensure smooth continuation of service.
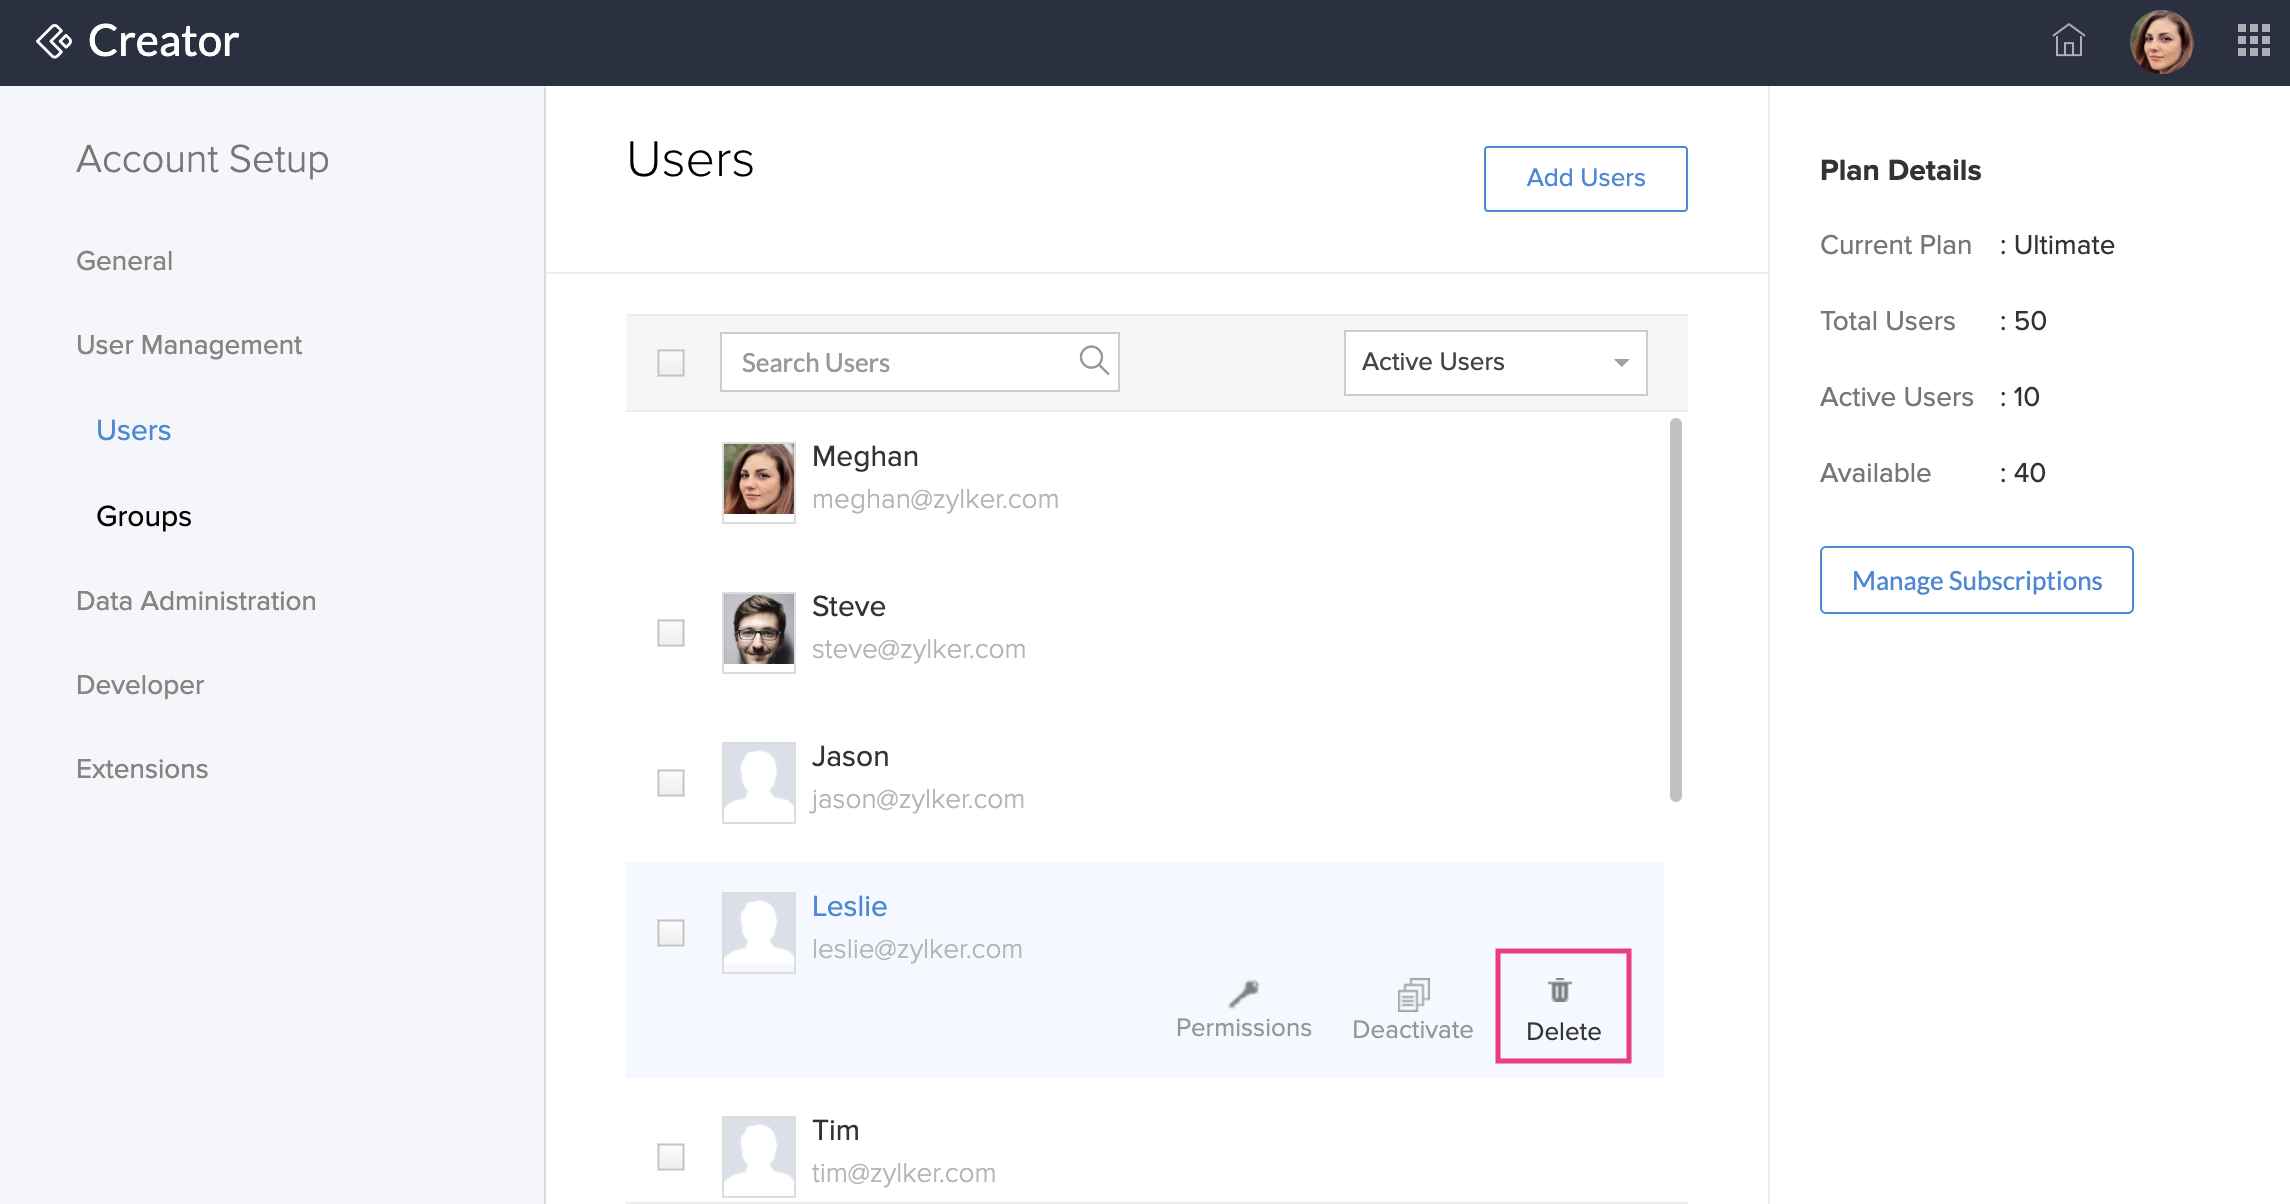
Delete Users
To delete a user, mouse over to the user's profile and click Delete.
To avoid disruptions in the functioning of your application due to this revocation, the super admin or admins must review and reauthorize those connections. On clicking review, you can view a filtered list of connections authorized by the selected user, for which authorization has to be done. You can switch or reauthorize these connections as required or proceed to do them post user deletion.
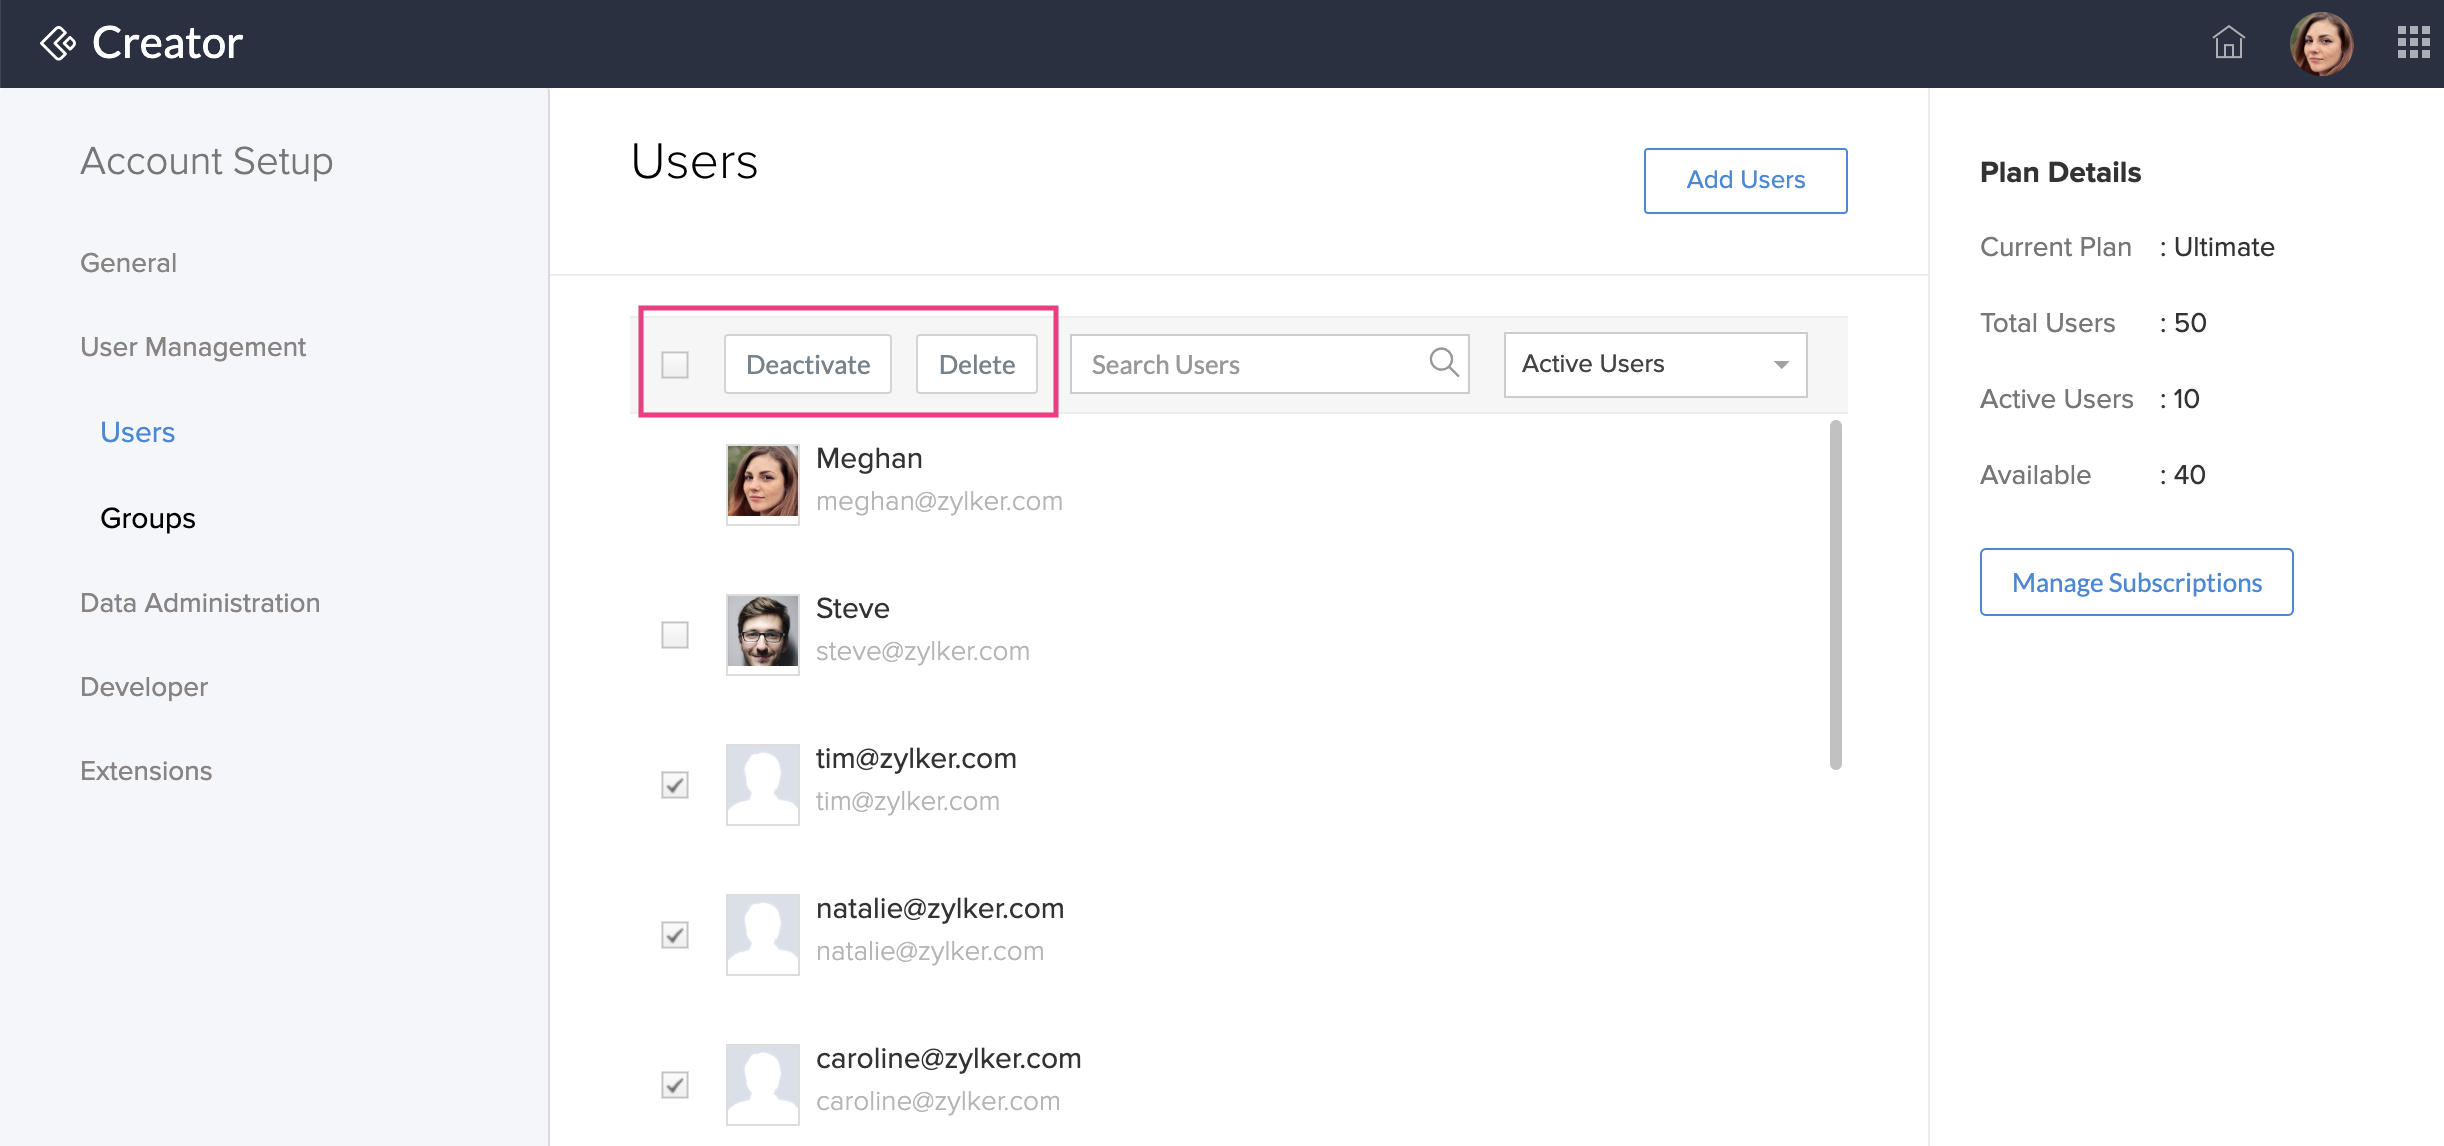
Bulk deactivate/delete Users
You can bulk deactivate/delete users from the header menu by checking the users and selecting the required actions.
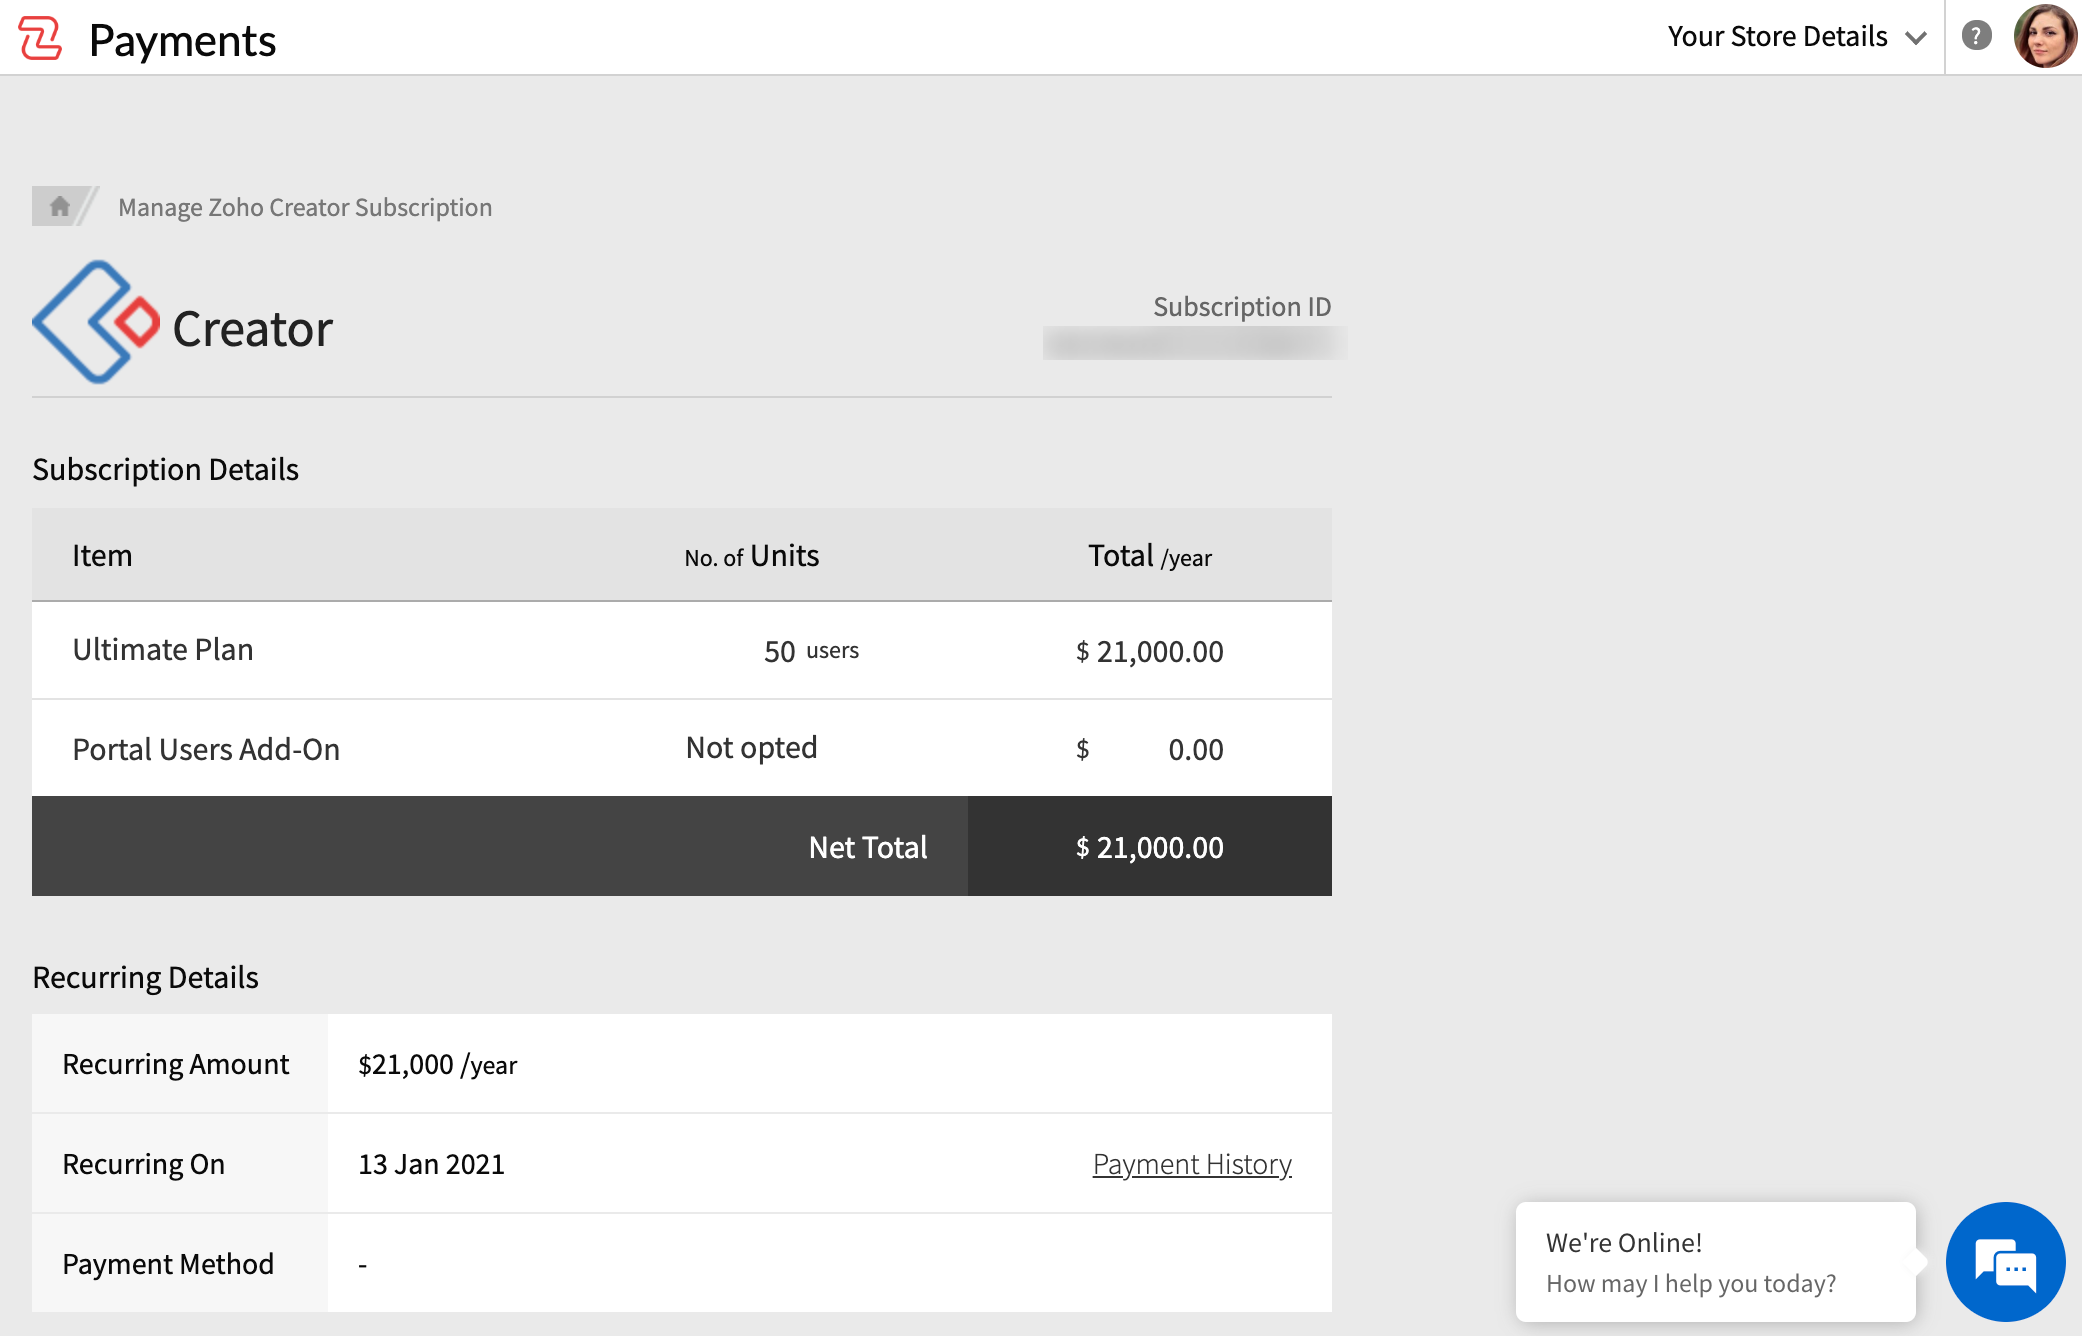
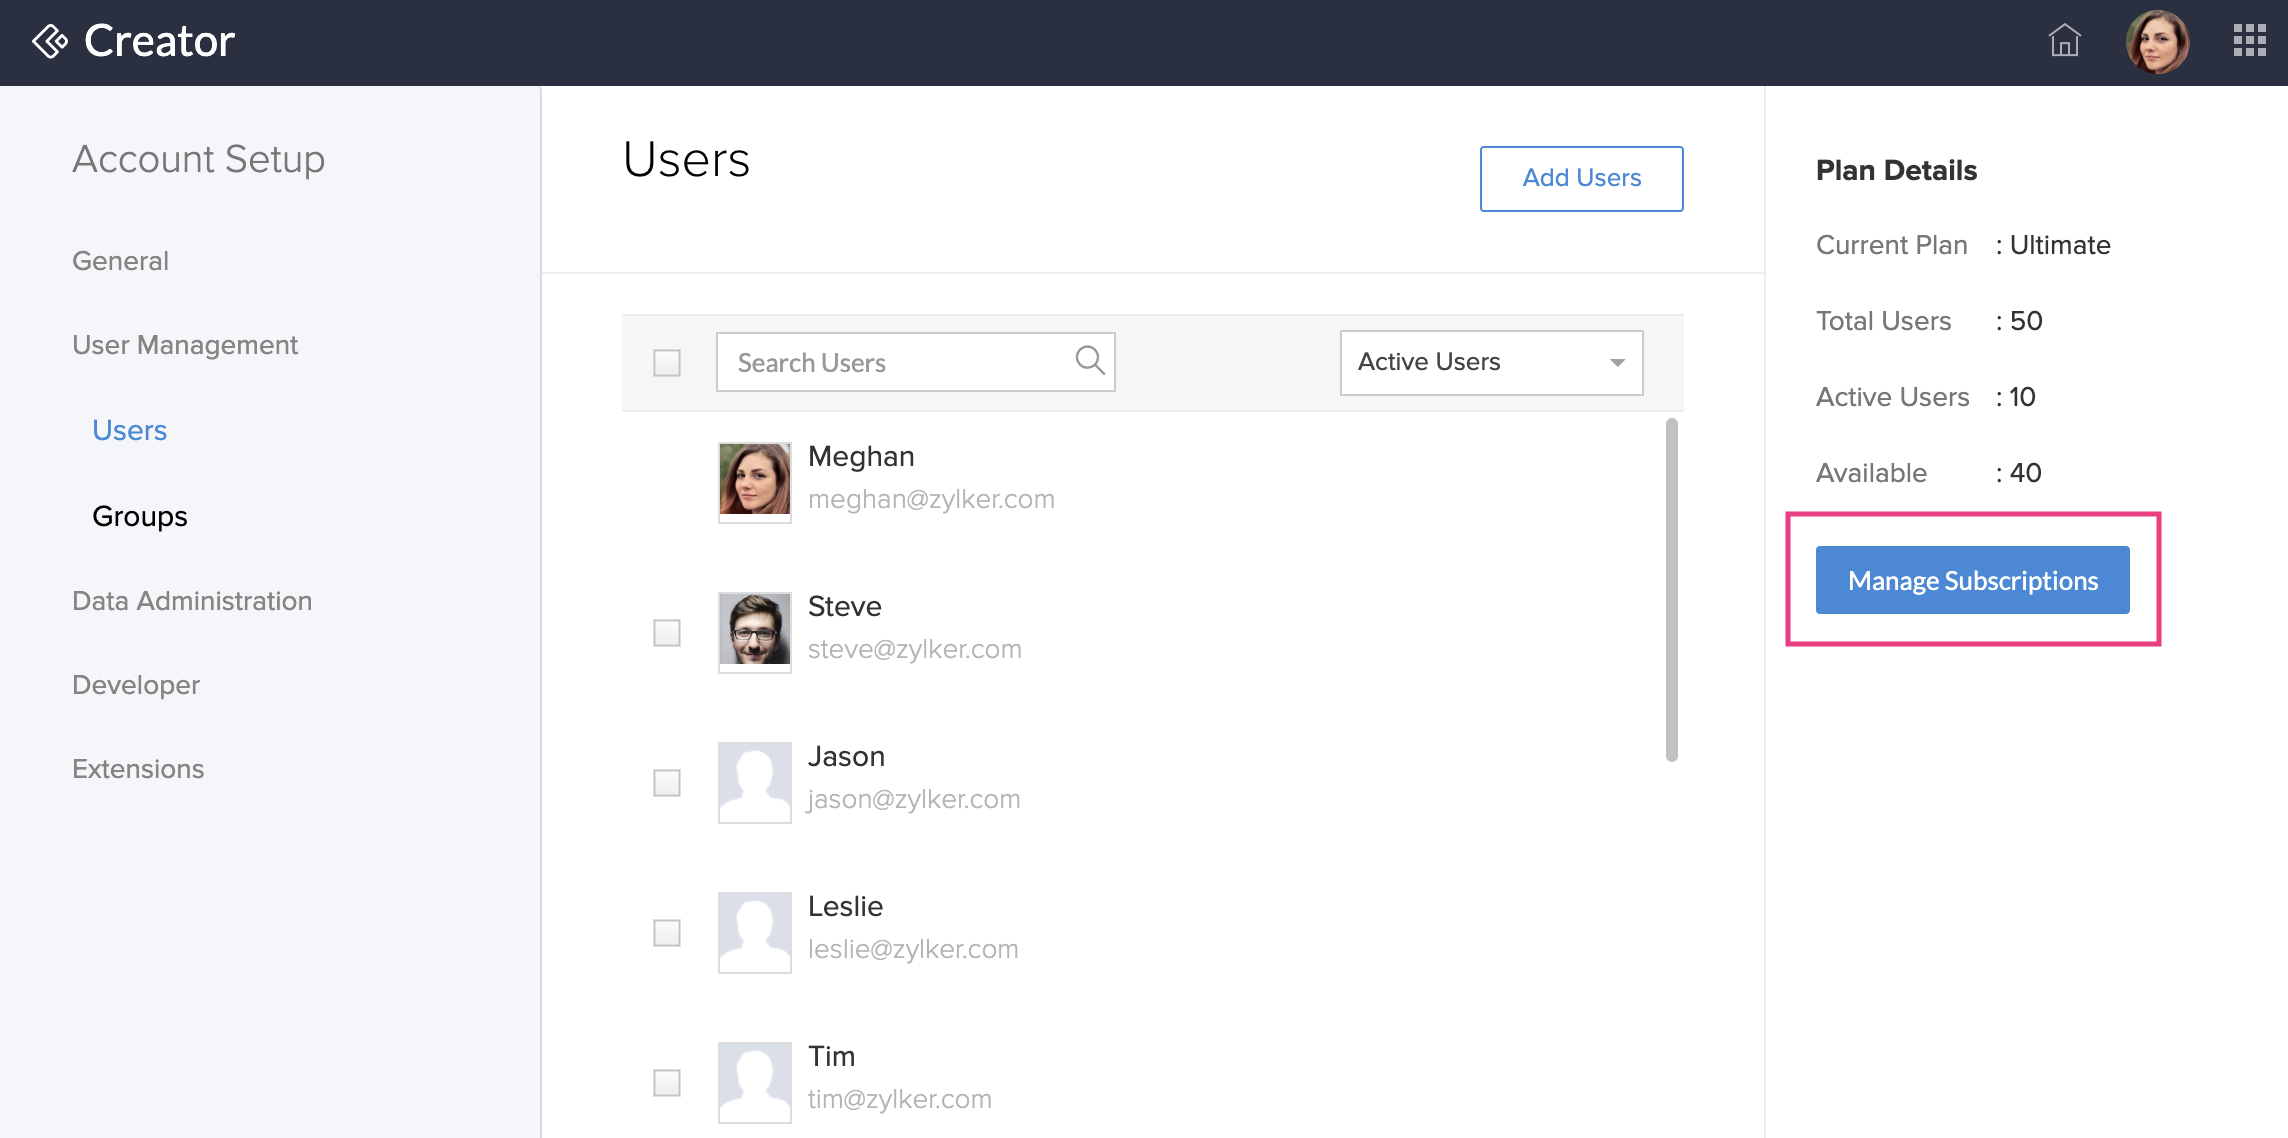
View and manage your plan details
The Users page lists your plan details with the link to manage your subscription. To manage your subscription plan,
Click Manage Subscriptions to open the Payments page.
You can view and modify your subscription details in the Payments page.