DNS Record Configuration for BigRock
Setting up Zoho Mail with a BigRock domain requires adding TXT or CNAME records to verify domain ownership and updating MX records to enable email delivery. Zoho Mail Admin Console automatically detects BigRock-hosted domains, letting admins log in to BigRock directly from the setup flow.
BigRock - Add TXT Records for Verification in Zoho Mail
If your domain's DNS is hosted with BigRock, it will be automatically identified in Zoho Mail Admin Console and you can log in to your BigRock account directly.
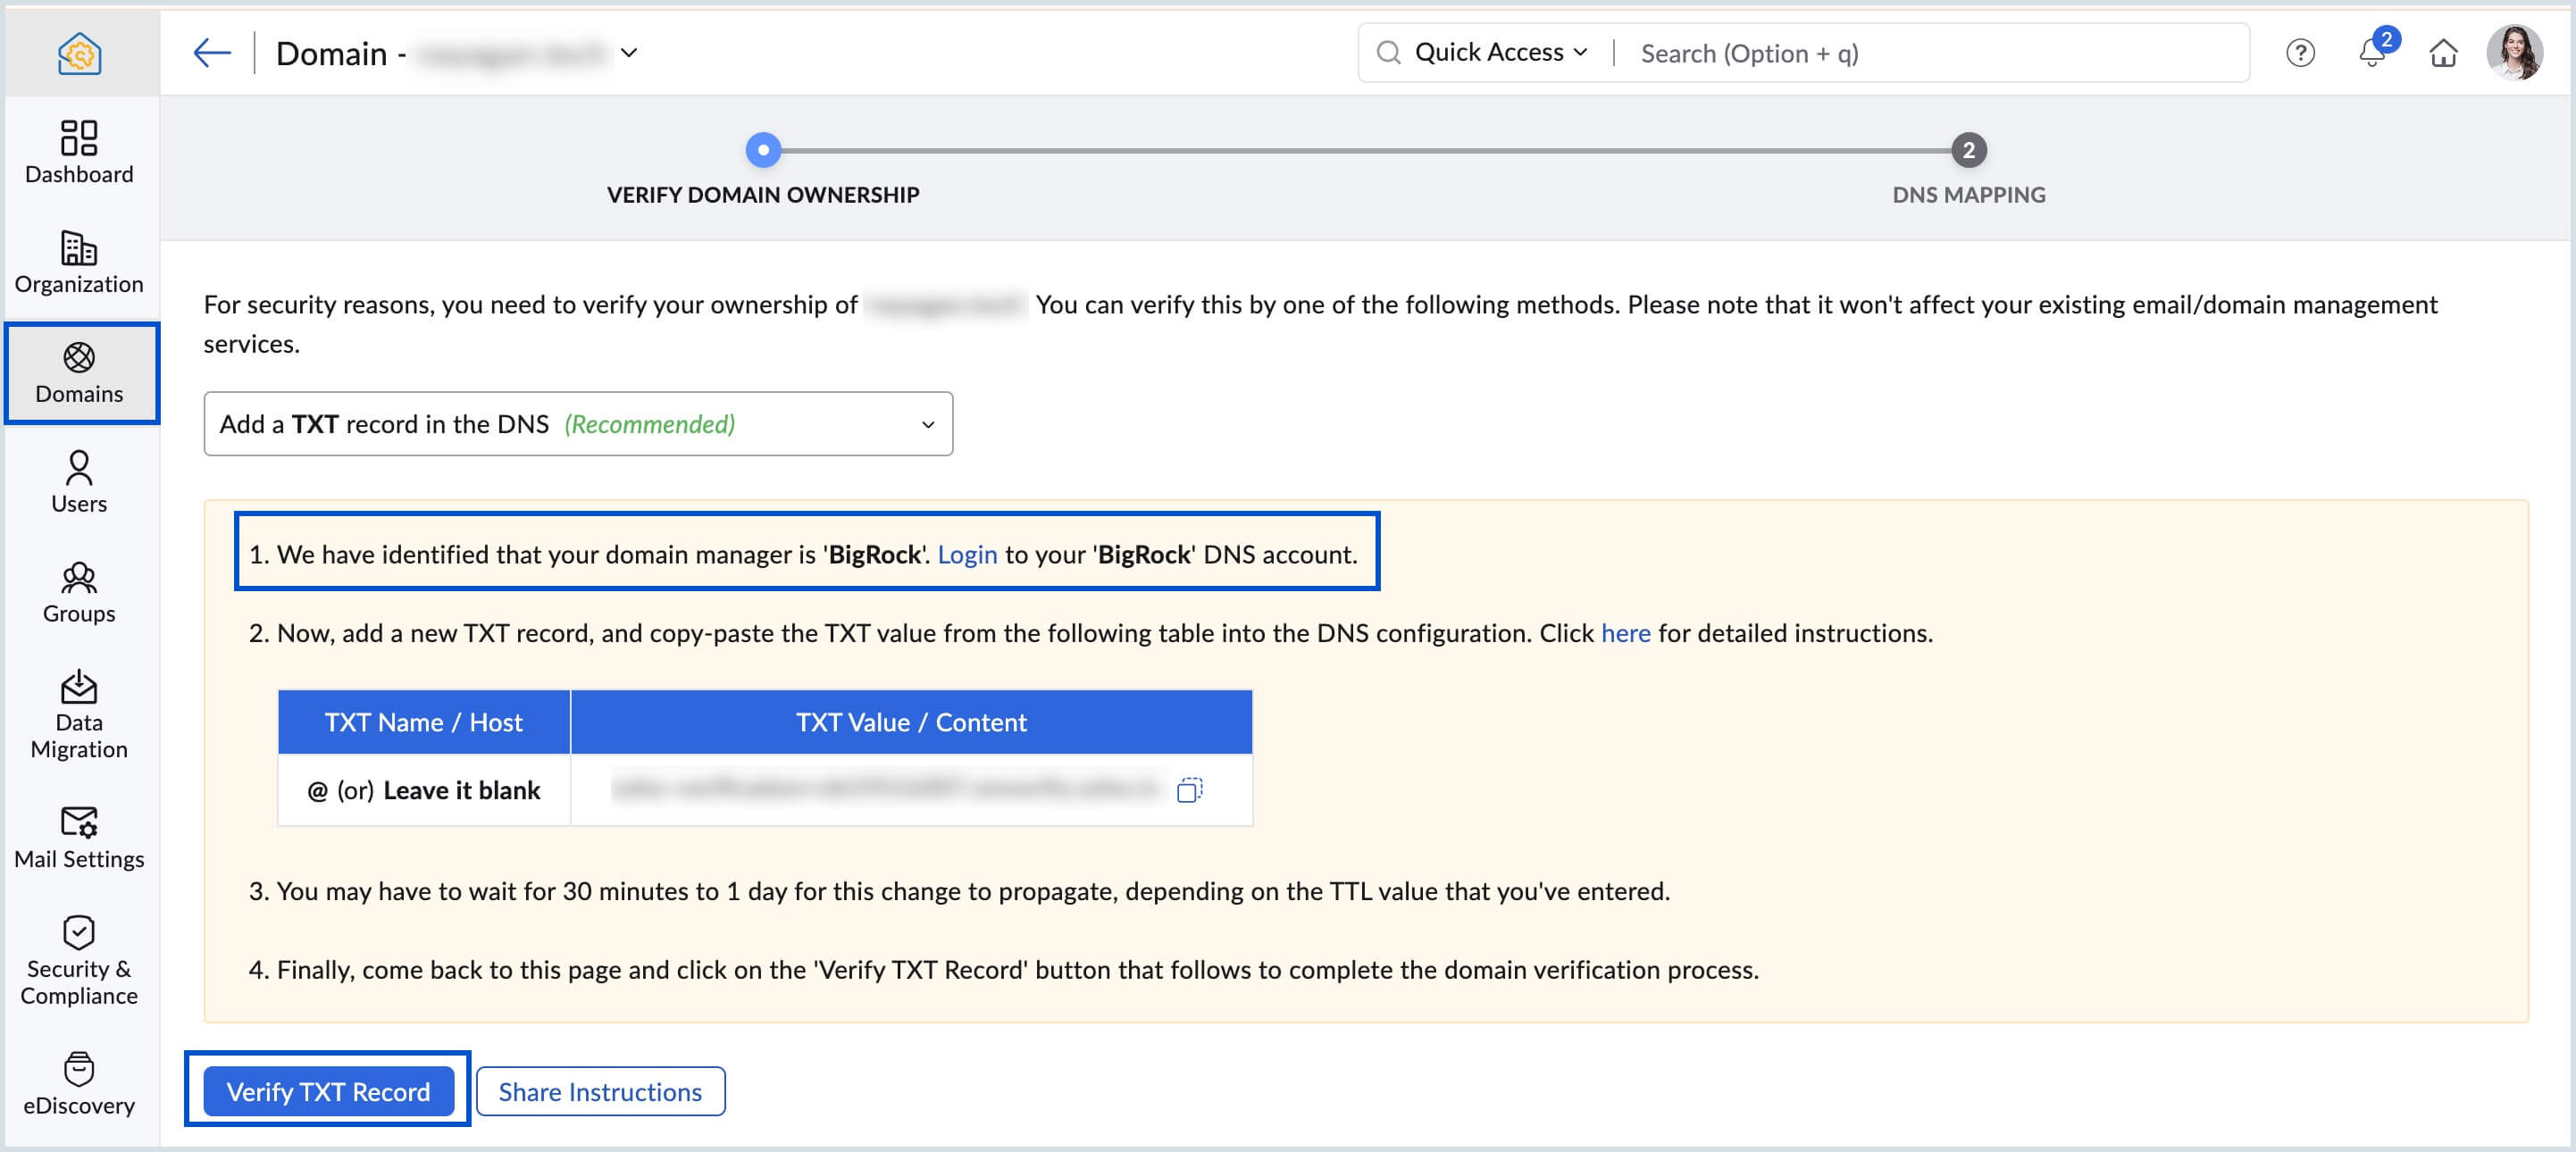
Follow the instructions below to add the TXT and verify the domain.
- Login to your BigRock domains account.
- Select the Domain for which you need to add the TXT Records and click Manage.
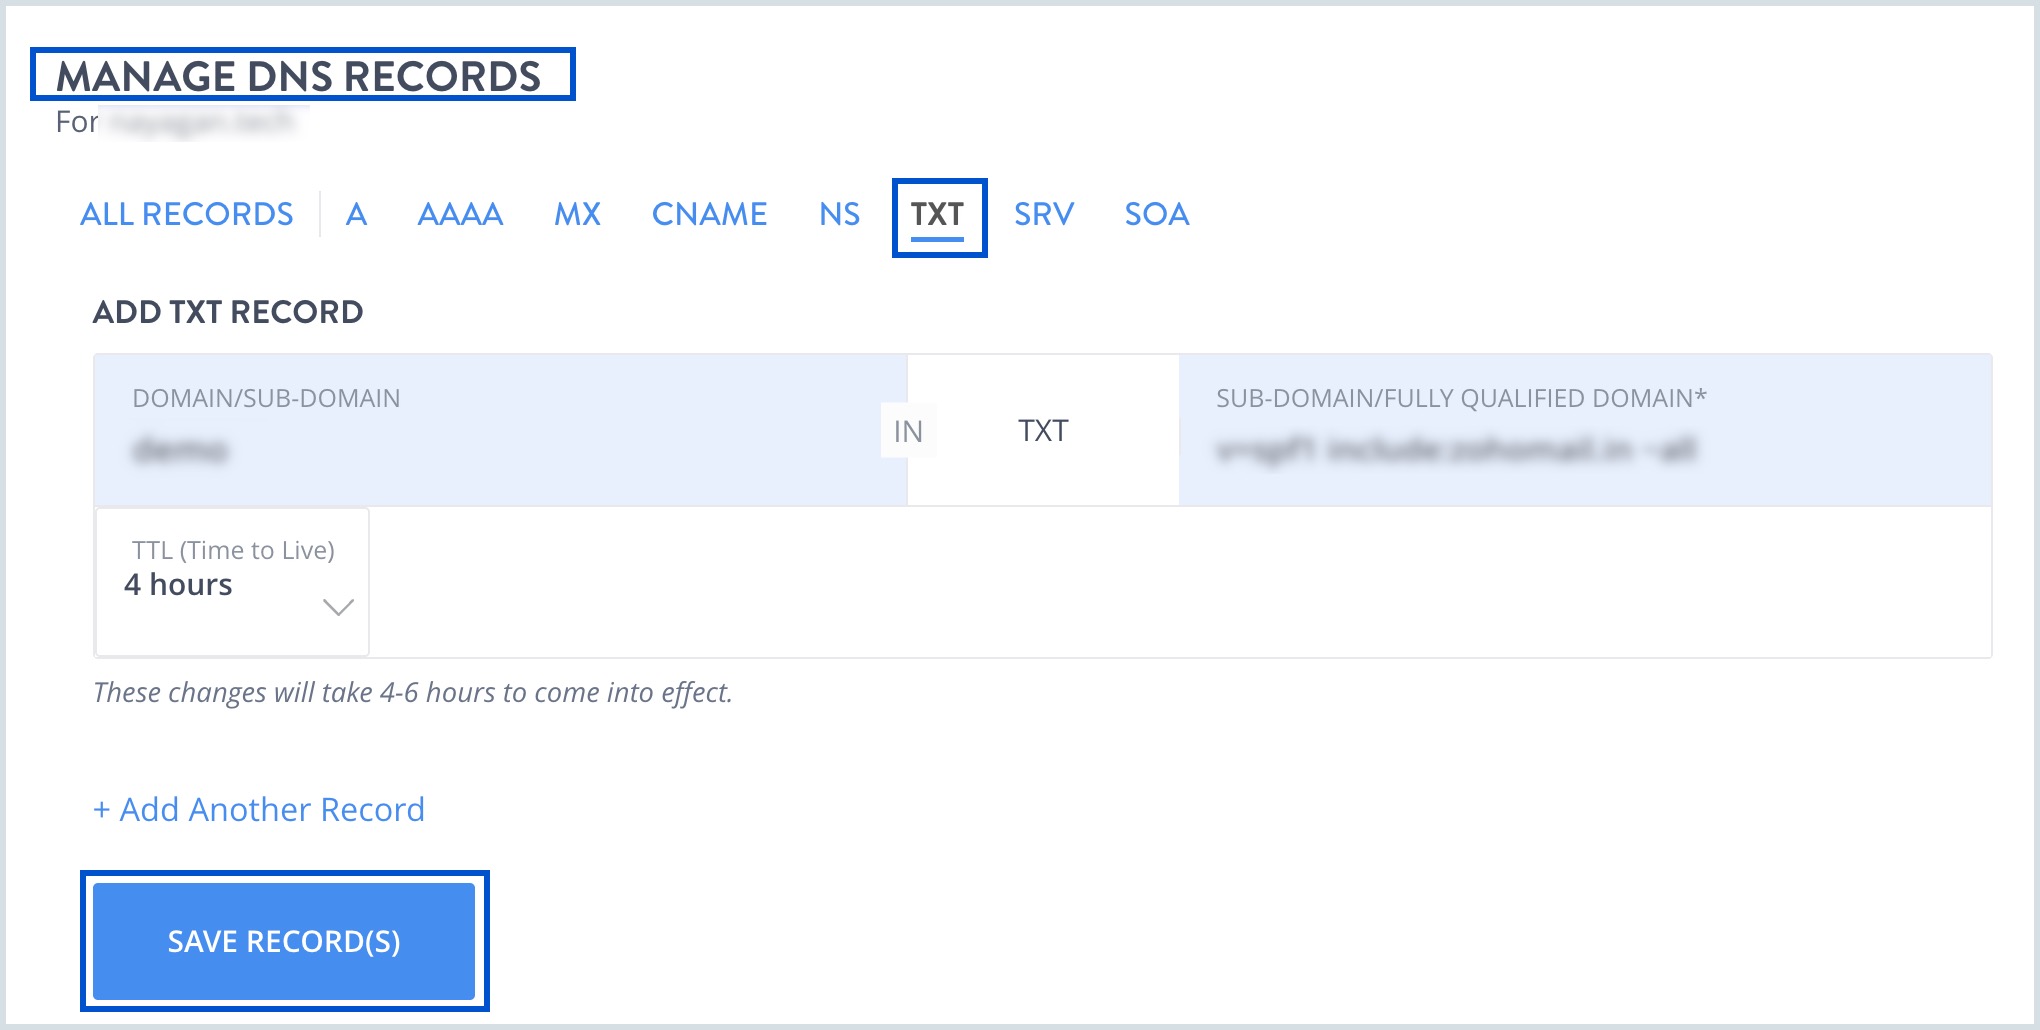
- Under MANAGE DNS RECORDS, navigate to TXT tab.
- Enter the details for your TXT value generated in the Zoho Mail Admin Console under ADD TXT RECORD section.
- In the Choose TTL field, select the shortest time possible.
- Click SAVE RECORD(S).
- Now come back to Zoho Mail Admin Console page and click 'Verify TXT Record'.
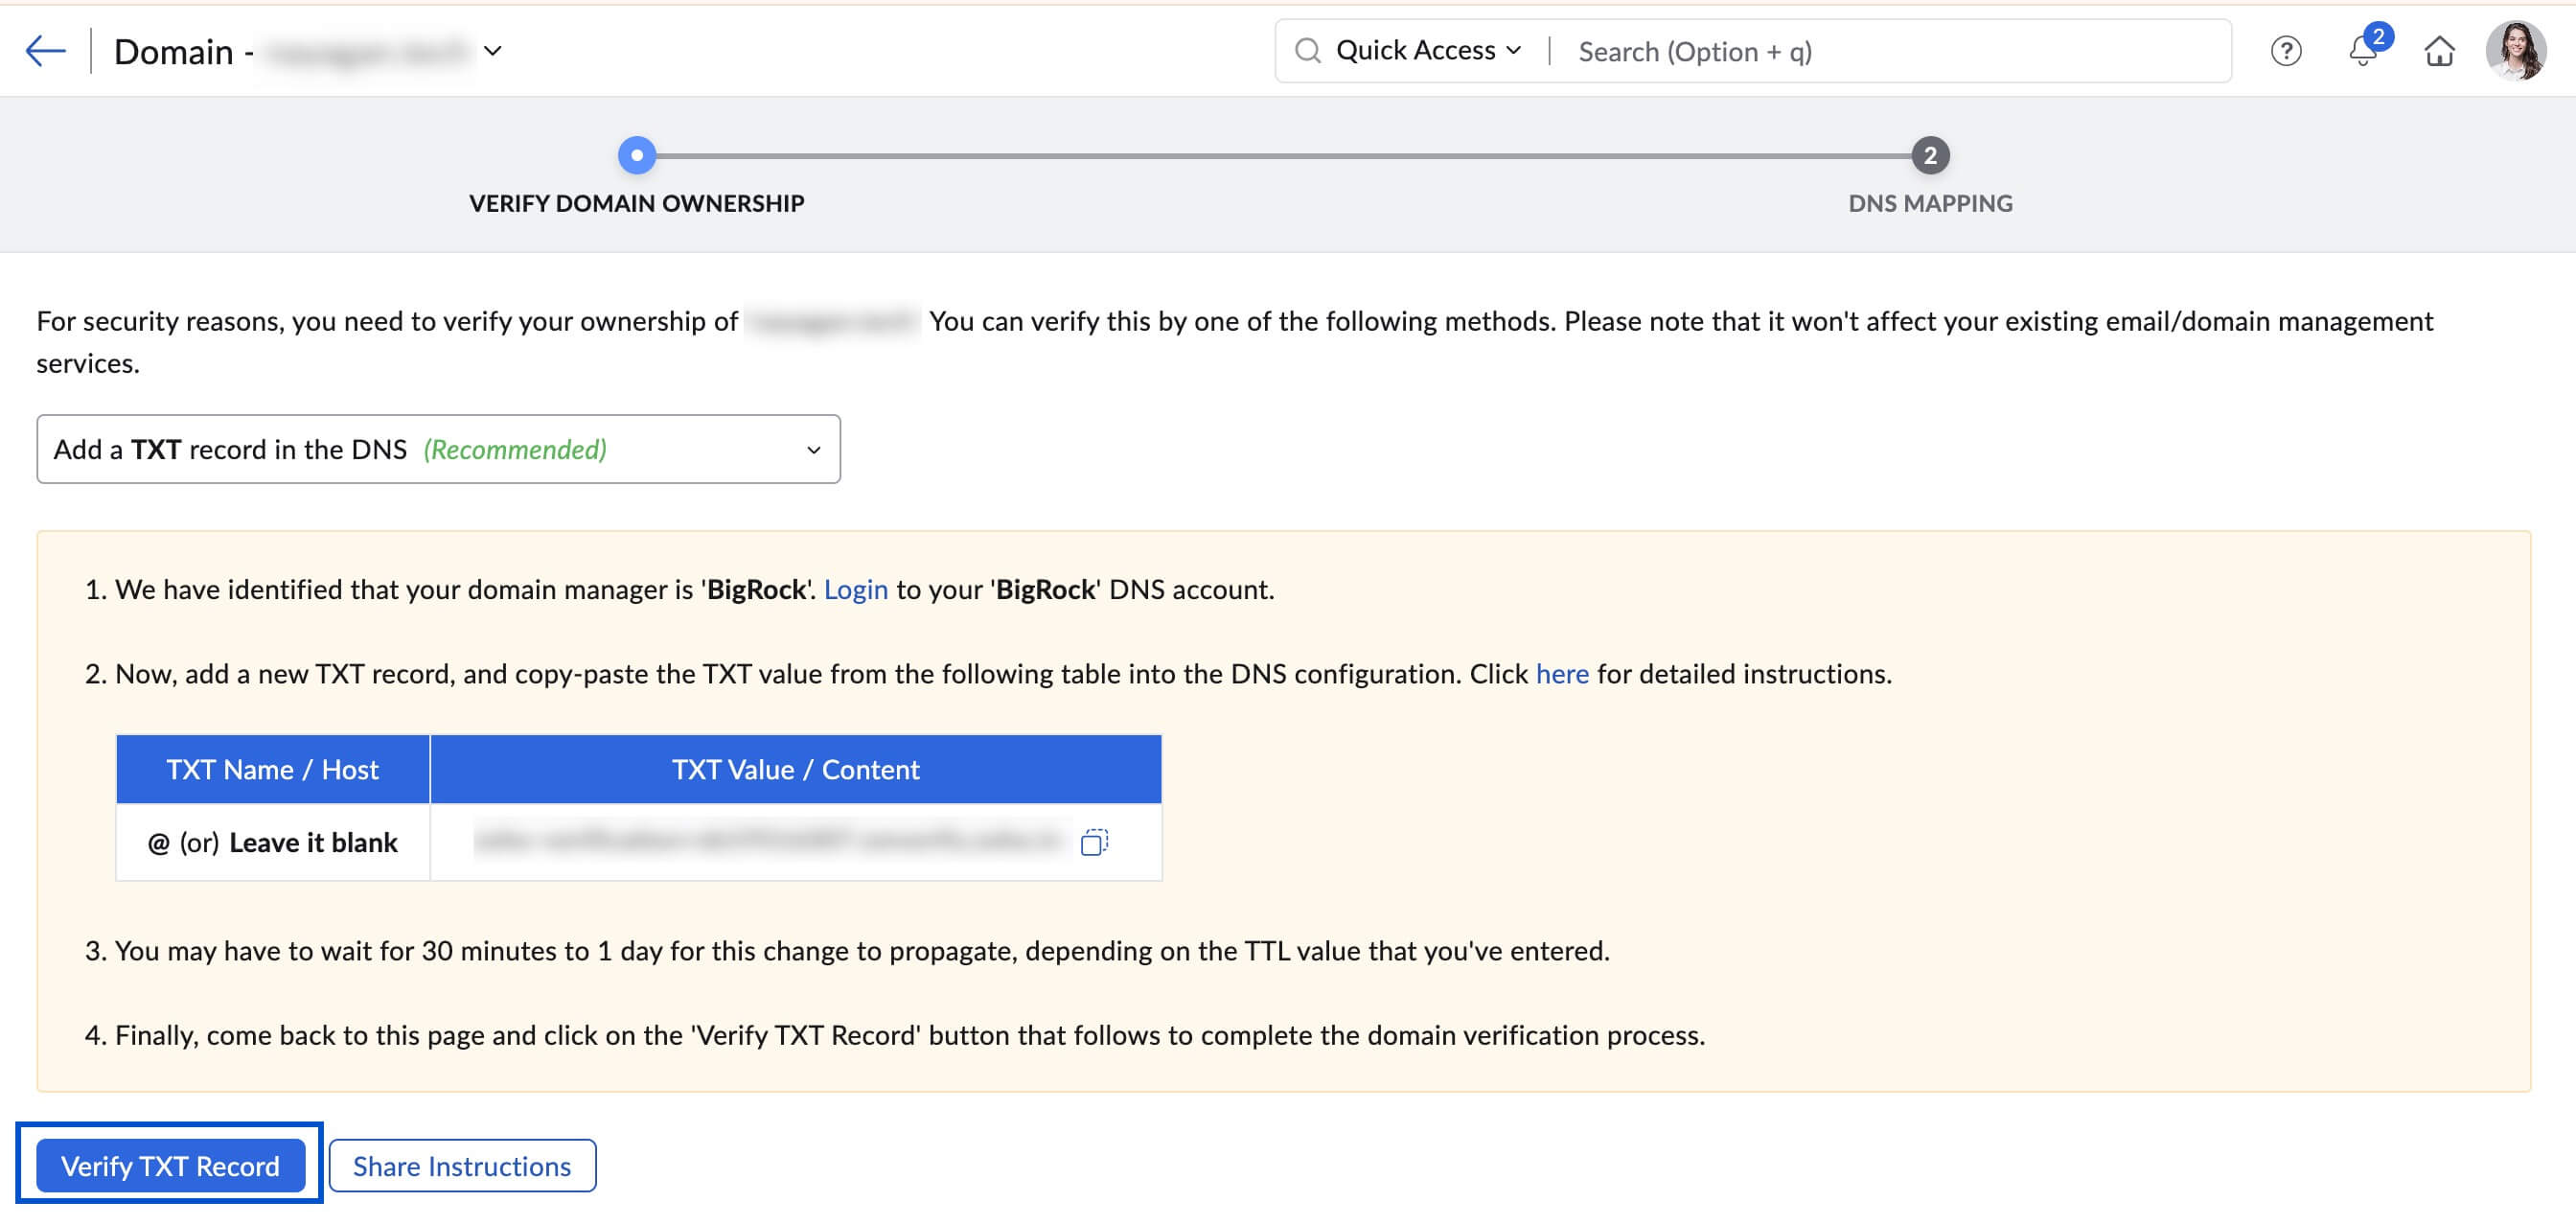
- If the DNS information is correctly propagated, the domain will be verified. You can proceed with the next steps to create user accounts.
BigRock - Add CNAME Records for Verification in Zoho Mail
If your domain's DNS is hosted with BigRock, follow the instructions below to add the CNAME and verify the domain.
- Login to your BigRock domains account.
- Select the Domain for which you need to add the CNAME Records and click Manage.
- Under MANAGE DNS RECORDS, navigate to CNAME tab.
- Enter the details for your CNAME value generated in the Zoho Mail Admin Console under ADD CNAME RECORD section.
- In the Choose TTL field, select the shortest time possible.
- Click SAVE RECORD(S).
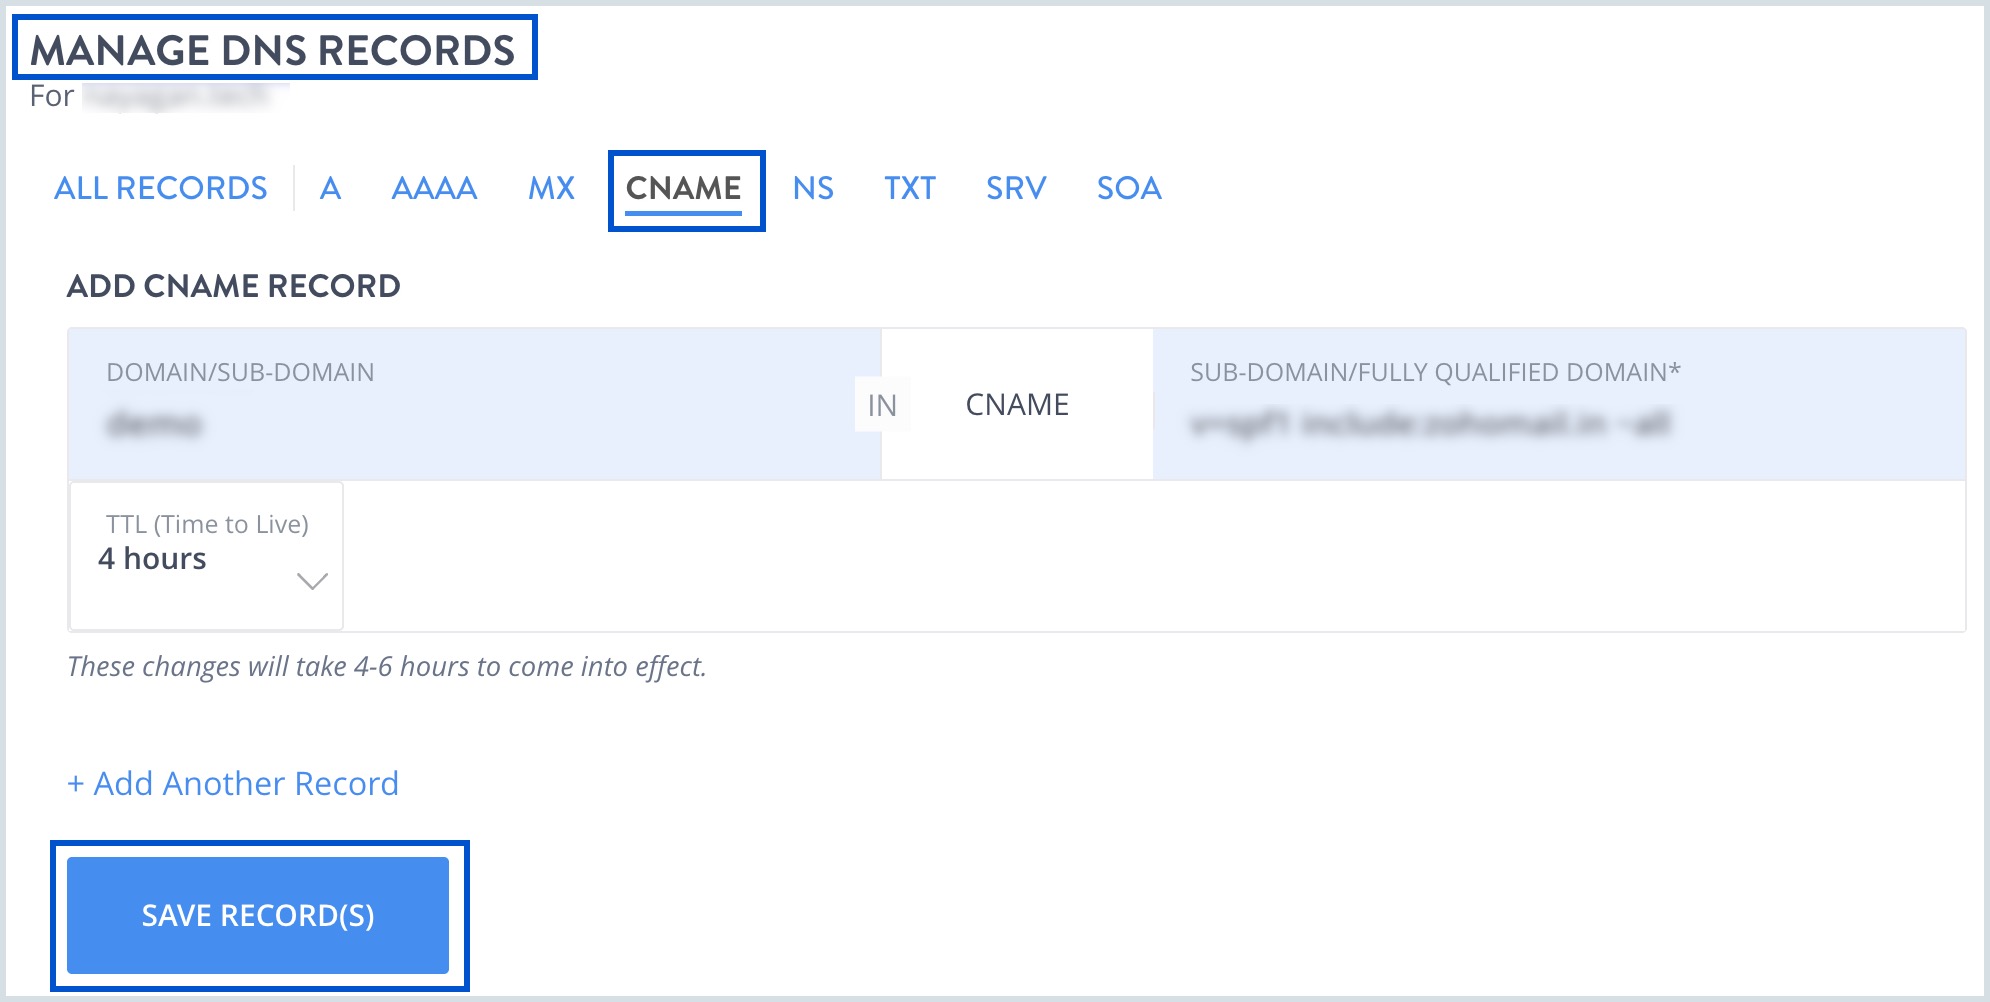
You have now added the CNAME successfully. You may have to wait for at least an hour for the changes to take effect in the DNS Servers. After an hour or two, login to your Zoho Mail Admin Console. and click 'Verify CNAME Record'. 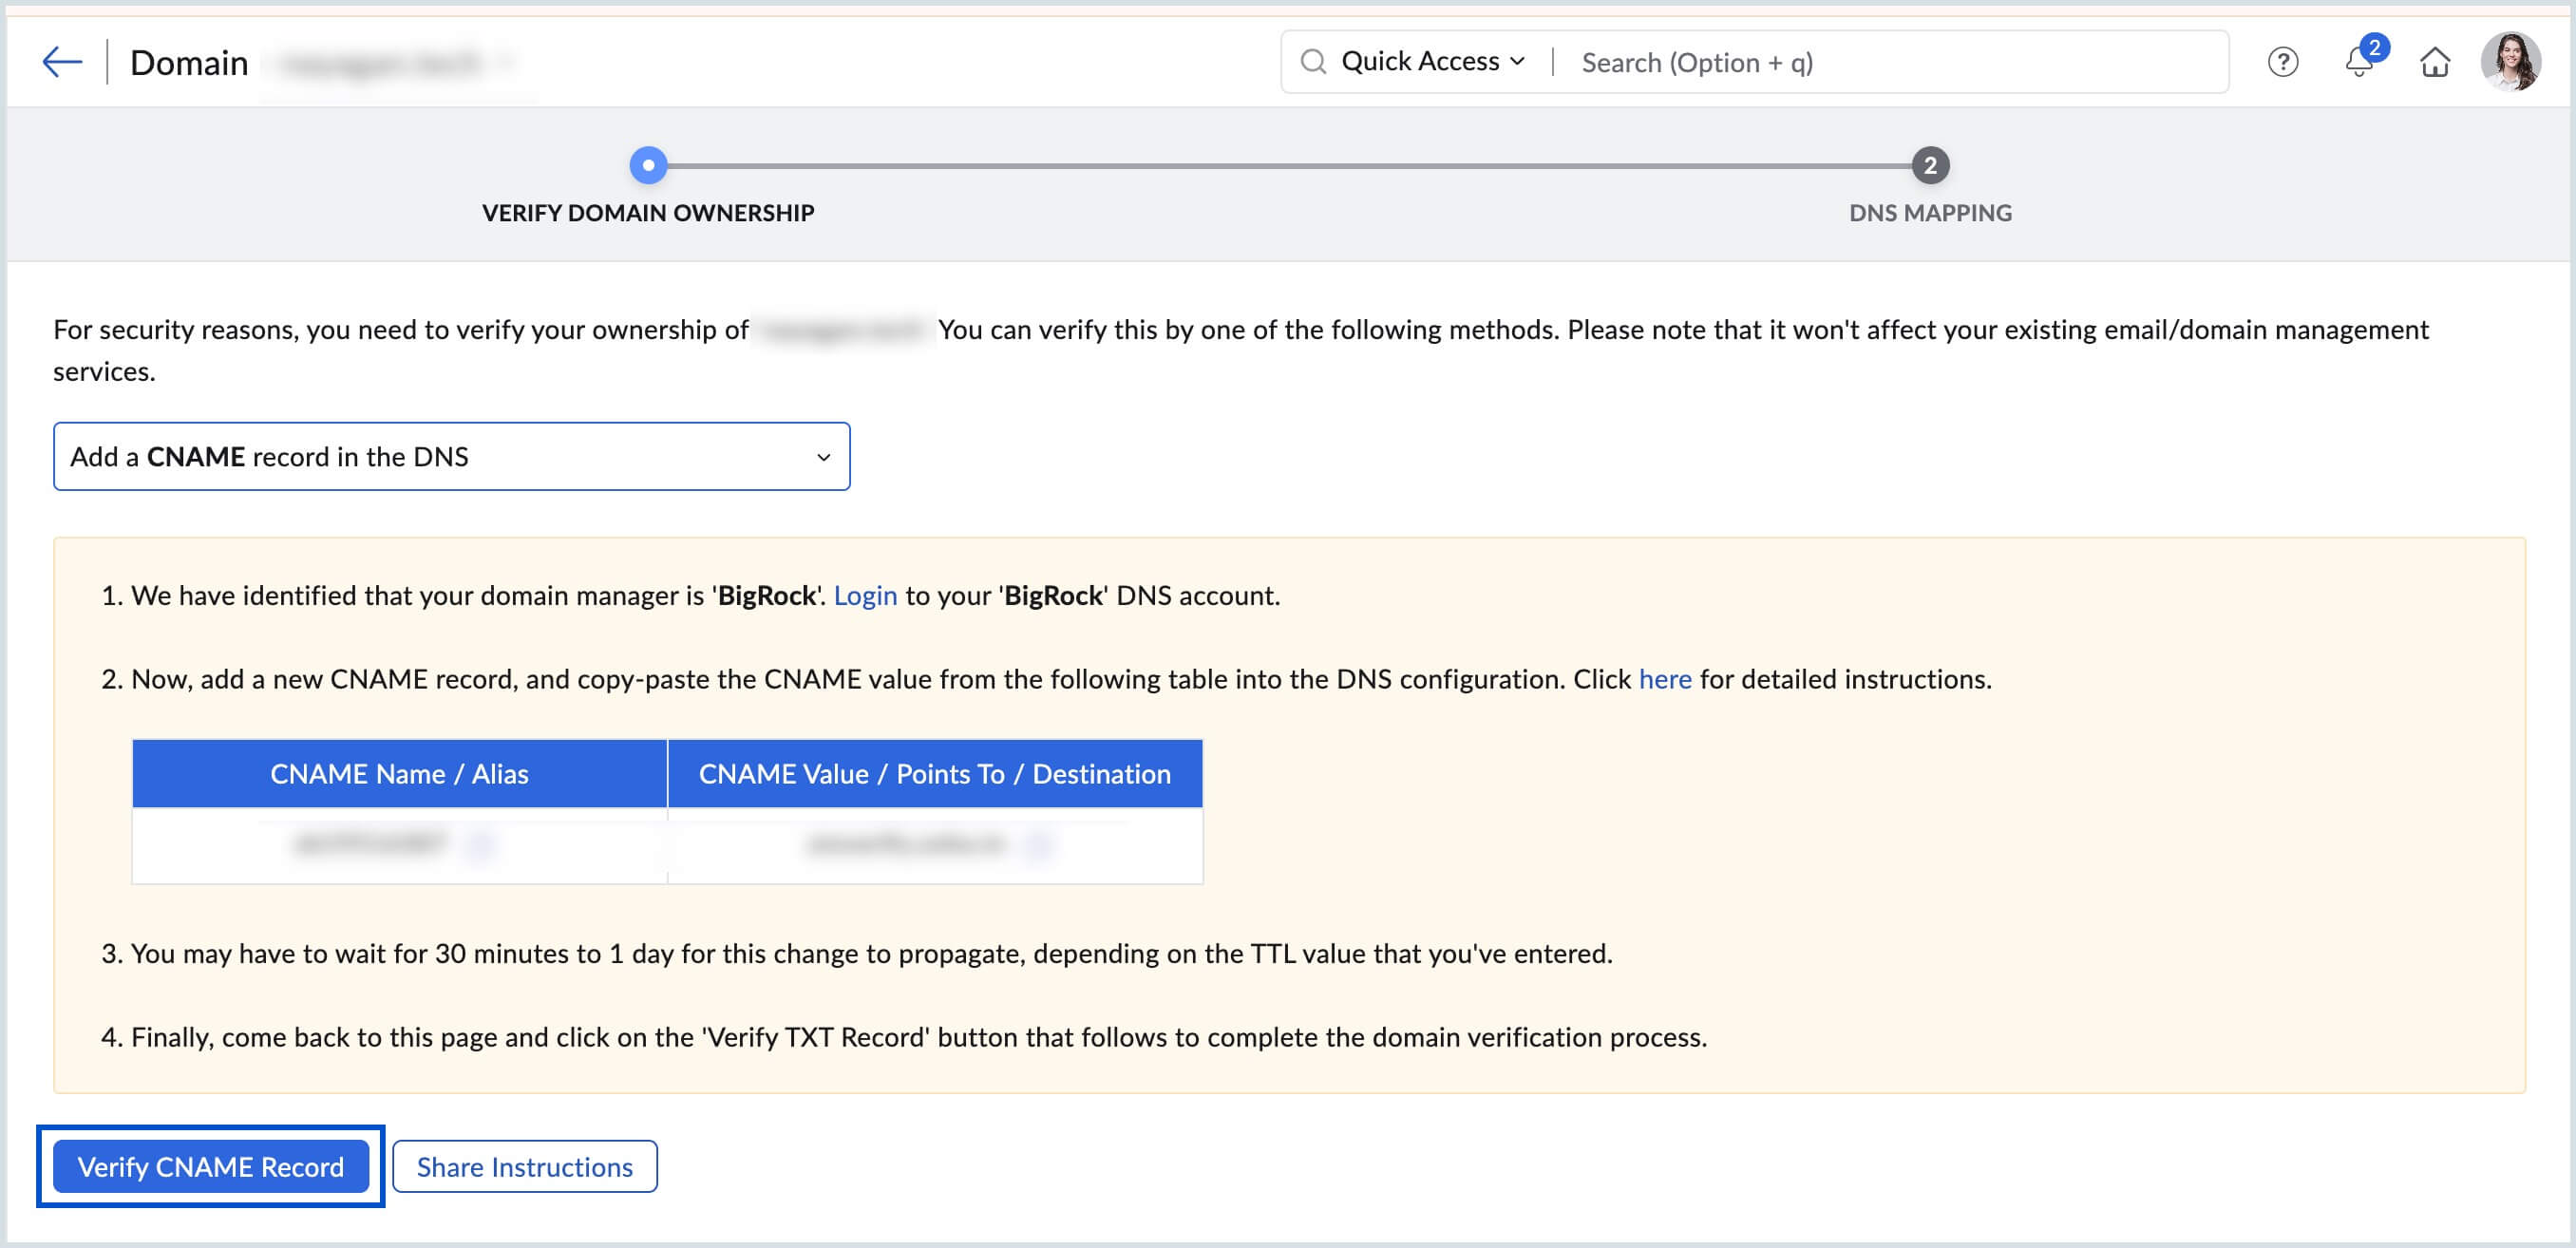
Once your domain is verified, you can start adding users and creating mail accounts.
BigRock - Update MX records to receive emails in Zoho Mail
If your DNS manager is hosted with BigRock, follow the below instructions to change the MX Records of your domain and receive emails.
- Login to your BigRock domains account.
- Select the Domain for which you need to add the MX Records and click Manage.
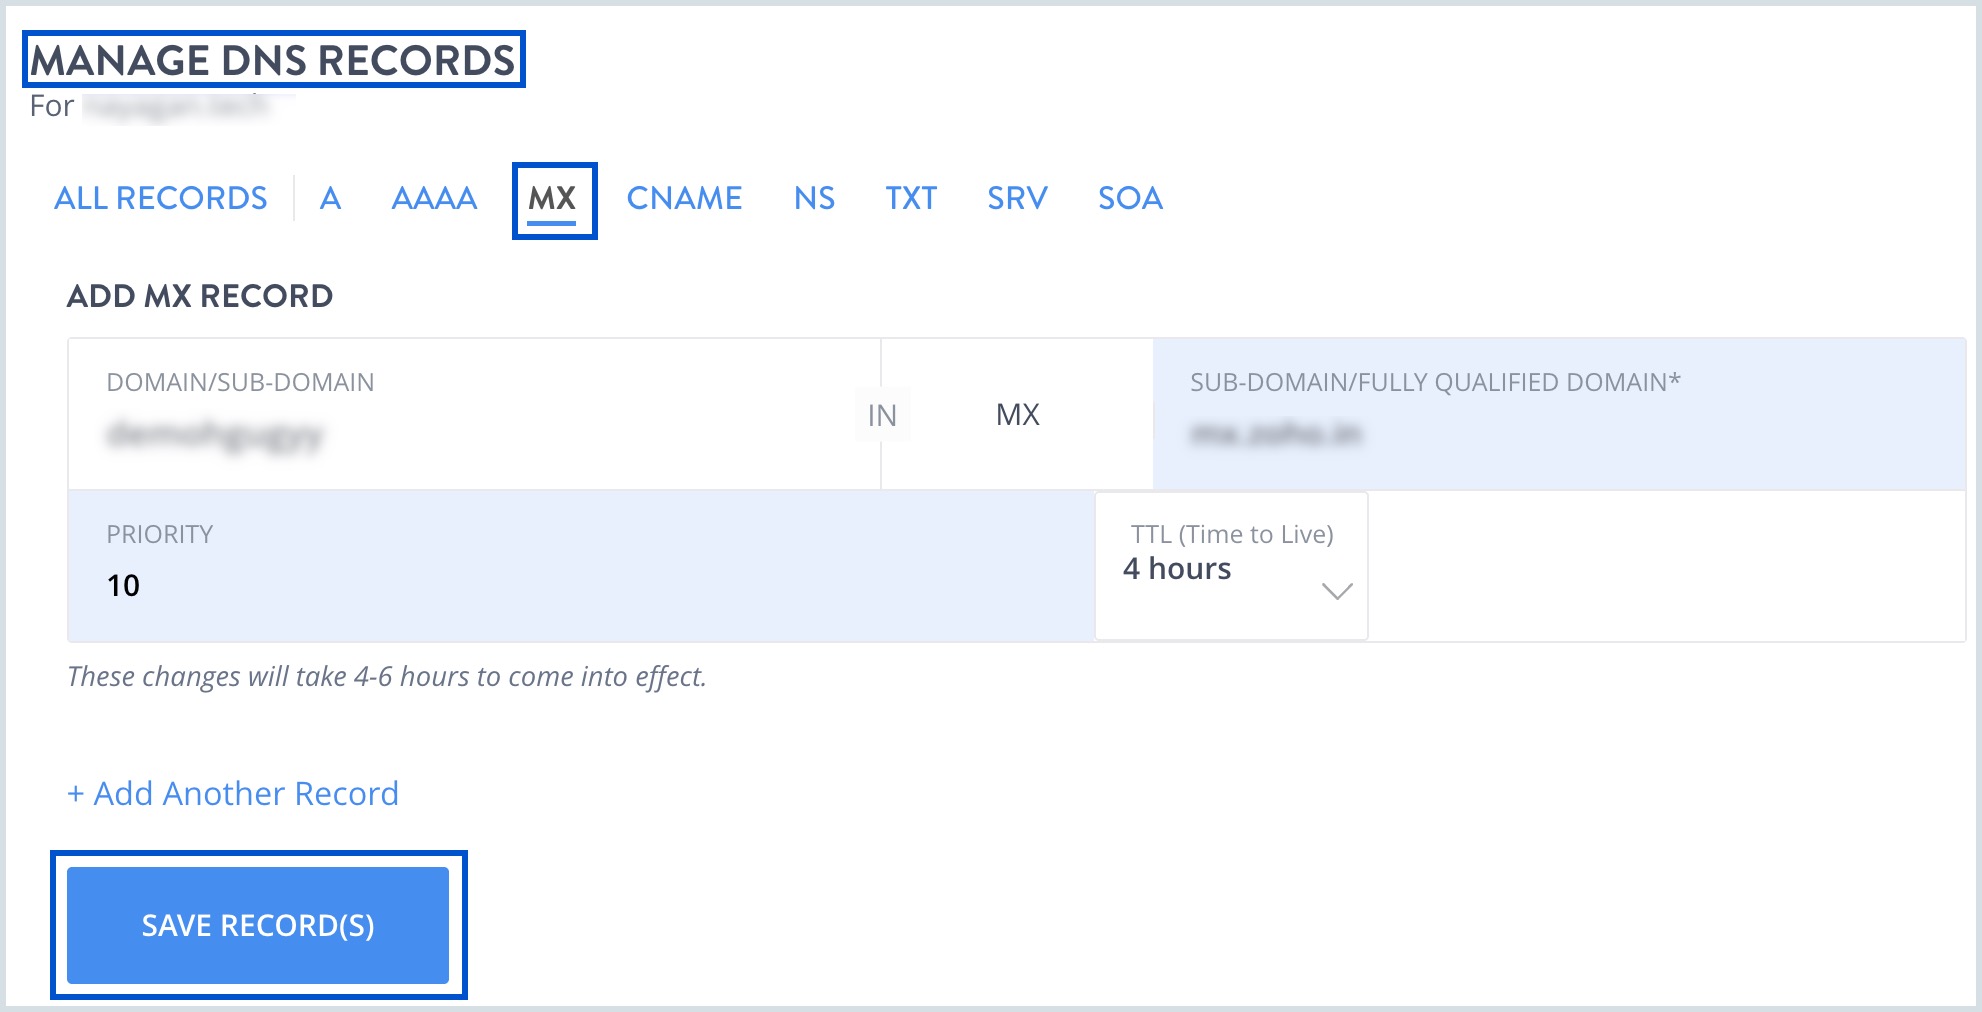
- Under MANAGE DNS RECORDS, navigate to MX tab.
- Enter the details for your MX value generated in the Zoho Mail Admin Console under ADD MX RECORD section.
- In the Choose TTL field, select the shortest time possible. It should be 4 Hours in the case of BigRock.
- Specify the first record's value as mx.zoho.***. (The TLD for the MX record will vary based on the DC in which your data is hosted in Zoho. Refer to the correct value for your domain from Tools & Configurations section in Admin Console )
The MX values shown in the screenshot above are based on generic configuration information. For domain-specific configurations, refer to the Tools & Configurations section in the Zoho Mail Admin Console. - Once done, click SAVE RECORD(S). Similarly, enter the second and third MX Records by selecting +Add Another Record.
What are the MX record values for Zoho Mail?
To ensure correct email delivery to your domain, only the MX Records provided in the Tools & Configurations section of Admin Console should be used.
Host/ Domain | Address/ Mail Server/ MX Entries/ Value | Priority |
|---|---|---|
@/ Blank/ Domain name | mx.zoho.com | 10 |
@/ Blank/ Domain name | mx2.zoho.com | 20 |
@/ Blank/ Domain name | mx3.zoho.com | 50 |
The MX values in the above table are based on the generic configuration information. For more specific configurations particular for your domain refer to the Tools & Configurations section in the Admin Console.
Note:
Depending on your DNS provider, you may need to include a trailing dot(.) at the end of the MX record. We recommend you to go through your DNS provider's support documentation for the exact method to add the MX entries.
Note:
- The Zoho Mail Toolkit is a free lookup tool for DNS-related lookup queries. You can lookup MX, lookup CNAME and other existing DNS values and perform many other admin-related activities using the Toolkit.
- After the records have propagated, you can try sending a test email from your external accounts to see if you are able to receive emails and to check if the MX records are properly added.
- For detailed instructions on using the Toolkit, refer to Toolkit by Zoho Mail.
How to share MX record configuration instructions in Zoho Mail
You can delegate the MX configuration details to any member by selecting the Send to DNS admin button under Domains > Email Configuration page. Enter a valid email address and click Send Mail. The mail will be sent to the chosen member with MX record details to complete the configuration.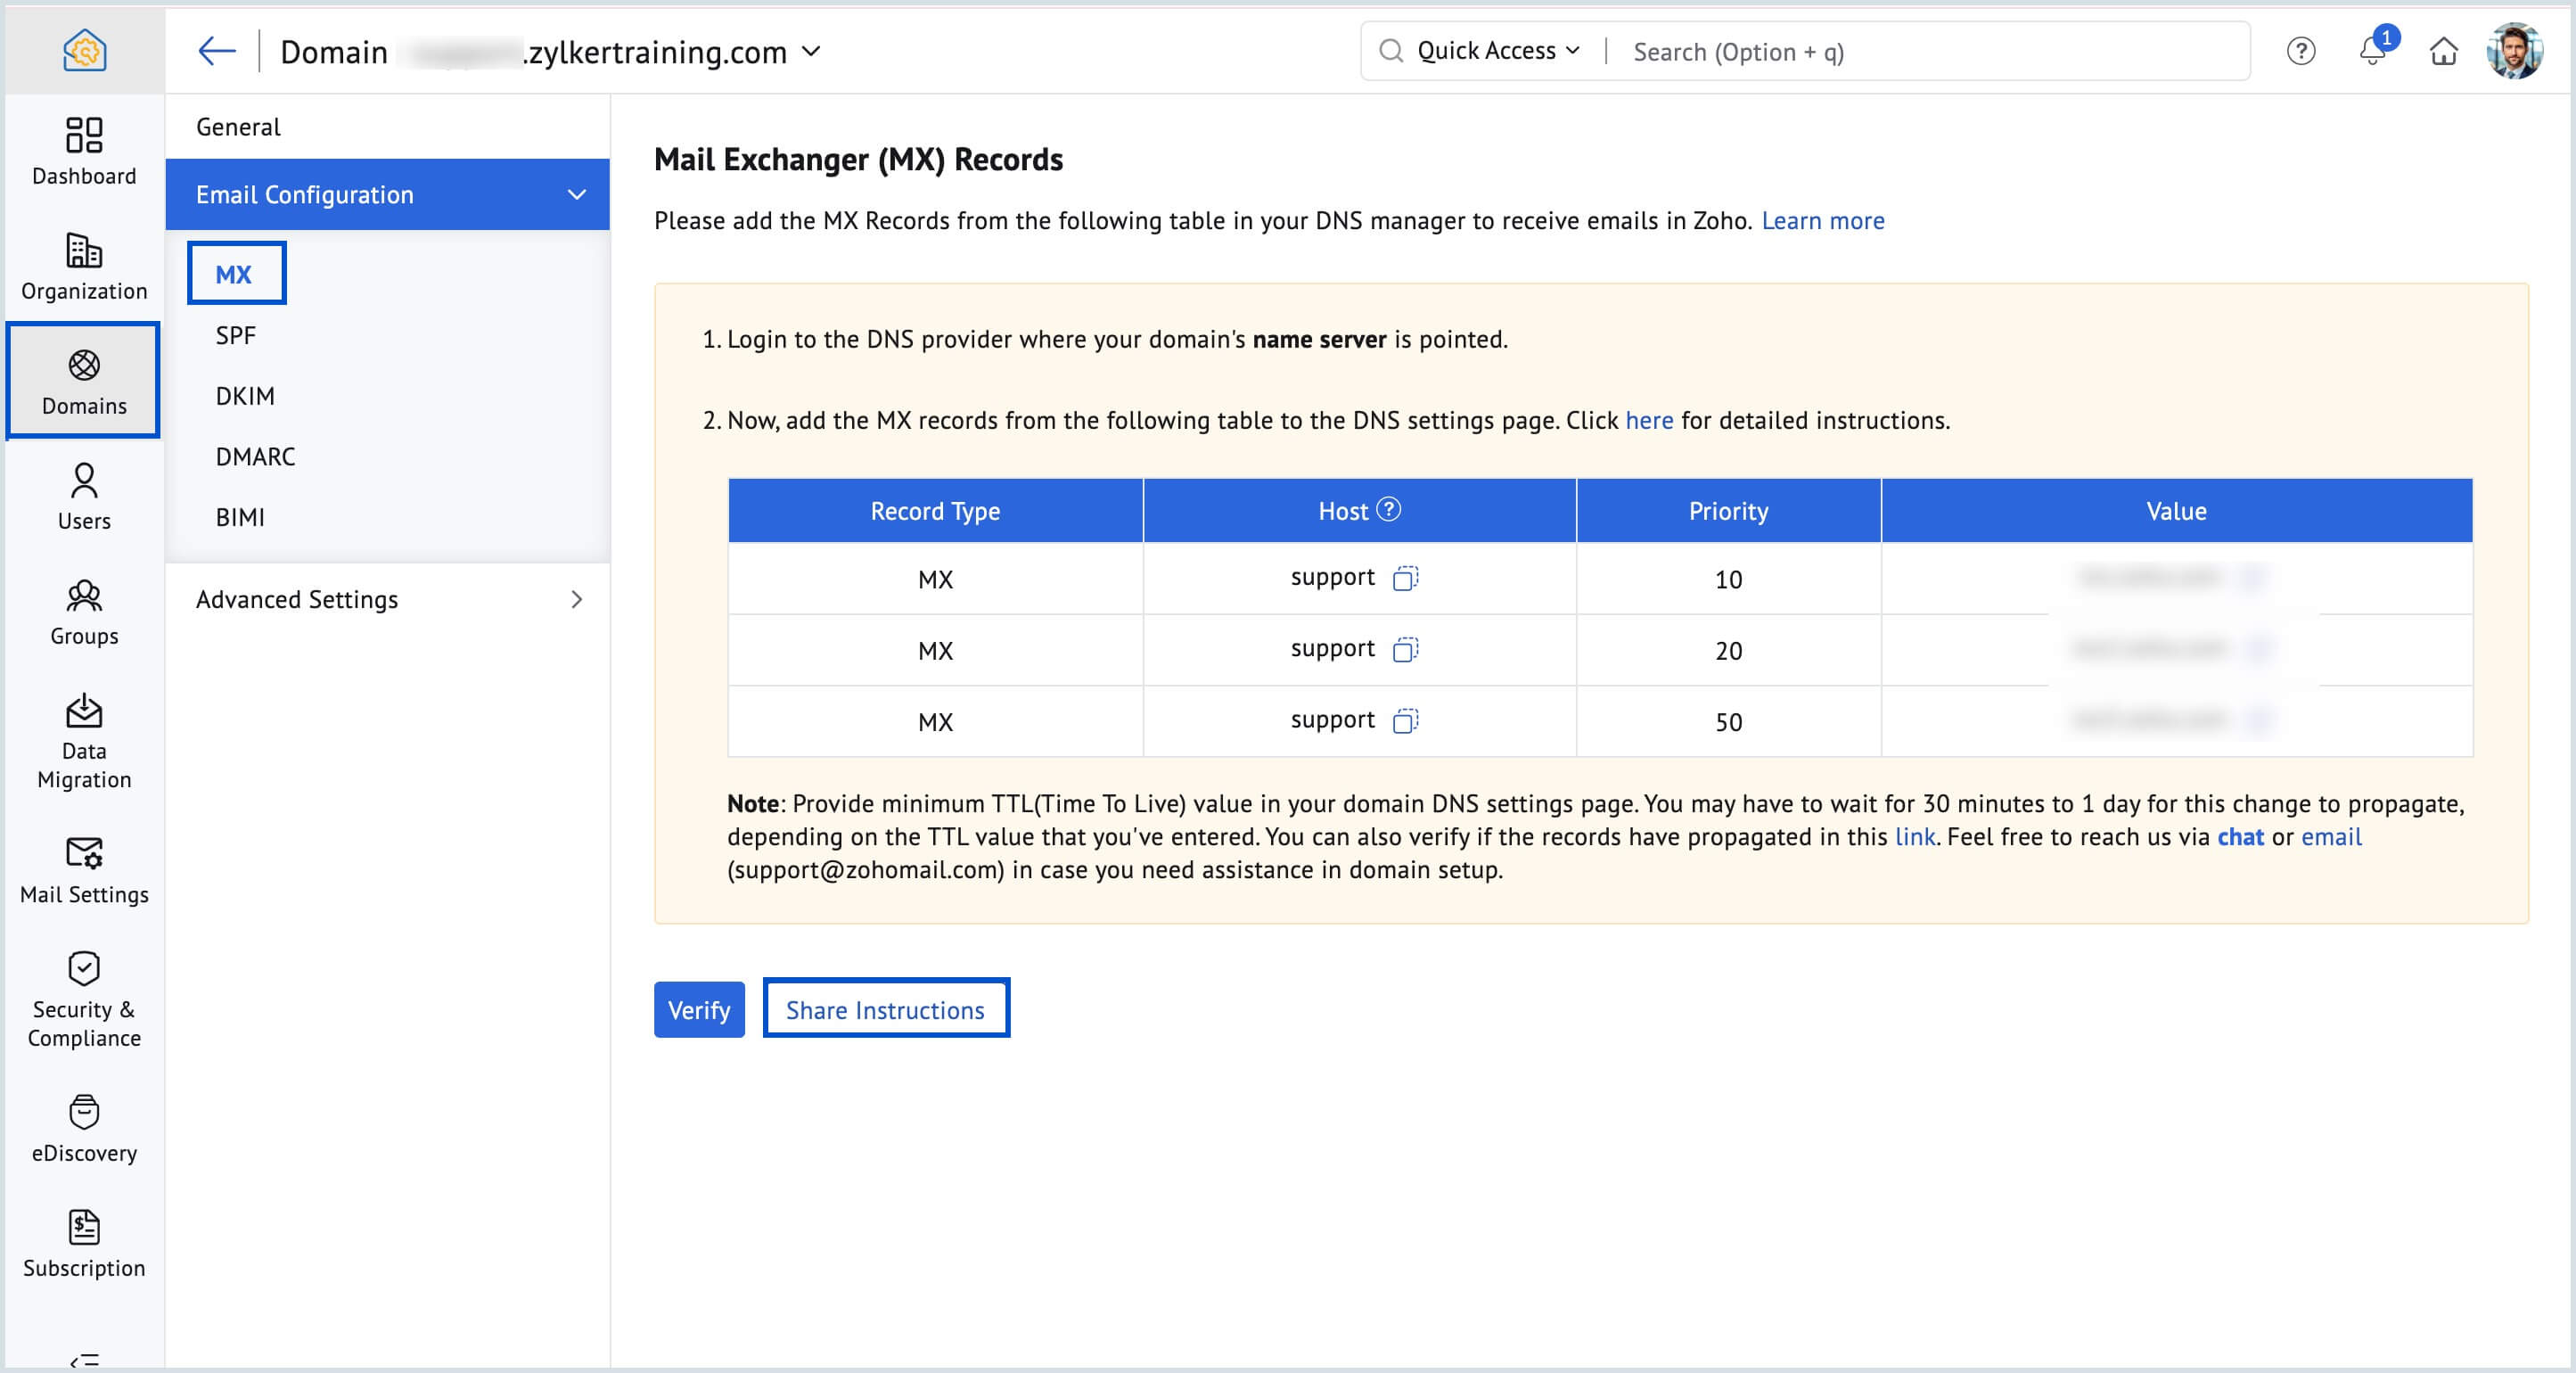
If you wish to share the instructions at a later date, you can perform from the Tools & Configurations page. Click Send DNS admin and select MX Record from the drop-down to share the instructions to a particular email address.