DNS Record Configuration for cPanel
Zoho Mail provides multiple options to verify your domain ownership and configure email delivery in cPanel.
Add TXT Records for Verification - cPanel
If your domain's DNS is hosted with cPanel follow the below steps to add TXT records and verify the domain.
- Login to your cPanel Account
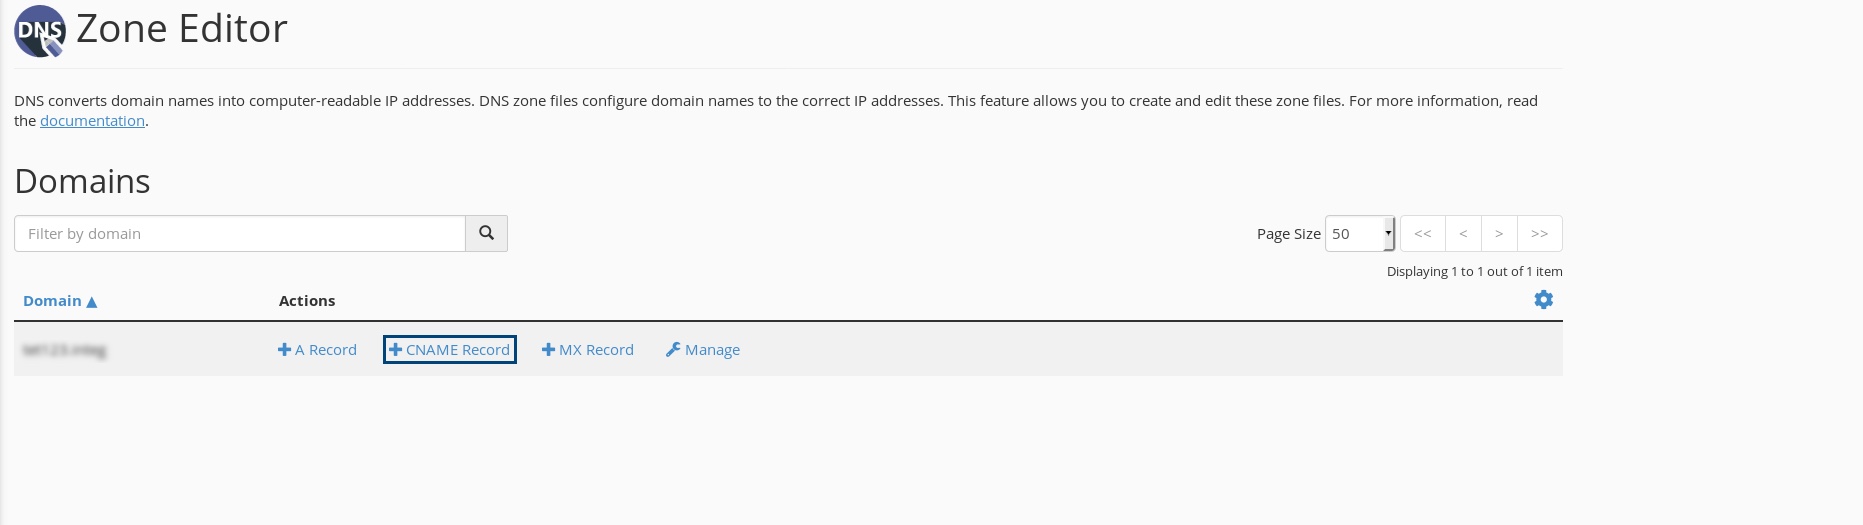
- Locate the DNS Zone Editor option under Domains to add the CNAME.
- Across the relevant domain, click Manage in the Actions column.
- Click Add Record and select TXT from the Type list.
- Enter the details for your TXT record.
- In the Host field, enter @
- In the TXT Value field, enter the TXT value generated in the Zoho Mail Admin Console
- In the TTL field, enter 3600 seconds
- Click Add Record.
- Now come back to the https://mailadmin.zoho.com/ page and click 'Verify by TXT'.
- If the DNS information is correctly propagated, the domain will be verified. You can proceed with the next steps to create user accounts.
Add CNAME Records for Verification - cPanel
If your domain's DNS is hosted with cPanel follow the below steps to add CNAME and verify the domain.
- Login to your cPanel Account
- Locate the DNS Zone Editor option under Domains to add the CNAME.
- Across the relevant domain, select the CNAME Record option.
- Enter the zbcode provided in the Name field.
- In the CNAME field, enter the value from the CNAME Value/ Points To/ Destination field of your Zoho Mail Admin Console.

- Click Add a CNAME Record to add the CNAME to your DNS.
Once saved, you have added CNAME in your DNS Manager. However, you may have to wait for at least an hour (or based on the TTL) for the changes to be effected in the DNS servers.
You may verify this by typing in zb******.<yourdomain>.com in the URL bar. This will be redirected to the Zoho login page. This ensures that you have added the CNAME records correctly. After this, you can log in to the Zoho Mail account and click 'Verify' to verify the domain.
In case you have difficulty in adding CNAME, contact cPanel support to get their assistance to add the CNAME for your domain.
Update MX Records to receive emails - cPanel
If your domain's DNS is hosted with cPanel, update the MX records of the domain, to start receiving emails in your domain based accounts based on the following instructions.
- Login to your cPanel Account.
- Locate the Zone Editor option under the Domains section to add the MX Records.
- Across the relevant domain, select the MX Record option.
- In the Priority field, enter 10 and in the Destination field, enter mx.zoho.com. Now click Add an MX Record.
- Repeat the steps again to add the second and third MX record and their priorities.
To ensure correct email delivery to your domain, only the MX Records provided in the Tools & Configurations section of Admin Console should be used.
MX records Host/ Domain
Address/ Mail Server/ MX Entries/ Value
Priority
@/ Blank/ Domain name
mx.zoho.com
10
@/ Blank/ Domain name
mx2.zoho.com
20
@/ Blank/ Domain name
mx3.zoho.com
50
The MX values in the above table are based on the generic configuration information. For more specific configurations particular for your domain refer to the Tools & Configurations section in the Admin Console.
Note:
Depending on your DNS provider, you may need to include a trailing dot(.) at the end of the MX record. We recommend you to go through your DNS provider's support documentation for the exact method to add the MX entries.
- To add the SPF records, click the Manage option across the relevant domain, in the Actions column.
- Click Add Record and select TXT from the Type list.
- Specify the Name/ Host as "@". In the TXT Value field, enter "v=spf1 include:zohomail.com -all"
Click Add Record.
Note:
- The values of the records with respect to cPanel will be given on the Zoho Mail Admin Console's DNS Mapping page. You can copy-paste the values into the respective fields in the DNS Manager.
- In case you are using only Zoho Mail to send emails, remove all the other SPF record types from the DNS. Click 'Save Changes' again to save all the changes.
- Having multiple SPF records will interrupt the SPF check and hence the SPF validation may fail and the emails will end up as Spam in the recipient servers. Learn more
- To add the DKIM records, click the Manage option across the relevant domain, in the Actions column.
- Click Add Record and select TXT from the Type list.
- For the Host field, copy the value "zoho._domainkey" (this will be different in the case of a different selector) from Zoho's Domain Setup page and paste it into your domain's DNS page.
For the Points to/ Value field, copy the value "v=DKIM1; k=r**; p=***************....****" from Zoho's Domain Setup page and paste it into your domain's DNS page and click Add record.
Note:
It may take anywhere between 4 to 48 hours for your DKIM record to propagate. You can check the validity of your DKIM record here.
After adding all three records, return to your Zoho Mail domain setup page and click Verify All Records. It may take about an hour or two for you to receive emails upon successful verification of your MX records and 4 to 48 hours for the propagation of SPF and DKIM records.