Email Forwarding Rules
The Email Forwarding Rules, often known as Incoming Transport Rules, allow you to define conditions based on which an email can be forwarded. The transport rules will be processed after an email reaches the intended recipient's mailbox. You can configure transport rules in the Incoming Rules section under Security & Compliance.
Note:
- The Email Forwarding Rules feature will be rolled out in a phased manner and be available only for organizations that use one of our paid plans.
- If you want the option enabled for your organization, please reach out to us at support@zohomail.com.
Create a New Rule
Follow these steps to create a new email forwarding rule:
- Log in to Zoho Mail Admin Console and select Security & Compliance in the left pane.
- Navigate to Forwarding Filter (Level 3) under Incoming Rules and click Create New Rule if you are creating the first rule.
Note:
You must enable Organization Rules in order to configure incoming transport rules. If you have not enabled it already, click Enable now from the Incoming Rules page.
- If there are any existing rules, select the Create drop-down and choose one of the below options:
- Create new rule
- Bcc emails from external senders to administrator
- Forward emails with specific content to administrator

- On the Create email forwarding rule page, enter the Rule name, an optional Rule Description, and click Proceed.
- Select the Condition Type as per your requirement:
- AND - Only if the incoming emails satisfy all the conditions you provided, the preferred action will be performed.
- OR - Even if the incoming emails satisfy one of the conditions you provided, the preferred action will be performed.
- Advanced - You can combine both AND & OR condition types, within a single condition, for the preferred action.
- No Condition - When chosen, all the emails you receive will go through the preferred action.
- Set your condition and preferred actions.
- Click the icon adjacent to Email forwarding addresses.
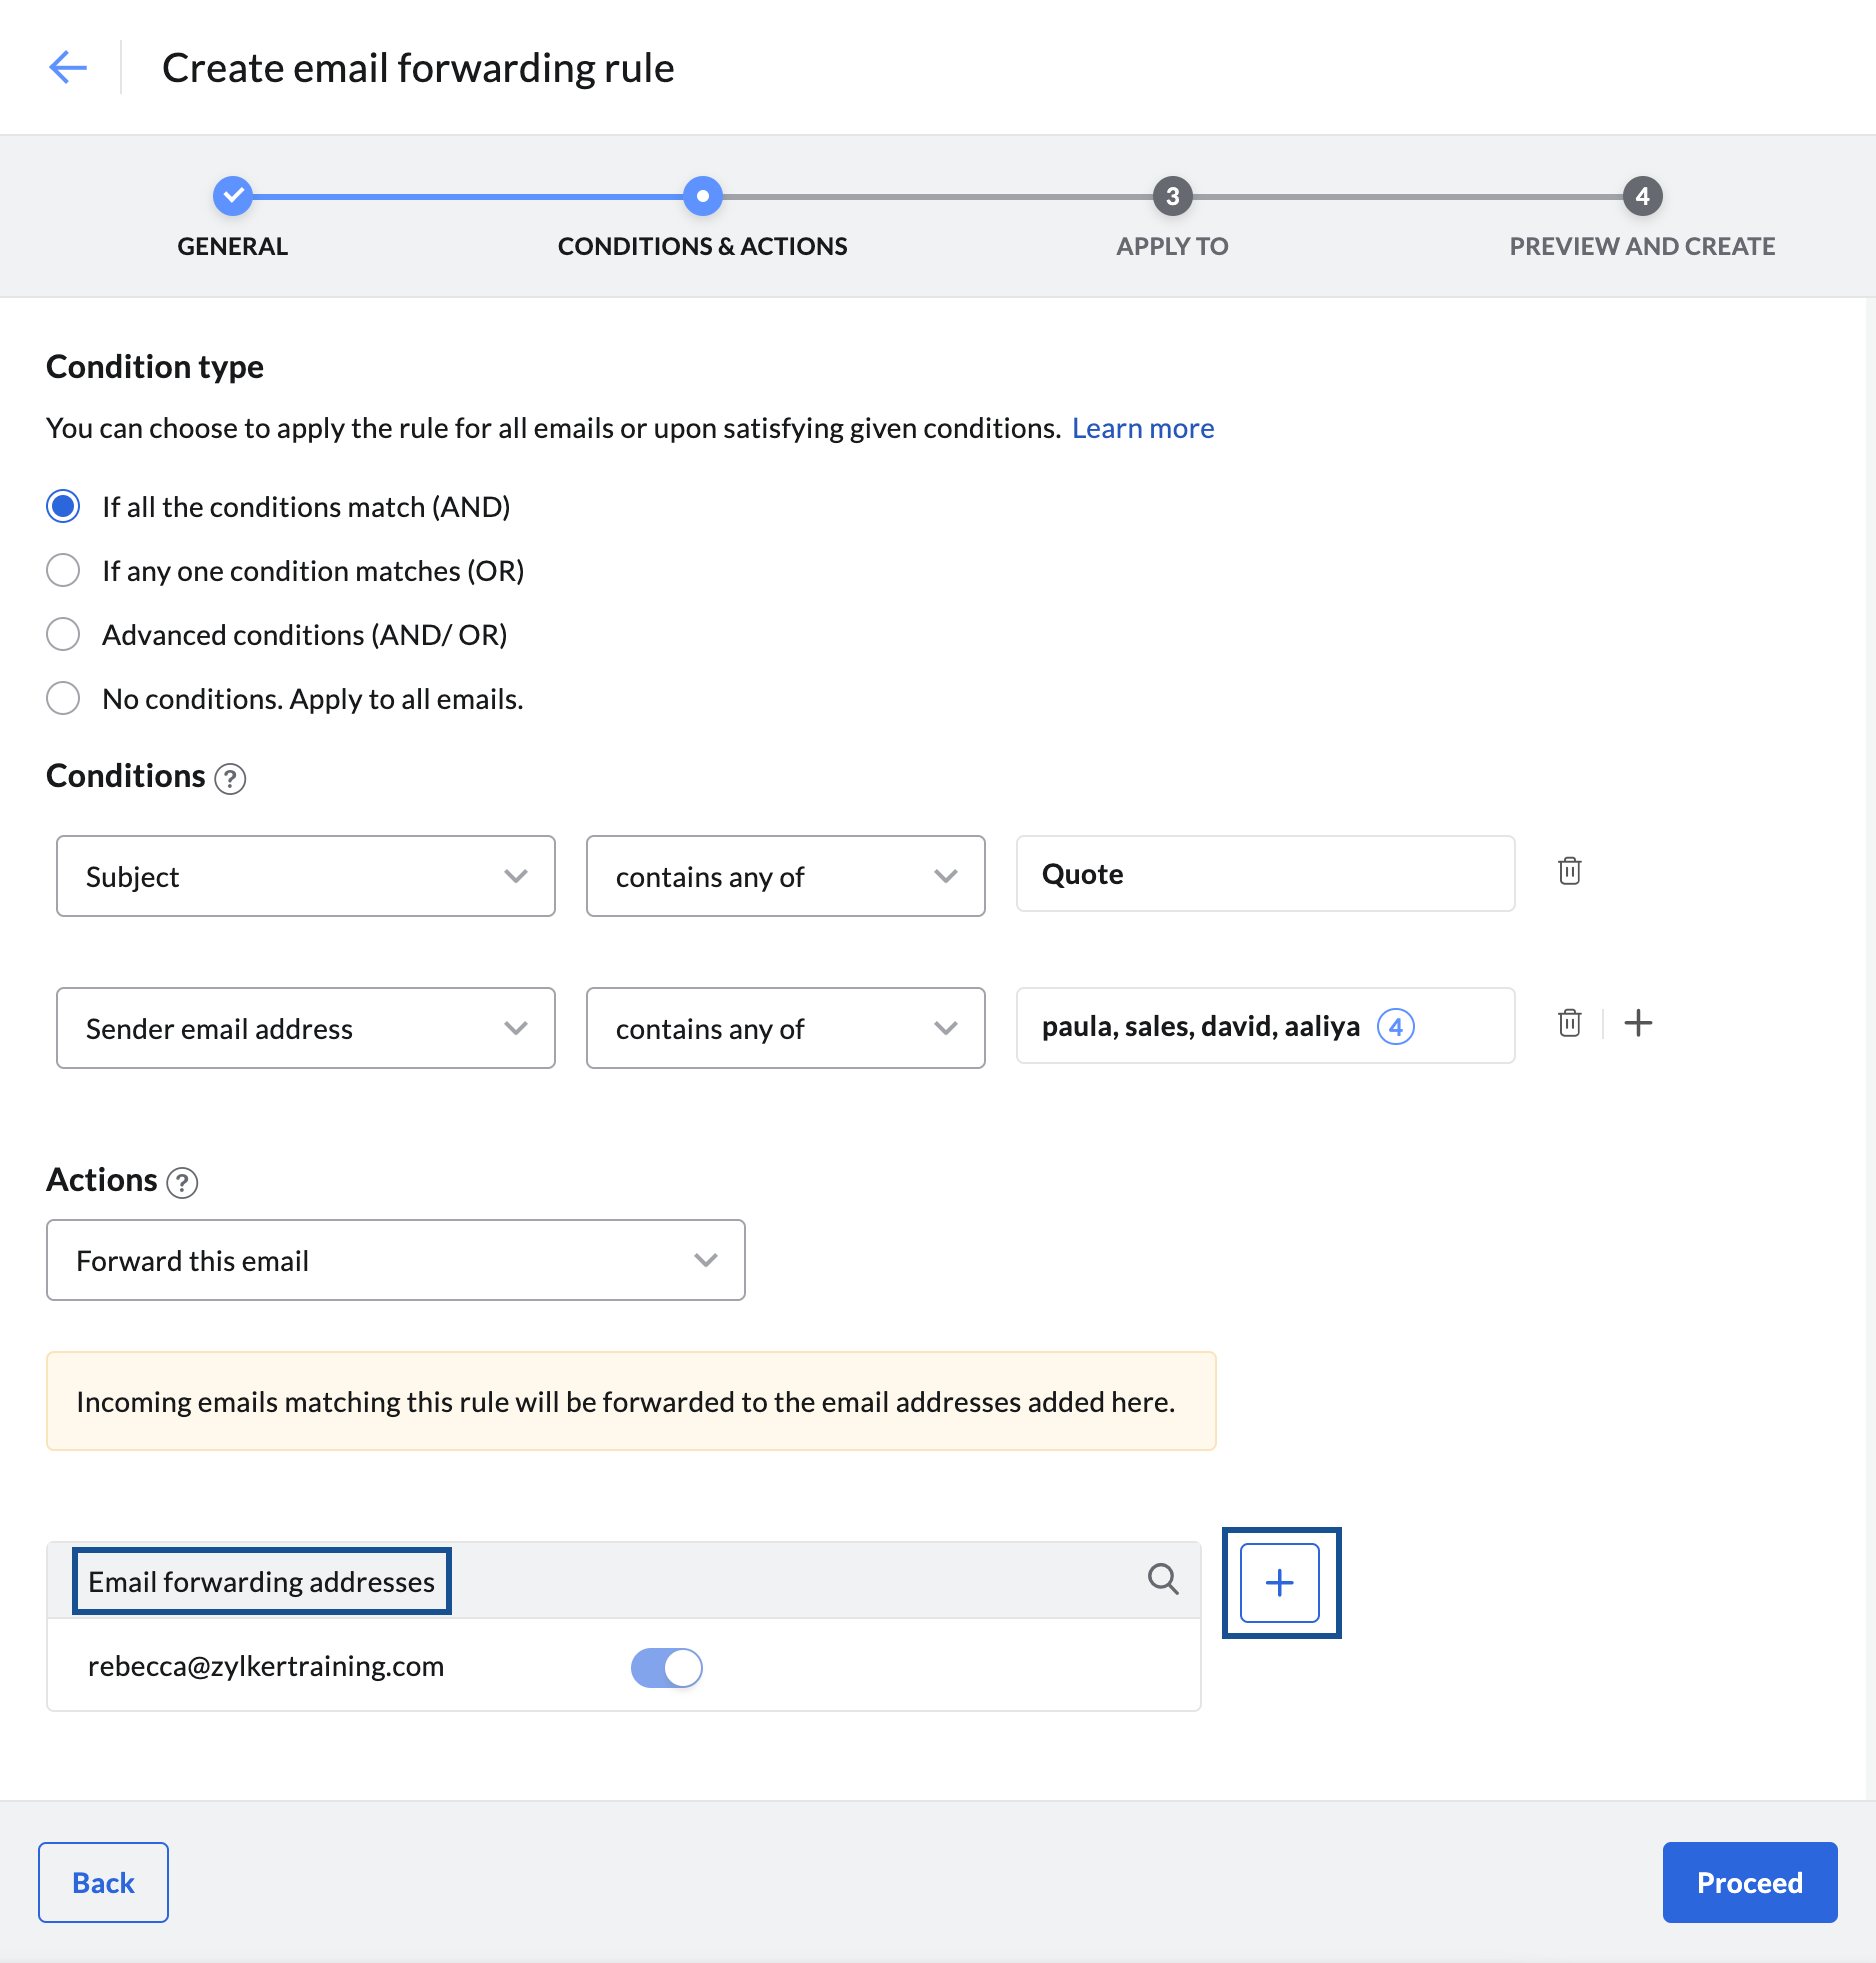
- Search and add the desired recipients in the Add email forwarding address dialog.
- Click Add and then click Proceed.
Note:
It is possible that there are one or more unverified email addresses in the Email forwarding address list. In such cases, you can enable the rules but, the email will not be forwarded to the unverified email address. Follow these steps to verify the email address in order to enable forwarding.
- Click Proceed after you add the intended recipients to the Email forwarding addresses list.
- After filter creation you can choose, to which users you want the rule to be applied. You can select one of the options below:
- All Users - The rule will be applied to all the users in your organization.
- Selected Users - The rule will be applied to the specific set of users you add.
- All users excluding selected users - The rule will be applied to all the users except the ones added to the list.
- To add users to the Selected Users or Excluded users list, simply select the respective option, and click the Add button.
- Select the users you want to add to the list and click Proceed. You can also remove a user from the list by clicking the Delete icon next to the user.
- Once done, click Proceed. You can review your rule on the preview page and set an expiry date if needed.
- After reviewing the rule, select one of the below options:
- Create & Enable Rule - Your rule will not only be created but also be activated automatically to start processing emails with respect to its conditions and actions.
- Create Rule - Your rule will only be created and not activated. That means if you want the rule to be applied to the emails you receive, you will have to manually enable it.
Available Conditions
You can set up more than one condition in a single rule depending on your requirement.
| Parameter | Description |
| Subject | The subject of the email. |
| Sender email address | The 'from' address of the email sender. |
| Sender domain | Checks the domain address of the email sender. |
| Sender IP address | Checks the IP address of the email sender. |
| Sender DNS | The DNS address of the sender. |
| Sender display name | The display name of the sender. |
| Sender not previously contacted | Checks if the recipient has sent any email(s) to the sender. |
| Is external sender | The sender is not a member of the organisation. |
| Unauthenticated sender | The sender's identity is unauthenticated. |
| Return path email address | The reverse-path/ bounce address of an incoming email. |
| Return path domain | The reverse-path/ bounce address's domain. |
| To/cc email address | The 'to' or 'cc' email address of the incoming mail. |
| Recipient (group) | Checks if the recipient belongs to the organisation group. |
| Recipient's email policy | The email policy applied to the recipient. |
| Recipient domain | The domain name of email recipients. |
| SPF verification result | The result of SPF verification. |
| DKIM verification result | The result of DKIM verification. |
| DMARC verification result | The result of DMARC verification. |
| Content | The content of the email. |
| Attachment type | The type of attachments present in the email. |
| Attachment size (in MB) | Attachments that exceeds the specified size. |
| Email language | The language in which the email was composed. |
| Originating country | The country from which the email was sent. |
| Has attachment | The existence of an attachment in an email content. |
| Has web bugs | The existence of web bugs in incoming email content. |
| Has JavaScript content | The existence of javascript content in the email content. |
| Has macros | The existence of macros in the email content. |
| Is bulk email | Checks if the email received is a bulk email. |
| Has frame tags | The existence of iframe tags in the email content. |
| Has object tags | The existence of object tags in the email content. |
| Has embed tags | The existence of embed tags in the email content. |
| Has form tags | The existence of form tags in the email content. |
| Has shortened URL | The existence of shortened URLs in the email content. |
| Has suspicious macros | The existence of suspicious macros in the email content. |
| MIME message ID | The ID that can be gathered from a MIME email's header. |
| MIME size (in MB) | The size of the non-text attachment is greater than the specified MB. |
| X-Mailer | The desktop client from which the email was sent. |
| URL domain | The domain names of the URLs available in email content. |
| URL | The existence of specified URLs in the email content. |
| Add header criteria | The type of email header criteria that needs to be verified for the provided values. |
Note:
- MIME message - Multipurpose Internet Mail Extensions supports non-text email attachments. A MIME header is added to the original email header from where you can gather the unique content ID/message ID used to identify the message.
- X-Mailer - Specifies which desktop client (For example, Apple client, Thunderbird, etc) was used to draft or send the email. Can be found in the email header.
Operating parameters
| Operators | Description |
| is | The respective parameter in the incoming email should exactly match the given criteria value. |
| is not | The respective parameter in the incoming email should not match the given criteria value. |
| contains | The respective parameter in the incoming email doesn't have to be an exact match but will pass even if it contains the given criteria value. |
| does not contain | The respective parameter in the incoming email doesn't have to be an exact match but will pass if it does not contain the given criteria value. |
| begins with | The respective parameter in the incoming email should begin with the given criteria value. |
| ends with | The respective parameter in the incoming email should end with the given criteria value. |
| is empty | The respective parameter in the incoming email should be empty. |
| is not empty | The respective parameter in the incoming email should not be empty. |
| is group member in | The recipient is a part of the selected group. |
| is not group member in | The recipient is not a part of the selected group. |
| matches | The respective parameter in the incoming email should match the regular expression pattern. |
| Does not match | The respective parameter in the incoming email should not match the regular expression pattern. |
| true | The given condition should be true. |
| false | The given condition should be false. |
| is greater than | The respective parameter in the incoming email should only be greater than the given criteria value. |
| is lesser than | The respective parameter in the incoming email should only be lesser than the given criteria value. |
| is greater than or equal to | The respective parameter in the incoming email can be greater than or equal to the given criteria value. |
| is lesser than or equal to | The respective parameter in the incoming email can be lesser than or equal to the given criteria value. |
Available Actions
| Action | Description |
| Forward this email | Forwards the email to the recipients added to the Email forwarding address list. |
| Add BCC and deliver to recipient | Emails matching the rule will be BCCed to the email addresses added to the Email forwarding address list. |
Verify an Email Address
Follow these steps to verify an email address:
- Log in to Zoho Mail Admin Console and click Security & Compliance.
- Navigate to Forwarding Filter (Level 3) under Incoming Rules. The list of rules added by you appears.
- Select the rule which has an unverified email address.

- Click Verify Now in the Email verification pending dialog that appears. Alternatively, you can scroll down to locate the unverified email address and click Verify.
- Enter the Confirmation code that was sent to the external email address and click the Verify icon. The email address gets verified successfully.
Rule Processing and Priority
You can add any number of email forwarding rule to process different types of incoming emails. In the case of multiple rules, the order of processing will be based on the Sequence. The rule with the highest sequence (1) will take precedence over the rules with a lower sequence (2). To change the sequence of the rules, follow these steps:
- Log in to Zoho Mail Admin Console and click Security & Compliance.
- Navigate to Forwarding Filter (Level 3) under Incoming Rules. The list of rules added by you appears.
- Drag and drop the rules in the order of your preference. The sequence of rules gets updated as per your selection.
Enable or Disable a rule
You can enable or disable a rule to start or stop filtering.
- Log in to Zoho Mail Admin Console and select Security & Compliance in the left pane.
- Navigate to Forwarding Filter (Level 3) under Incoming Rules. The list of rules added by you appears.
- Switch the Status toggle bar to ON/OFF in order to enable or disable a rule.

Note:
If you want to delete all the rules, select Delete all from the top menu. Be cautious when you do this because you will not be able to recover the rules after you delete them.
Remove expired rules from the list
In case you set an expiry date for the rules, you will find a number of expired rules in your list. You can remove them by using the Clear option.
- Log in to Zoho Mail Admin Console and select Security & Compliance in the left pane.
- Navigate to Forwarding Filter (Level 3) under Incoming Rules. The list of rules added by you appears.
- Click Clear from the top menu and then select Delete in the Clear all expired rules warning dialog. This will remove all the filters that have already expired from your list.
