Phishing & Malware Control - Zoho Mail
The Phishing and Malware section in the Admin Console provides multiple options to control spoofing or other fraudulent activity with respect to your organization's emails. You can decide on the actions that need to be taken on certain look-alike domains that send emails to your organization, ensure that the display names of important people in your organization are not spoofed, and further set up a spam check on emails with certain types of content or HTML tags.
Table of Contents
Cousin Domains
Cousin Domains are domain names that are very similar to any other valid domain name. If you expect a domain to send genuine emails, but want to mark an email from any other variations of the domain name as spam, you can add it in this section.
For example, if 'zylker.com' sends genuine emails, but emails from 'zylker1.com' needs to be processed for spam, you can add zylker.com here.
- Login to the Zoho Mail Admin Console.
- Go to the Security & Compliance menu, and select Phishing & Malware .
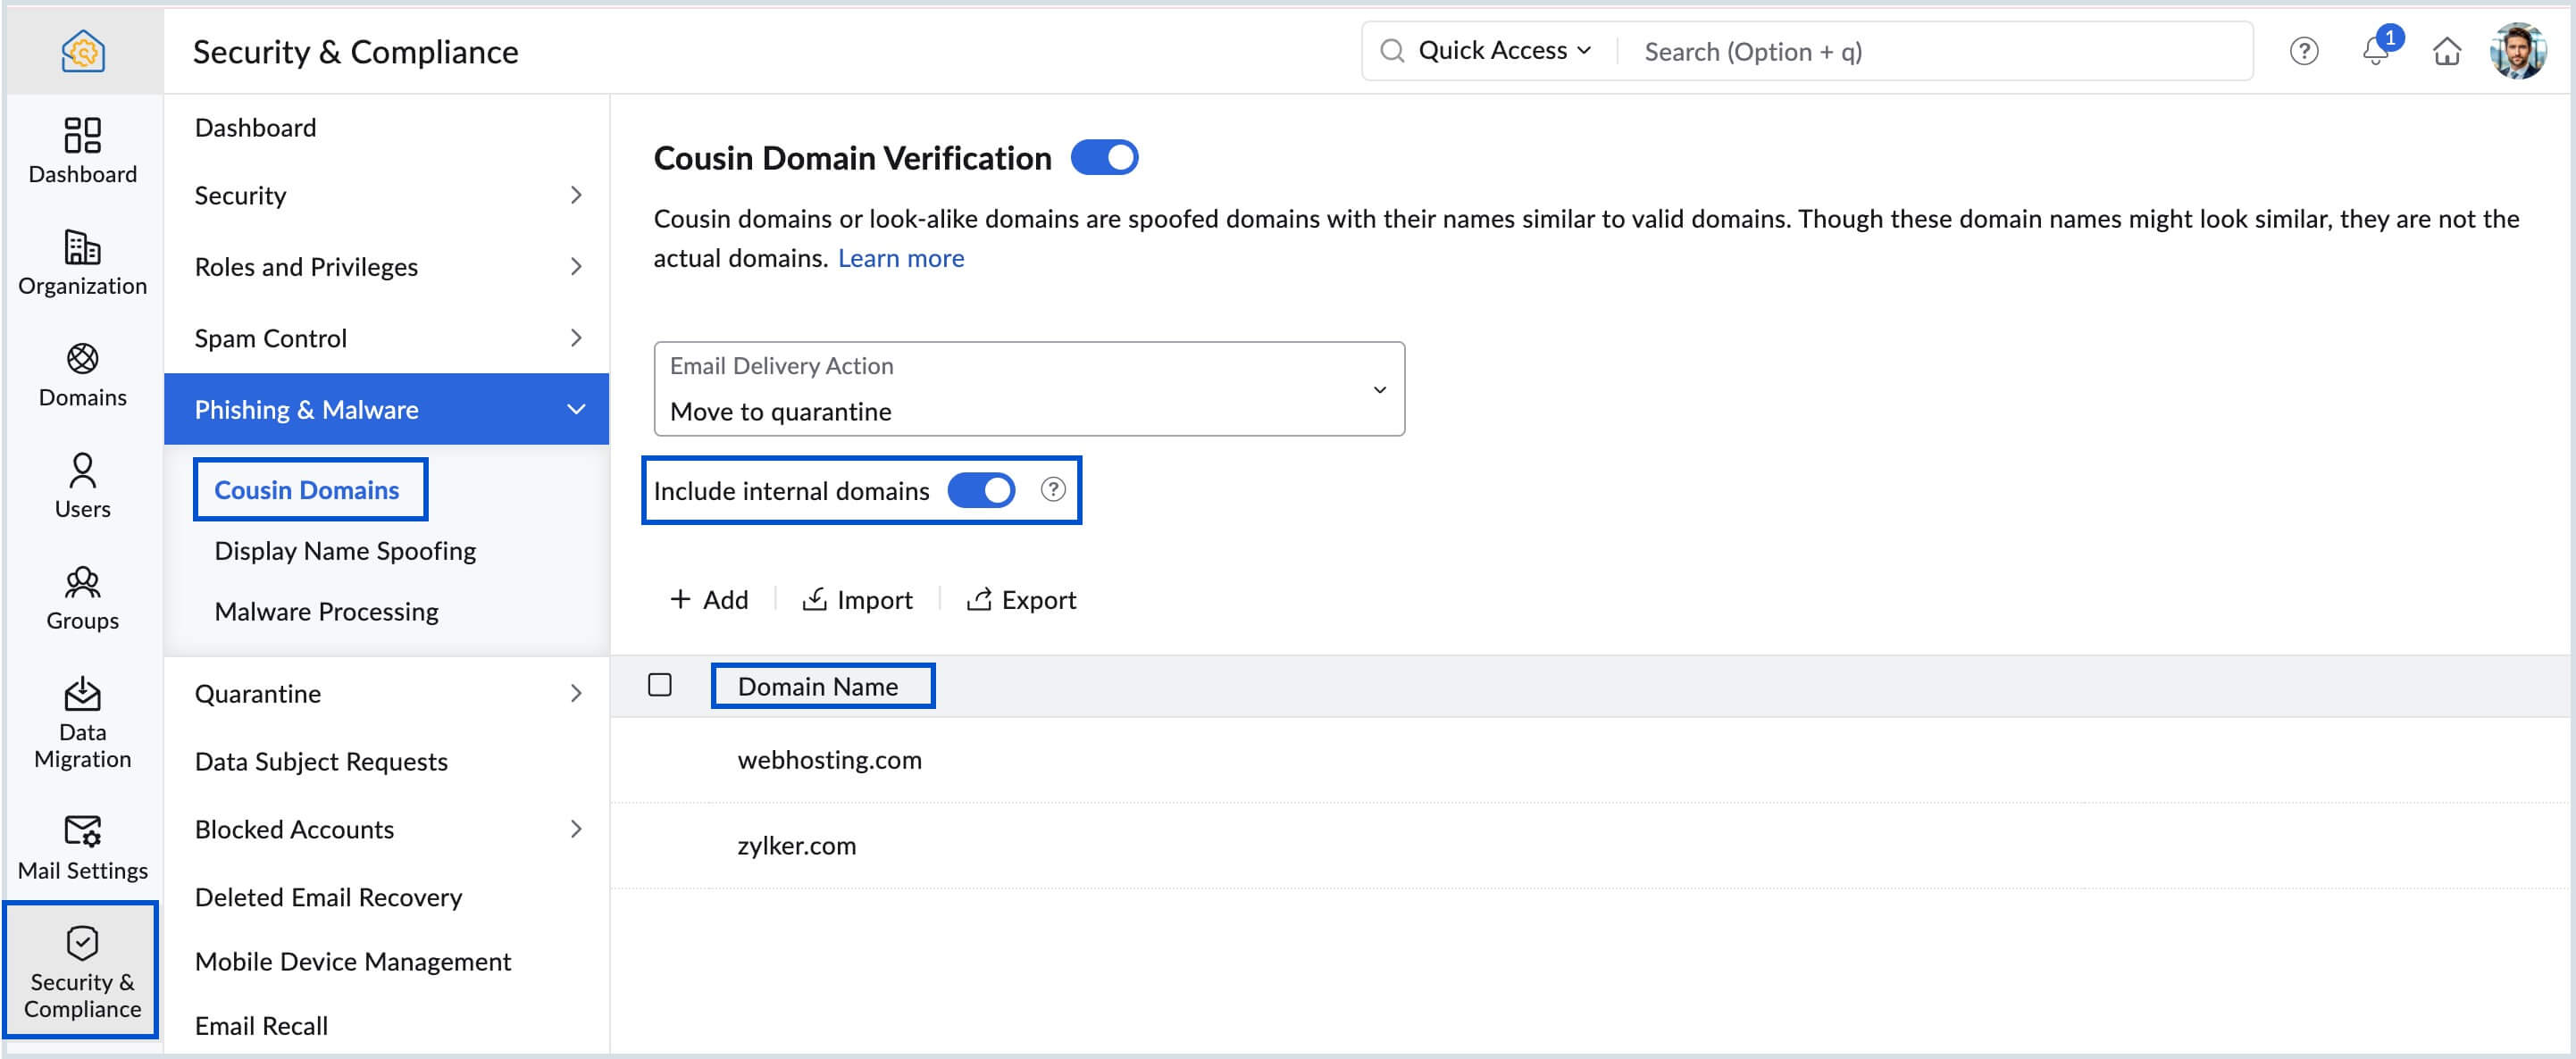
- Select the Cousin Domains option.
- In the Email Delivery Action dropdown, select the actions for emails that have look-alike domain names.
- If you select None, no action will be taken.
- If you select Move to spam, the email will be moved to the spam folder of the email recipient.
- If you select Move to quarantine, the email will be moved to the quarantine list, from where the admin will have to process if further.
- You can also choose to Include Internal Domains, which means that all of your organization's domains will undergo the cousin domains check by default. So, any domain name that is similar to yours will undergo the specified action.
- Now, click Add, enter the domain names for which cousin domain check has to be done, and click Add.
- You can also choose to include the domain names by click on Import, and selecting a CSV file which has all the domain names.
- All the added domains will be listed under Domain Name section.

The Cousin Domains feature is especially useful in cases where an email sender might try to trick recipients with a valid domain name. For example, you might expect the domain webhosting.com to send valid emails to your org users. So, when an email arrives from user@vvebhosting.com, your org members might consider it legitimate, but the email sender has tricked the recipient by replacing the 'w' in webhosting.com with 'vv'. In cases like these, the Cousin Domains feature comes into play.
Display Name Spoofing
You can control the fraudulent usage of display names by setting up the respective conditions for emails that violate your customization. You can set up a display name and associate one or more email addresses with this display name in the Zoho Mail Control Panel. For example, consider the email address ceo@mydomain.com, you can ensure that if an email with the display name 'CEO' arrives from any other email address, the action defined by you is taken on this email address.
Follow the below steps to add a policy to prevent display name fraud:
- Login to the Zoho Mail Admin Console.
- Go to the Security & Compliance menu, and select Phishing & Malware .
- Select the Display Name Spoofing option.
- In the Email Delivery Action section, select the action for emails that have spoofed display names.
- If you select None, no action will be taken.
- If you select Move to spam, the email will be moved to the spam folder of the email recipient.
- If you select Move to quarantine, the email will be moved to the quarantine list, from where the admin will have to process if further.
- Now, click Add>>Add using email addresses.

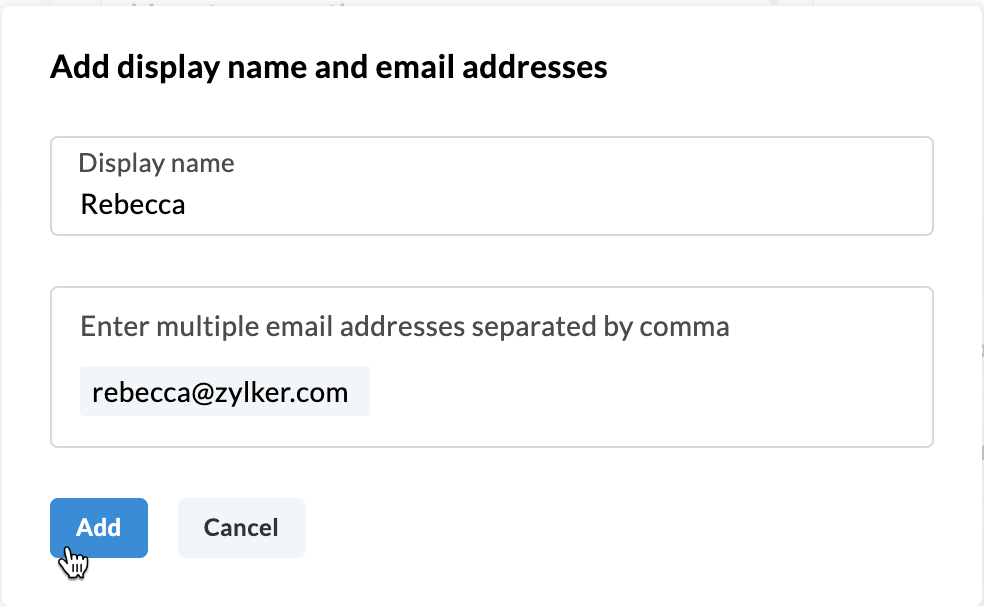
- Enter the display name, and the email addresses that can be associated with this name, and click Add.

You will be able to see a list of the Display Names and the respective Email Addresses that you have added in the list.
For users with alias email address, you can quickly add the user's primary email address along with their alias addresses without having to manually enter each email address. Follow the below steps:
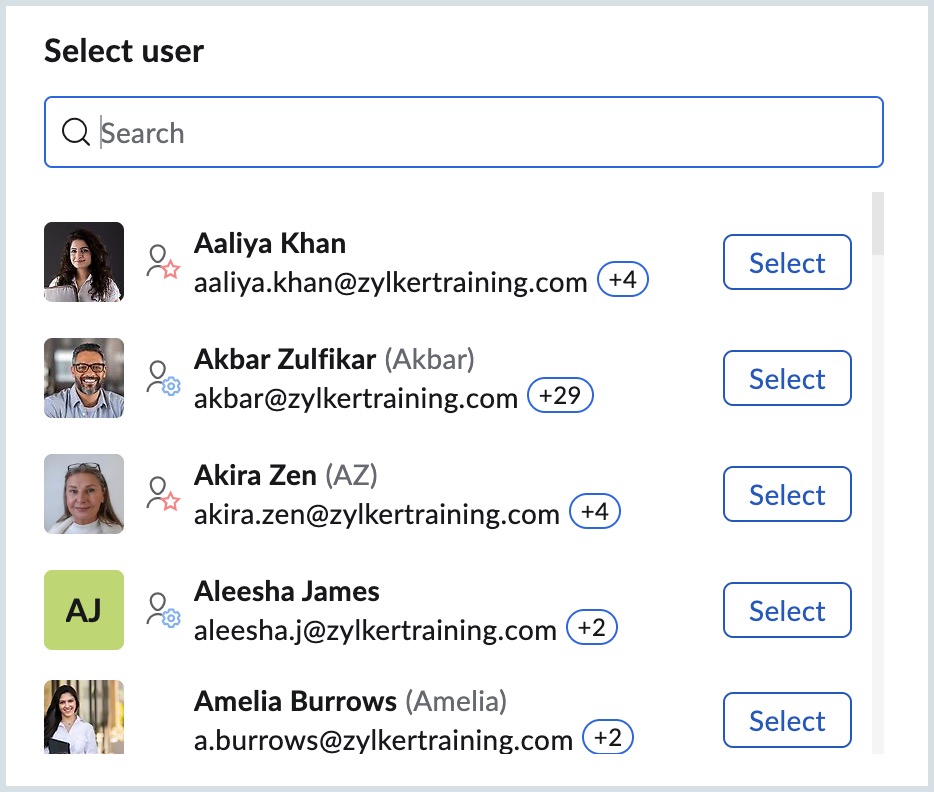
- Click Add>>Search and add organization users.

- A list of your organization users appears as a pop-up window.

- Select the user you wish to add. If you wish to provide a different display name for the user, you can enter it in the Display name text box. Else, you can leave that box empty.
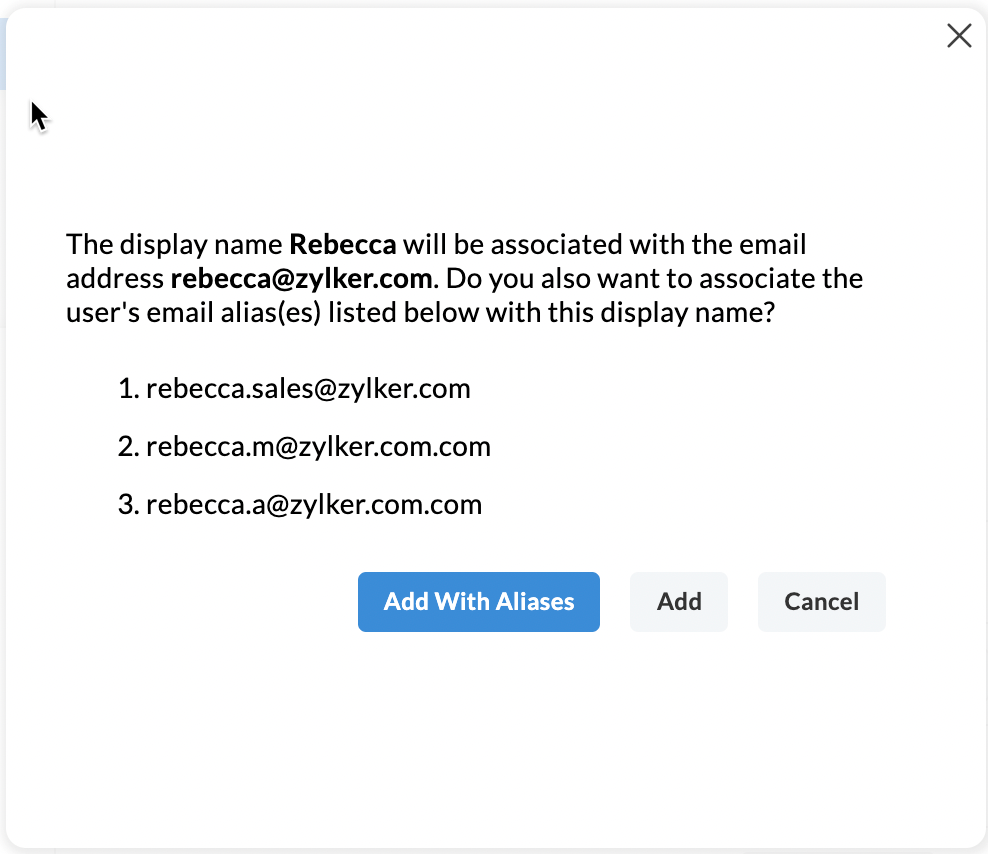
- Click Add with Aliases if you want to add the user's alias email address along with their primary email address.
- Click Add without aliases if you want to associate only the user's primary email address with their display name.

You will be able to see the Display Name and the respective Email Addresses that you have added in the list.
Furthermore, to avoid display name spoofing, Zoho Mail will show the sender's display name only if the sender is in your contacts or if you have had a previous conversation with the sender. Otherwise, only the sender's email address will be shown. For example, consider you get an email from rebecca@zylker.com who has Rebecca as her display name. The display name Rebecca will be shown only if rebecca@zylker.com is already in your contacts or if you have had a previous conversation with her. Otherwise, only the email address rebecca@zylker.com will be shown to avoid display spoofing.
Malware Processing
To ensure that emails your org members receive do not have any harmful scripts or tags, you can choose the content types or the HTML tags that you do not want to allow, and any emails containing these tags, will be moved to the user's spam folder.
- Login to the Zoho Mail Admin Console.
- Go to the Security & Compliance menu, and select Phishing & Malware .
- Select the Malware Processing option.
- In the Content-based Spam Settings option, you can see 4 content types (web bugs, bulk emails, JavaScript, macros) listed.
- Select the types that you think might be harmful, and emails containing the content types selected will be moved to spam.
- Next, in the HTML Tags-based Spam Check option, 4 tags (frame, object, embed, form) will be listed.
- Select the tags that you think might be harmful, and emails containing these tags will be moved to spam.
Note:
All the features in the Phishing & Malware section will be available only for paid account users.