Security Information and Event Management
Security Information and Event Management (SIEM) allows an administrator to efficiently manage increasing security threats and also comply with regulatory norms. SIEM helps you detect, visualize, scrutinize, and respond to the various threats that risk your organization's data security. Using Zoho Mail you can integrate the audit events logged in Admin Console with your SIEM tool.
Splunk
Splunk is an analytics-driven SIEM tool that continuously collects high volumes of network and machine data, analyzes, and correlates them in readable form in real time.
To integrate Splunk with Zoho Mail follow these steps:
- Log in to your organization's Splunk account.
- Create an event collector token in Splunk. This token must be entered when you configure Splunk in Zoho Mail Admin Console.
Once you generate a token, you can configure Splunk settings in Zoho Mail Admin Console.
Configure Splunk in Zoho Mail
Follow these steps to configure Splunk in Zoho Mail:
- Log in to Zoho Mail Admin Console.
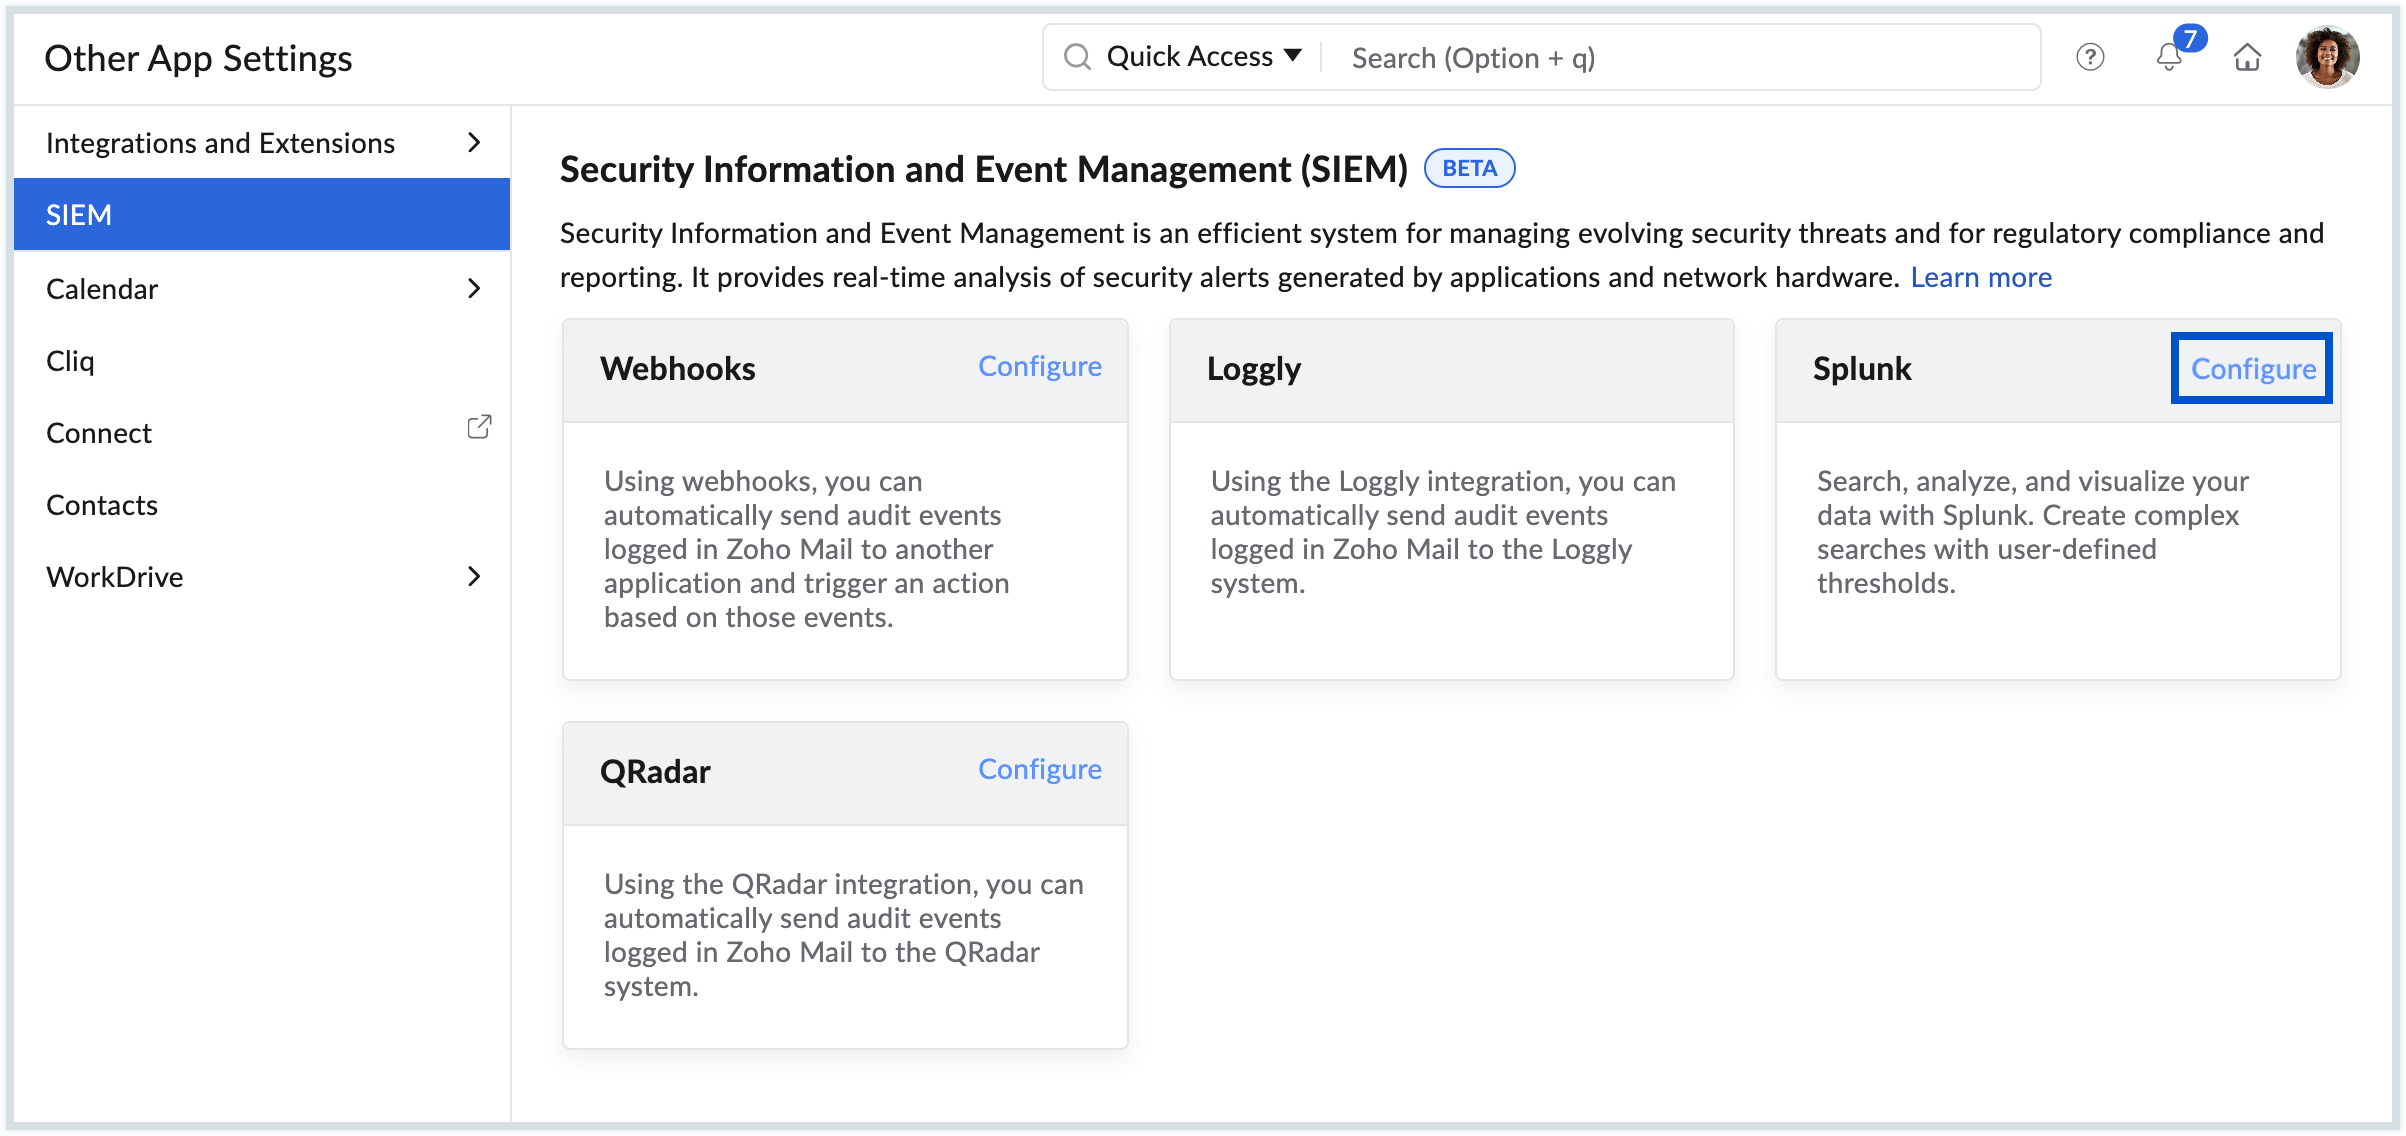
- Choose Other App Settings from the left menu and select SIEM.
- Navigate to Splunk and click Configure.
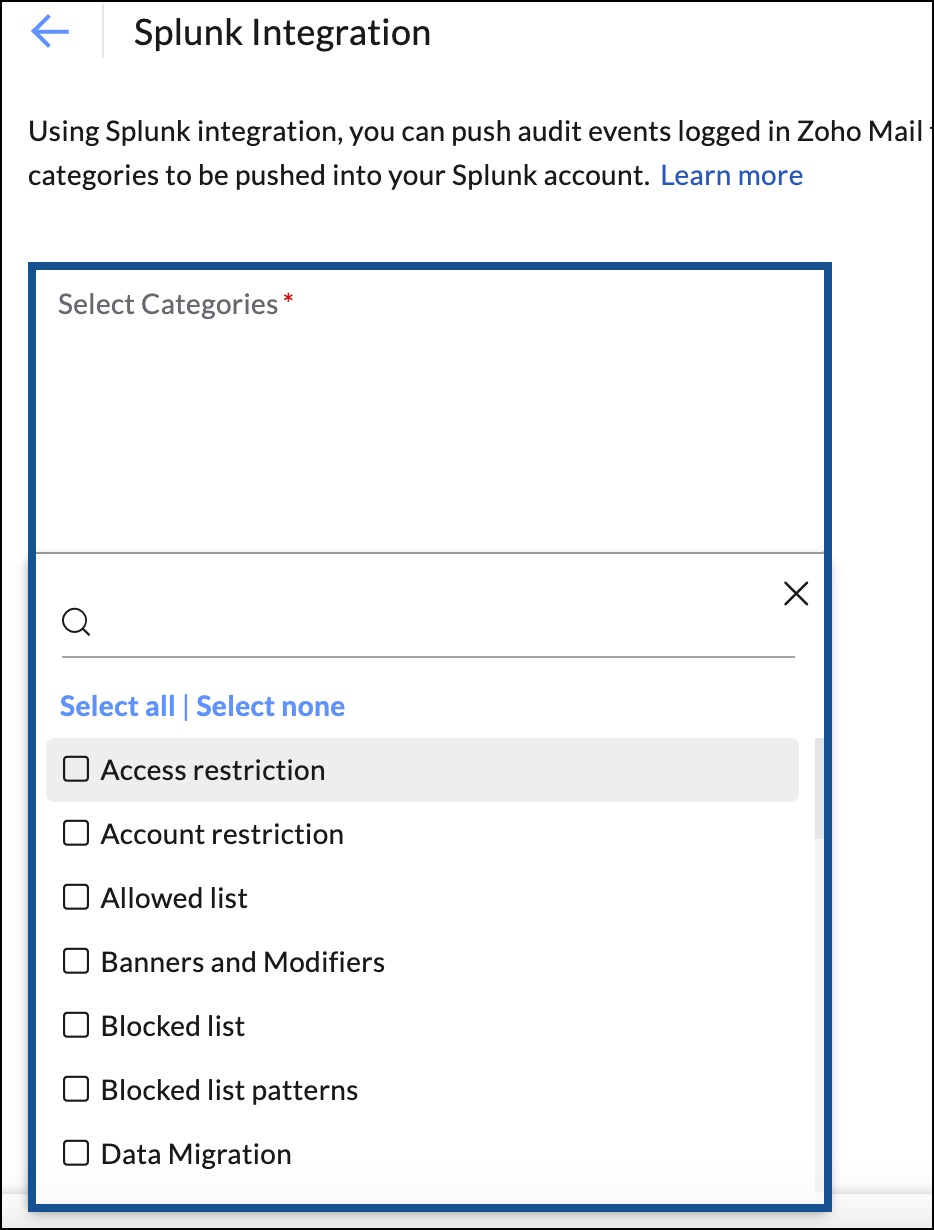
- Select the audit event categories in the Selected Categories field.
- In the Host Address field, add the hostname in which your organization's Splunk instance is running. Please ensure to provide the host address without including 'https://' prefix. The system will automatically add 'https://' to your provided host address.
- Enter the token which you generated in Splunk. Ensure that the HTTP event collector is enabled in the Splunk Global Settings menu.
- If required, follow the steps to enable the HTTP event collector under the Splunk Global Settings menu.
- Click the Add button. The categories that you selected get saved and you can view the audit log data seamlessly in your Splunk account.
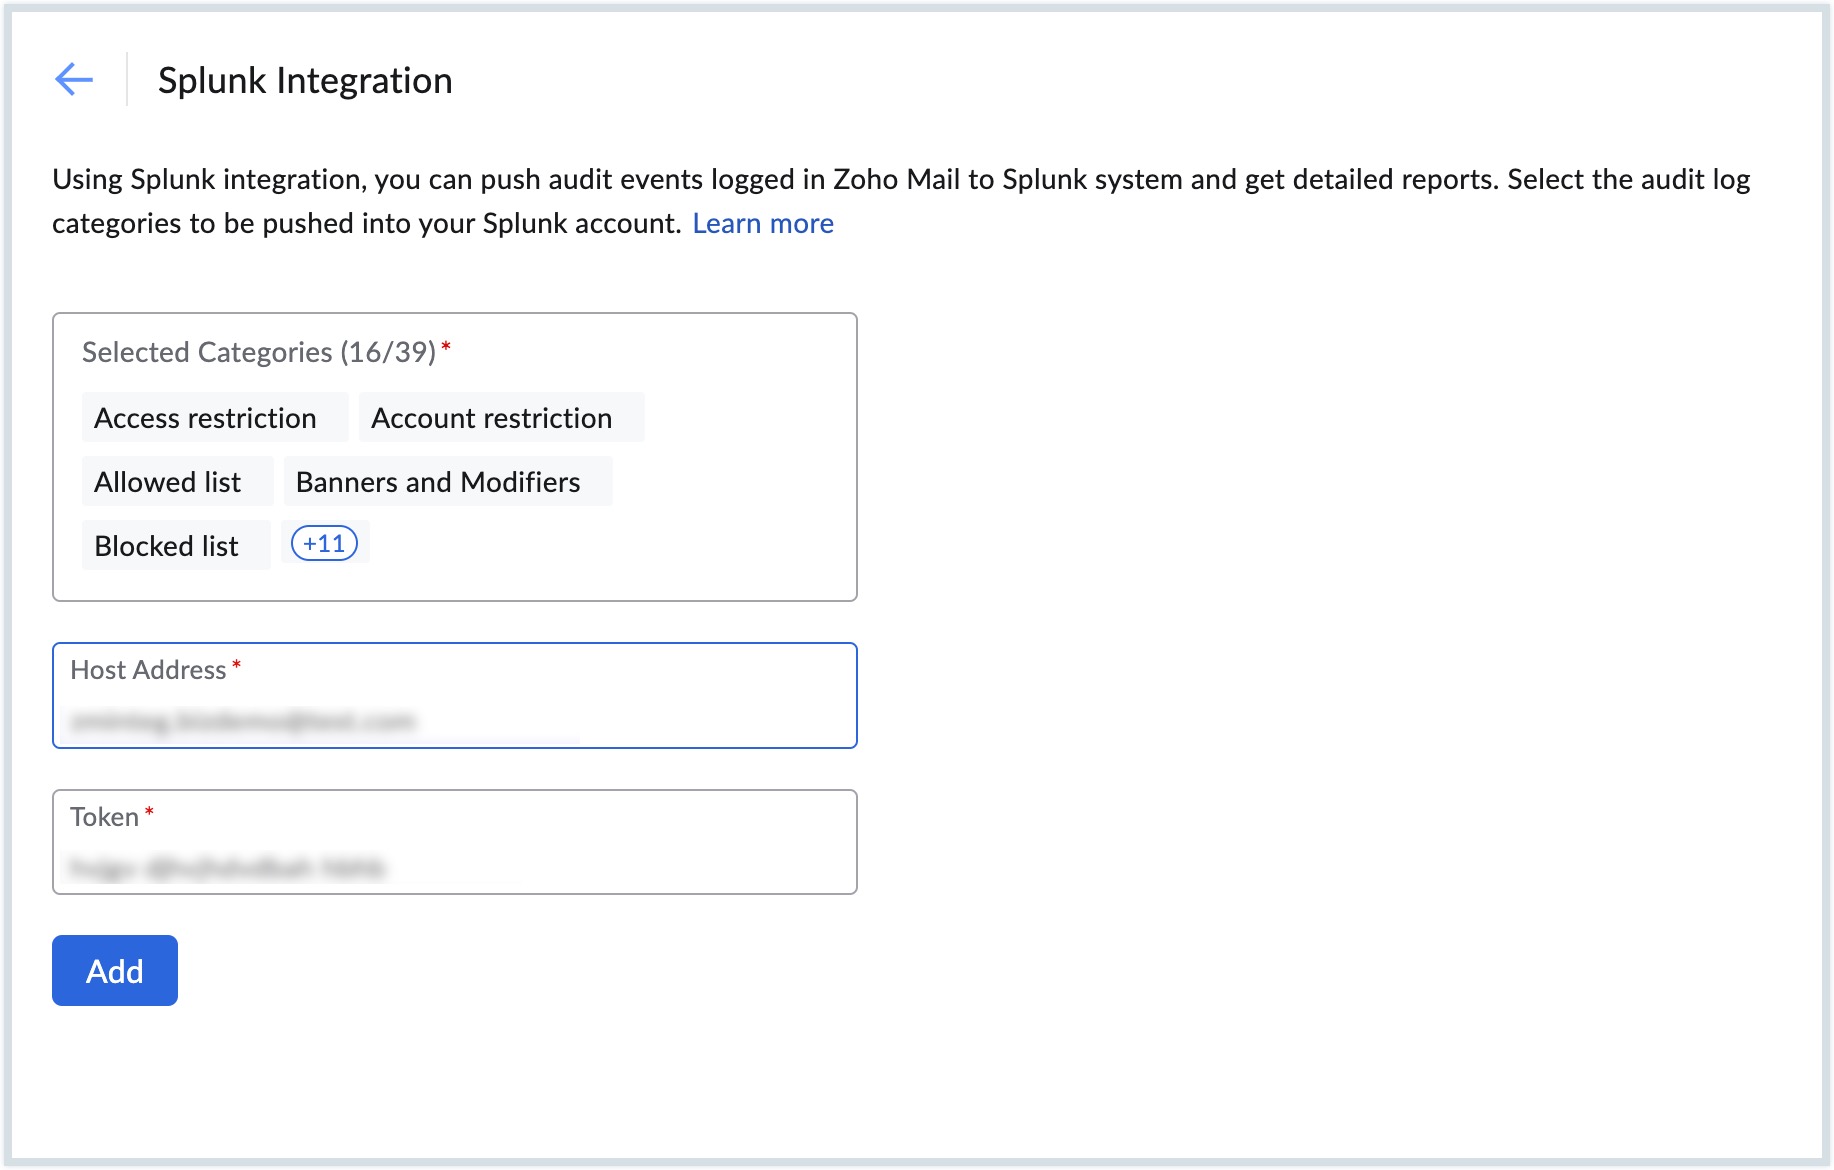
- To modify the audit event categories, add or remove the events in the Selected Categories field, enter the Token and click the Update button.
Note:
- Your organization's host can run in an on-premise Splunk Enterprise or a Splunk Cloud Platform with a paid plan.
- Zoho Mail supports only the port value 443 for HTTPS domains which has a valid SSL certificate.
Loggly
Loggly is a cloud based log management and analytical solution that helps organizations manage, analyze, and gain insights from their log data. It supports searching, filtering, and visualizing massive log volumes, making it easier to understand and act upon the information contained in their logs.
To integrate Loggly with Zoho Mail follow these steps:
- Log in to your organization's Loggly account.
- Copy your Customer Token from Loggly. This token is a unique identifier for your Loggly account. The Customer Token must be an Active Token.
This token must be entered when you configure Loggly in Zoho Mail Admin Console.
Configure Loggly in Zoho Mail
Follow these steps to configure Loggly in Zoho Mail:
- Log in to Zoho Mail Admin Console.
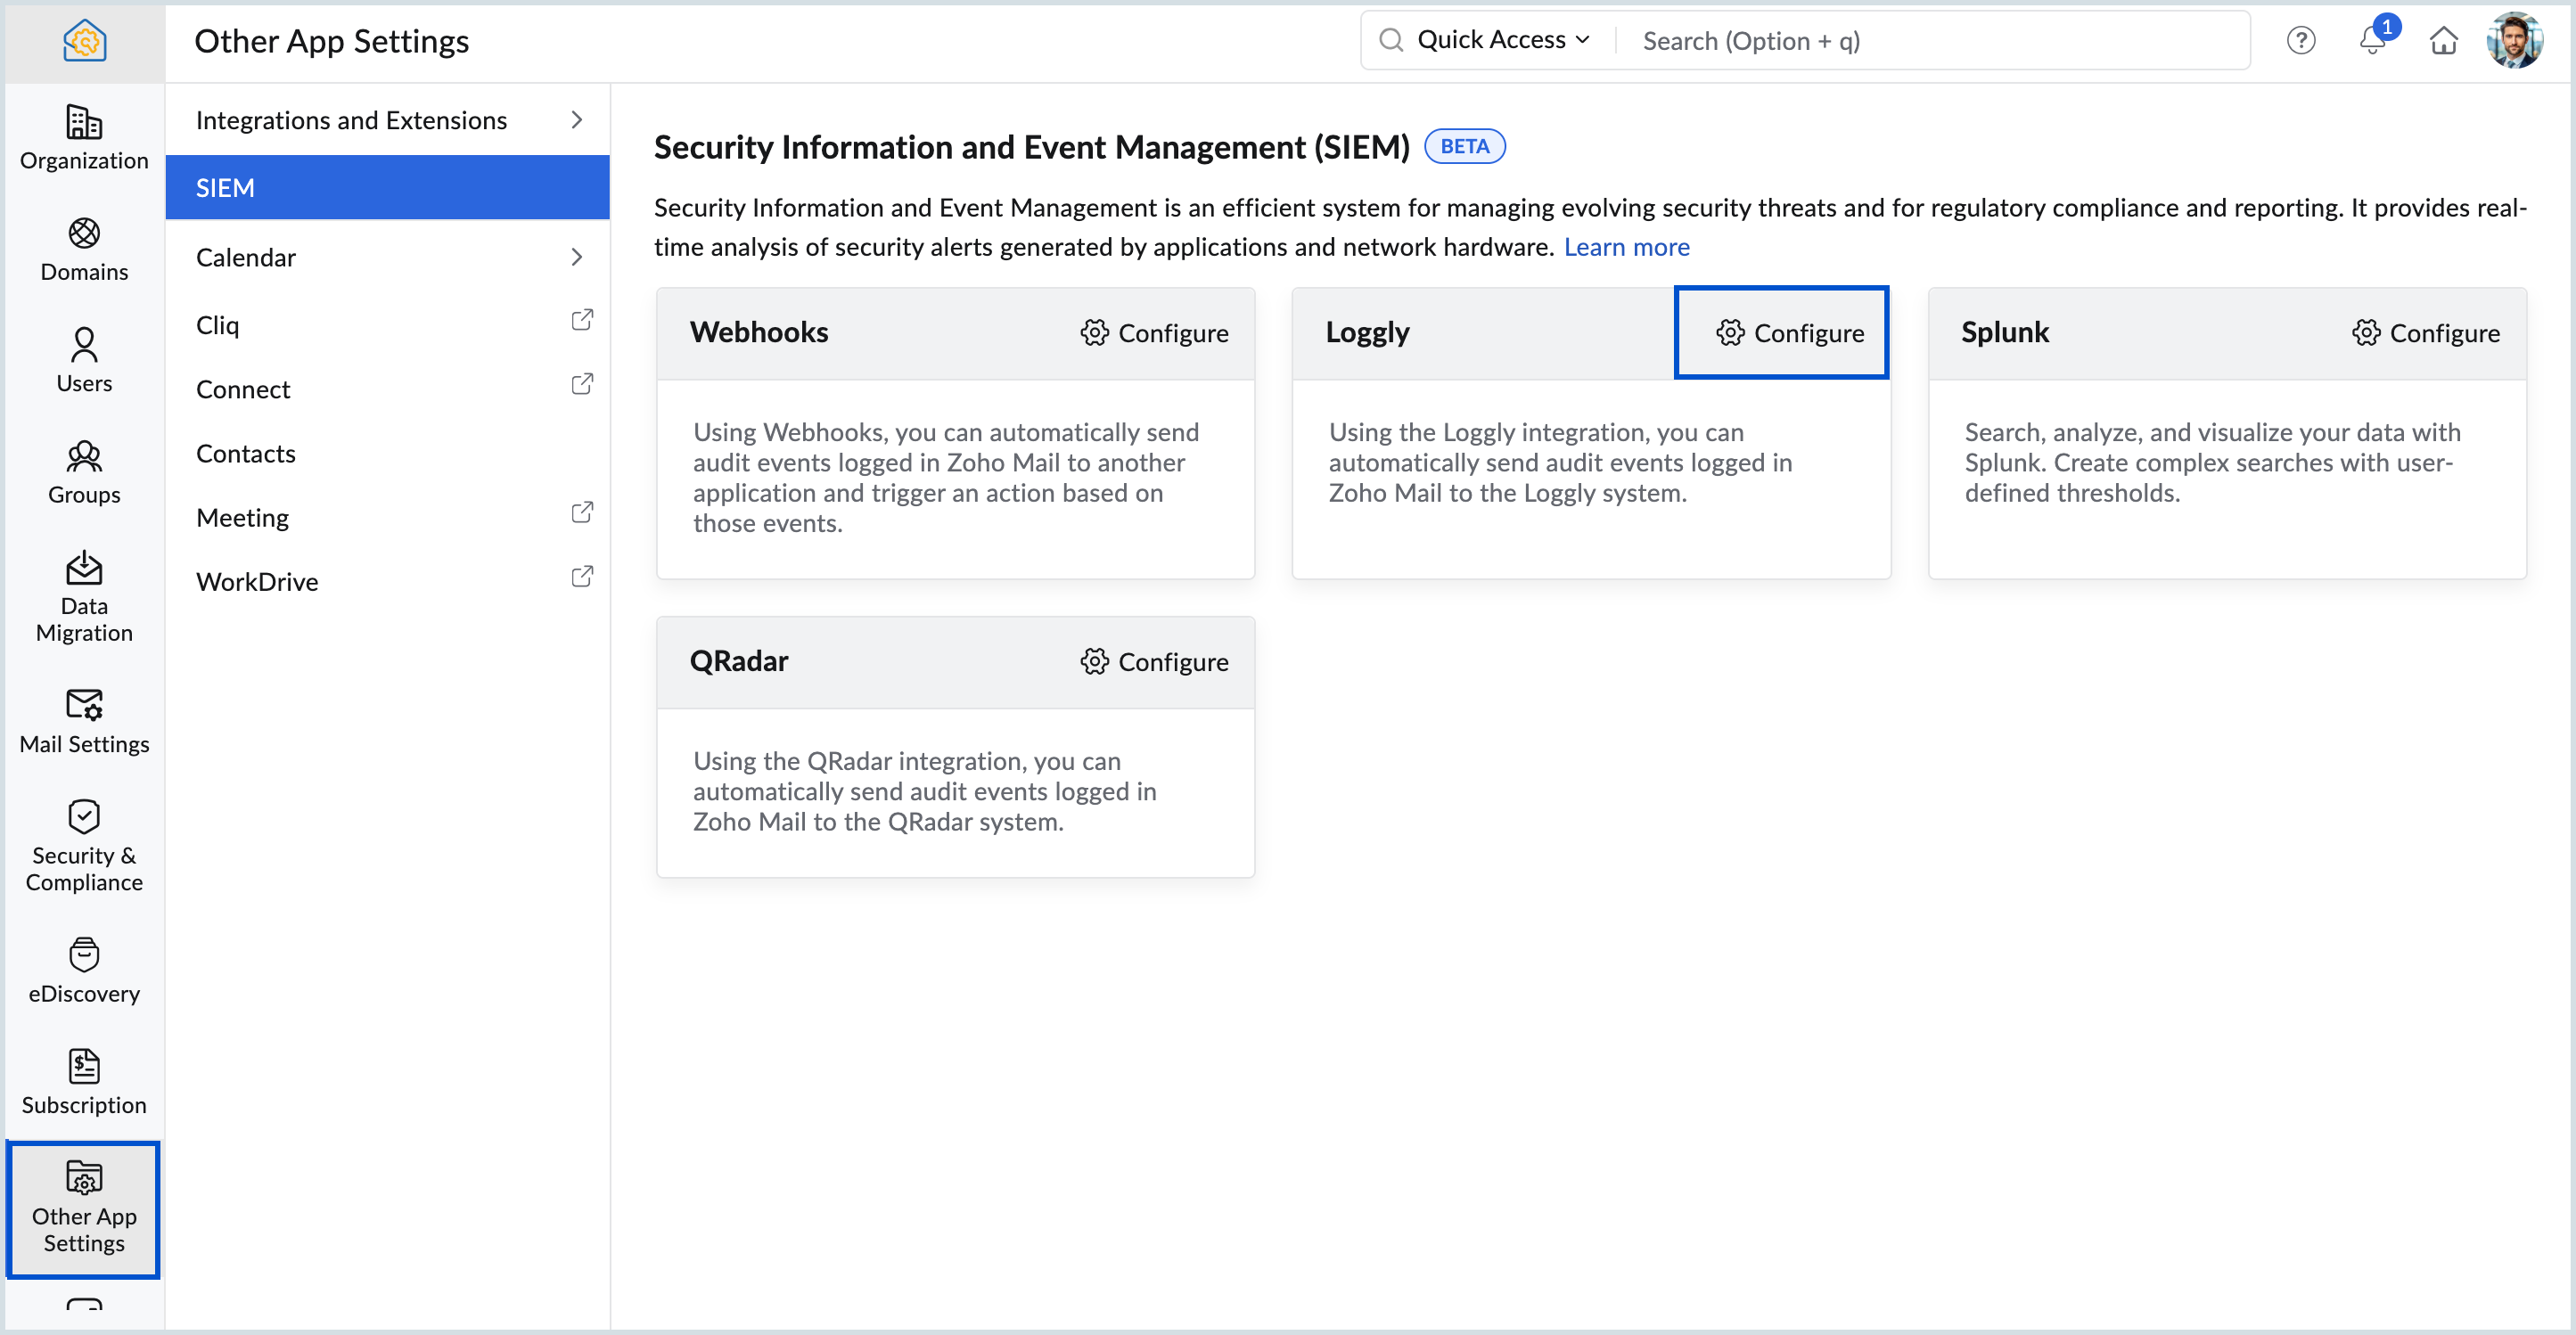
- Choose Other App Settings from the left menu and select SIEM.
- Navigate to Loggly and click Configure.
- Select the audit event categories in the Selected Categories field.
- Enter the Token (Customer token) copied from your Loggly account.
- Click the Add button.
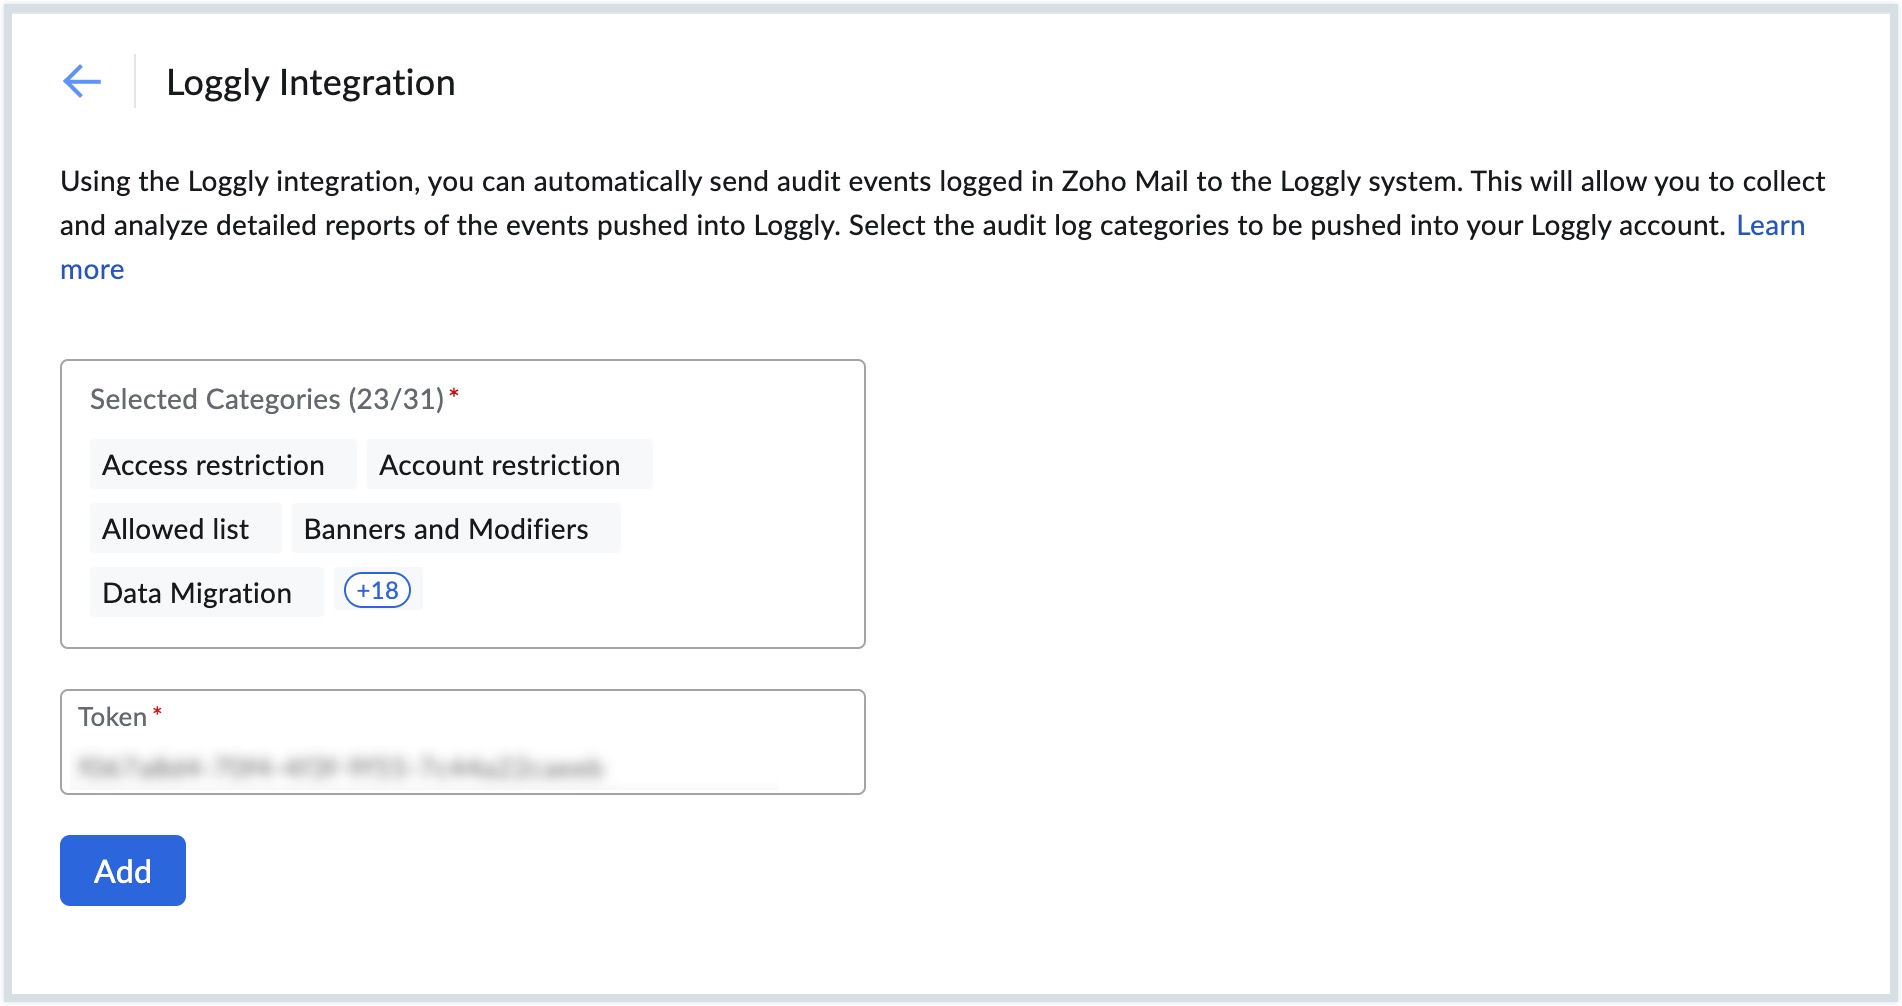
- To modify the audit event categories, add or remove the events in the Selected Categories field, enter the Customer Token again if needed and click Update.
- Enter the OTP sent to your Loggly account to save the modifications.
The categories that you selected get saved, and you can view the audit log data in your Loggly account.
QRadar
IBM QRadar is a network security management solution that collects, correlates, and analyzes real-time audit log data to identify and address security threats. It helps organizations manage their network security by providing real-time information and monitoring, alerting for offenses, and responding to potential network threats.
To integrate QRadar with Zoho Mail follow these steps:
Note:
Zoho Mail supports sending event logs from Admin Console to QRadar only through the HTTP Receiver protocol configuration, with a valid SSL certificate issued by a certificate authority (CA). For more information, click here.
- Log in to your organization's QRadar account.
- Navigate to Log Source Management App to create a new HTTP Receiver log source.
- Create a new HTTP Receiver protocol log source in the New log source section.
- Ensure that your QRadar account has an open inbound Port 12469 for seamless reception of data.
Once the HTTP Receiver Log Source has been configured and deployed in QRadar, you can configure QRadar settings in Zoho Mail Admin Console.
Configure Qradar in Zoho Mail
Follow these steps to configure QRadar in Zoho Mail:
- Log in to Zoho Mail Admin Console.
- Choose Other App Settings from the left menu and select SIEM.
- Navigate to QRadar and click Configure.
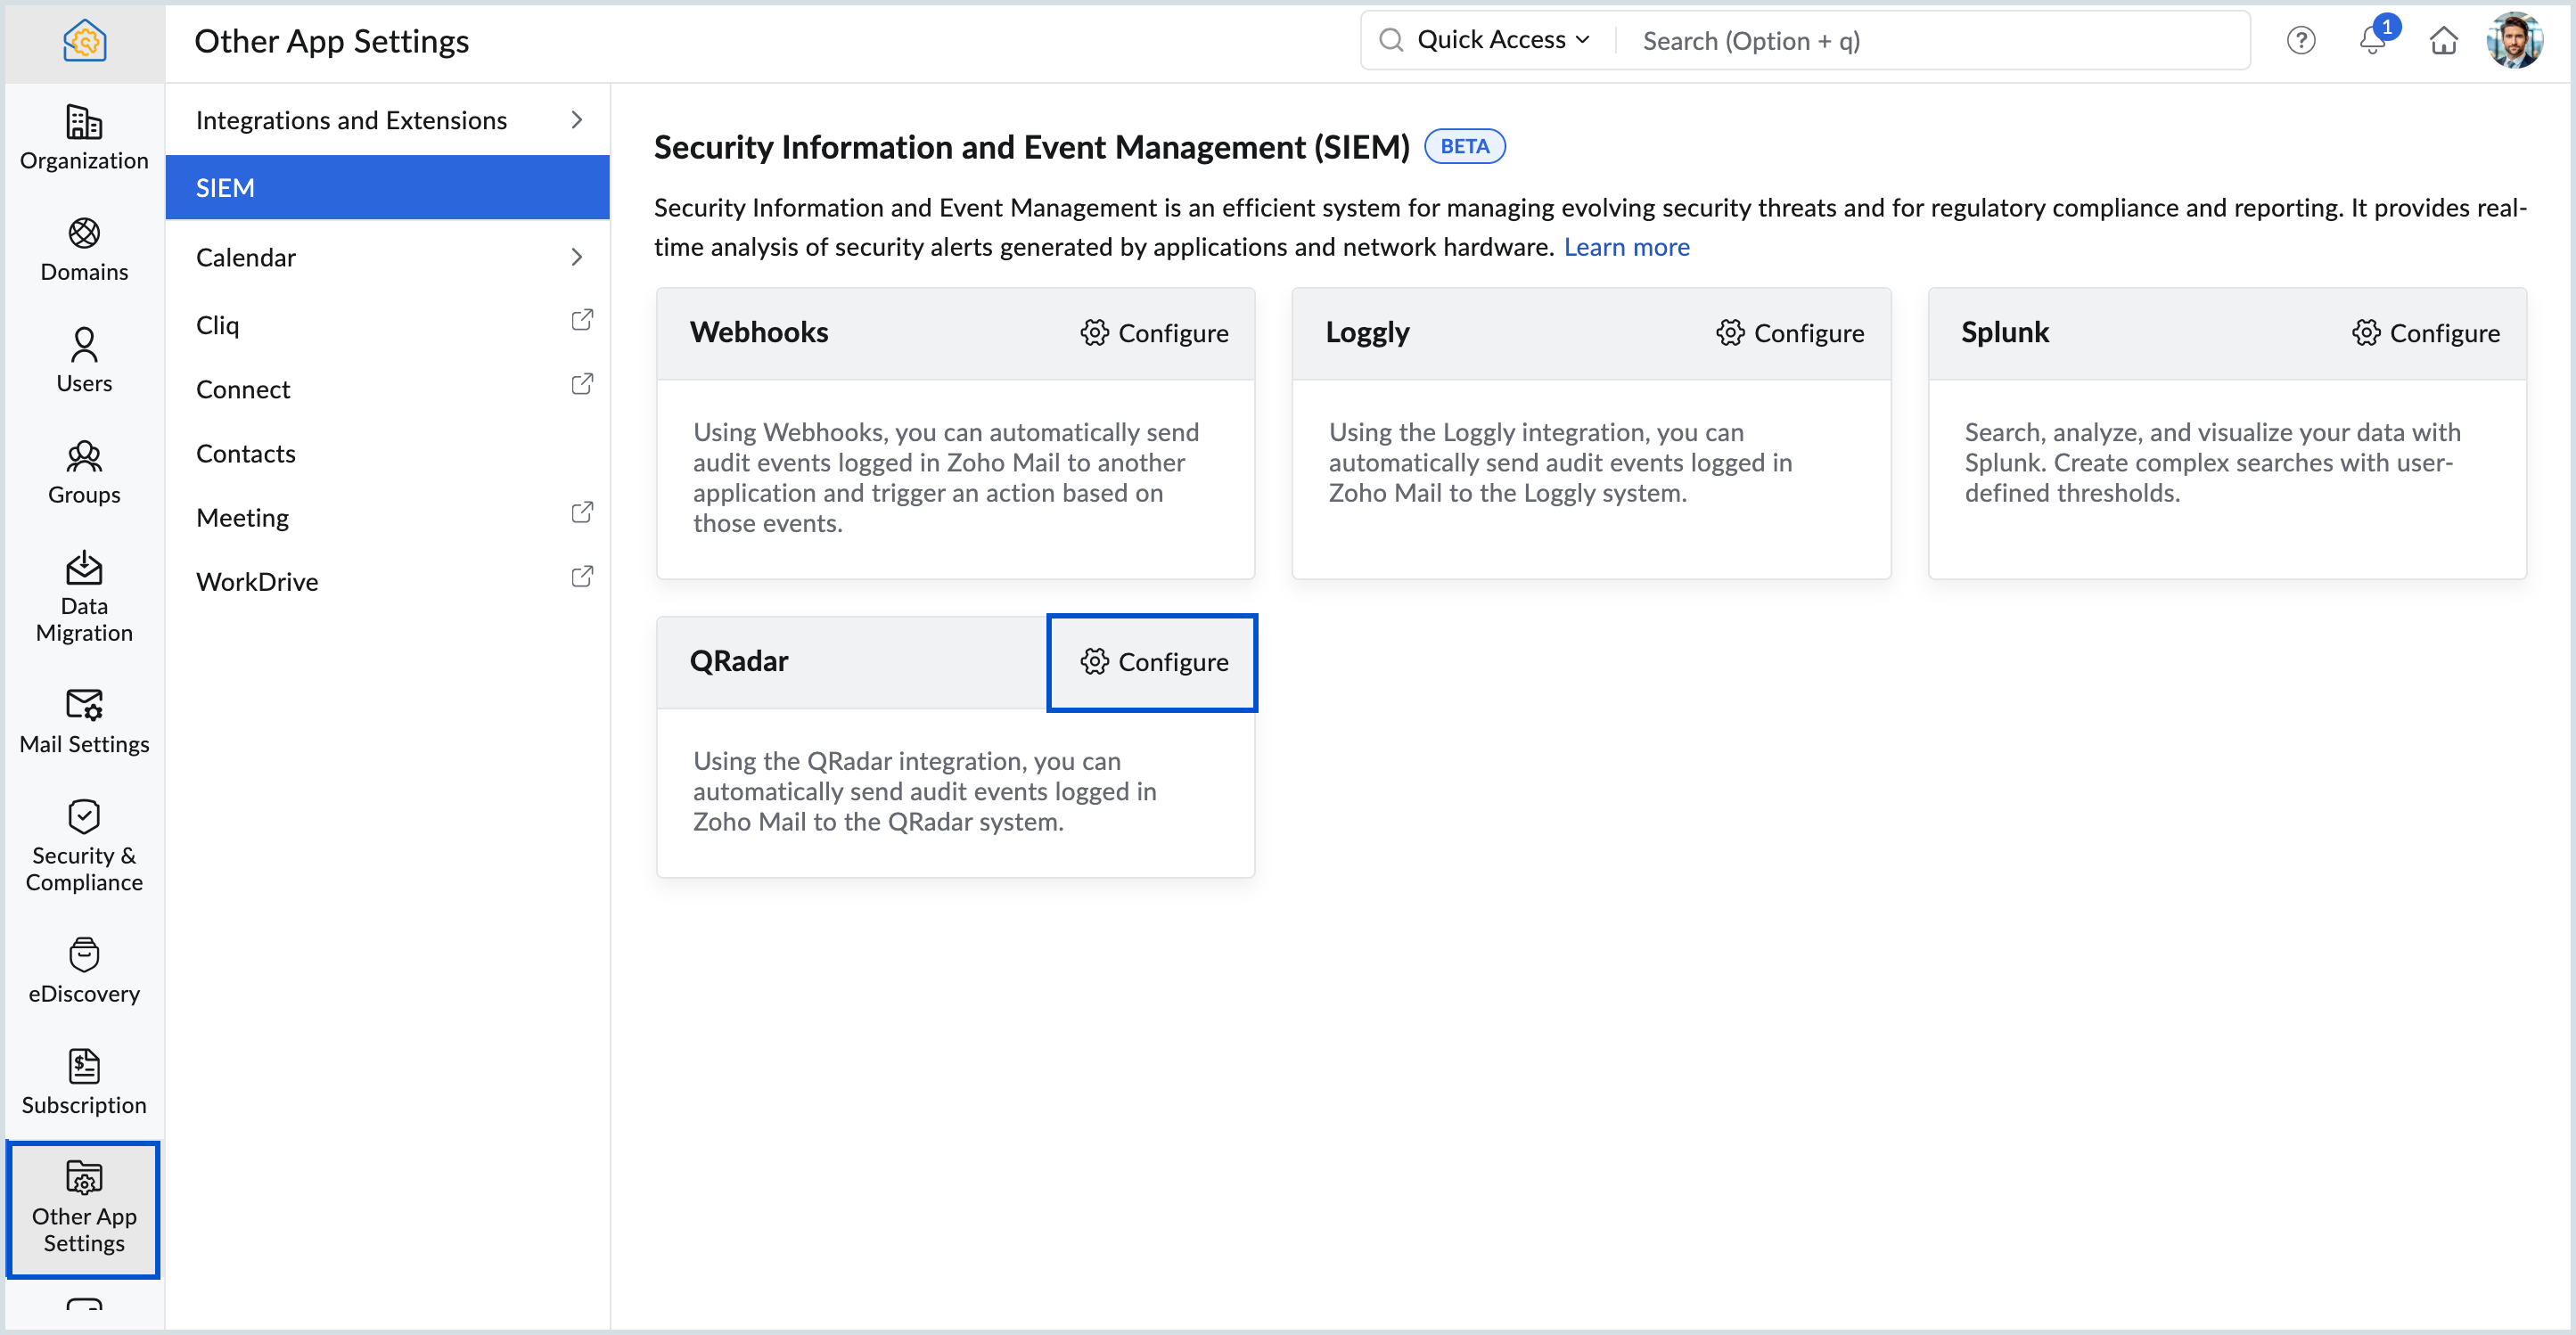
- Select the audit event categories in the Selected Categories field.
- Enter the Https Receiver Protocol Configuration URL from your QRadar account in the URL field.
- Click the Add button.
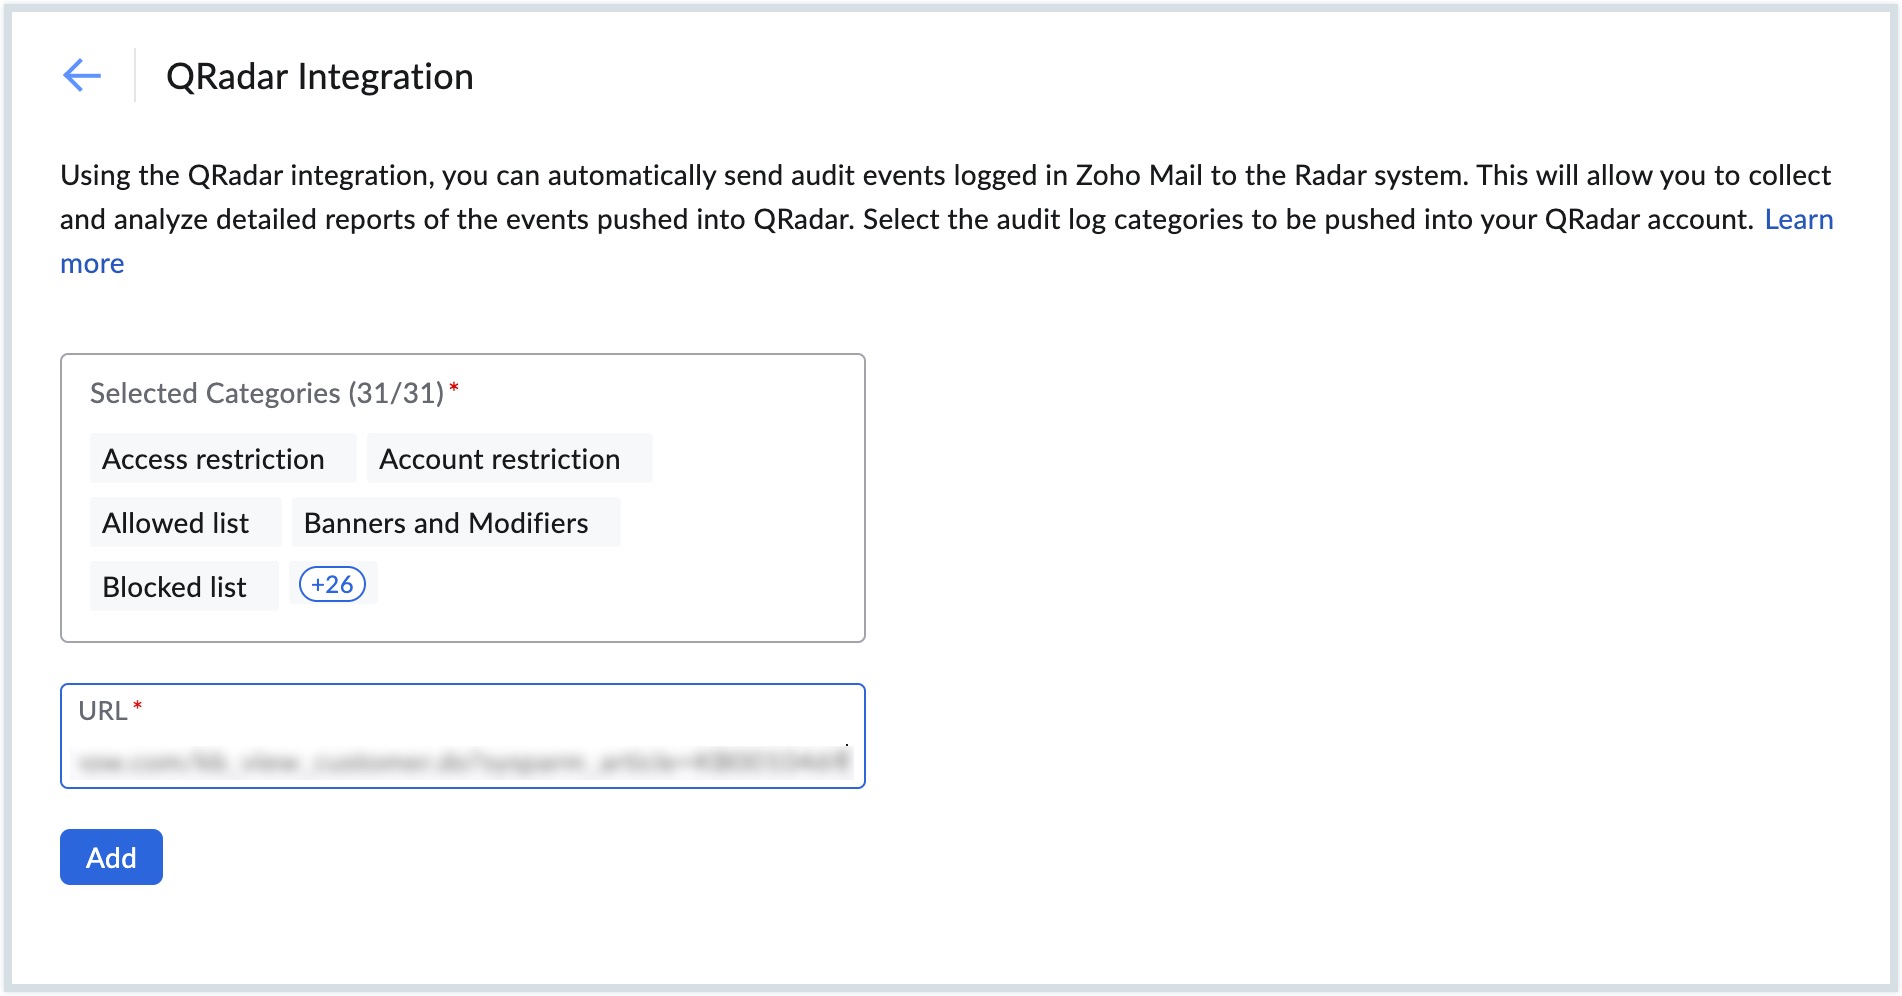
- To modify the audit event categories, add or remove the events in the Selected Categories field, and click Update.
- Enter the OTP sent to your QRadar account to save the modifications. Follow the below steps to fetch OTP from QRadar account.
- Log in to your QRadar account.
- Navigate to the Log Activity tab in the top pane.
- Select Add Filter from the top pane of Log Activity tab.
- Fill in the Parameter as Log Source[Indexed], Operator as Equals and the desired Value in the Add Filter dialog box and click Add Filter.
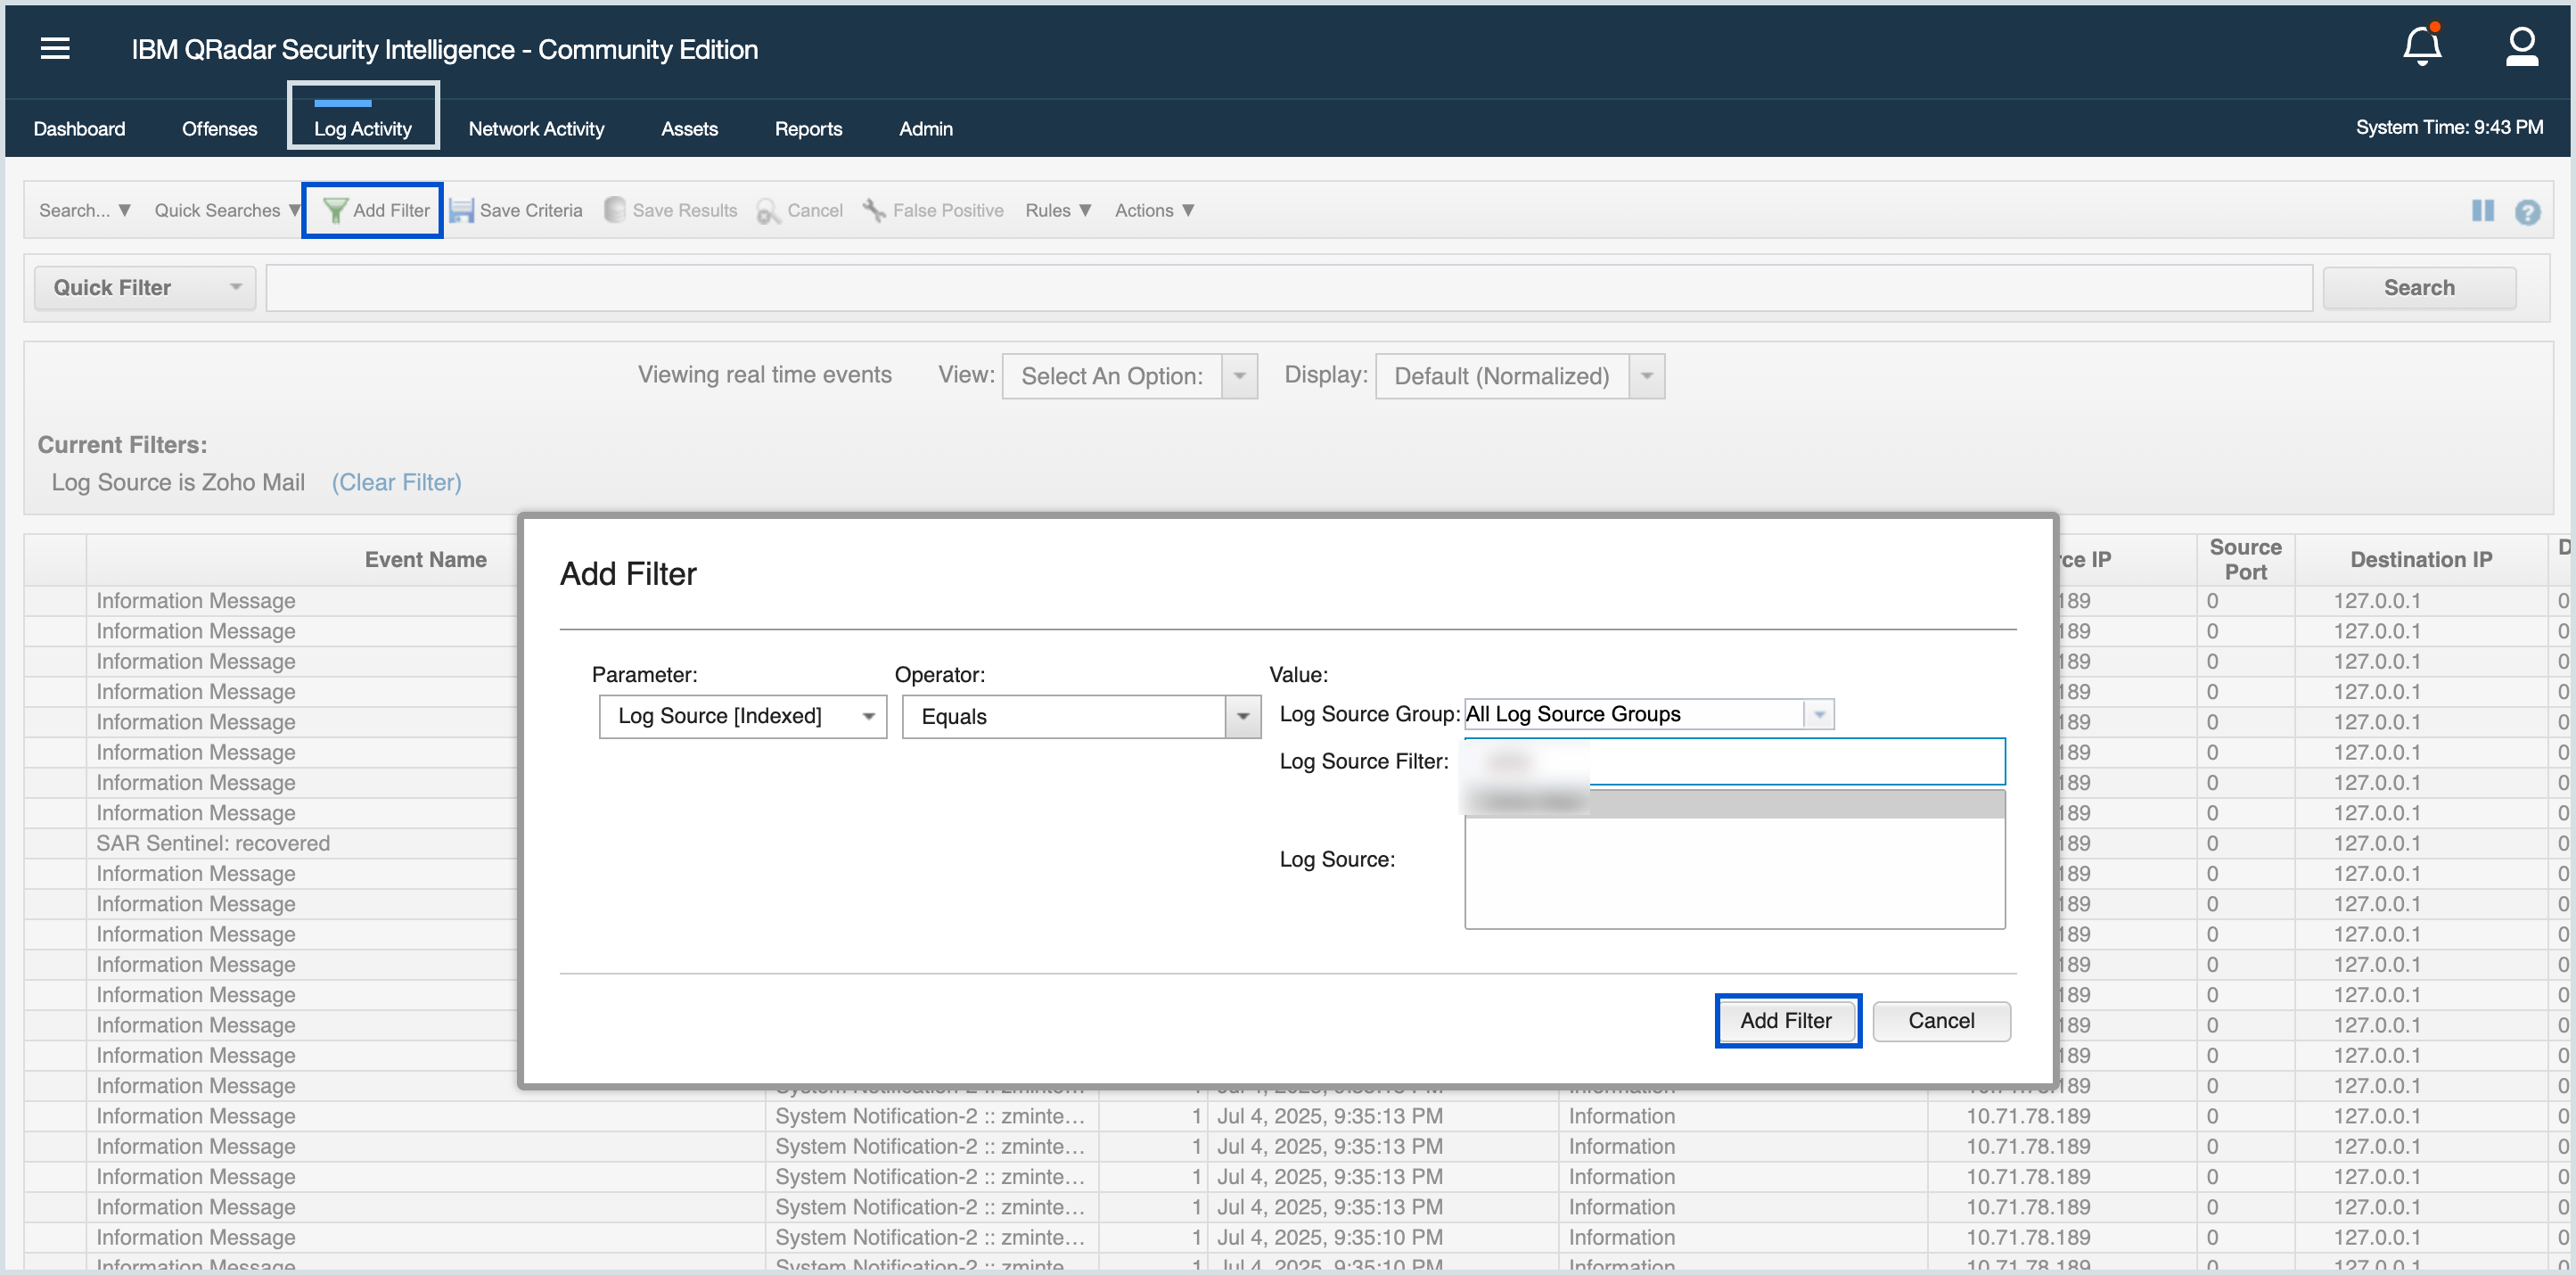
- Select the View (time interval) and Display (Normalized or Raw Events) type from the drop-down provided. The log details with Event Name, Log Source, Time, Category, Port, Source and Destination IP will be displayed.
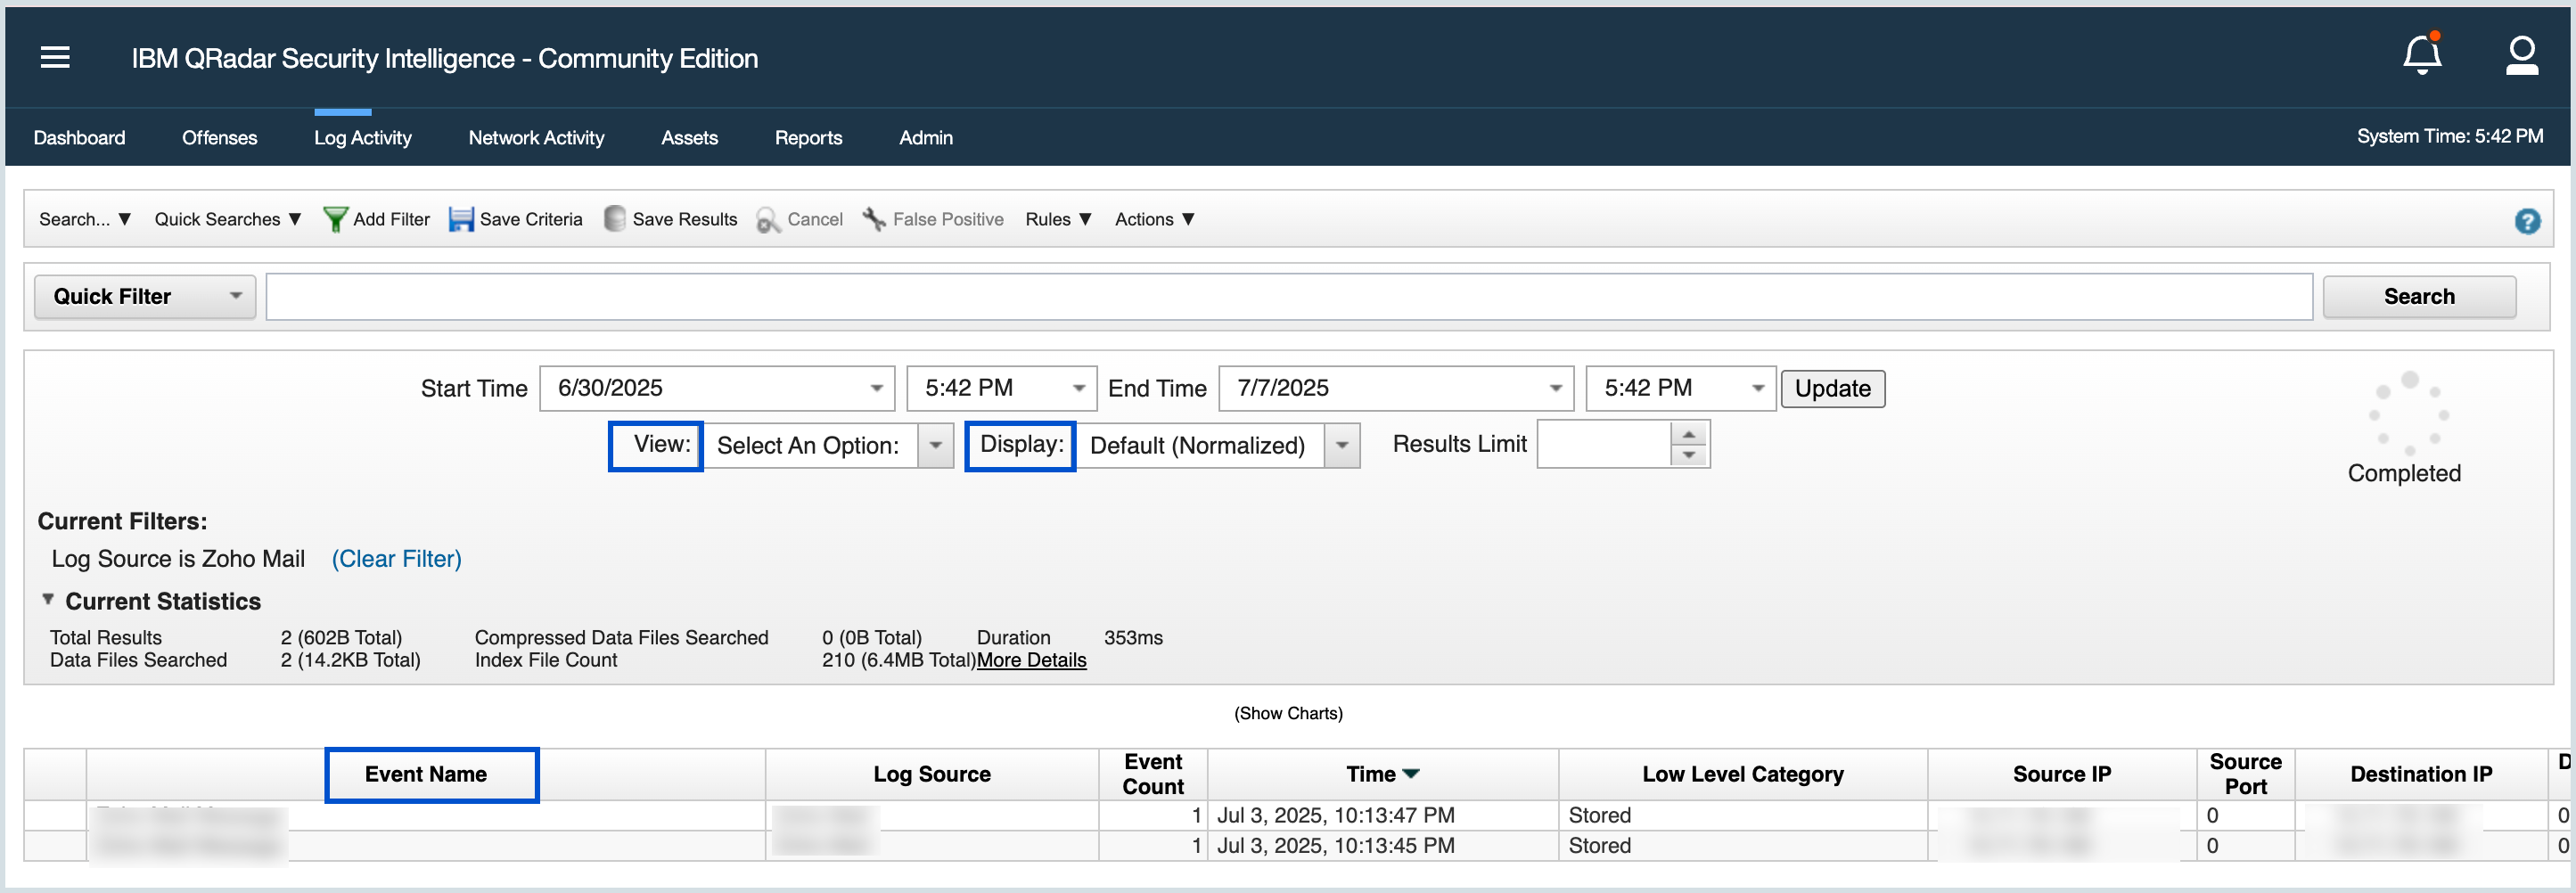
- Double-click on the particular event name, for which you need to fetch OTP, from the displayed list to view the complete log.
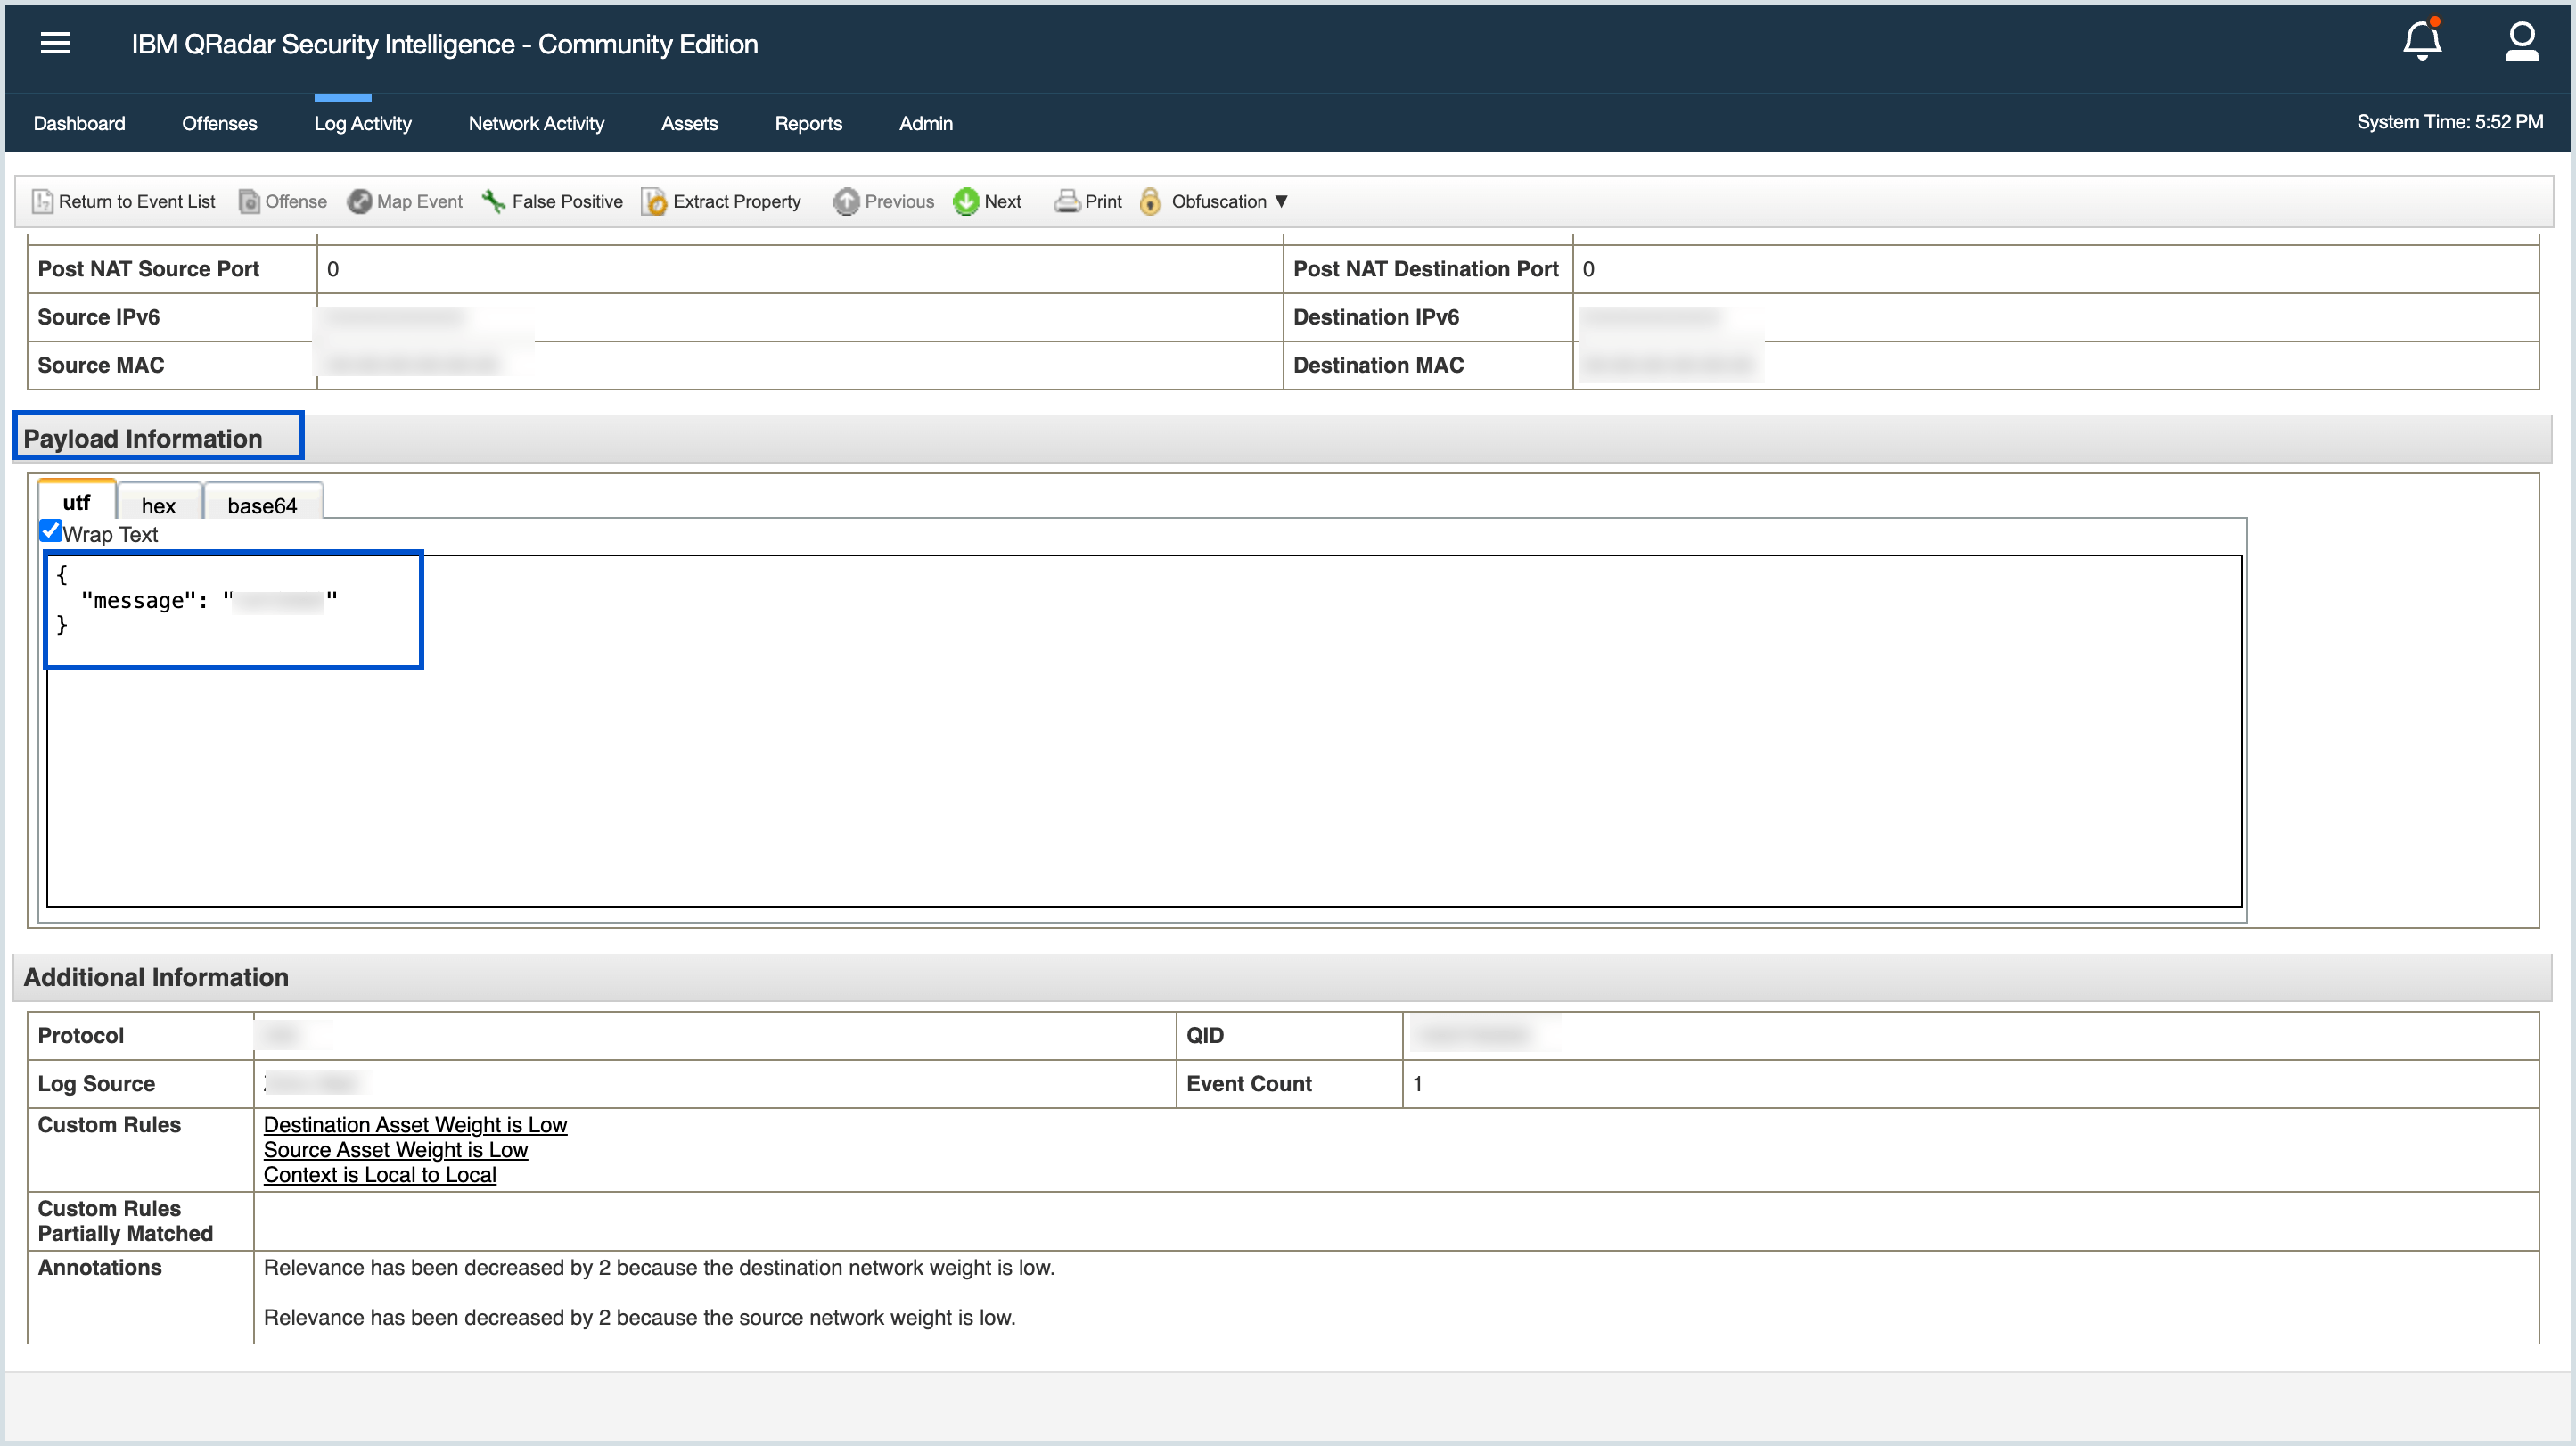
- Scroll-down to the Payload Information section of the log to view the OTP sent.
- You can view the 7 digit OTP in the below format:
{
"message": "*******"
}
Note:
The screenshots above have been taken from the QRadar version 7.3.
The categories that you selected get saved and can be viewed in your QRadar account.
Webhooks
In Zoho Mail, Webhooks provide a flexible and adaptable alternative if the SIEM tool you are attempting to integrate is not directly supported, to ensure seamless event data transmission and integration with the SIEM tool. This adaptability allows you to maintain effective log management and event monitoring, even when dealing with SIEM tools that may not have native support. Our webhooks serve as a bridge, enabling you to send event data from Admin Console to your preferred SIEM infrastructure.
Follow the below steps to configure Webhooks:
- Log in to Zoho Mail Admin Console.
- Choose Other App Settings from the left menu and select SIEM.
- Navigate to Webhooks and click Configure.

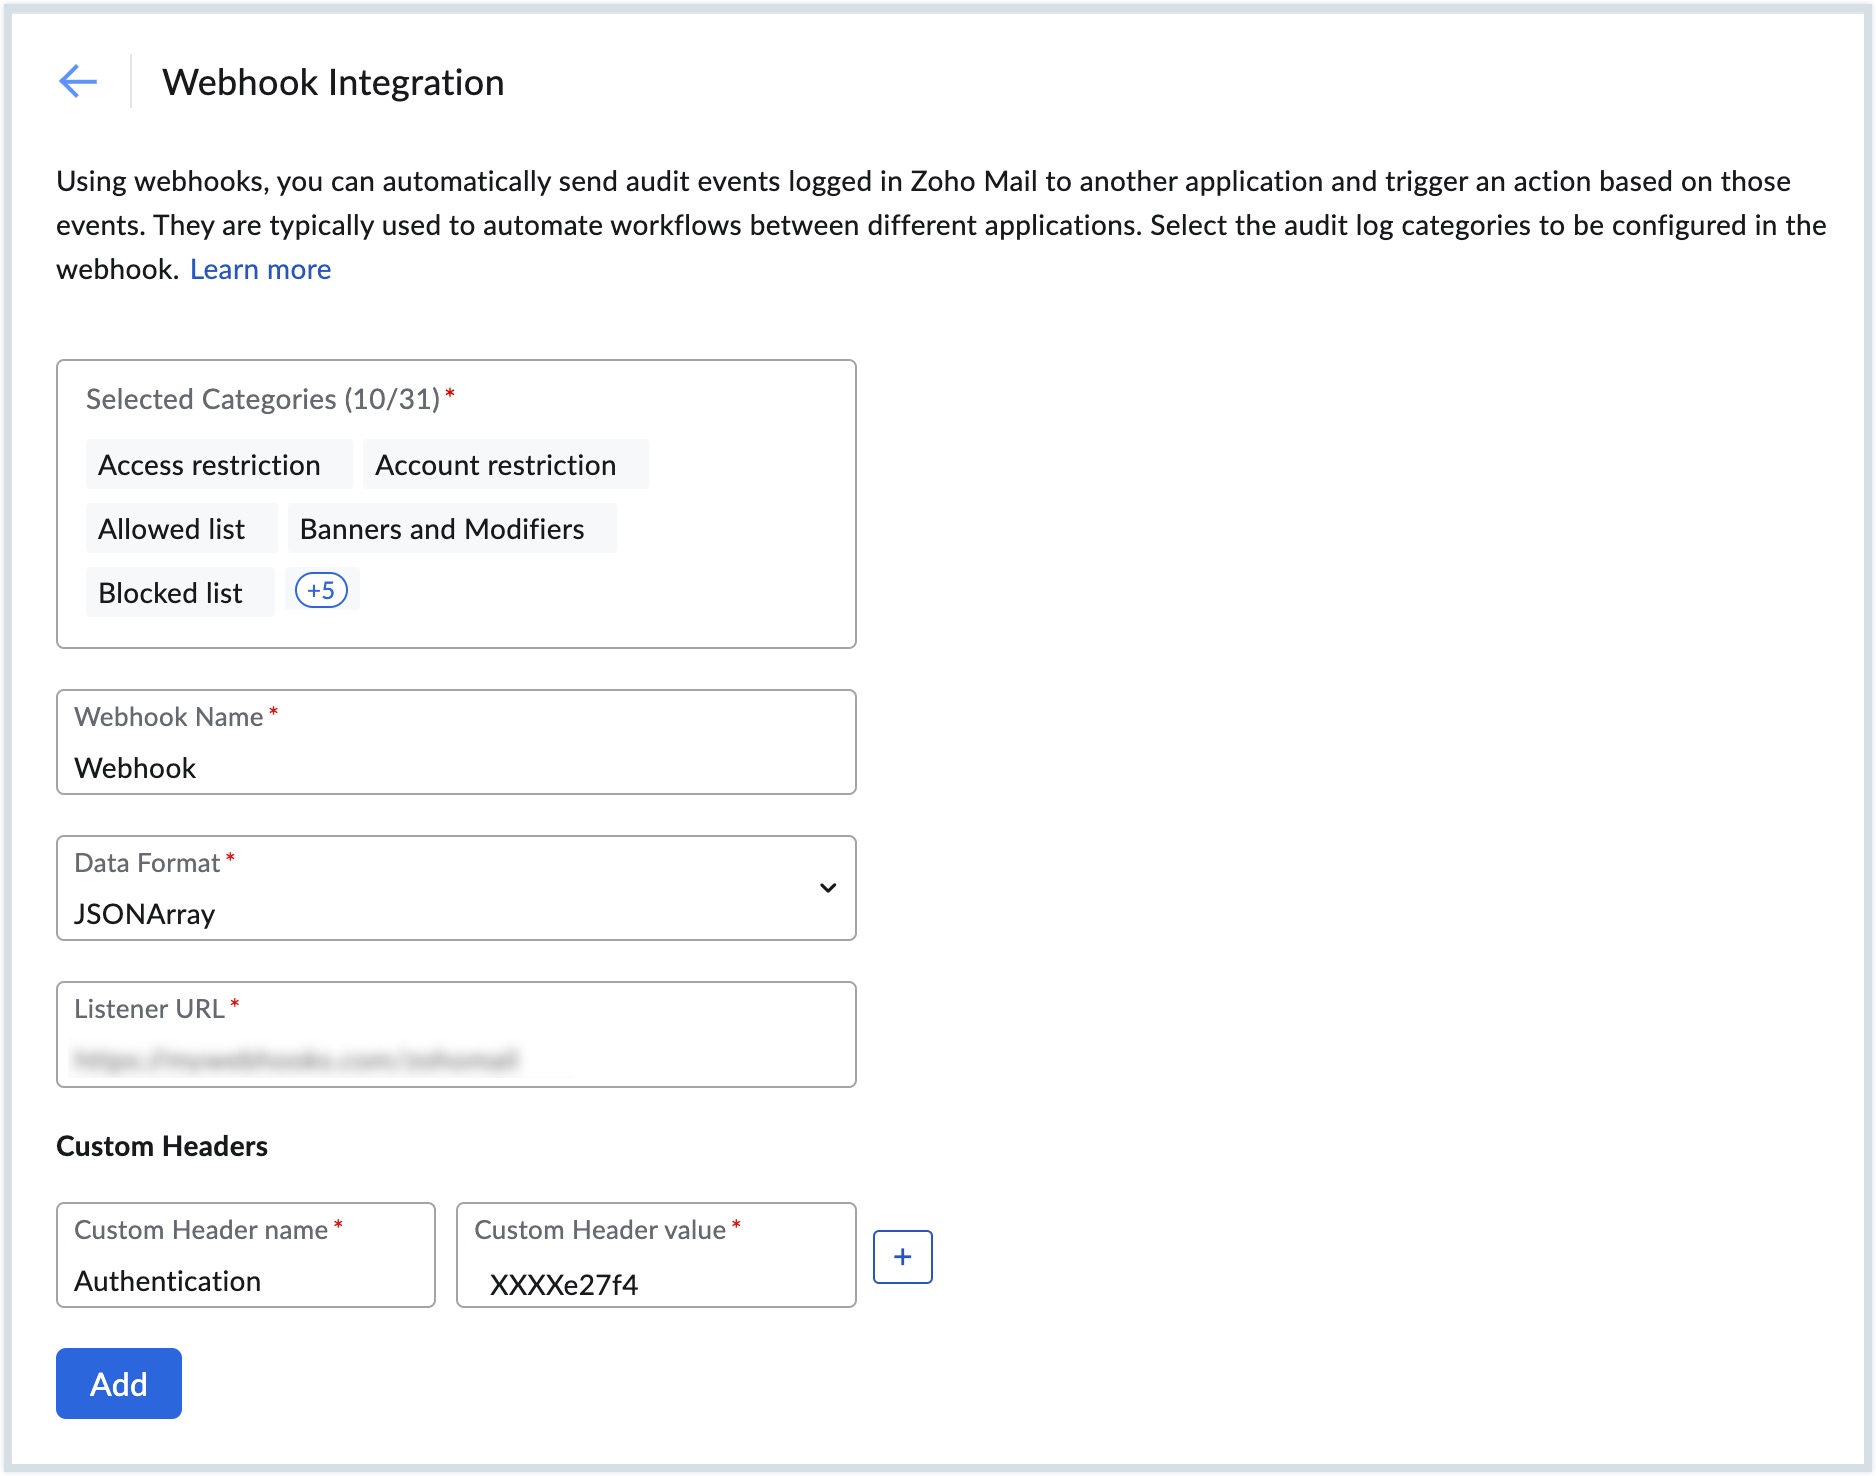
- Select the audit event categories in the Selected Categories field.
- Enter a Name for the webhook.
- Select the Data Format from the drop-down.
- JSONARRAY
- NDJSON
- Enter the webhook URL that will receive the incoming data in the Listener URL field.
- Enter the required Custom Header name and Custom Header value from the SIEM tool in the Custom Headers field.
- Click the Add button.
- To modify the audit event categories, add or remove the events in the Selected Categories field and click Update.
- Enter the OTP sent to your configured application to save the modifications.
Manage SIEM Configurations
Enable/ Disable Integration
Based on your organization's needs, you can disable an Integration whenever it is not needed. Navigate to your preferred Integration page, and select the Integration toggle button, and click the Disable button. This allows you to enable the same configuration at a later stage.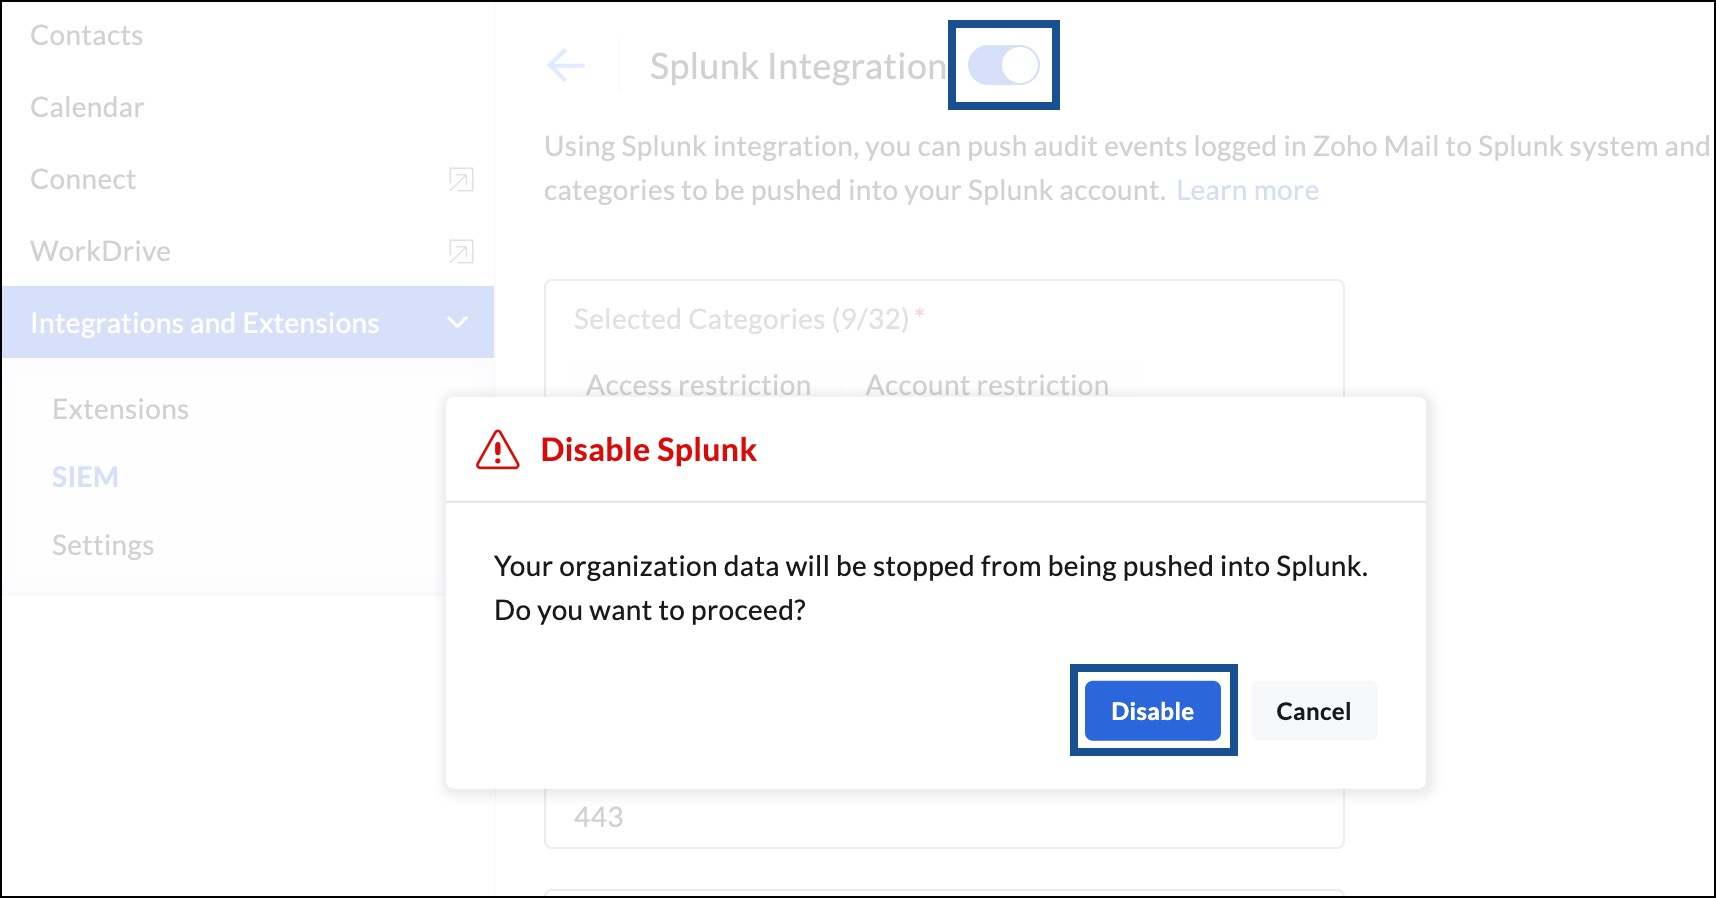
Remove Configuration
If you no longer need an configuration, select Remove Configuration in the respective Integration page and click the Remove button in the pop-up that appears.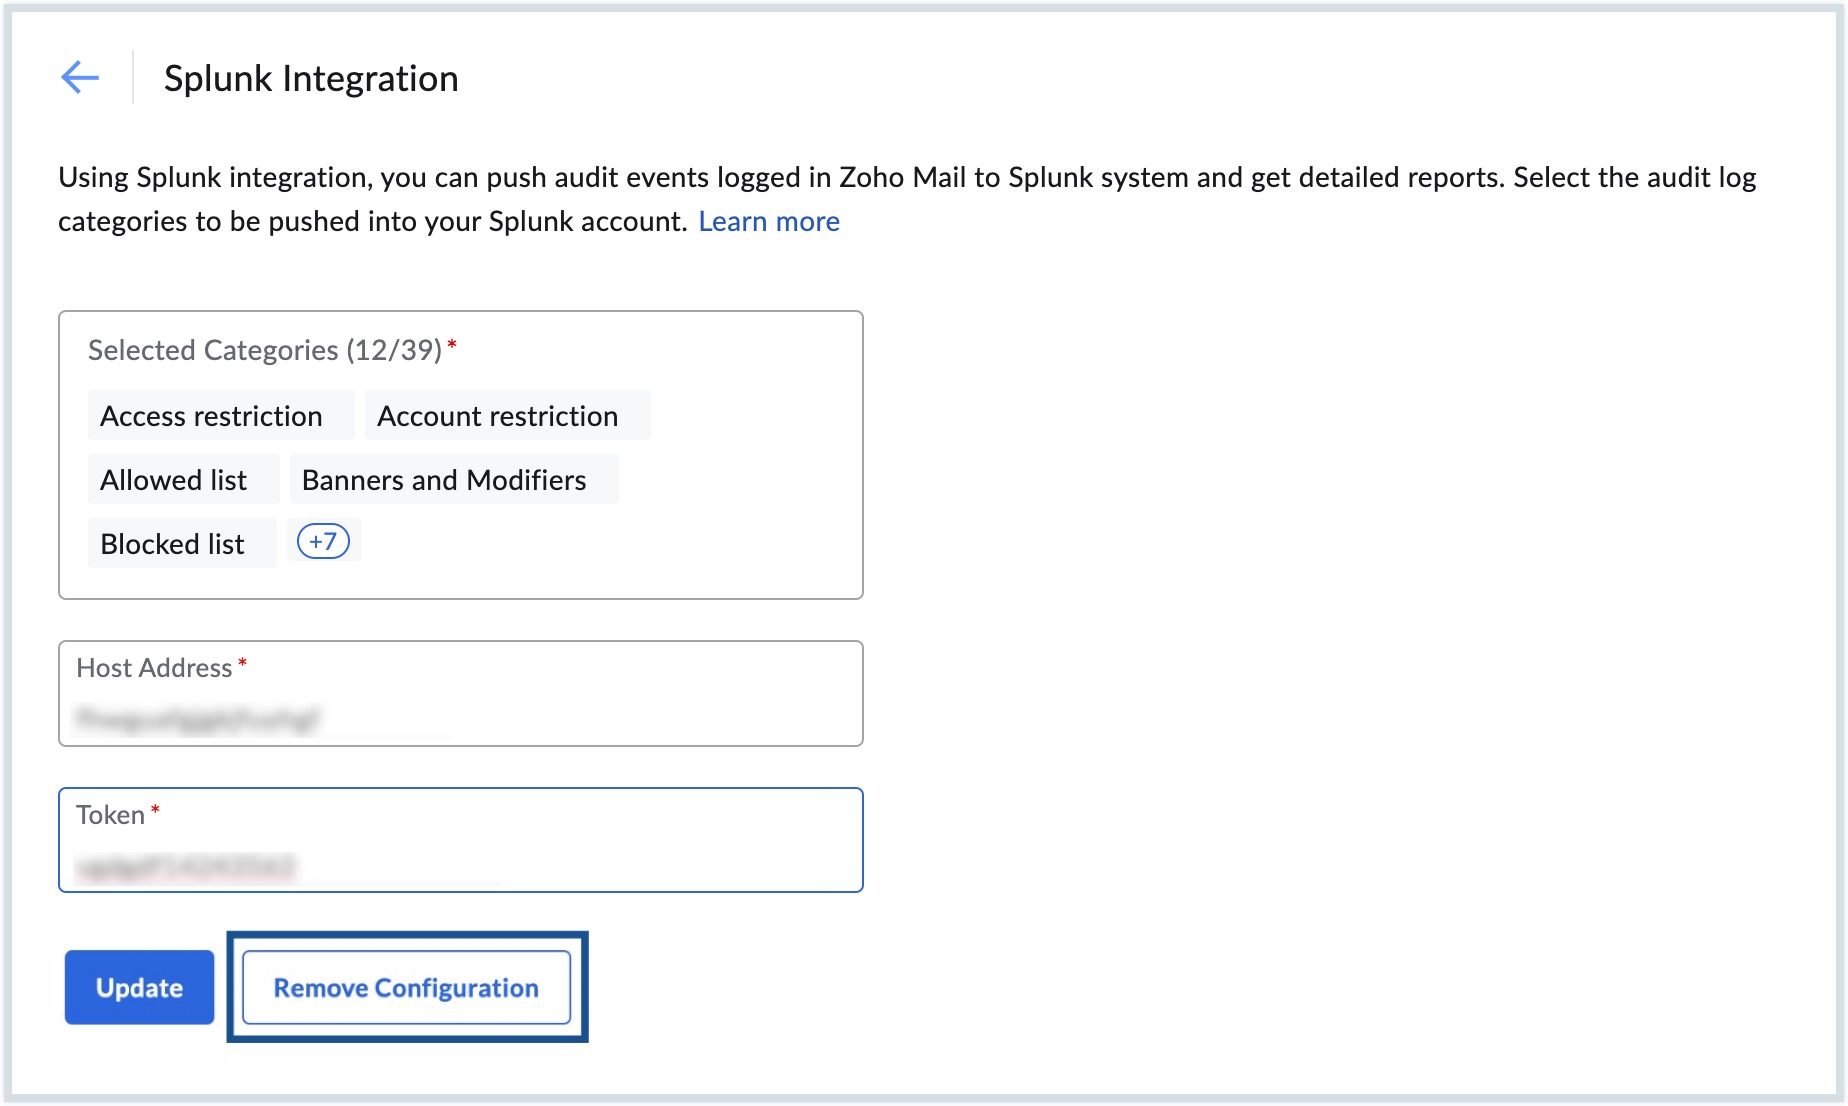
Note:
- Be cautious when you configure your SIEM applications in Zoho Mail. By doing this, you agree to share your organization's data from Admin Console with other applications.
- The SIEM Integration is introduced as a BETA version and will be available for organizations that use one of Zoho Mail's paid plans.