User Spam Control Settings In Zoho Mail
Every inbox is different, and so are your spam filtering needs. Zoho Mail lets you personalize spam filtering using Anti-Spam Lists, helping trusted emails reach your inbox while unwanted emails stay out.
You can allow or block specific email addresses and domains, giving you greater control over how incoming emails are handled. By maintaining these lists, you can reduce false spam classifications and improve the accuracy of spam filtering for your mailbox.
What is Allowed list?
The Allowlist contains trusted email addresses and domains that you want to receive emails from. When you add an email address or domain to the Allowlist, emails from those senders are given higher priority during spam evaluation, making them more likely to be delivered to your inbox. You can add emails and domain to Allowlist if you want to scrutinize who sends you emails.
Note
- Allowlist does not 100% guarantee Inbox delivery.
- In cases of spam check failures, emails from addresses present in the Allowlist might be marked as spam and can be delivered to the Spam folder.
What is Blocklist?
Adding emails and Domains to Blocklist helps you prevent unwanted emails from specific email addresses or domains. Once a sender is added to the Blocklist, future emails from that sender are automatically filtered according to your spam settings, reducing unwanted or recurring emails in your inbox.
You can use the Blocked List to stop emails from persistent senders, promotional campaigns, or domains you do not trust. If you no longer want to block a sender, you can remove the email address or domain from the Blocked List at any time.
How to add email address or Domains to Allowlist/Blocklist?
- Login to Zoho Mail
- Go to Settings
- Navigate to Anti-Spam List
- Click on the Email Address tab and then click on Allowlist/Blocklist Emails if you want to add email addresses to the Allowlist/Blocklist.
- To allow an email address, click the Add option above the Allowlist email field.
- To block an email address, click the Add option above the Blocklist email field.
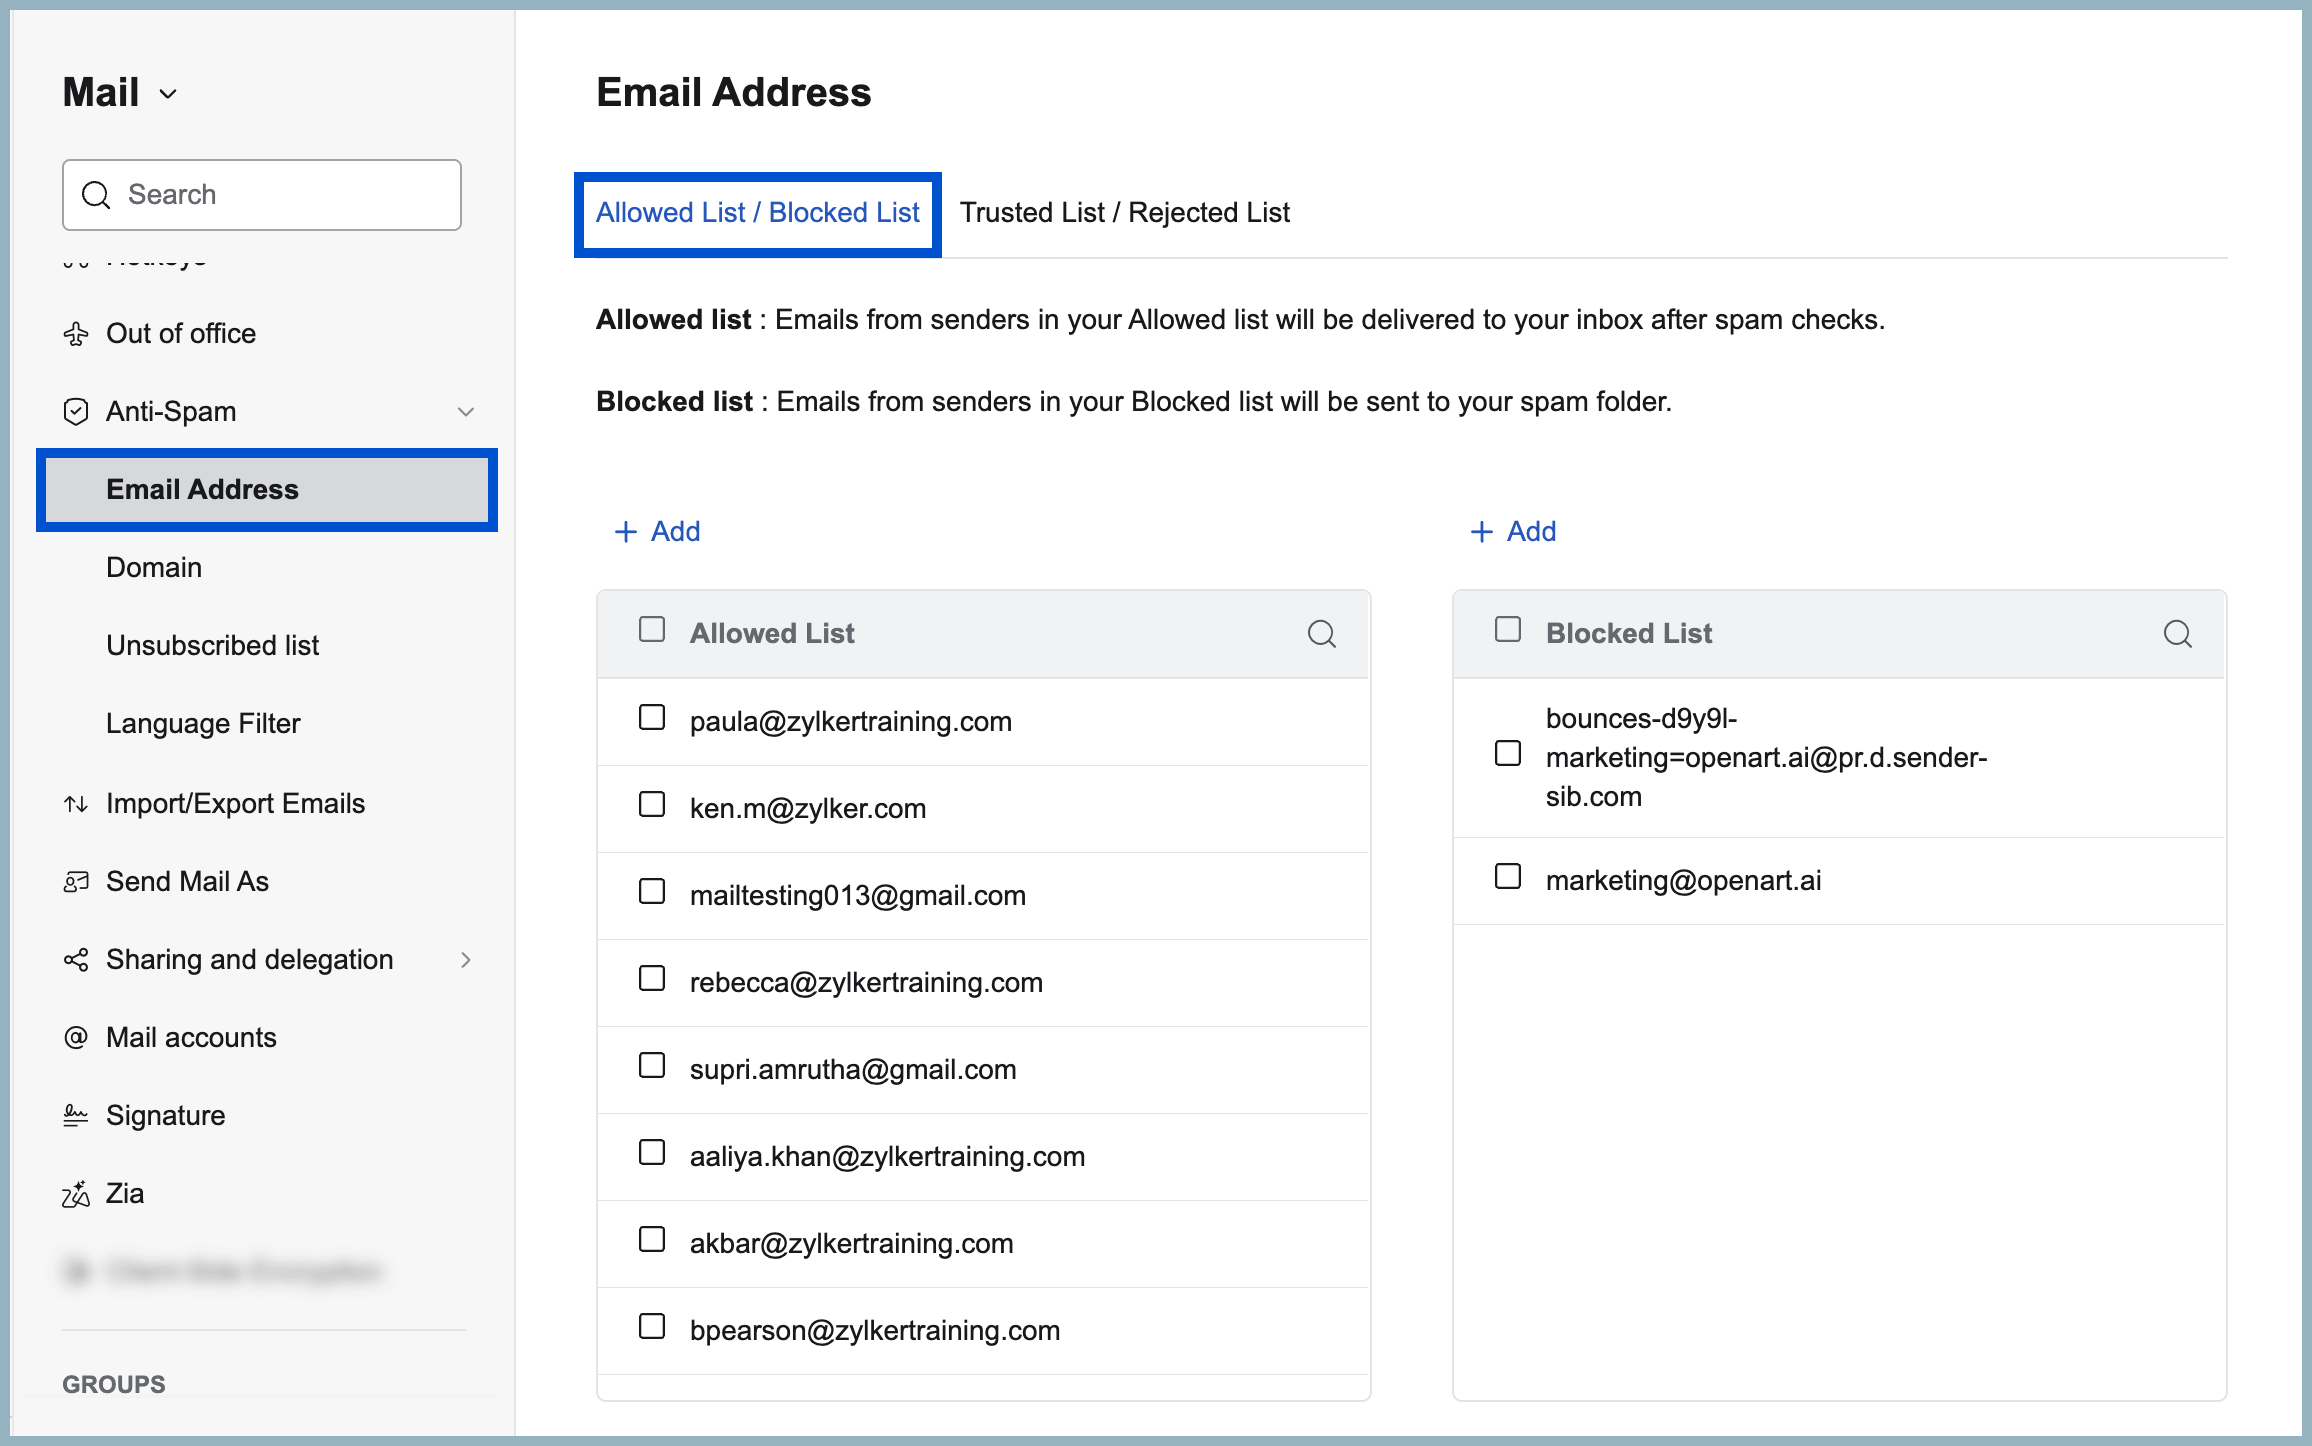
- Click on the Domain tab from the left pane if you wish to add a domain to the Allowlist/Blocklist.
- To allow emails from a domain, click the Add option above the Allowlist Domain field.
- To block emails from a domain, click the Add option above the Blocklist Domain field.
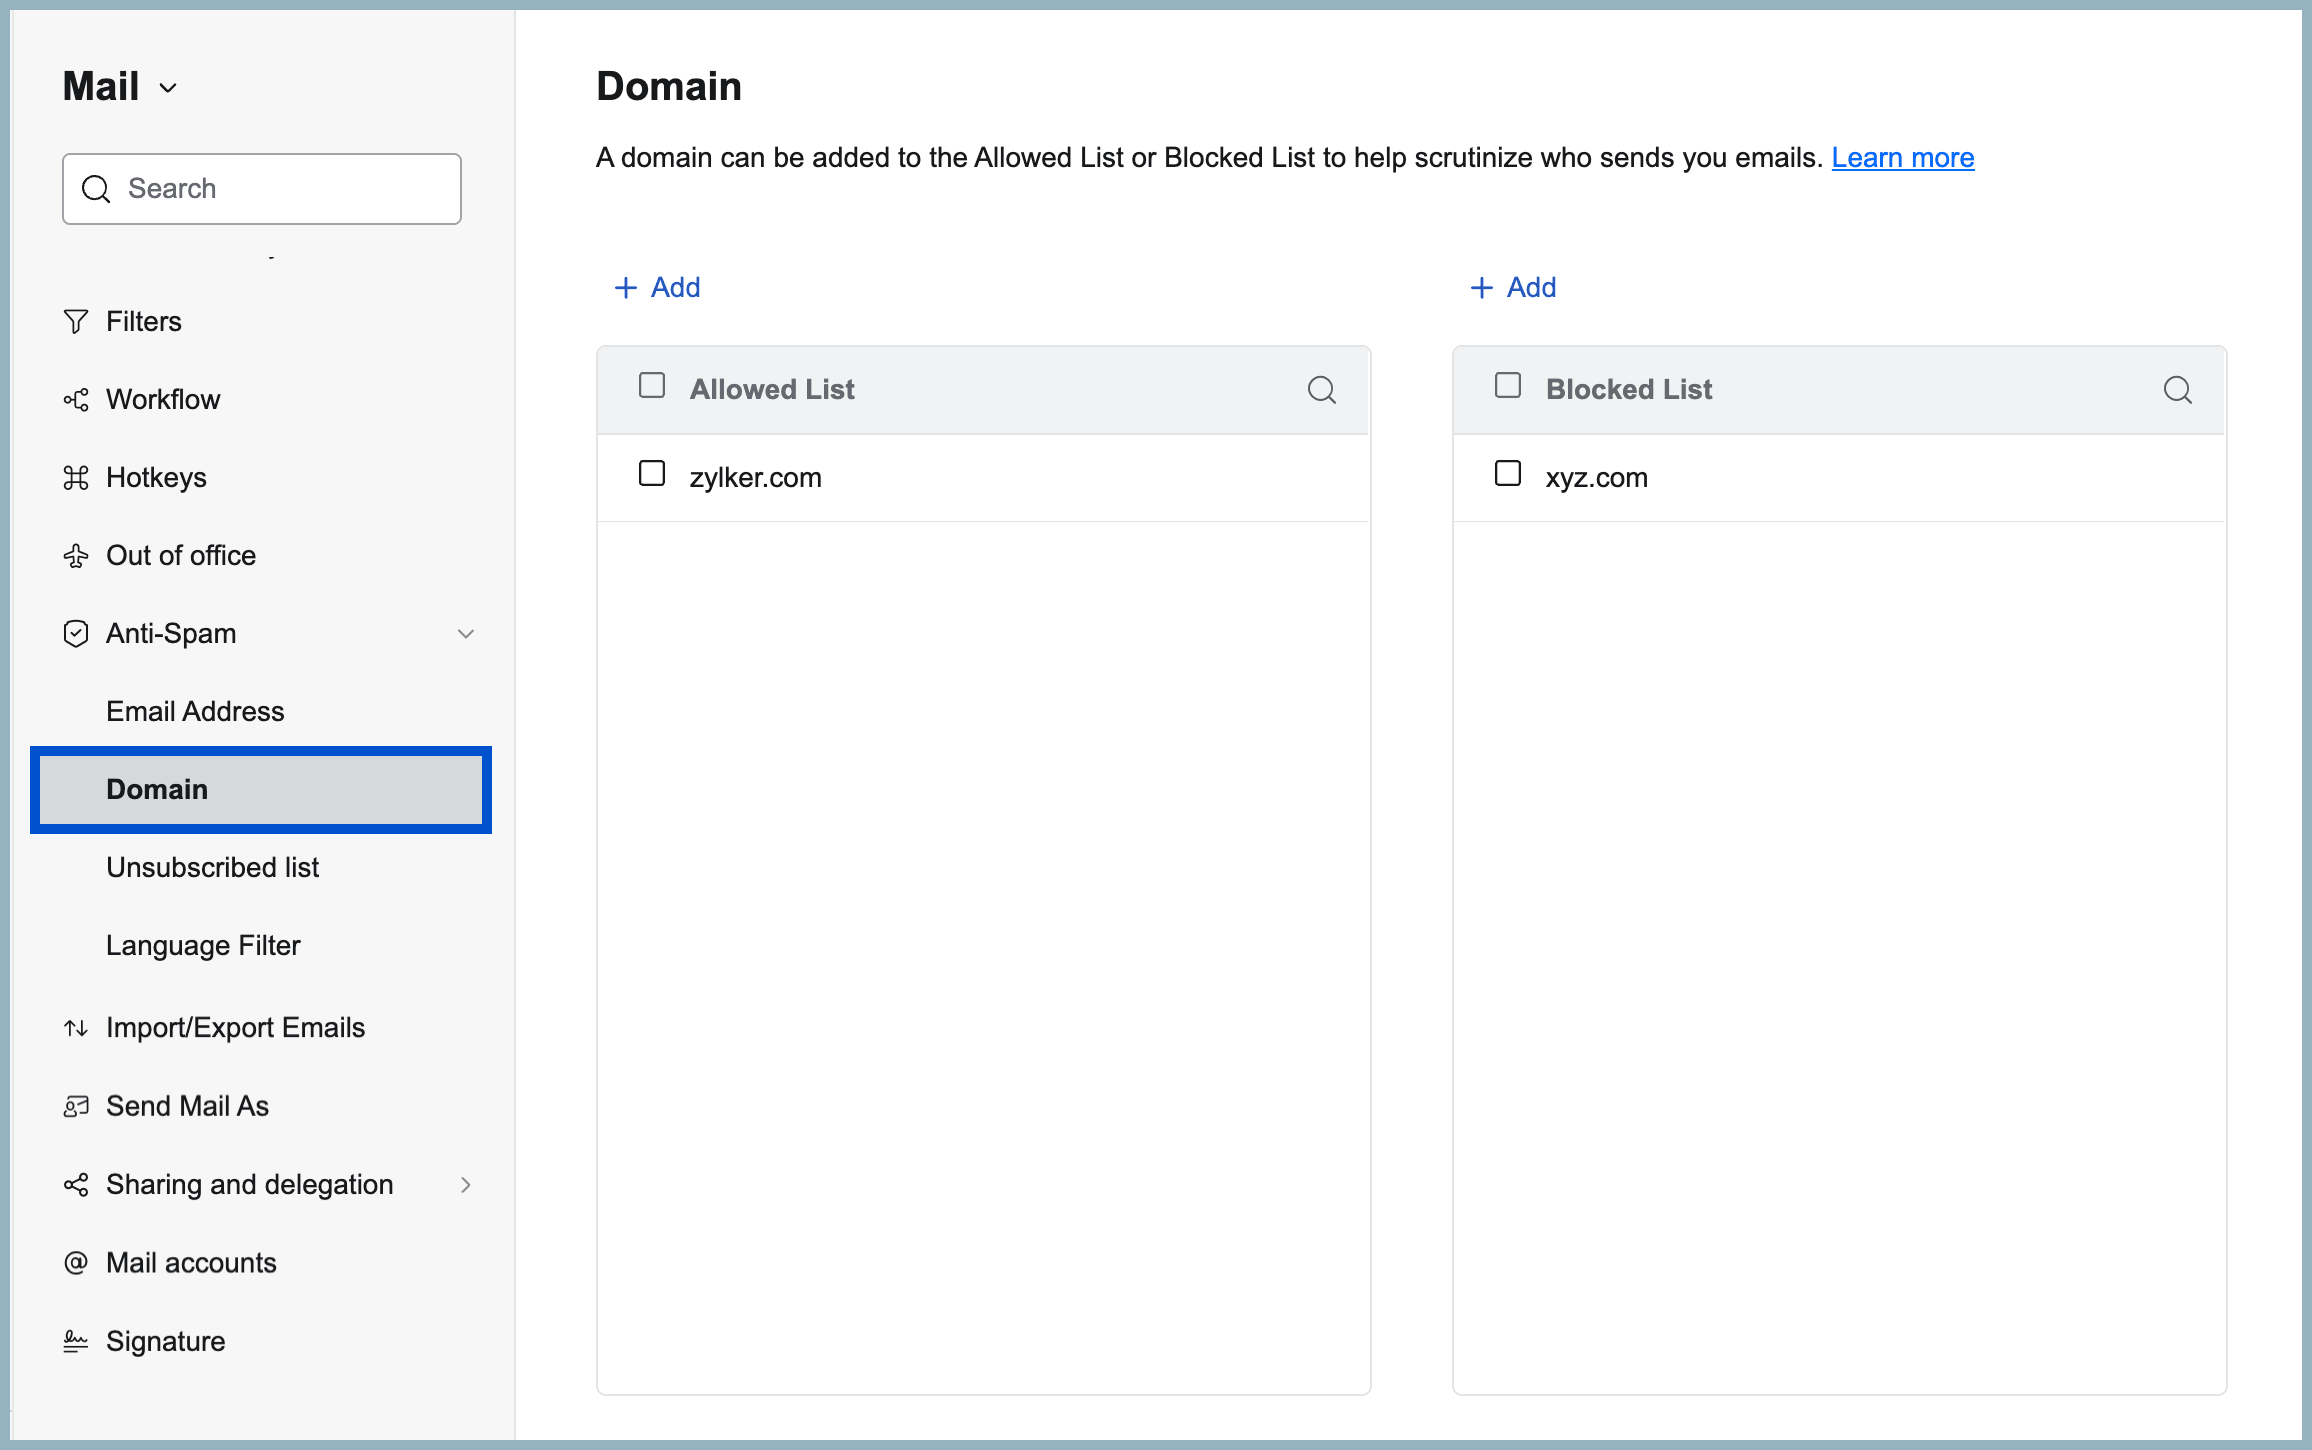
- Once done, press the enter key. When you add a domain to Allowlist/Blocklist, all the emails originating from that respective domain will be allowed or blocked respectively.
- The given email/domain will be added to the respective list.
Note:
- You can use Mark As Spam in any email you receive to quickly add the sender's email address to the Blocklist.
- You can search the existing lists by clicking on the Search sign next to the relevant list.
What is a Trusted list?
Email addresses added to the Allowed List are given higher priority during spam evaluation, making them more likely to reach your inbox. However, if you want to ensure that emails from a specific sender are never subjected to spam filtering, you can add the email address to the Trusted List.
Emails from senders in the Trusted List bypass all spam checks and are delivered directly to your inbox. For example, you can add important senders such as your bank, payroll system, or a team members to ensure their emails are always delivered. Add only email addresses that you completely trust to avoid receiving unwanted or potentially harmful emails.
What is Rejected list?
Unwanted emails that are absouletly uncessary and just clutter up your inbox can now be added to Rejected list. Email address added to Rejected list are directly send to Spam without any Spam filtering.
For example, if you repeatedly receive unwanted promotional emails or messages from a sender you never interact with, you can add that email address to the Rejected List to prevent those emails from appearing in your inbox.
How to add an email address to Trusted/Rejected list?
- Login to Zoho Mail
- Go to Settings
- Navigate to Anti-Spam List
- Click on the Email Address tab and then click on Trusted/Rejected Emails if you wish to add an email address to Trusted or Rejected.
- To add an email address to the Trusted list, click the Add option above the Trusted Emails section.
- To add an email address to the Rejected list, click the Add option above the Rejected Emails section.
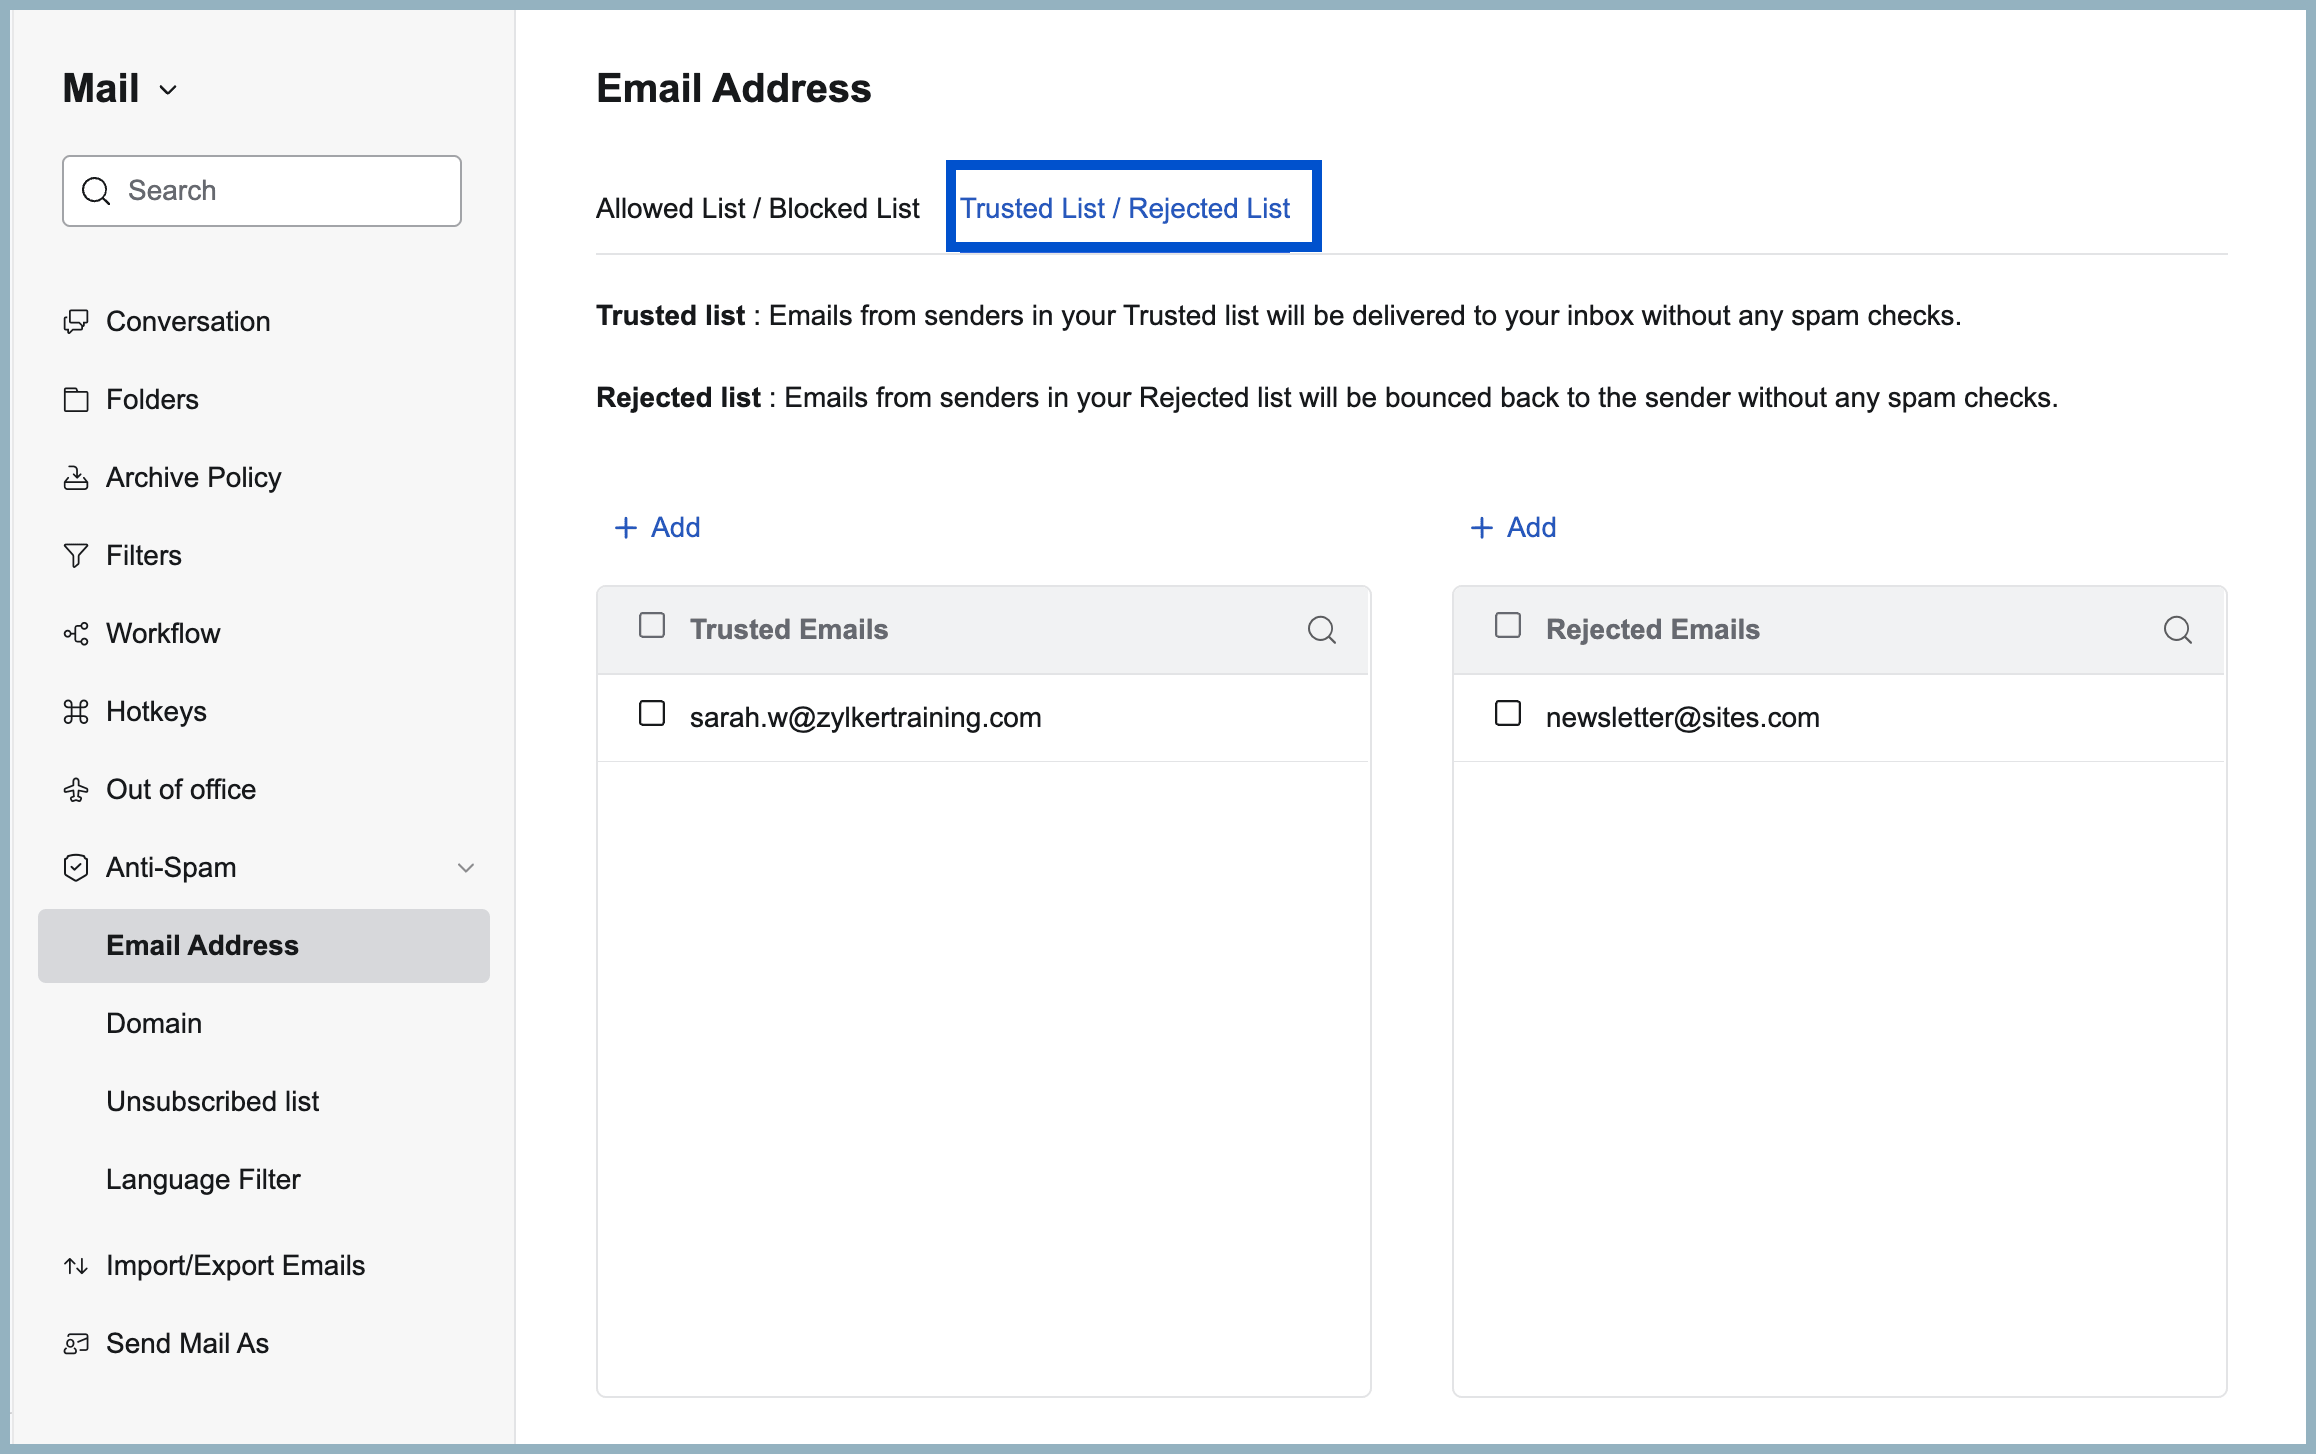
- The given email address will be added to the respective list.
Note:
It is necessary to be cautious before adding any email address to the Trusted/Rejected list. You may receive a lot of spam or lose legitimate emails in case of wrong addition.
What is Unsubscribed list?
Unsubscribed List keeps track of email addresses and newsletters that you have unsubscribed from. When you unsubscribe from a mailing list, the sender is automatically added to this list to help prevent future messages from reaching your inbox.
Any new emails from senders in the Unsubscribed List are automatically delivered to your Spam folder. This helps ensure that newsletters and promotional emails you have chosen to opt out of do not reappear in your inbox.
Steps to Access Unsubscribed List
- Login to Zoho Mail
- Go to Settings
- Navigate to Anti-Spam List
- Click Unsubscribed list tab from the left pane.
To remove any emails/links from your unsubscribed list, click on the delete button next to them. Deleting any emails/links from your unsubscribed list will restore their delivery as it was before.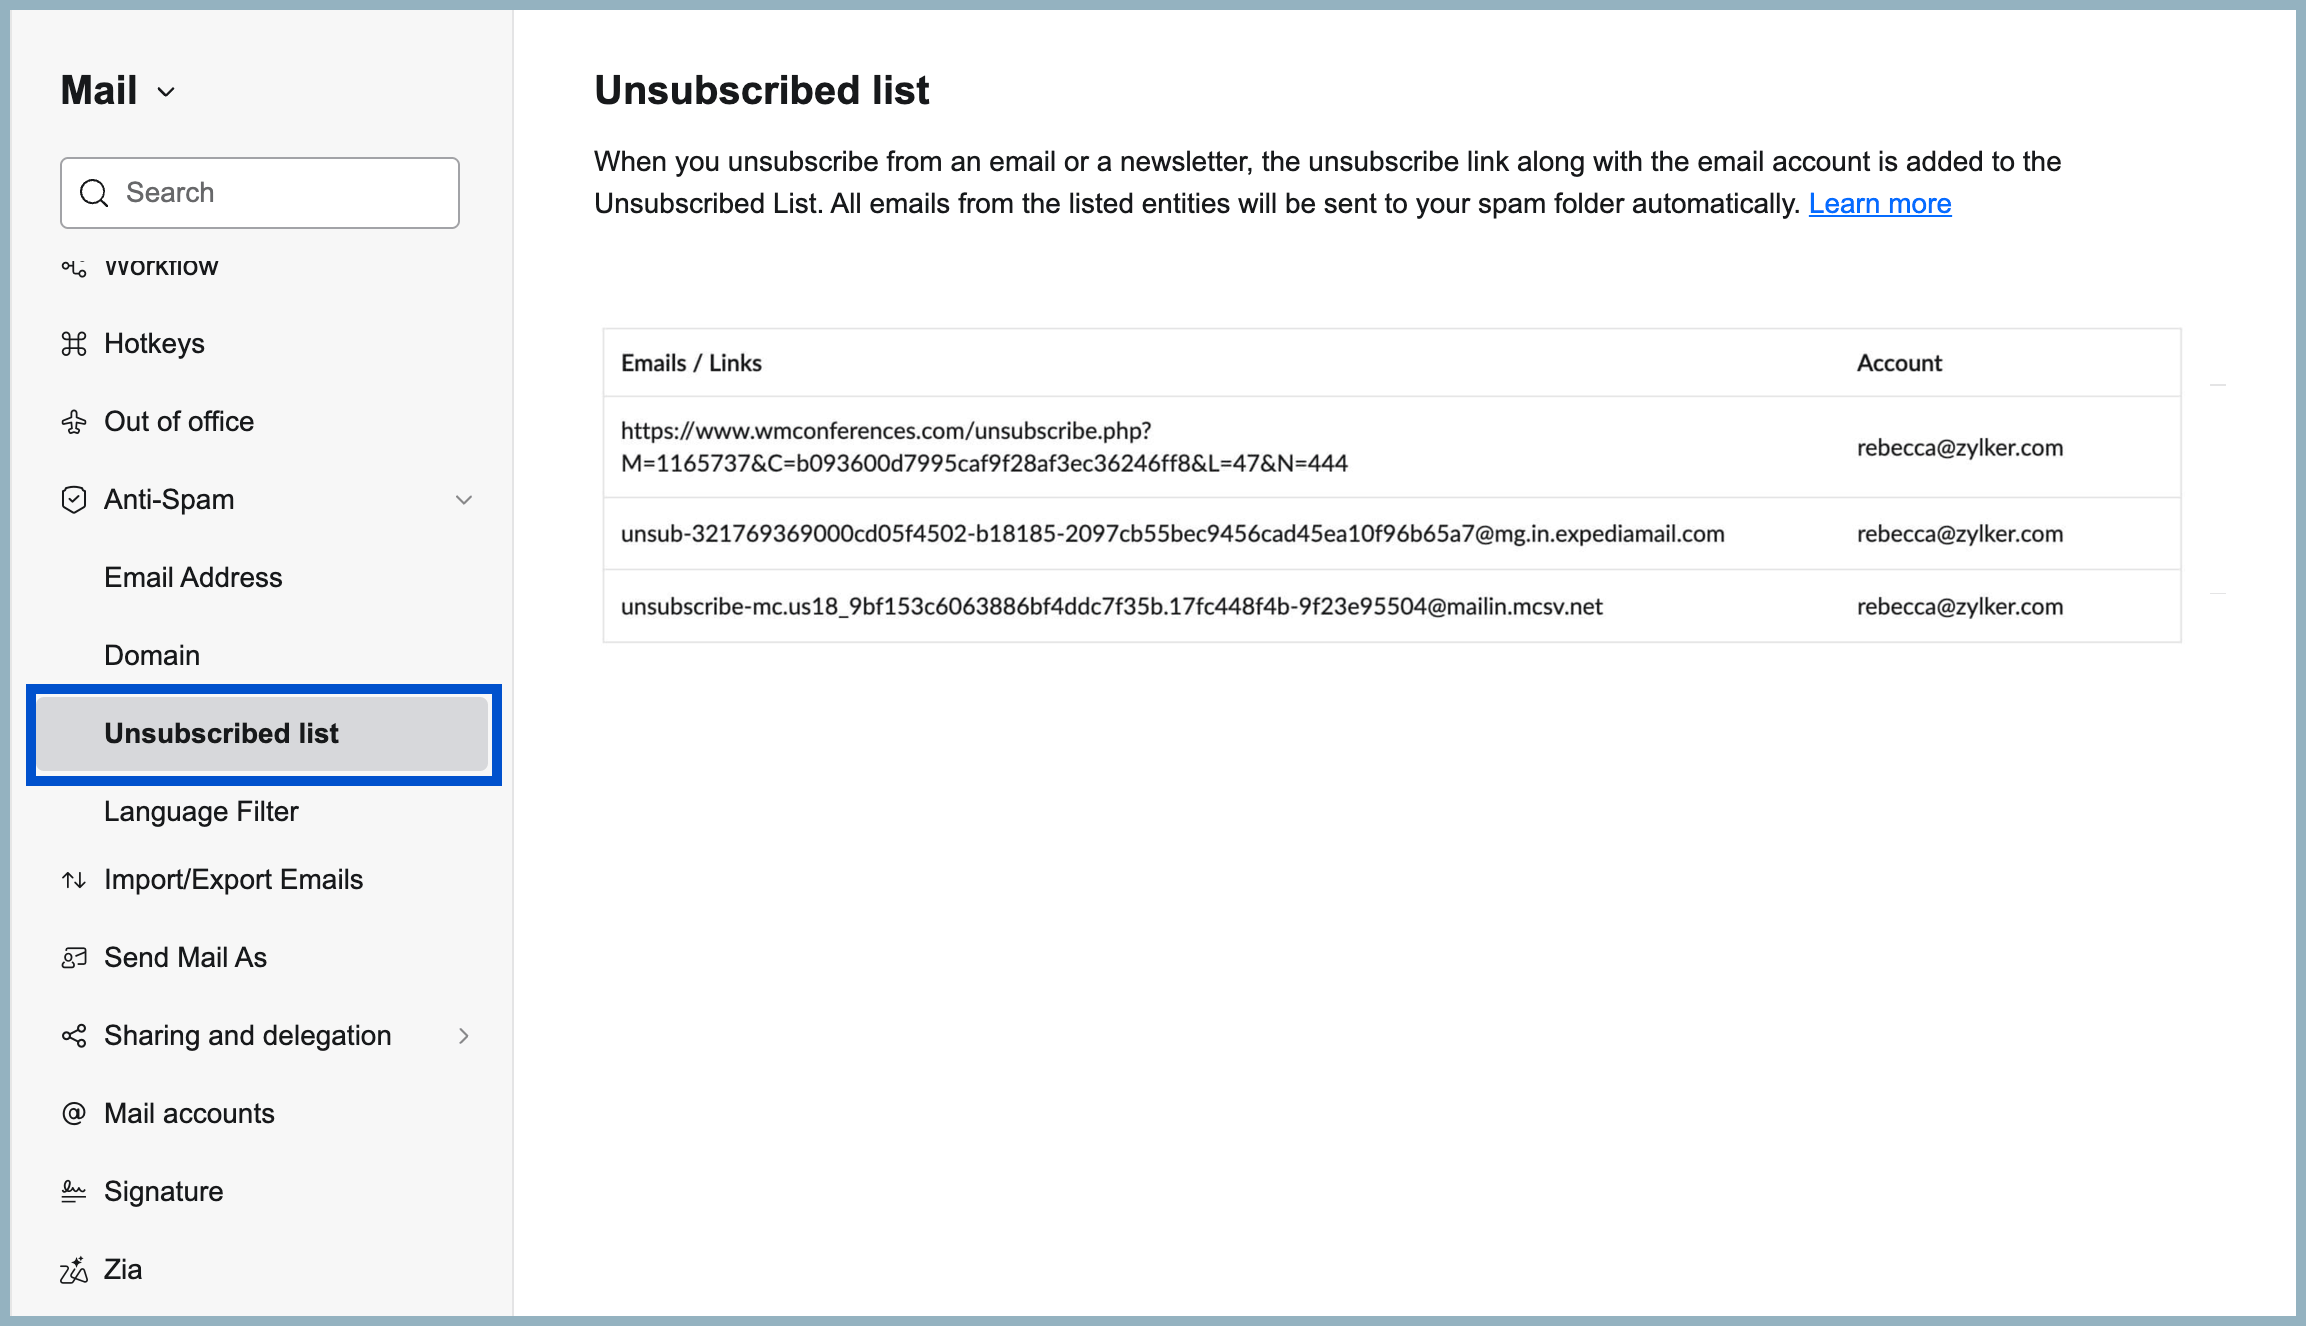
How to filter Spam based on languages?
Language-based spam filtering lets you control which emails are accepted based on the language they are written in. You can allow or block specific languages to reduce unwanted emails and ensure that messages in your preferred languages are prioritized.
- Login to Zoho Mail
- Go to Settings
- Navigate to Anti-Spam List
- Click on the Language Filter tab.
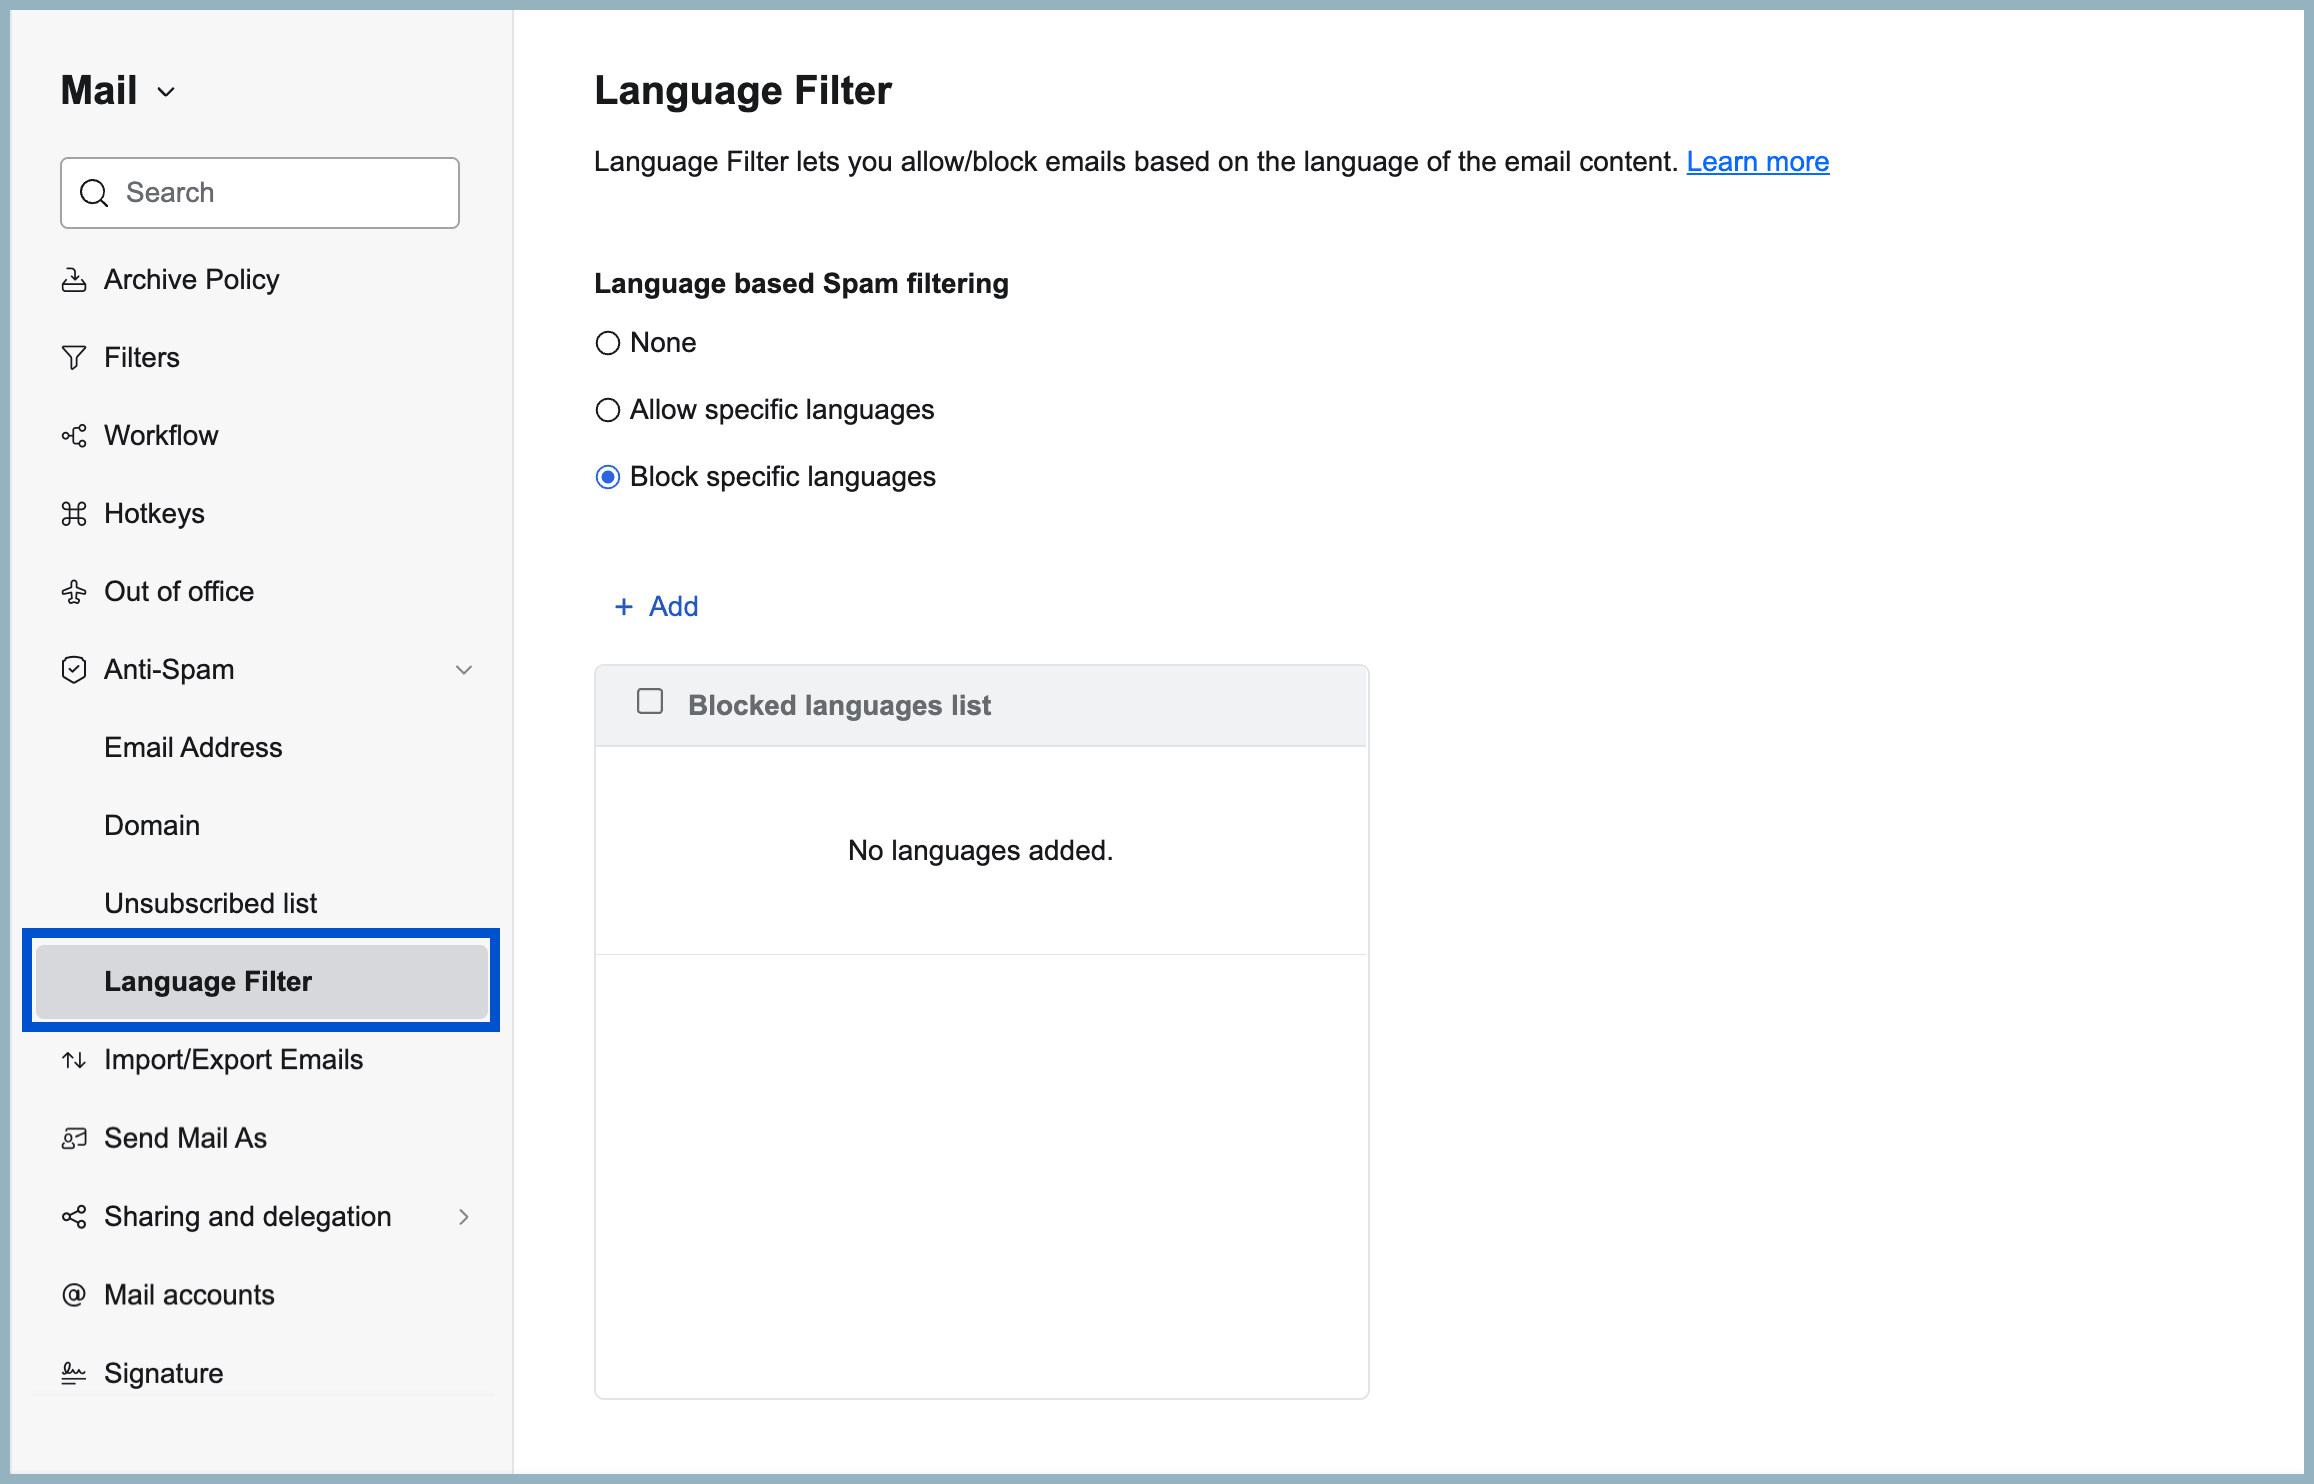
- You can select from one of the available options:
- None - No language-based spam filters are set
- Allow Specific Languages - Only emails sent in the languages in this list will be allowed into your inbox.
- Block Specific Languages - Emails sent in the languages in this list will not be allowed into your inbox.
Related Pages
Spam Control Guidelines | Organization Spam Control | Mark As Spam