Zoho Projects Extension
Zoho Projects is a project management software for planning, tracking, and collaborating on projects and tasks with your team. eWidget supports Zoho Projects integration to aid you in managing your projects and tasks from Zoho Mail. Zoho Projects needs to be configured in order to use it in eWidget.
Table of Contents
Setting up Zoho Projects
- Log in to your Zoho Mail Account
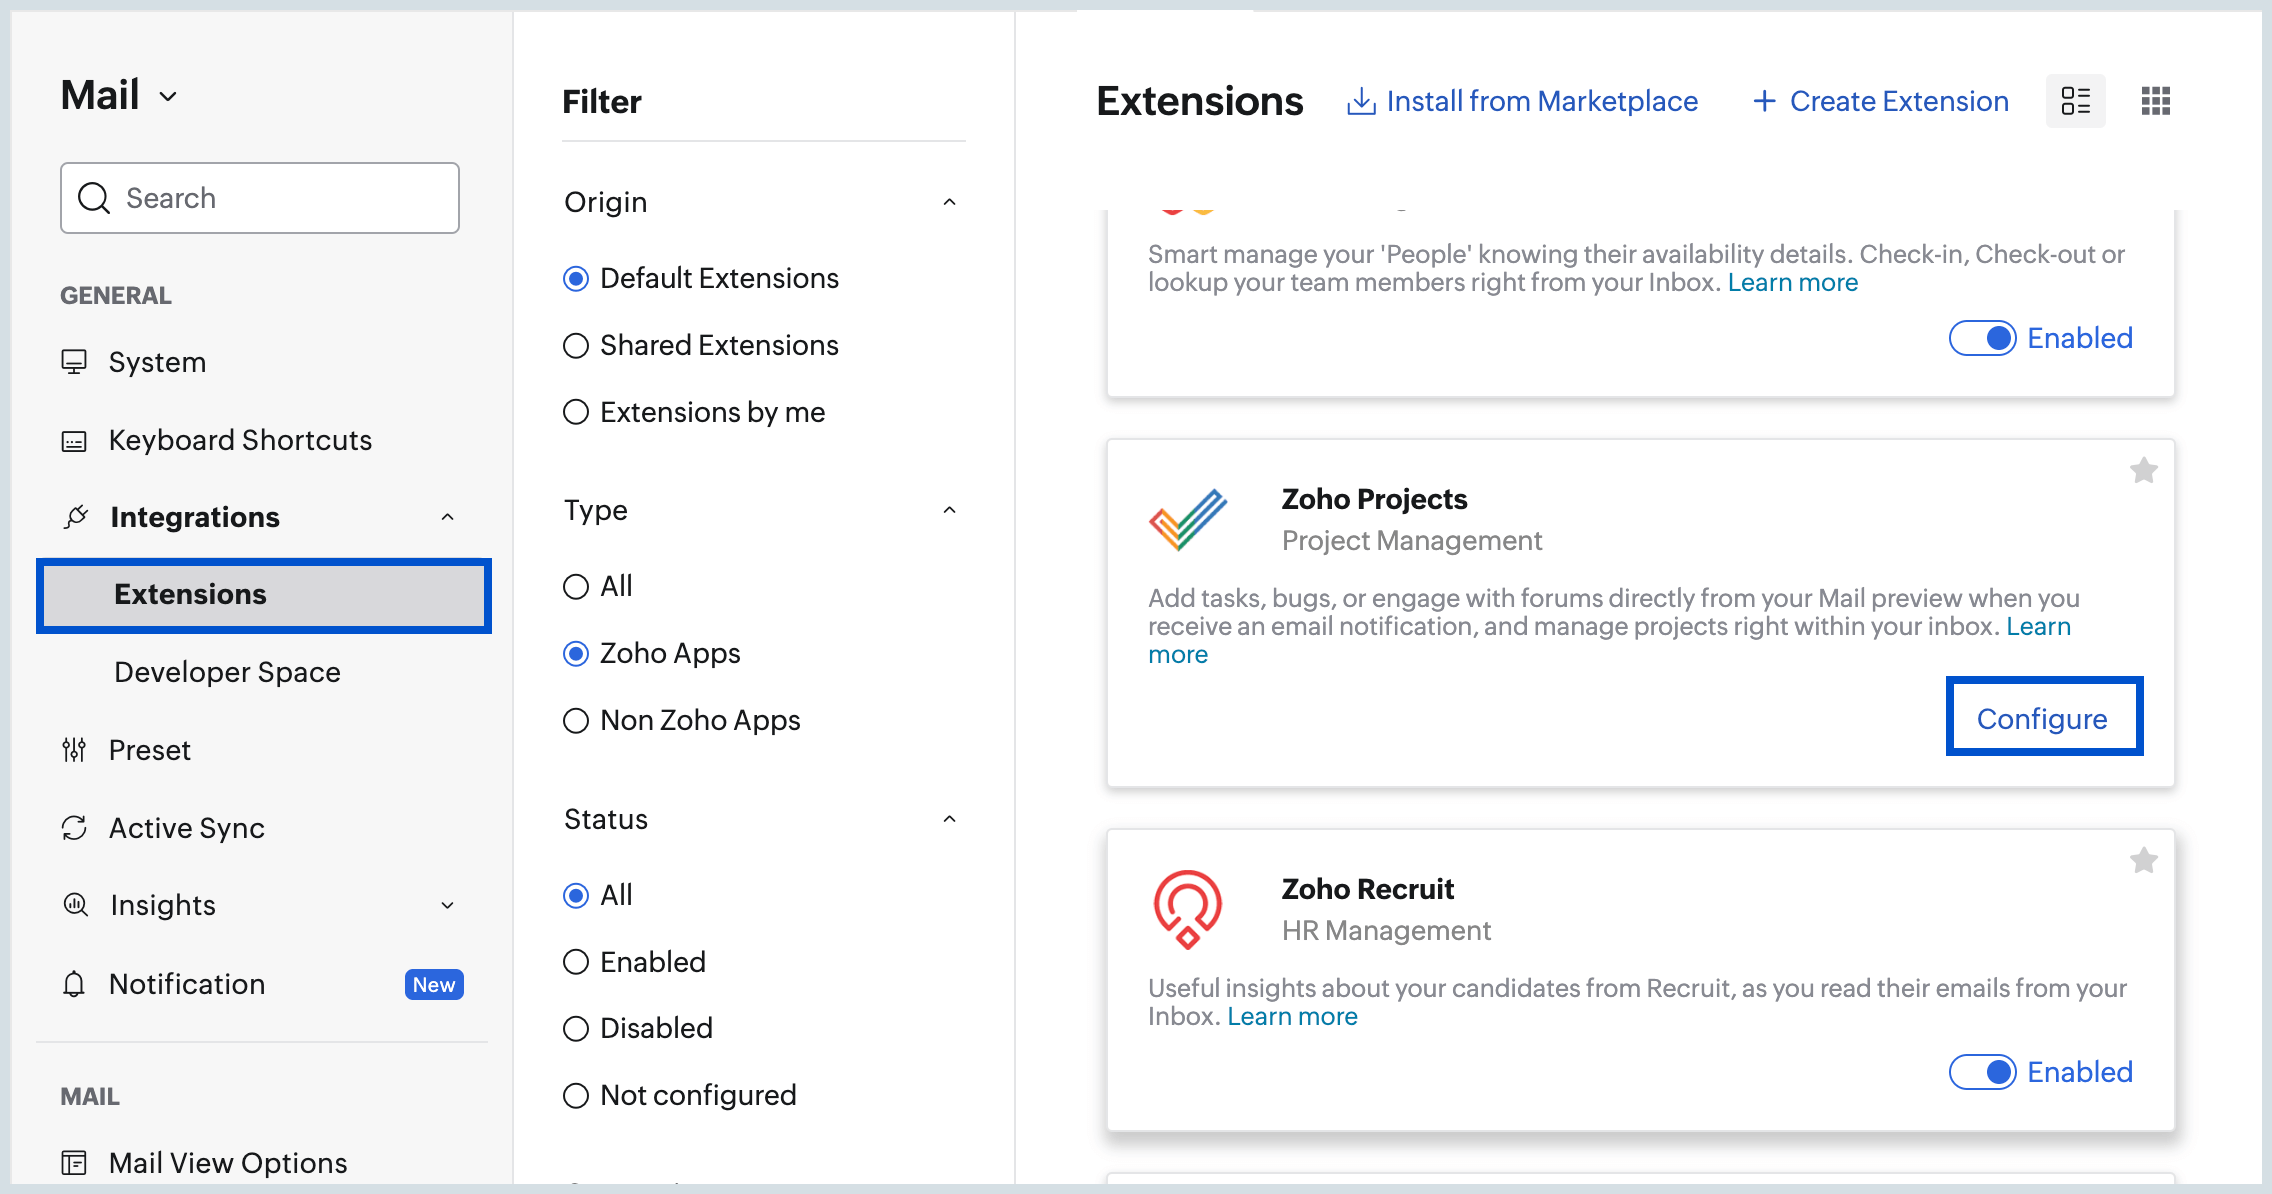
- Go to Settings > Integrations Card.
- Select Zoho Projects card and Click on Configure.
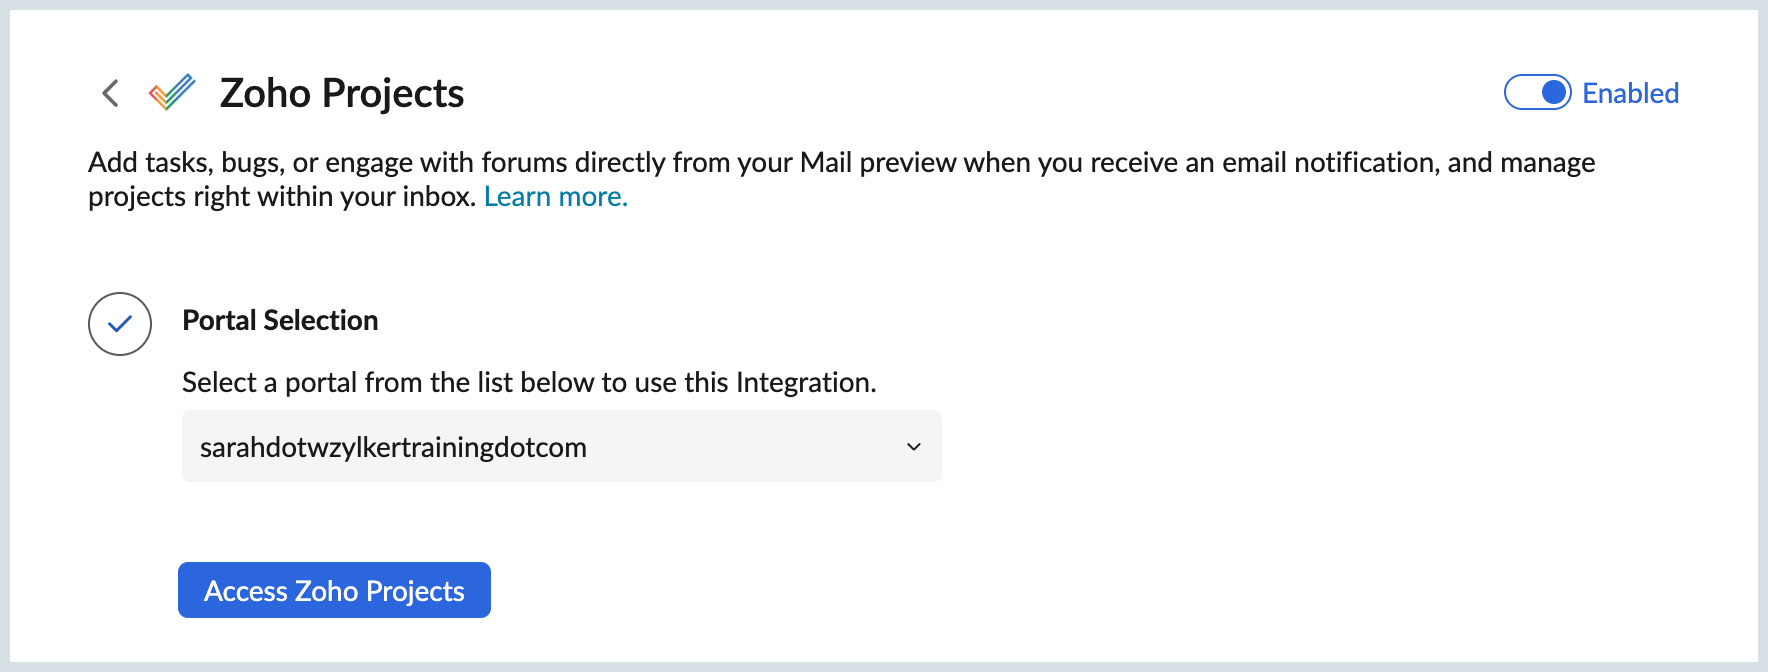
- Turn 'ON' the toggle button and select your default portal from the portal name drop-down in the Zoho Projects option.
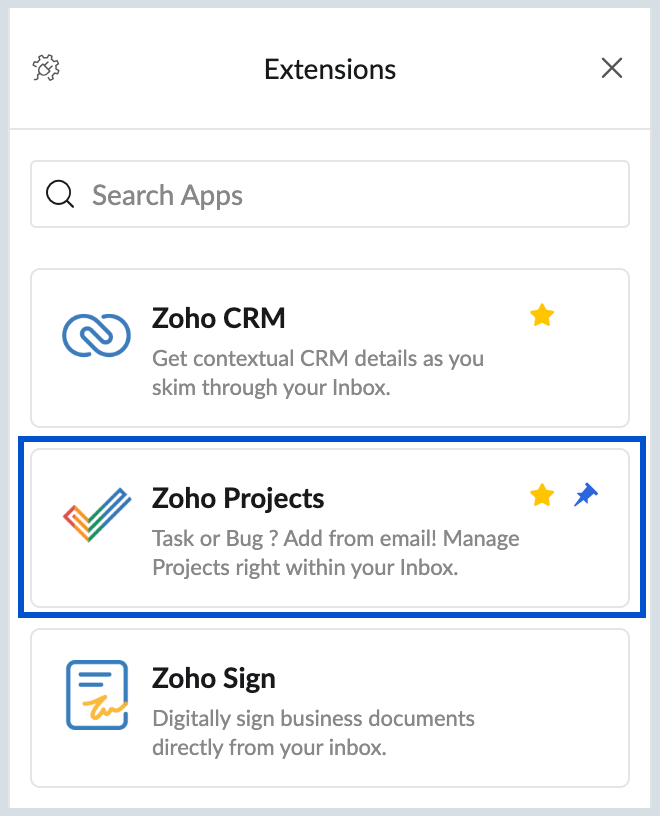
- Zoho Projects integration will be enabled and listed in eWidget pane.
Note:
In case you change the portal from the Integration settings, all the prior Tasks associated with the previous portal will not be visible in the emails or in the mail listing. Those tasks can be viewed only if that particular portal is selected as the default portal.
Zoho Projects Integration in Zoho Mail, allows you to conveniently view and manage tasks, bugs, issues, task lists, and forums in the Zoho Mail email preview. Refer here to know more.
Using Zoho Projects Extension
Zoho Projects extension in eWidget in Zoho Mail enables you to view, add, and manage tasks and bugs directly from the mailbox, as well as access your projects without leaving the mailbox.
Access Zoho Projects Extension
Once you have enabled the Zoho Projects extension from the Zoho Mail settings page, you can access the Zoho Projects extension directly from the eWidget pane available on the right side of your mailbox. Through the Zoho Projects extension, you can easily view all your tasks with status and other info, issues and bugs and all of your Zoho Projects list.
When accessing the Zoho Projects extension, you will land on the Tasks page by default. You can further switch to the Bugs page under Home View or view your projects. 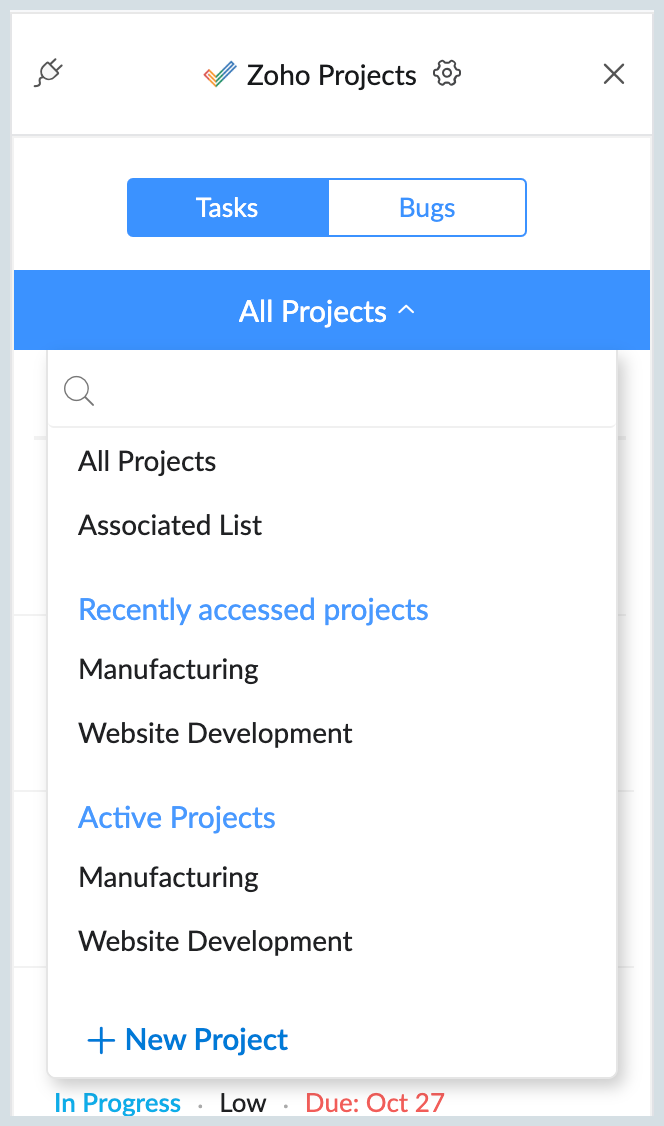
The Create New Project option will still be available, but instead of creating a new project in the extension itself, you will be directed to the Zoho Projects application.
View Zoho Projects eWidget
After setting up, follow these steps to use the Zoho Projects integration in eWidget:
- Navigate to the eWidget icon available on the right pane.
- Select Zoho Projects from the app menu
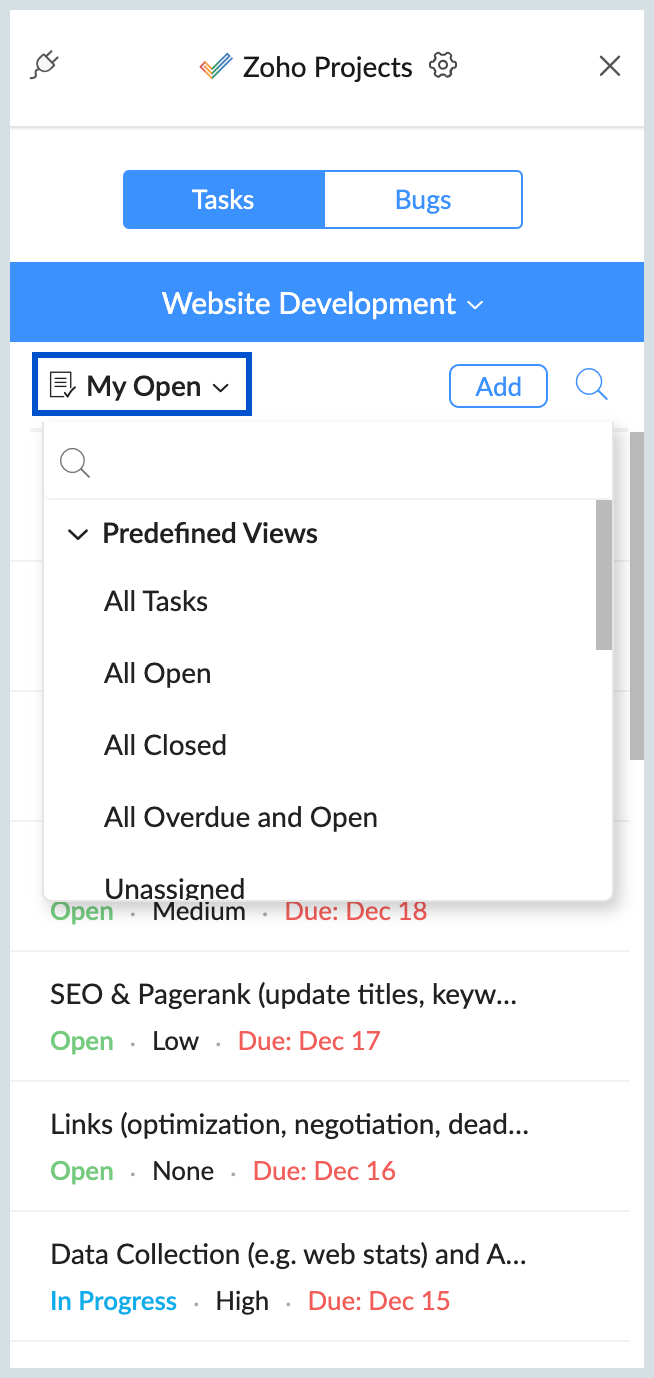
- Once you open a project, a list of Open Tasks from your project will be displayed by default. Click the drop-down menu beside My Open to select your preferred Task/ Bug view.
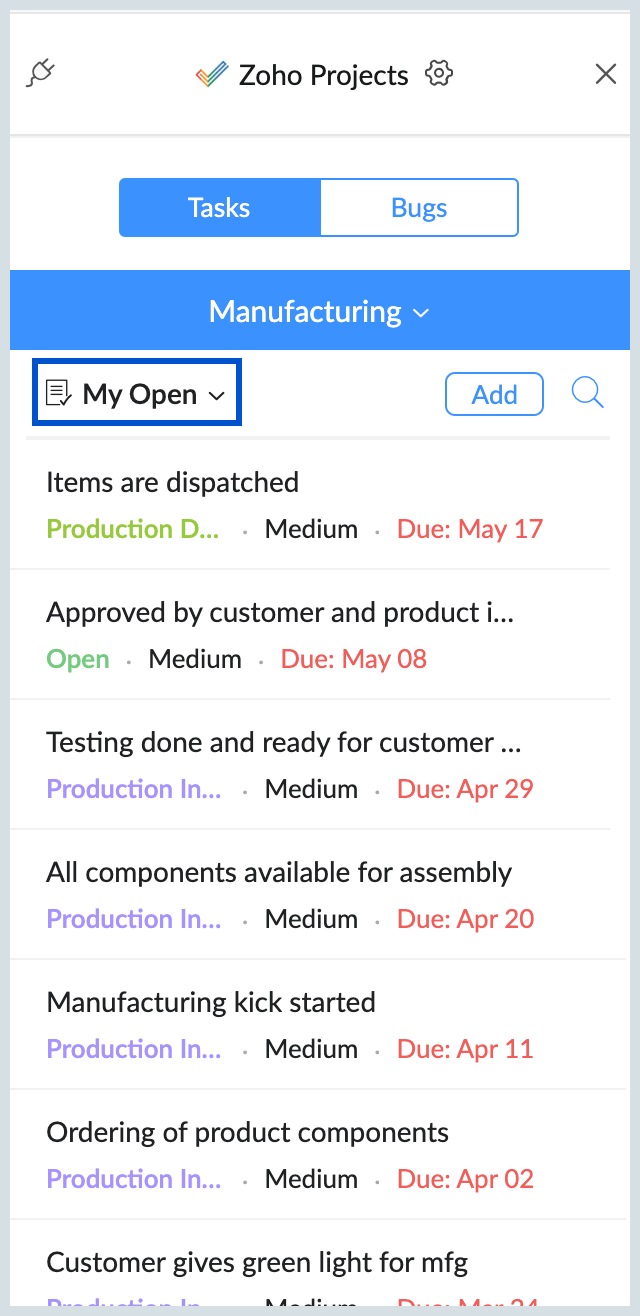
- View the list of your Recent Projects and All Projects by clicking the drop-down menu in the header.
Add Tasks/ Bugs
You can create tasks or add a bug to your projects directly from your mailbox. To add a task/bug, follow the steps mentioned below:
- Log into your Zoho Mail account.
- Click on the eWidget icon available on your right pane.
- Search and click on the Zoho Projects extension.
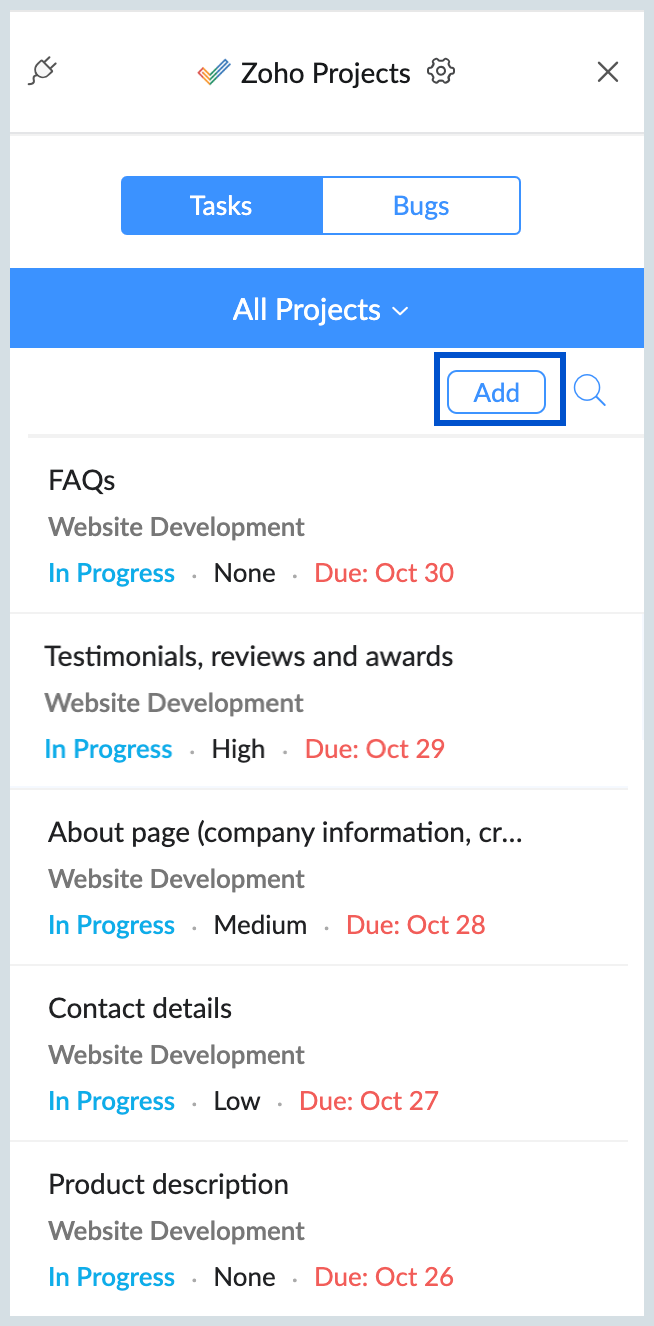
- Click the Add button at the top right of Tasks or Bugs page to add a task or a bug.
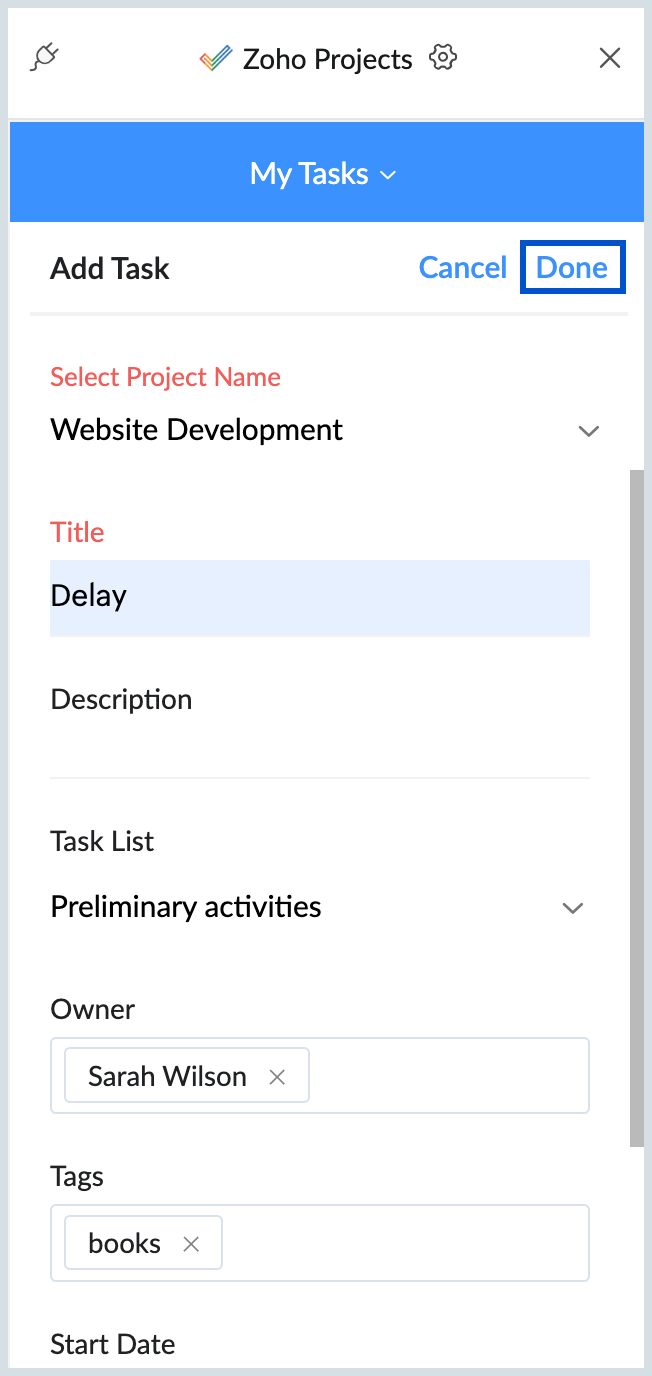
- Enter the required details and click Done to save the details.
Add Tasks/Bugs from Mail content
You can also add a Task/Bug using the content of mail using the Zoho Projects extension. To add a task/ Bug from mail content, follow the steps mentioned below:
- Log into your Zoho Mail account.
- Open the email containing the content you would like to add as a task or an bug. Click on the eWidget icon available on your right pane.
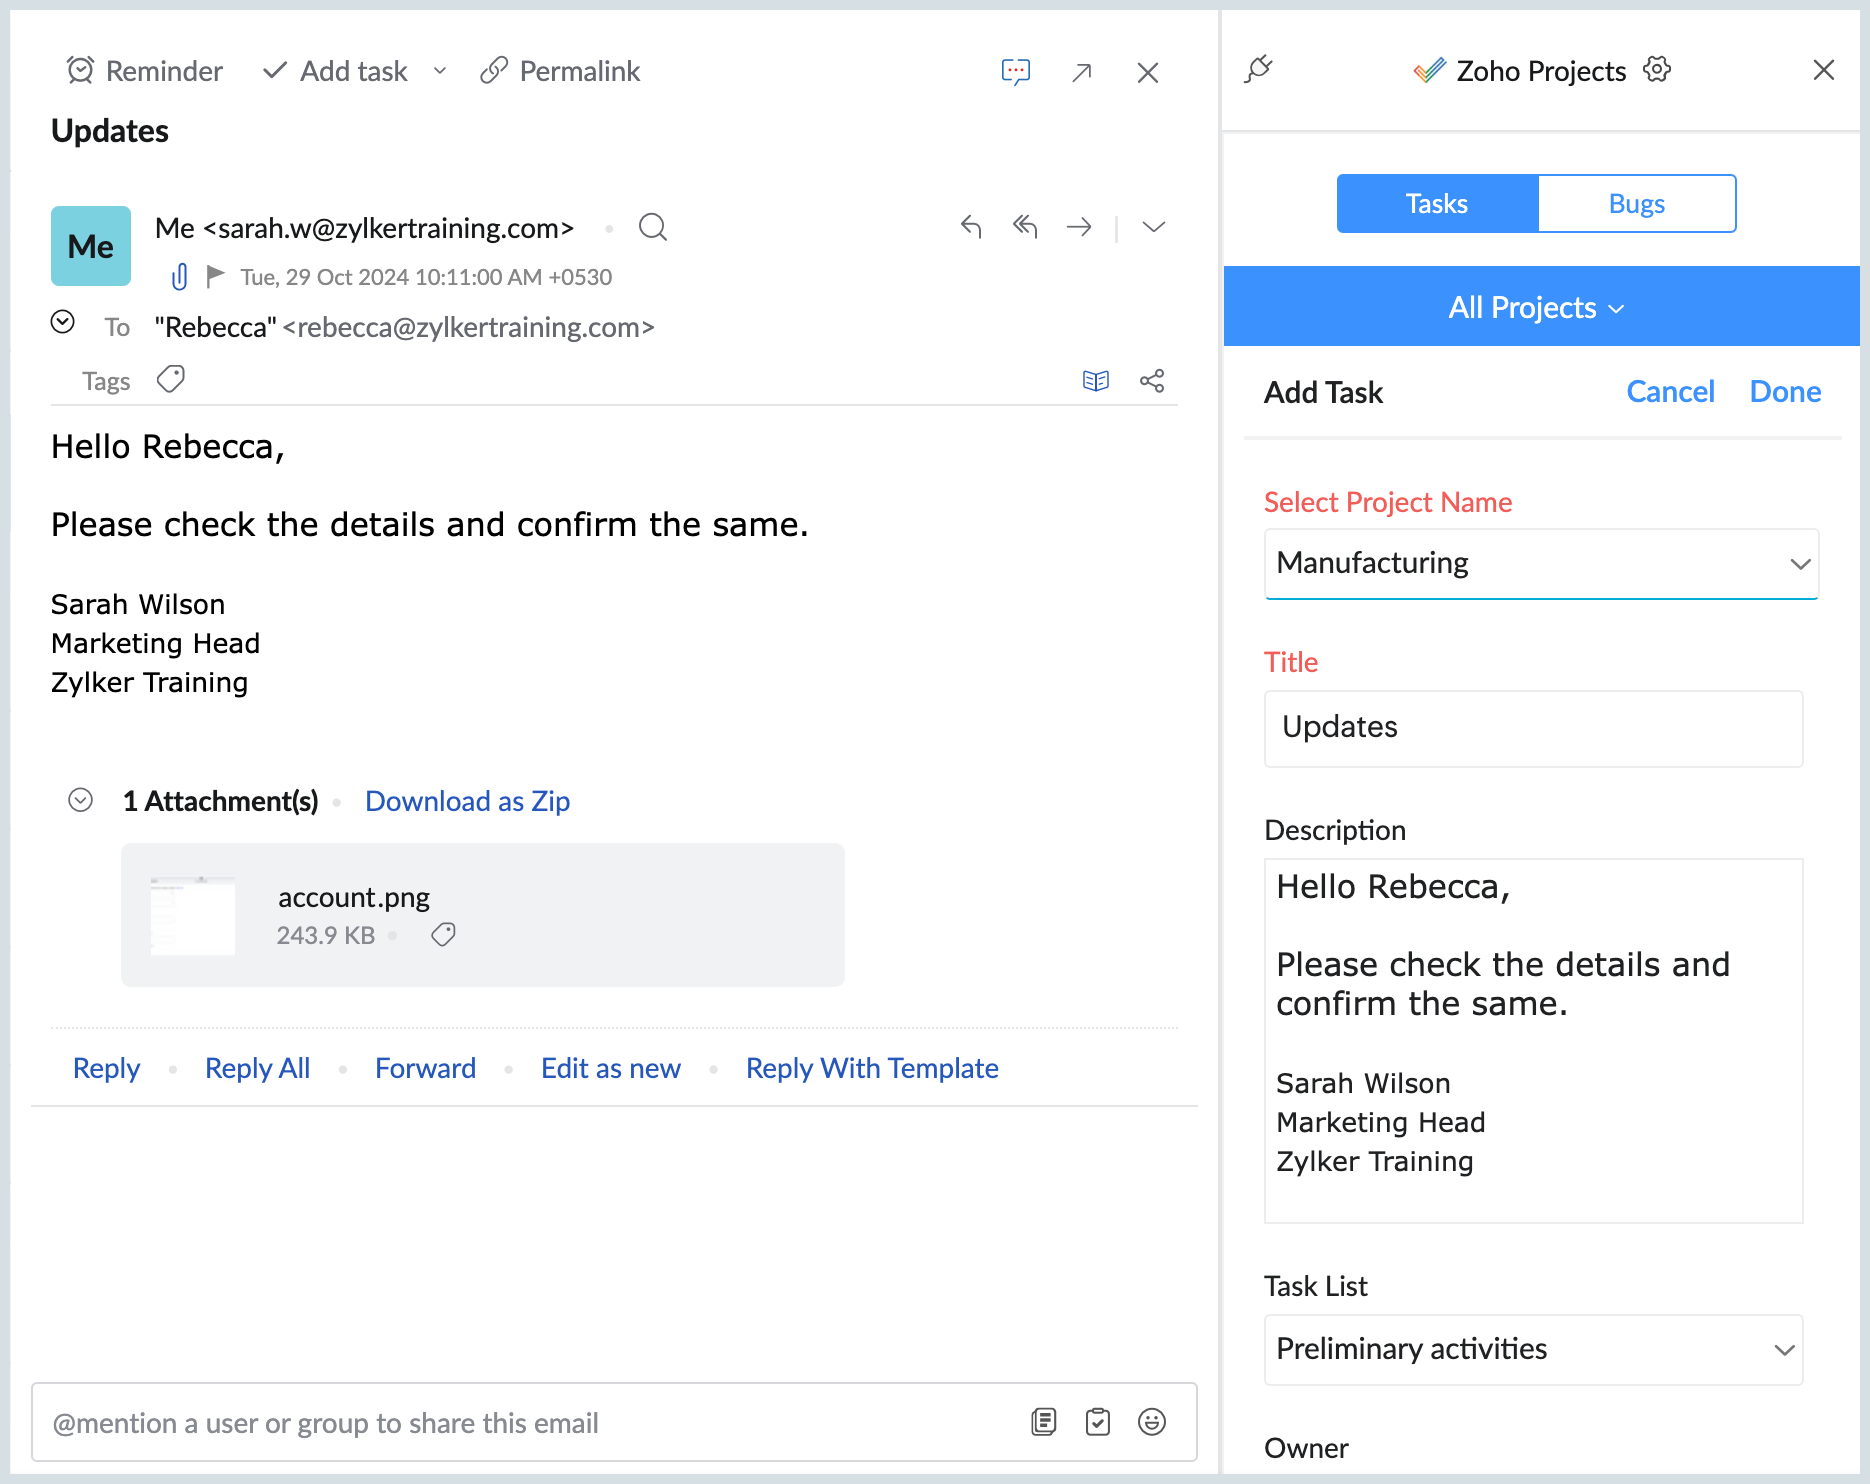
- In the Add Task/ Bug tab, title and description details will be auto-populated from the mail subject and content. Additionally, you can modify these details as required and enter other necessary details.
- Click Done to save the details.
The Task/Bug created will be associated with the email. When you open the email and click on the Zoho Projects eWidget, the Task/Bug will be automatically displayed.
Search
When you need to find a Task or Bug, you don't have to scroll through everything manually. Instead, you can use the search option in Zoho Projects eWidget to quickly find what you're looking for. You can also search for projects that you have created.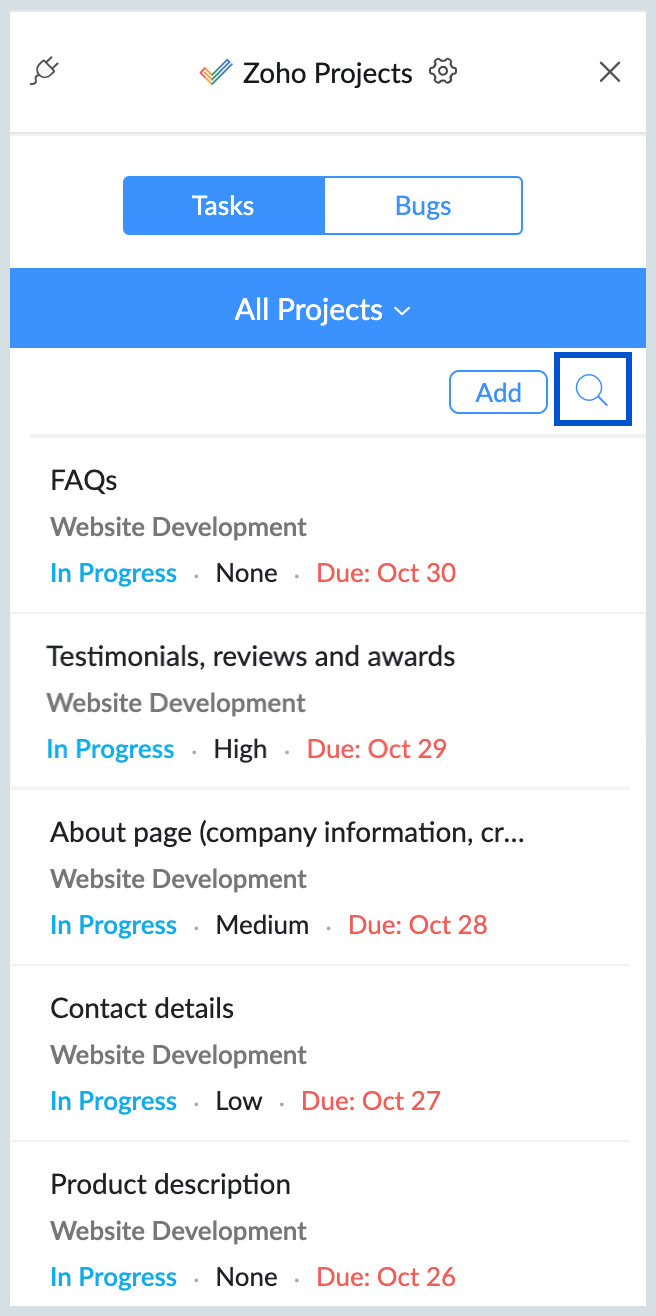
View in Zoho Projects
You have the option to open a Task/Bug or a project directly in Zoho Projects to either edit or view details. To view in Zoho Projects, follow the steps mentioned outlined below:
- Log in to your Zoho Mail account.
- Click on the eWidget icon available on your right pane.
- Navigate to the specific Task/Bug or project that you want to view in Zoho Projects.
- In the top right corner, click on the View in Zoho Projects icon.
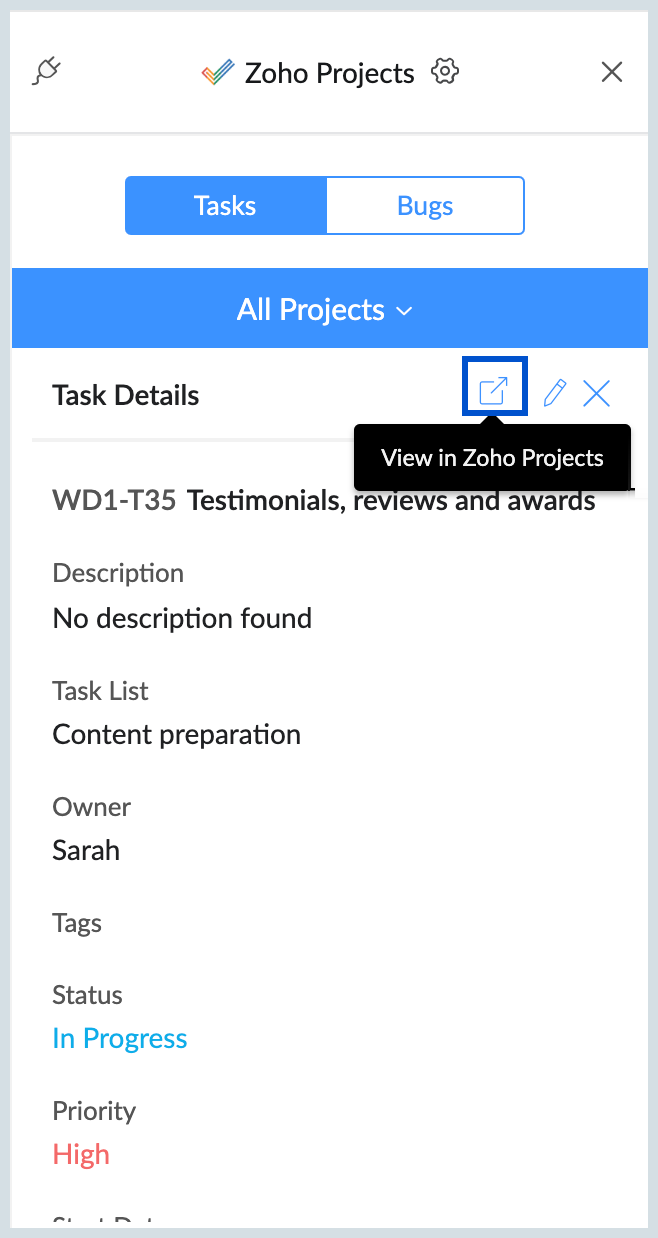
- You will be redirected to the Zoho Projects page. You can also make edits to the Task/Bug or project directly from this view if needed.
Edit
If you need to modify or update details, you can easily do so using the Zoho Projects eWidget, without switching to the Zoho Projects application. To edit details, follow the steps below:
- Log in to your Zoho Mail account.
- Click on the eWidget icon available on your right pane.
- Navigate to the specific Task/Bug or project that you want to edit.
- In the top right corner, click on the Edit icon.
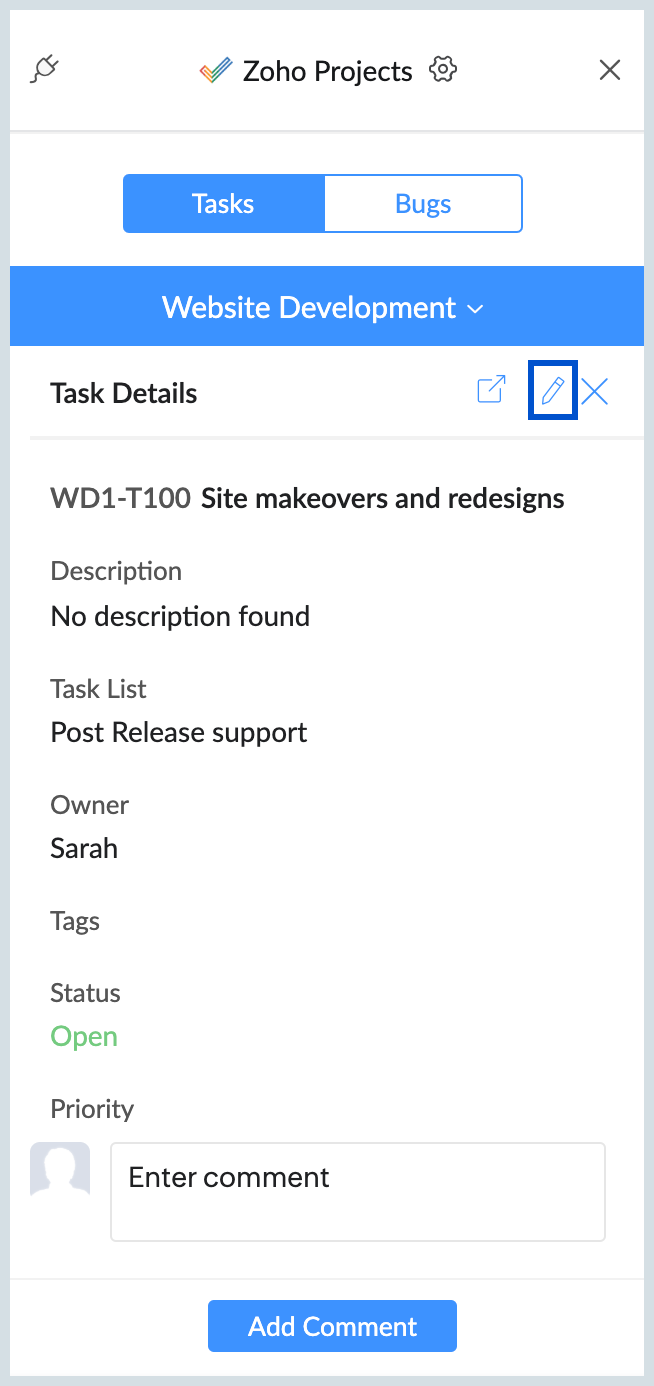
- Make the required details and click on Done to save the details.
Add Comments/ Attachments
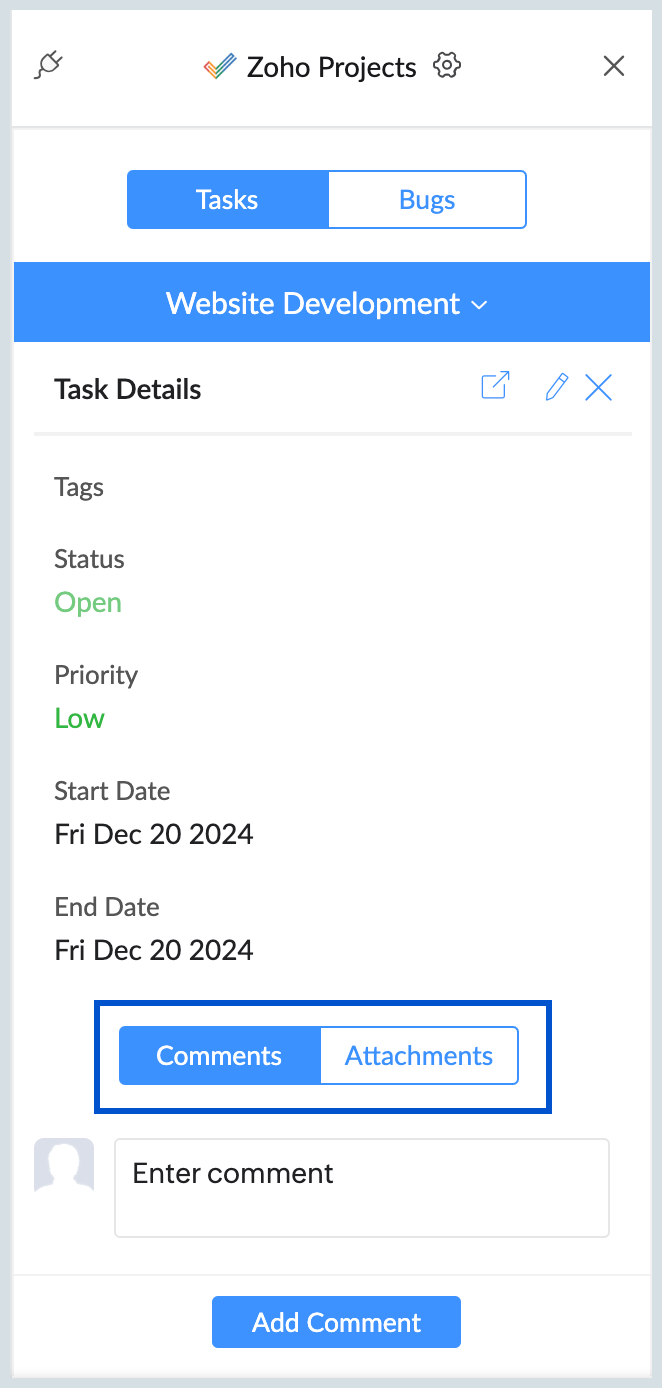
You can add comments to tasks/bugs if you need to provide feedback or additional details. You can also attach files from your desktop or drag and drop them as needed. To Add Comments or Attachments, follow the steps mentioned below:
- Log in to your Zoho Mail account.
- Click on the eWidget icon available on your right pane.
- Navigate to the specific Task/Bug where you want to add a comment or insert an attachment.
- Scroll down and choose either Comments or Attachments to proceed.
Views
You can efficiently manage and gain a clear picture of your projects using the various views offered by Zoho Projects eWidget. You can select from predefined views such as open, closed, unassigned tasks/bugs, and many more. Additionally, custom views that you create in Zoho Projects will be displayed, allowing you to tailor your needs. You can access different views by choosing the project you want to open and clicking on the views icon at the top left corner of the eWidget. Then, select your preferred view from the drop-down menu.