Action cards
The Criteria Router helps you split the flow into different paths based on specific rules or filters. You can choose from a wide range of filters related to visitors, system, and CRM data.
- To add a Criteria router card to the flow, click on the card holder (+) icon to view the cards gallery and select the Criteria router card under the action cards section.
- Now, give your card a name and click on Add a rule.
- Now, define a rule by entering the conditions in the search field or choose a rule based on the section header.
- You can add multiple rules to perform multiple complex routing based on your business requirements.
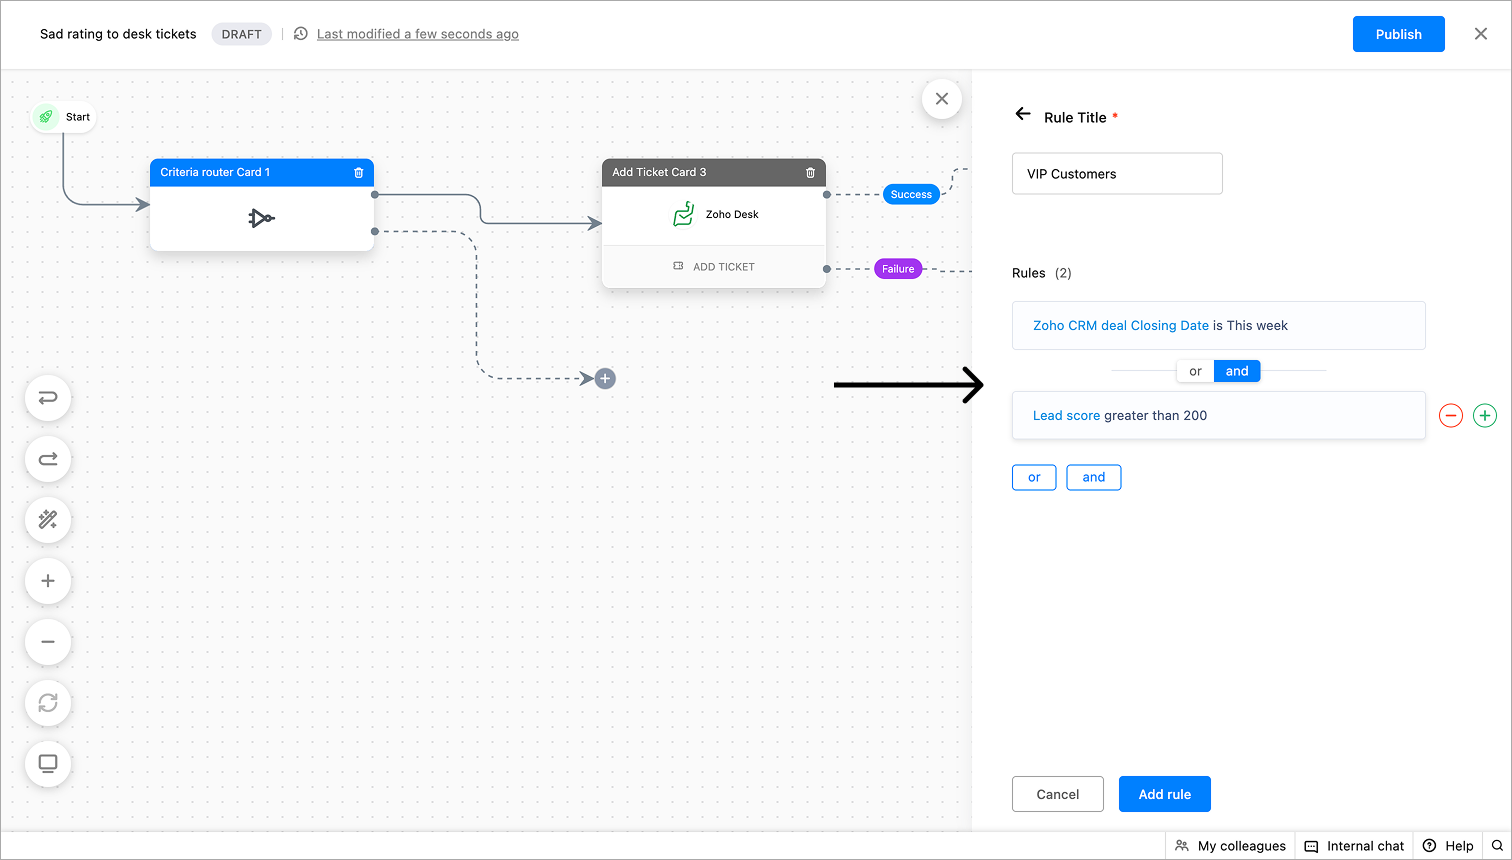
- After adding all the required rules, click Save.
- Once the card is configured, you can view all the flows based on the conditions specified in the criteria router cards. In case if the visitors don't match any condition, then they will be diverted to the 'Not matched' flow.
This card can be used to jump from one card to another. You can either re-use/restart a flow from there. There are two types of Go To cards that you can add inside the flow builder:
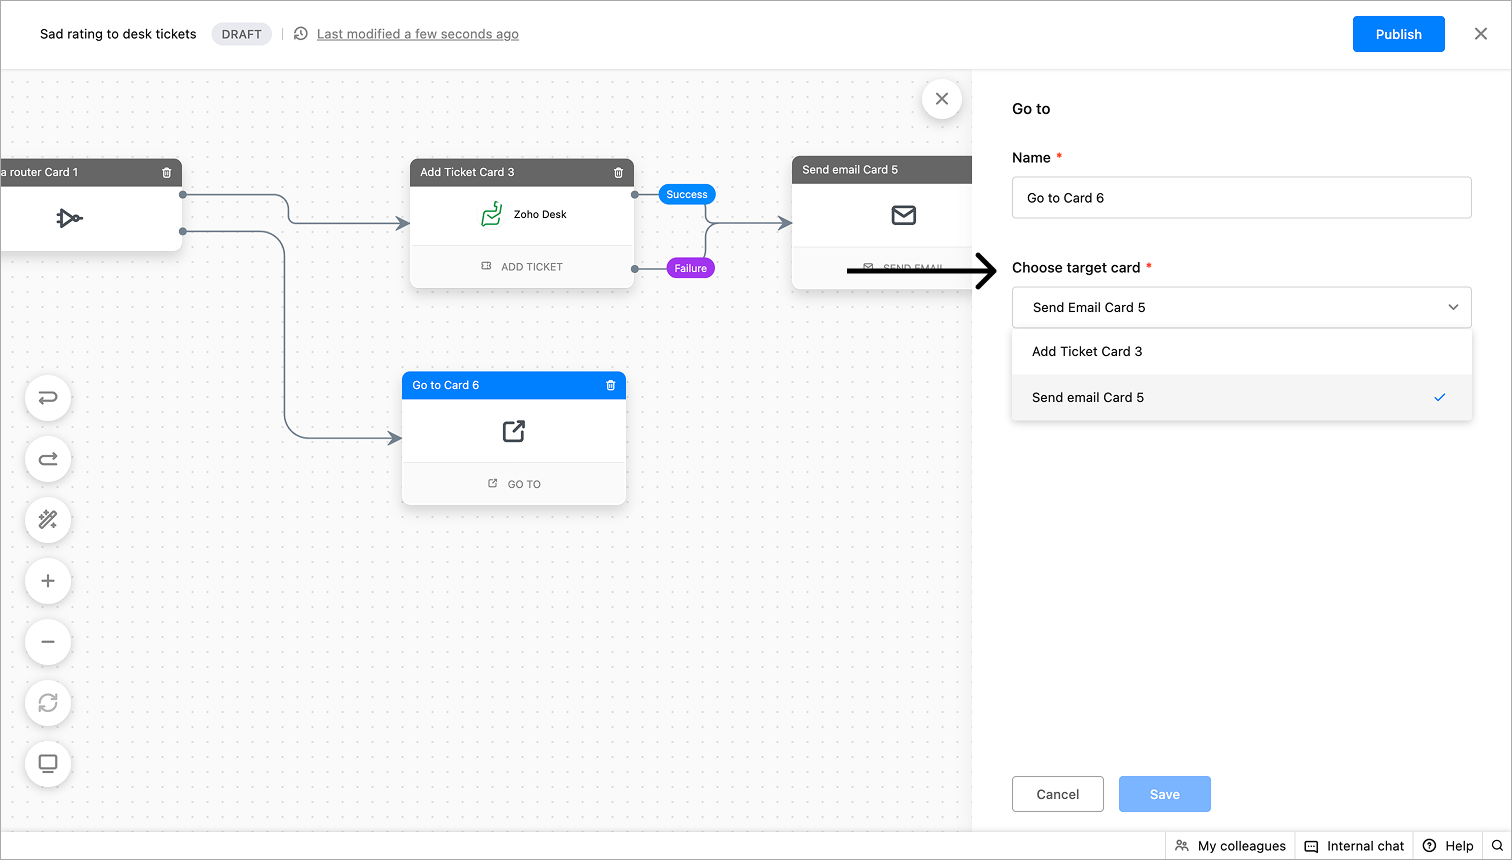
- Individual Card - to show the flow jump as a separate card
- Wire Connect - to show the flow jump by wire
To add this card
- Click on the cardholder (+) icon to view the cards gallery and select the Go To cards under the action card section.
- Choose the type of Go To card - Individual Card or Wire Connect
- Specify the card name you want to go to. Once this card is activated, the flow will continue from the specified card.
- Click Save.
Note: The type of Go To card cannot be changed once the configuration is saved.
Add tag(s)
- To add tags, click on the card holder (+) icon to view the card gallery and select the Add tags card under the action cards section.
- Give a name, select the tags to add, and click on Save.
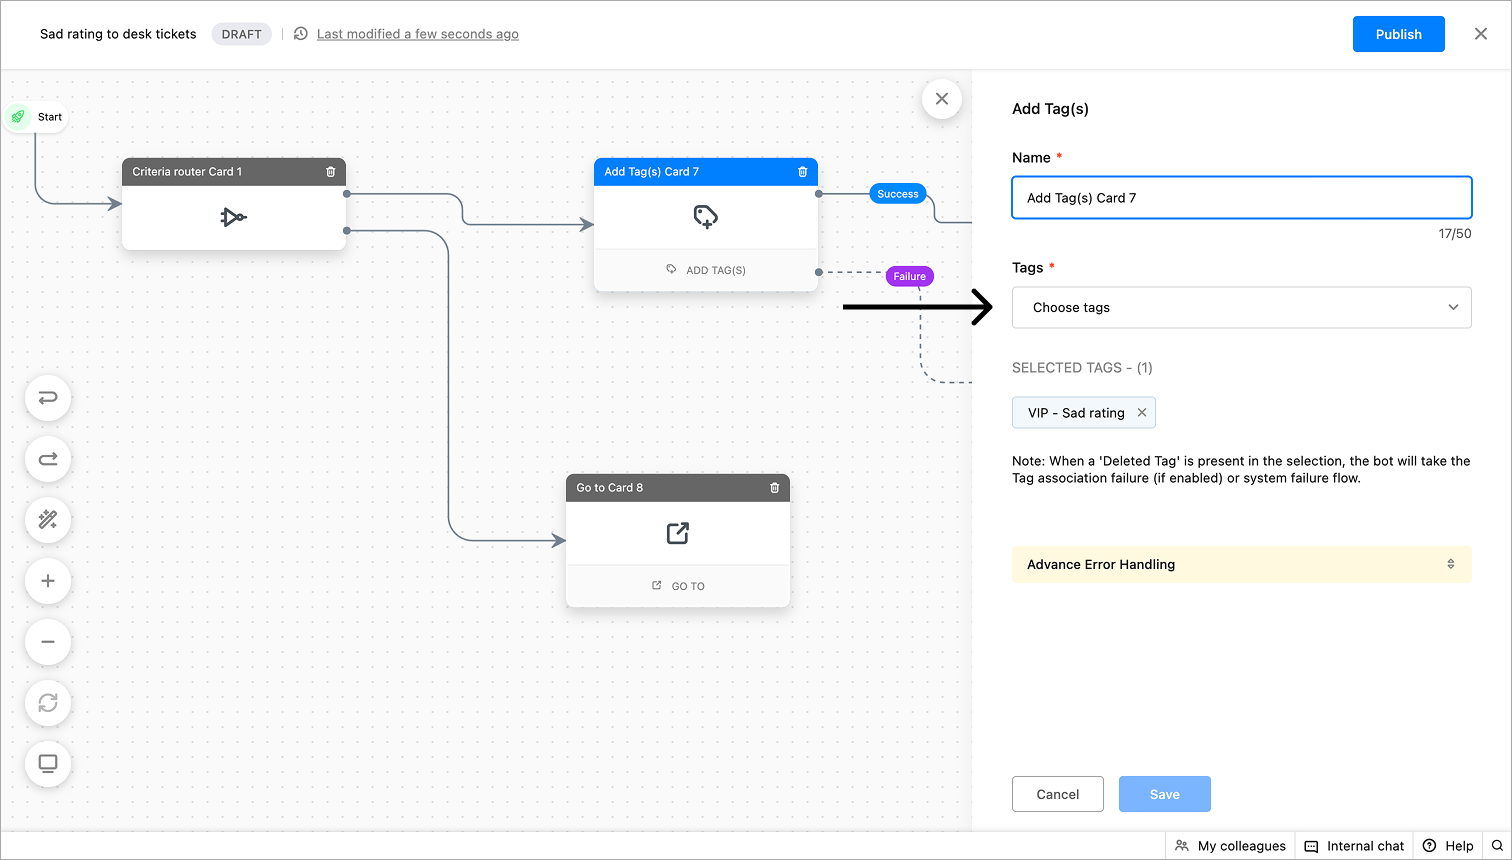
- Success: To add cards after the tag is associated successfully.
- Failure: To add cards in case of tag association failure due to technical reasons.
- Misconfiguration: To add cards if the associated tag is deleted.
Plugs
Plugs in the flow bot builder help to perform customized actions/third-party integrations. To build plugs, navigate to Settings > Developers > Plugs. Once the plug is built and published, you can use it in the flow bot builder.
- Click on the card holder (+) icon to view the cards gallery and select the Plugs card under the action cards section.
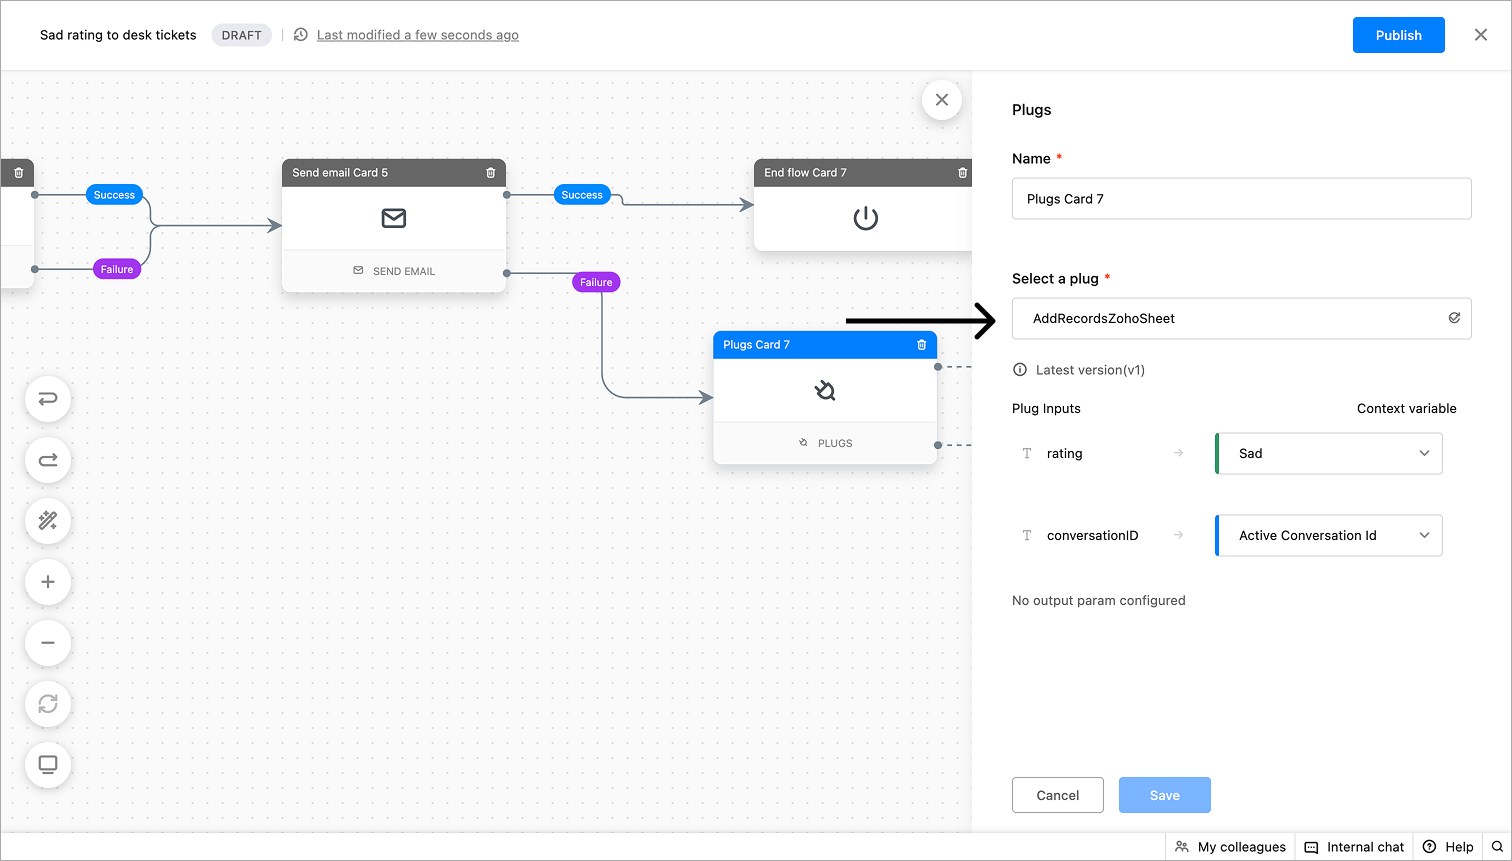
- Give your card a name, and select the Plug you want to associate from the drop-down.
- Then, provide the context variables for plug's Input and Output fields.
- Click Save.
There are two possible flows when the plug card is triggered. The flows can be used to:
- Success: To add cards upon successful execution of the plug.
- Failure: To add cards in case of plug failure. This can happen due to wrong usage/values or technical issues.
The send email card allows triggering emails.
- To send emails, click on the card holder (+) icon to view the card gallery and select the Send Email card under the action cards section.
- Provide the card name.
- Next, you can also use your existing Email templates for this card. All the templates from your portal will be listed here. You can either associate a template with the card or copy the subject and body from the email template to the card.
- When an email template is associated with the card, the contents of the template will be synced with this card. Any changes made to the email template will be automatically updated on this card.
Learn how to add email templates
- To use the same email template without editing the email contents, subject, or body, click Use Template.
- If you wish to make modifications to the chosen template, click on Edit & Use.
- If you do not have any existing templates, you can create a custom subject and body for your email. You can also insert dynamic text by typing % to enhance the email's content.
- Next, specify the recipient's email address and CC (carbon copy) recipients to send the email to the required address.
- Finally, click Save.
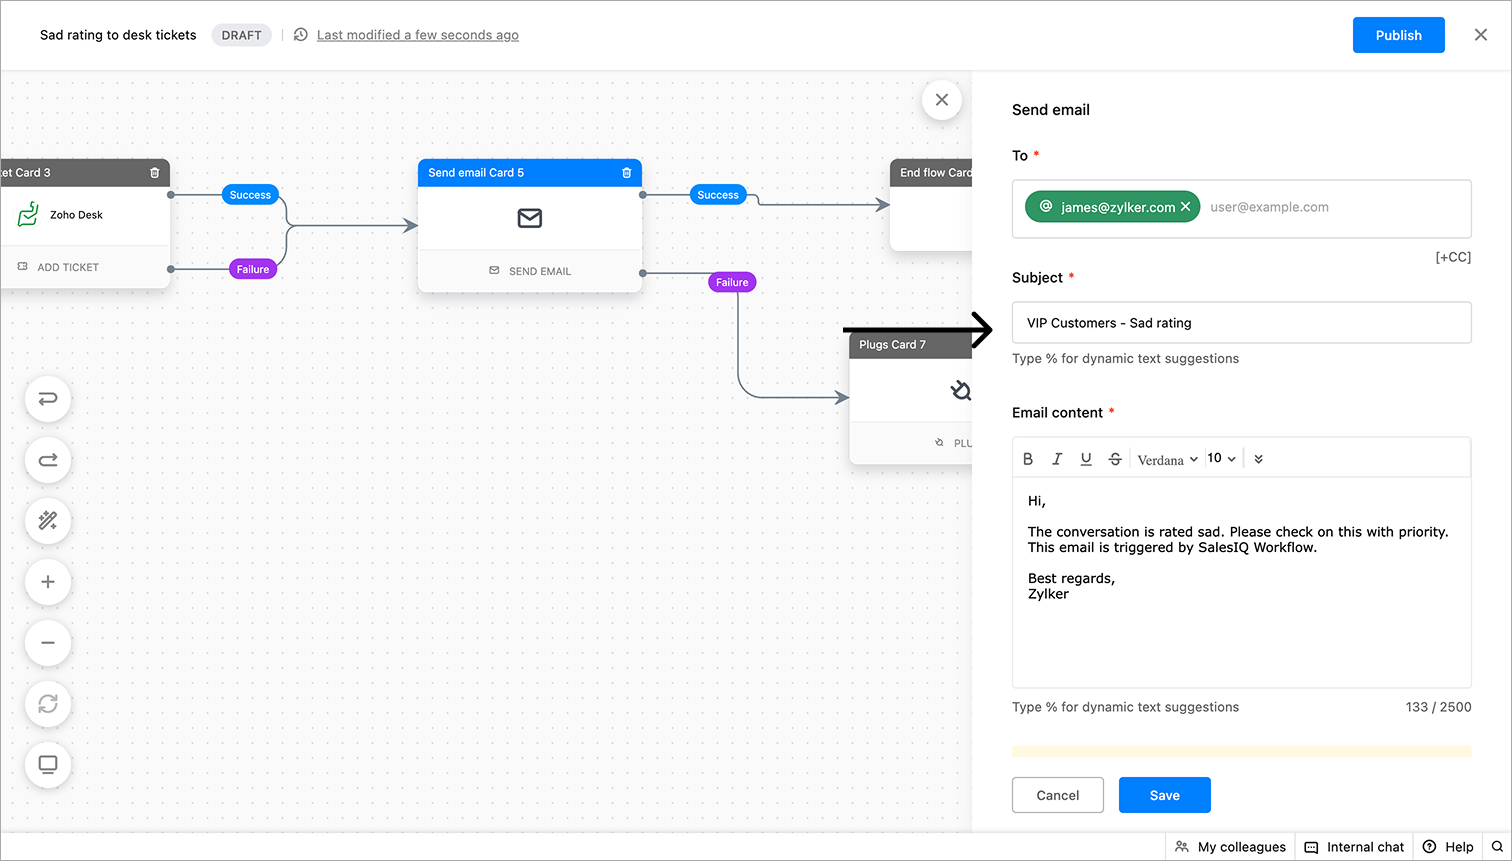
There are two possible flows upon the execution of the Send email card:
- Success: To add cards after the mail is sent successfully.
- Failure: To add cards in case of failure due to technical reasons.
- Misconfiguration: To add card in case of the company email address is not available in the portal's email configuration.
Webhook
Configuring the Webhook
Each webhook request consists of a few main components that define what data is sent and how.
Handling responses
{
"ticket_id": "12345",
"details": {
"status": "In Progress"
},
"remarks": "The refund has been initiated and will reflect by November 30th."
}- To display the remarks, enter remarks as the response parameter.
- For nested values, use the path (e.g., details.status).
{
"data": [
{
  "ticketNumber": "101",
  "name": "Payment issue (Order ID - #445433)",
  "status": "In Progress"
},
{
  "ticketNumber": "176",
  "name": "Order delay (Order ID - #55684)",
  "status": "Closed"
}
]
}- To display the status, include the key path with the list index in the response parameter. For example, use "data[0].status" to fetch the status from the first item in the list. In this case, data[0].status will return "Open".
- Context variable name – The variable to store the value
- Response parameter – The JSON key or path
- Data type – The value’s type (string, number, etc.)
Success and failure legs
- Triggered when the webhook call is completed successfully.
- The failure leg is triggered when the webhook request fails for any reason—invalid credentials, wrong URL, network errors, or unexpected responses.
- If the external service takes more than 5 seconds to respond, the webhook times out, and the failure leg is executed.