Install the iOS UI framework for the customer app
In addition to the capabilities of the core framework, the UI framework offers predefined view controllers for the components in your Creator application. This allows you to directly include forms, reports, and pages from your Creator app into your iOS app, and build custom UI that can interface with the data in your Creator app.
1. Prerequisites
- Xcode IDE 26.0 (Required for latest SDK version)
- iOS 15 and above
- CocoaPods
Note:
- If your Mac is powered by Apple Silicon (M1, M2, etc.), it is recommended to run Xcode with Rosetta enabled, as simulator support in Xcode is currently available only via Rosetta destinations.
- It is recommended to use the latest SDK version to ensure compatibility and access to the newest features. CocoaPods installs the latest stable version by default. To use a specific or earlier version, specify it explicitly in your Podfile.
For the list of supported SDK versions and compatible Xcode versions, refer here.
2. Register your iOS app with Zoho
- Edit your Zoho Creator application.
- Navigate to its Settings page.
- Click Mobile SDK under Developer Tools.
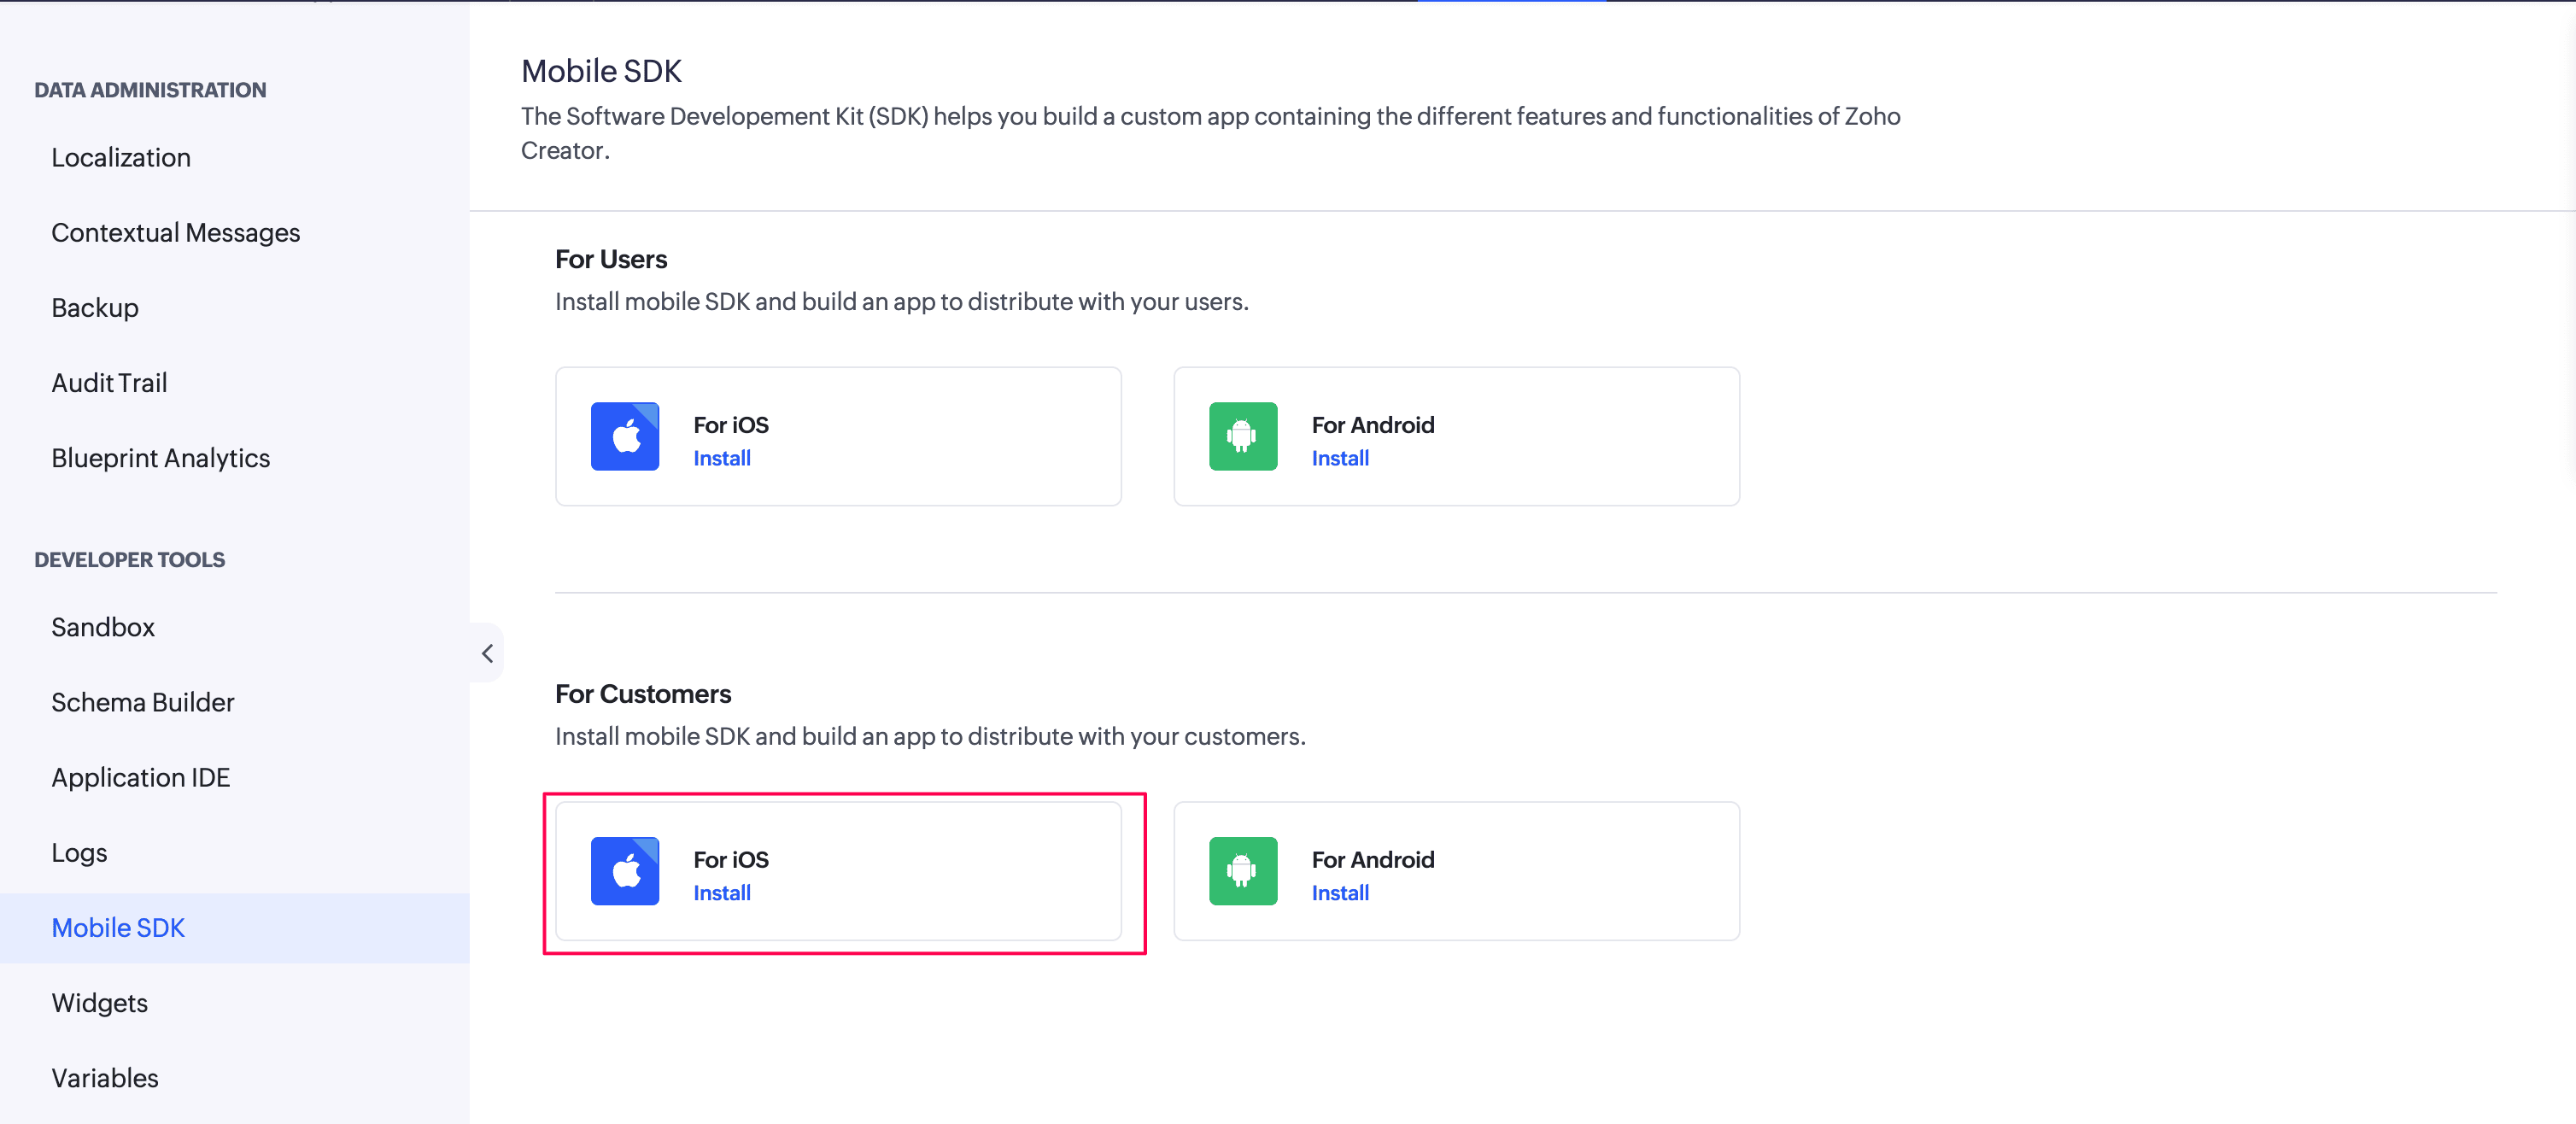
- Under the For Customers section, click For iOS. A pane will slide in from the right.
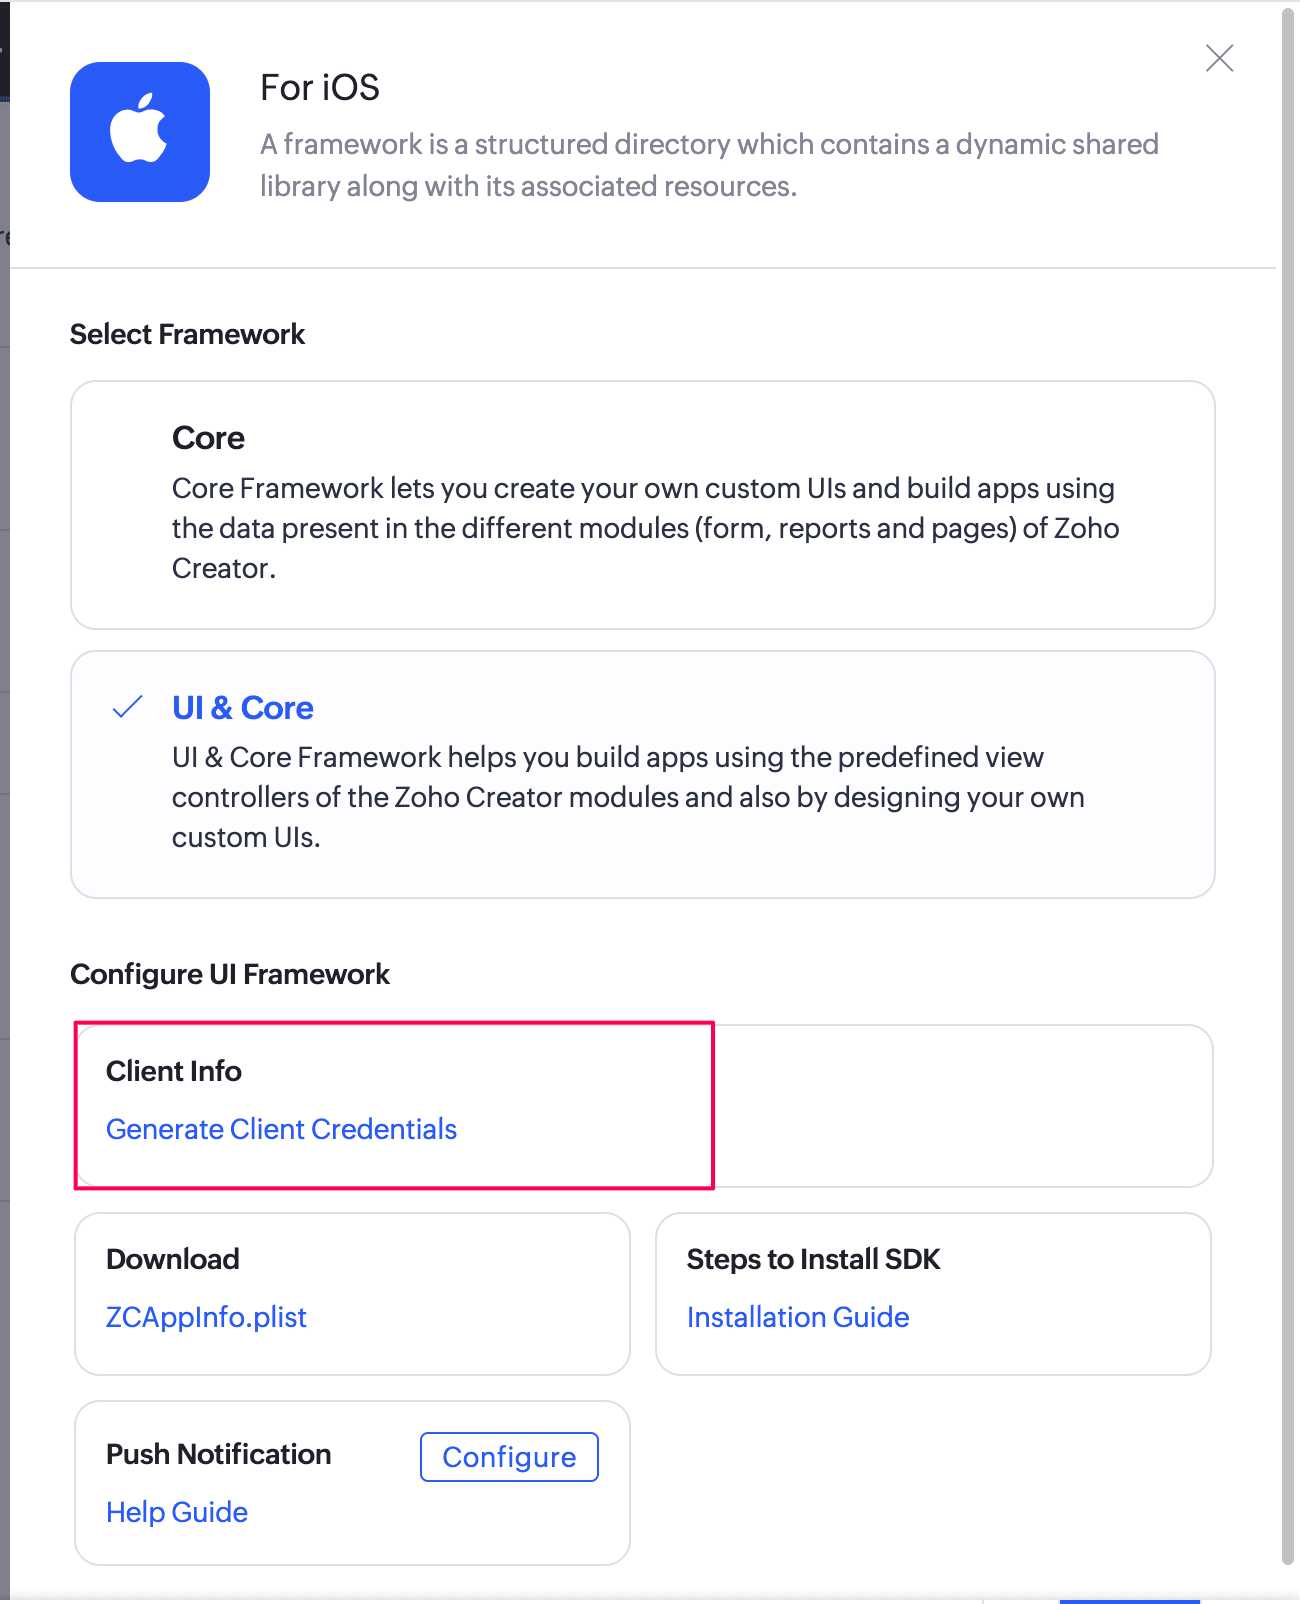
- Select the UI & Core library.
- Click the Generate Client Credentials to create a dedicated token storage entity for an application instance. A popup to configure client details appears.
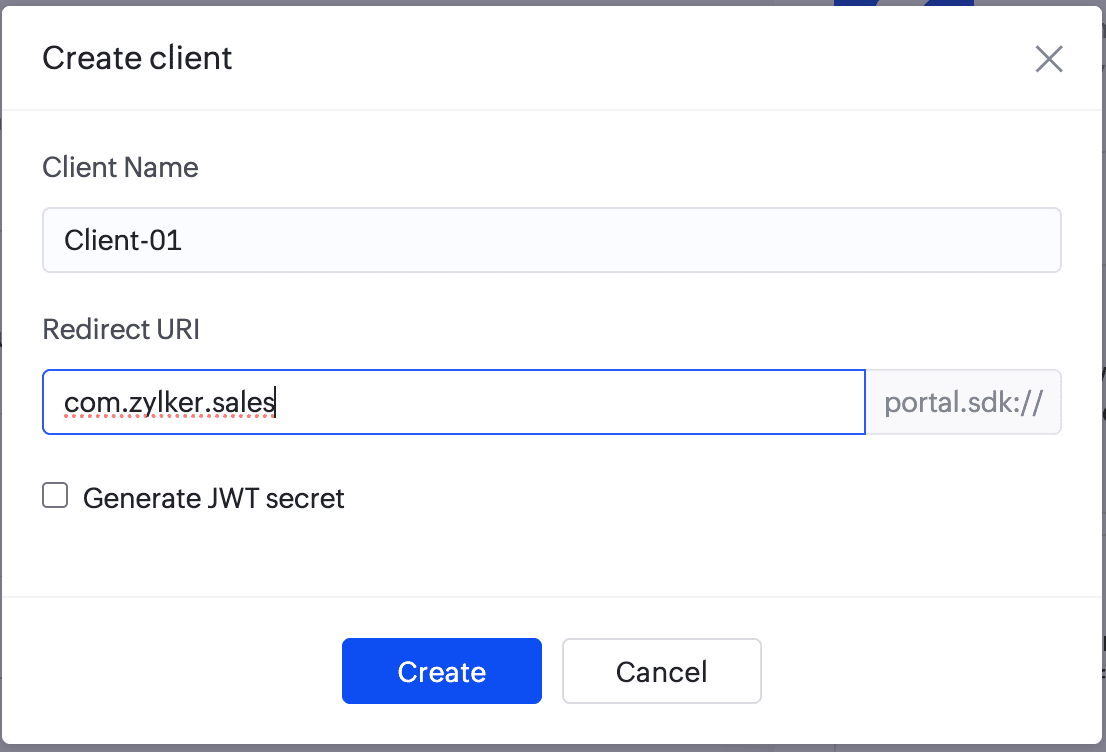
Fill out a custom Client name and Redirect URI in the respective input fields of the popup. The redirect URI is an application specific unique identifier, used to redirect the user from the browser back to the mobile application after successful authentication.The same URI should be configured in the authentication server.
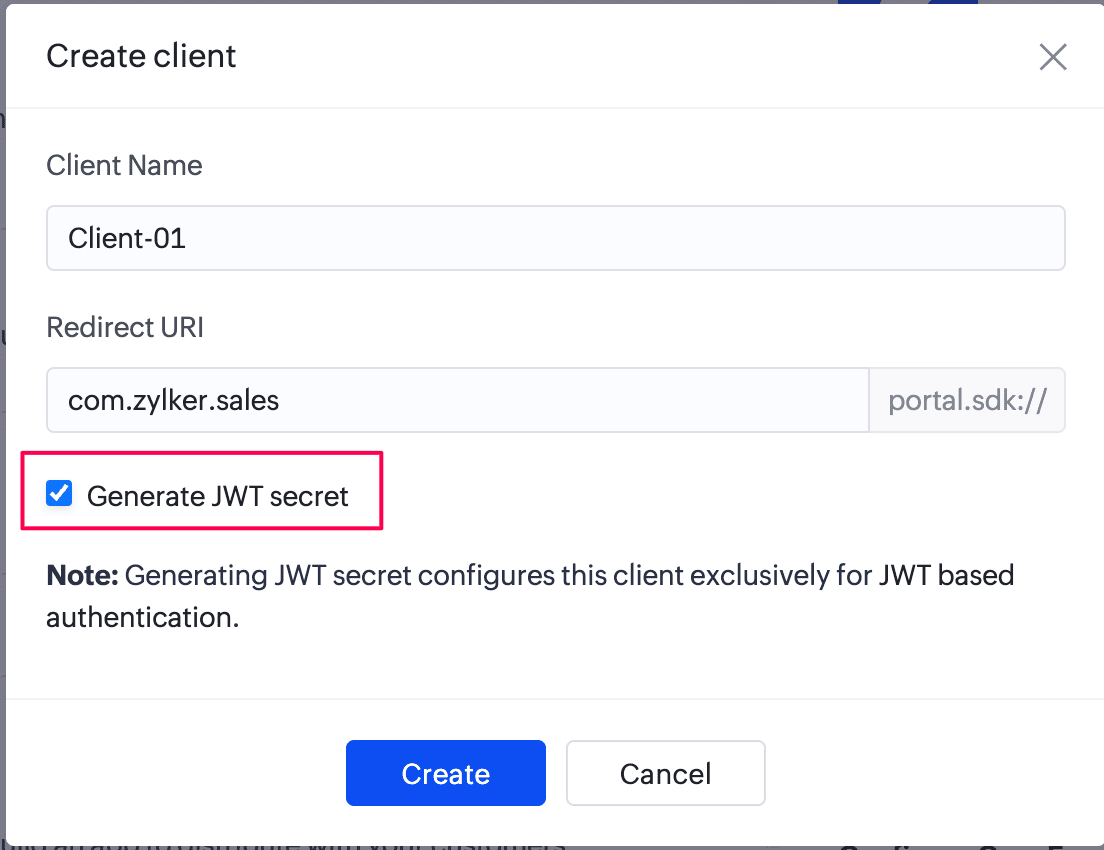
Tick the Generate JWT Secret checkbox to generate a secret key that can be used as an input to the JWT builder for generating JWT tokens while installing the core framework.
Click Create to proceed. This will generate the client ID, client secret, and portal ID for the iOS app that you want to integrate with your Creator application. The JWT secret will also be displayed, if the Generate JWT Secret checkbox was selected. Once a client is created, the + Create Client option, allows you to create additional clients for the same application.
Note:
Generating a JWT secret configures the client exclusively for JWT-based authentication. After the JWT secret is generated, access and refresh tokens can only be requested using this method.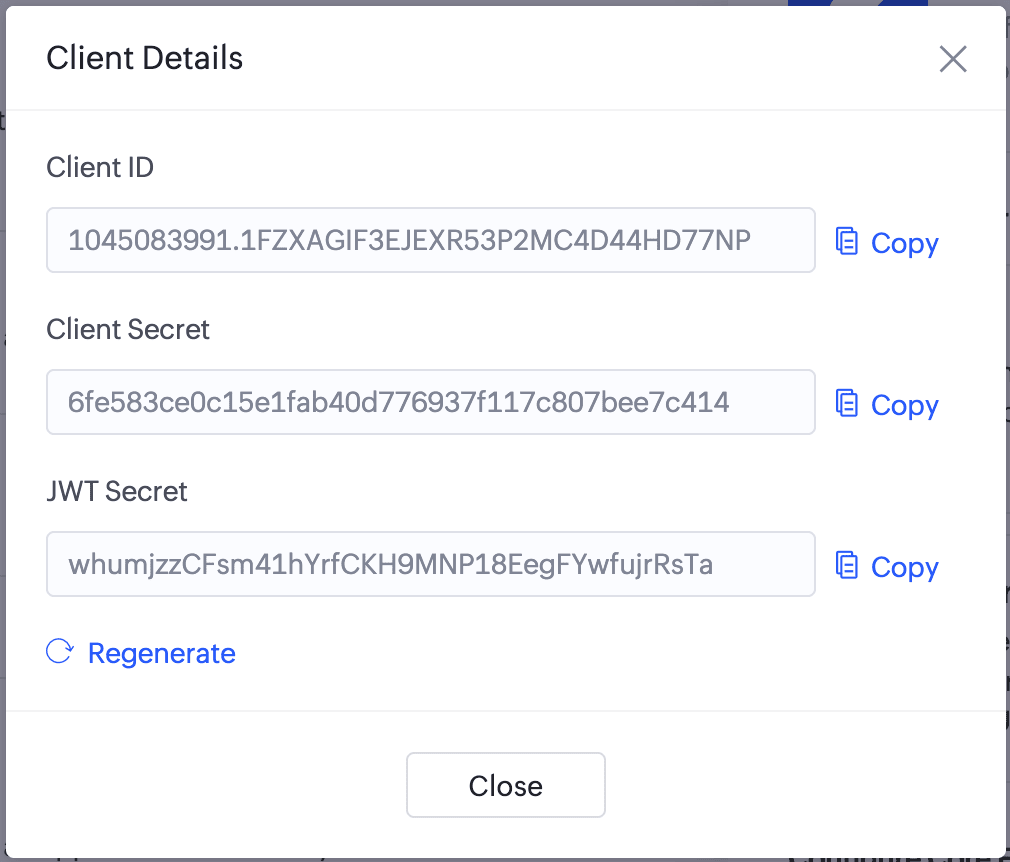
Downloaded the ZCAppInfo.plist file and add it to your project.

2.1. Managing clients
The below actions can be performed for a client in the For Customer - SDK configuration pane:
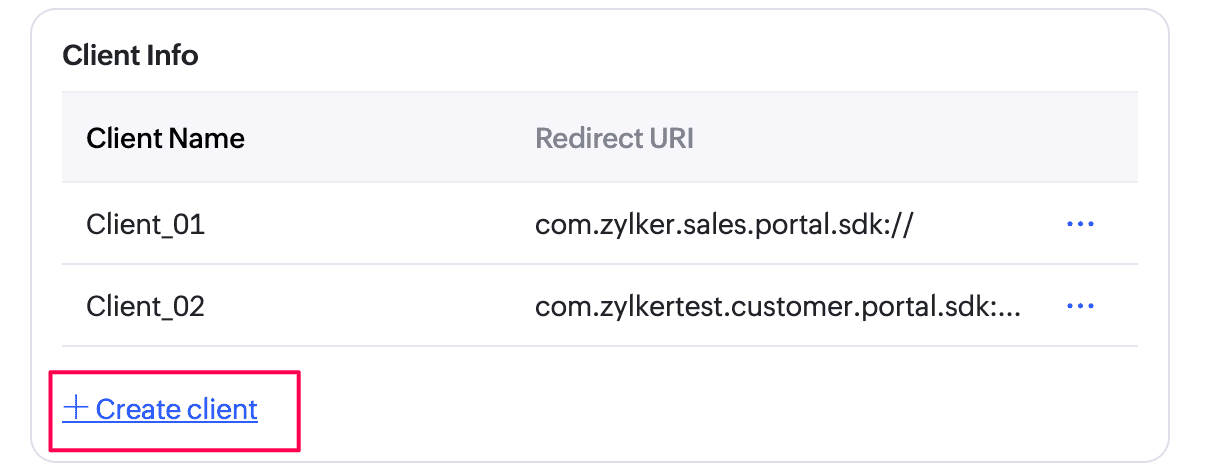
- Create multiple clients: Click +Create Client to add additional clients and generate respective credentials for the Zoho Creator portal application.
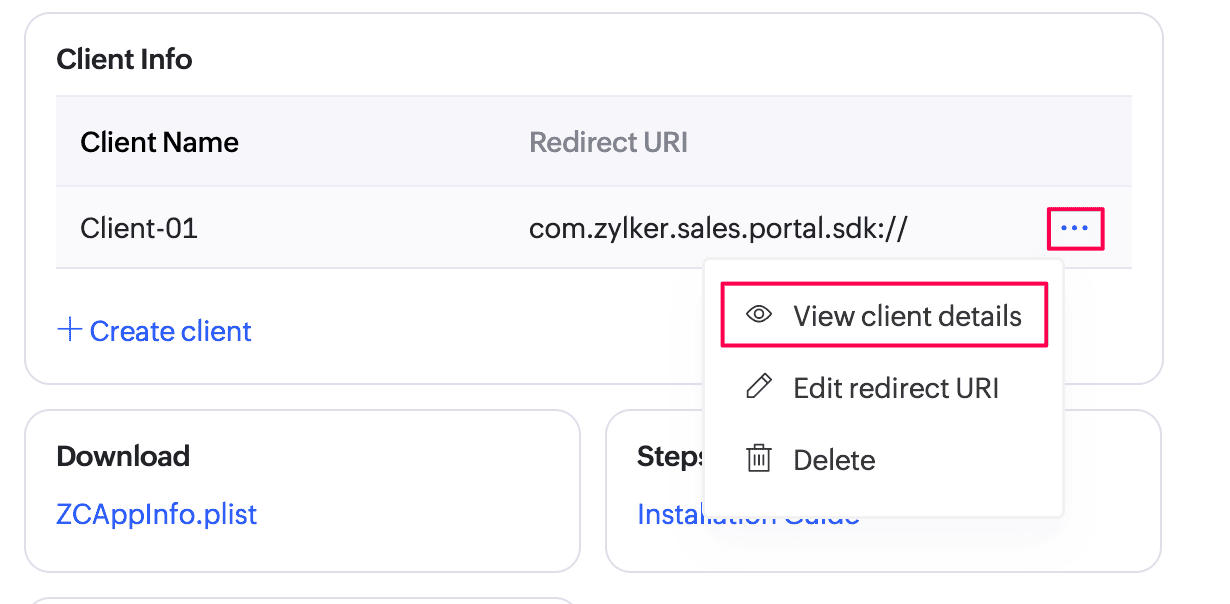
- View client details: Click the horizontal ellipsis () icon next to a client and select View client details. The client ID, client secret, and JWT secret for the selected client are displayed.
Regenerate JWT secret:
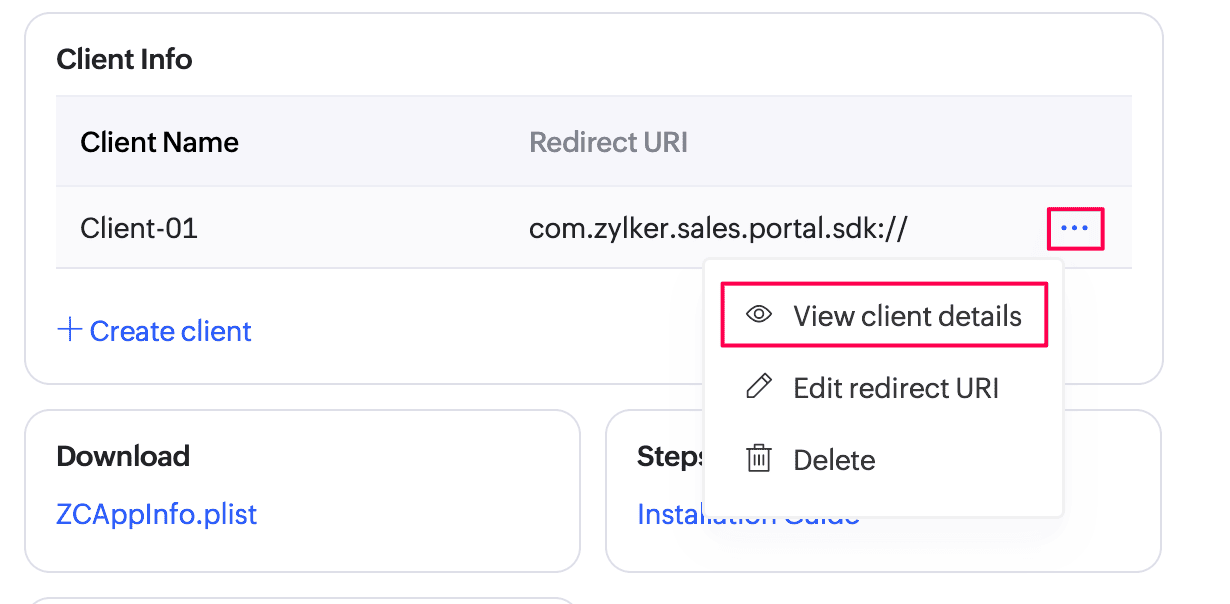
Click the horizontal ellipsis () icon next to a client and select View client details.
Click Regenerate under Client Details to generate a new JWT Secret if the existing secret needs to be refreshed for
security purposes.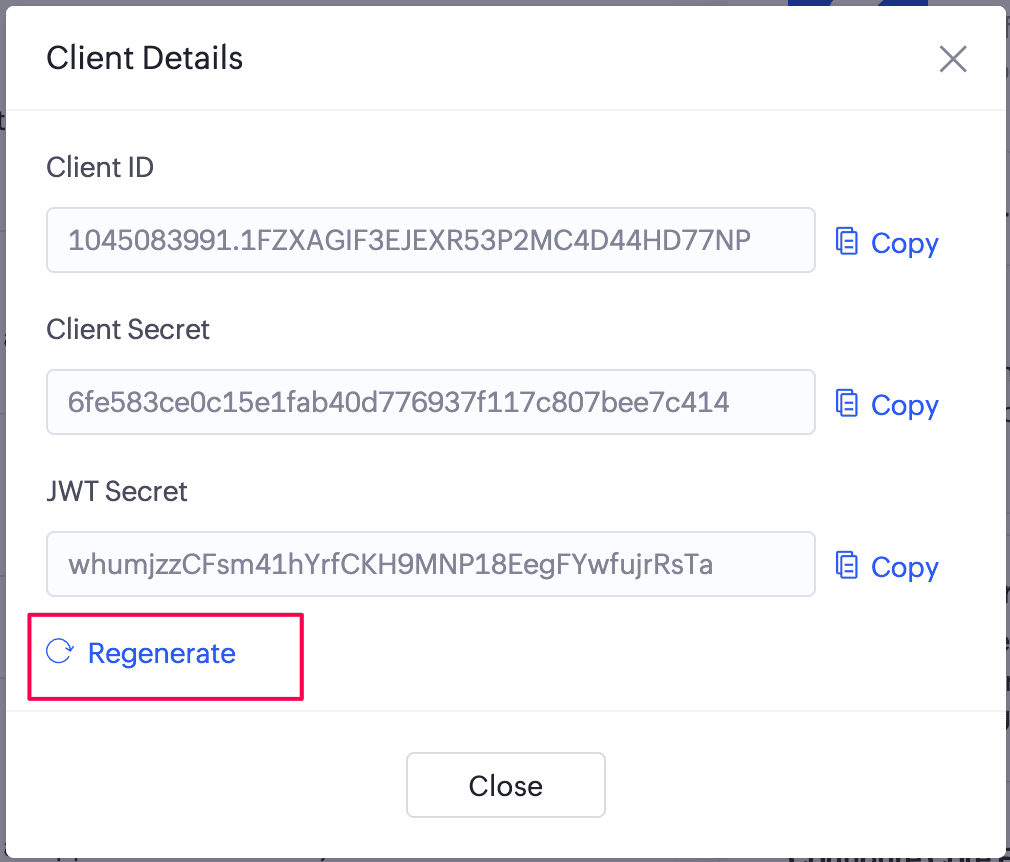
Click Done to save the changes.
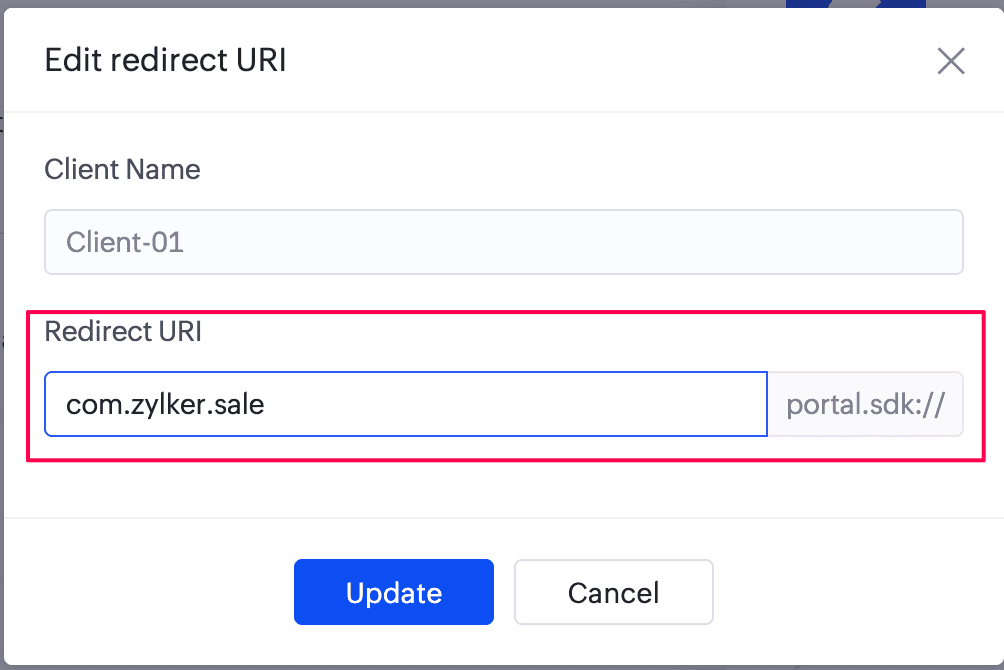
Edit redirect URI:
Click the horizontal ellipsis () icon next to a client and select Edit redirect URI.
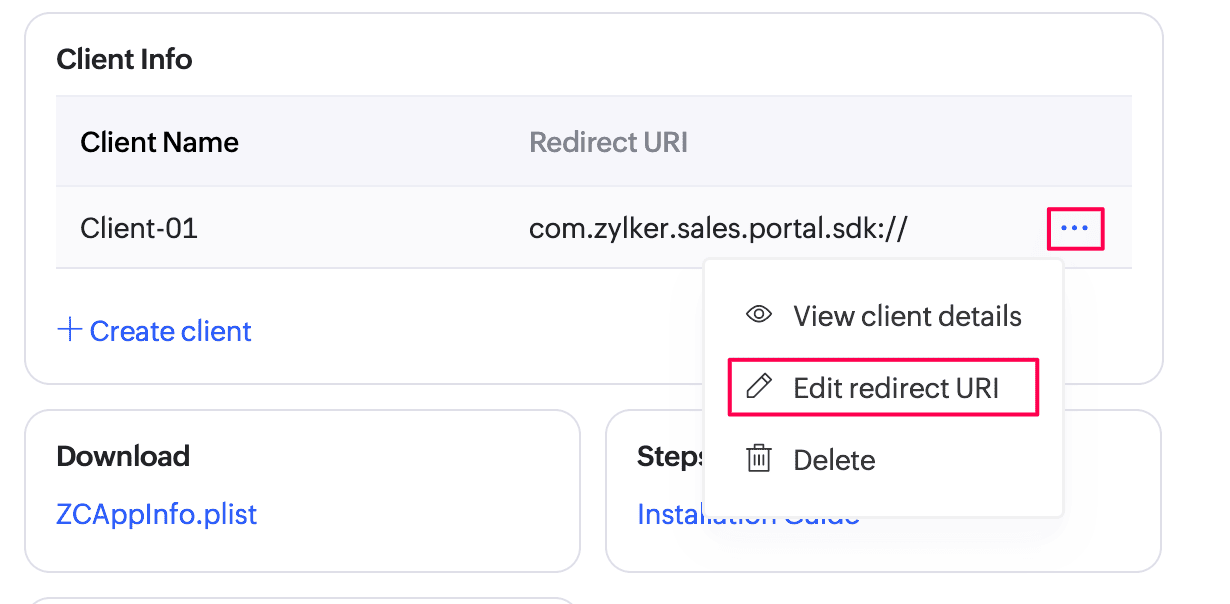
Enter the new redirect URI and click Update to save the changes.
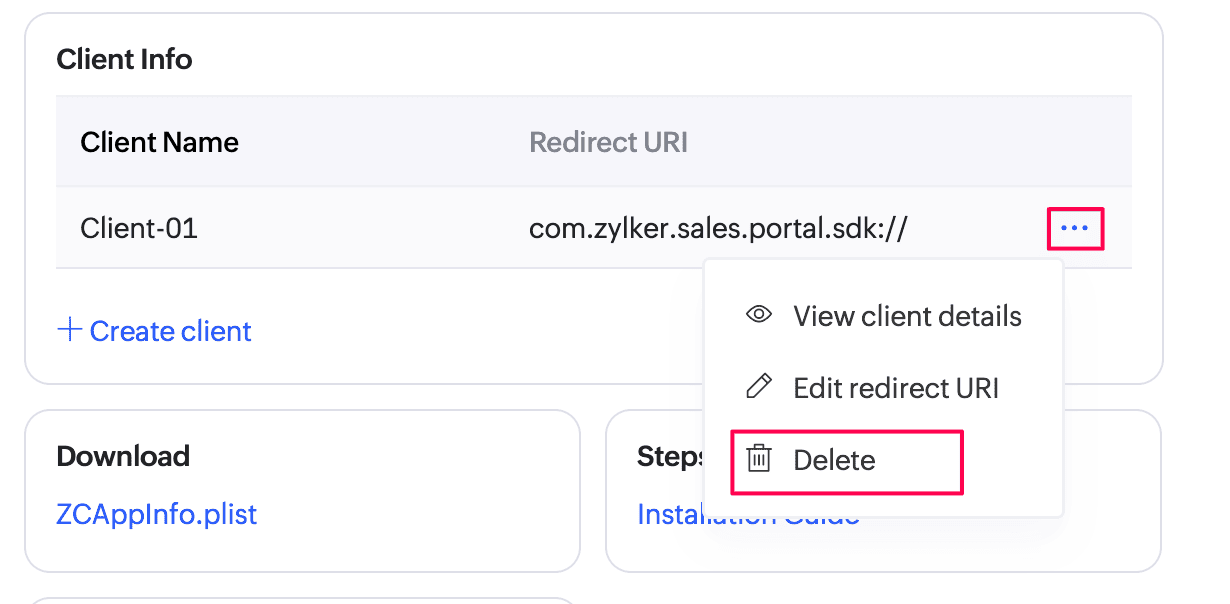
Delete a client: Click the horizontal ellipsis () icon next to a client and select Delete to remove a client. The generated client ID and its authentication credentials will also be removed.
3. Install the iOS UI framework for the customer app
Install the Zoho Creator SDK using Pod:
target 'Demo' do
use_frameworks!
pod 'ZohoPortalAuth'
pod 'ZCUIFramework'
end
post_install do |installer|
installer.generated_projects.each do |project|
project.targets.each do |target|
target.build_configurations.each do |config|
config.build_settings['CODE_SIGNING_ALLOWED'] = 'NO'
config.build_settings['IPHONEOS_DEPLOYMENT_TARGET'] = '13.0'
end
end
end
endAdd the following to your Objective-C bridging header:
#import <ZohoPortalAuthKit/ZohoPortalAuth.h>Import ZCUIFramework to use Zoho Creator's iOS UI framework:
import ZCUIFrameworkConfigure your project with the following code, for example in the SceneDelegate file:
If you enabled Generate JWT token while creating the client, add the code snippet in the With JWT token tab. Otherwise, add the code in the Without JWT token tab.class SceneDelegate: UIResponder, UIWindowSceneDelegate { var window: UIWindow? func scene(_ scene: UIScene, willConnectTo session: UISceneSession, options connectionOptions: UIScene.ConnectionOptions) { if let windowScene = scene as? UIWindowScene { let window = UIWindow(windowScene: windowScene) } let scope = ["aaaserver.profile.READ","zohocontacts.userphoto.READ","ZohoContacts.contactapi.READ","ZohoCreator.meta.CREATE","ZohoCreator.meta.READ","ZohoCreator.meta.UPDATE","ZohoCreator.meta.DELETE","ZohoCreator.data.CREATE","ZohoCreator.data.READ","ZohoCreator.data.UPDATE","ZohoCreator.data.DELETE","Stratus.stratusop.READ","ZohoCRM.modules.READ","ZohoCRM.users.READ"] let clientID = "<Your Client ID>" let clientSecret = "<Your Client Secret>" let portalId = "<Your Portal id>" let urlScheme = "<Your Url Scheme>" let accountsUrl = "<Your Portal URL>" // This should be your portal URL. For eg: 'https://demoapp.zohocreatorportal.com' ZohoPortalAuth.initWithClientID(clientID, clientSecret: clientSecret, portalID: portalId, scope: scope, urlScheme: urlScheme, mainWindow: self.window!, accountsPortalURL: accountsUrl) // To verify if the app is already logged in ZohoPortalAuth.getOauth2Token { (token, error) in if token == nil { // Not logged in self.showLoginScreen() } else { // App logged in already. // Ensure to use the following line of code in your iOS app before you utilize any of Creator SDK’s methods Creator.configure(uiDelegate: self) } } } func scene(_ scene: UIScene, openURLContexts URLContexts: Set <UIOpenURLContext> ) { if let context = URLContexts.first { let _ = ZohoPortalAuth.handleURL(context.url, sourceApplication: context.options.sourceApplication, annotation: context.options.annotation) } } } extension SceneDelegate: ZCUIServiceDelegate { func oAuthToken(with completion: @escaping AccessTokenCompletion) { ZohoPortalAuth.getOauth2Token { (token, error) in completion(token, error) } } func openURL(for openURLTasks: [OpenUrlTask]) { // Get Call back here when openurl have query string "zc_MobileSDK_HandleOpenURL=true" } }
Code to allow Zoho Portal login to your iOS app:func showLoginScreen() { ZohoPortalAuth.presentZohoPortalSign( in: { (token, error) in if token != nil { //login success } }) }
Code to provision logout from Zoho Portal:func logout() { ZohoPortalAuth.revokeAccessToken { (error) in if error == nil { //Logout Successfully } else { //Error Occurred } } }class SceneDelegate: UIResponder, UIWindowSceneDelegate { var window: UIWindow ? func scene(_ scene: UIScene, willConnectTo session: UISceneSession, options connectionOptions: UIScene.ConnectionOptions) { if let windowScene = scene as? UIWindowScene { let window = UIWindow(windowScene: windowScene) } let scope = ["aaaserver.profile.READ","zohocontacts.userphoto.READ","ZohoContacts.contactapi.READ","ZohoCreator.meta.CREATE","ZohoCreator.meta.READ","ZohoCreator.meta.UPDATE","ZohoCreator.meta.DELETE","ZohoCreator.data.CREATE","ZohoCreator.data.READ","ZohoCreator.data.UPDATE","ZohoCreator.data.DELETE","Stratus.stratusop.READ","ZohoCRM.modules.READ","ZohoCRM.users.READ"] let clientID = "<Your Client ID>" let clientSecret = "<Your Client Secret>" let portalId = "<Your Portal ID>" let urlScheme = "<Your Url Scheme>" let accountsUrl = "https://accounts.zohoportal.com" // enter the accounts URL of your respective DC. For eg: EU users must use 'https://accounts.zohoportal.eu' ZohoPortalAuth.initWithClientID(clientID, clientSecret: clientSecret, portalID: portalId, scope: scope, urlScheme: urlScheme, mainWindow: self.window!, accountsPortalURL: accountsUrl) // To verify if the app is already logged in ZohoPortalAuth.getOauth2Token { (token, error) in if token == nil { // Not logged in self.authenticatePortalUserwithJWT() } else { // App logged in already. // Ensure to use the following line of code in your iOS app before you utilize any of Creator SDK’s methods Creator.configure(delegate: self) } } } func scene(_scene: UIScene, openURLContexts URLContexts: Set <UIOpenURLContext> ) { if let context = URLContexts.first { let _ = ZohoPortalAuth.handleURL(context.url, sourceApplication: context.options.sourceApplication, annotation: context.options.annotation) } } } extension SceneDelegate: ZCCoreFrameworkDelegate { func oAuthToken(with completion: @escaping AccessTokenCompletion) { ZohoPortalAuth.getOauth2Token { (token, error) in completion(token, error) } } }
Code to add Zoho Portal JWT based login to your iOS app:import ZohoPortalAuth func authenticatePortalUserwithJWT(jwtToken: String) { // Ensure you use the specific Login Type for JWT let loginType = ZohoPortalAuthRemoteLoginTypeJWT ZohoPortalAuth.getOAuthToken(forRemoteUser: jwtToken, tokenType: loginType, tokenHandler: { token, error in if let error = error { print("Portal Auth Failed: \(error.localizedDescription)") return } guard let accessToken = token else { print("Success reported but token is nil.") return } print("Portal Access Token: \(accessToken)") })}
Code to provision logout from Zoho Portal:func logout() { ZohoPortalAuth.revokeAccessToken { (error) in if error == nil { //Logout Successfully } else { //Error Occurred } } }Add values for the following keys in info.plist. These are mandatory parameters for Apple's privacy compliance because their respective services are used in the UI framework.
'NSCameraUsageDescription', 'NSContactsUsageDescription', 'NSLocationWhenInUseUsageDescription', 'NSMicrophoneUsageDescription', 'NSPhotoLibraryUsageDescription' and 'NSPhotoLibraryAddUsageDescription'
FAQ
- I'm a M1 Mac user and I'm facing issues while adding dependencies. What should I do?
To proceed further, please use the arch=x86_64 pod install command.
References
- Please refer to our iOS SDK documentation for detailed information about the various SDK methods.
- Familiarize yourself with Mobile SDK for iOS by trying out our sample application here.
- To configure push notifications for iOS, refer here.