Bulk Activities in Zoho Mail Admin Console
Bulk Activities allow you to perform certain operations where an action is required to be performed for multiple users simultaneously. This enables administrators to efficiently manage a large number of user accounts by applying changes or performing actions in bulk, rather than manually repeating the same actions for each user. With bulk activities, administrators can streamline the process of managing user-related operations, saving time and effort.
Steps to perform bulk activity
You can create a CSV file using any spreadsheet application, including all the necessary details for performing these bulk operations. A Sample CSV file will be provided under each bulk operation during the import process. The format for entering the required details in the CSV file can be found in this sample file for easy data input. By using the sample CSV file, you can ensure that your data is correctly mapped with the default headers available.
The list of bulk operations available in Zoho Mail Admin Console are:
Steps to bulk add user in Zoho Mail
- Log in to Zoho Mail Admin Console.
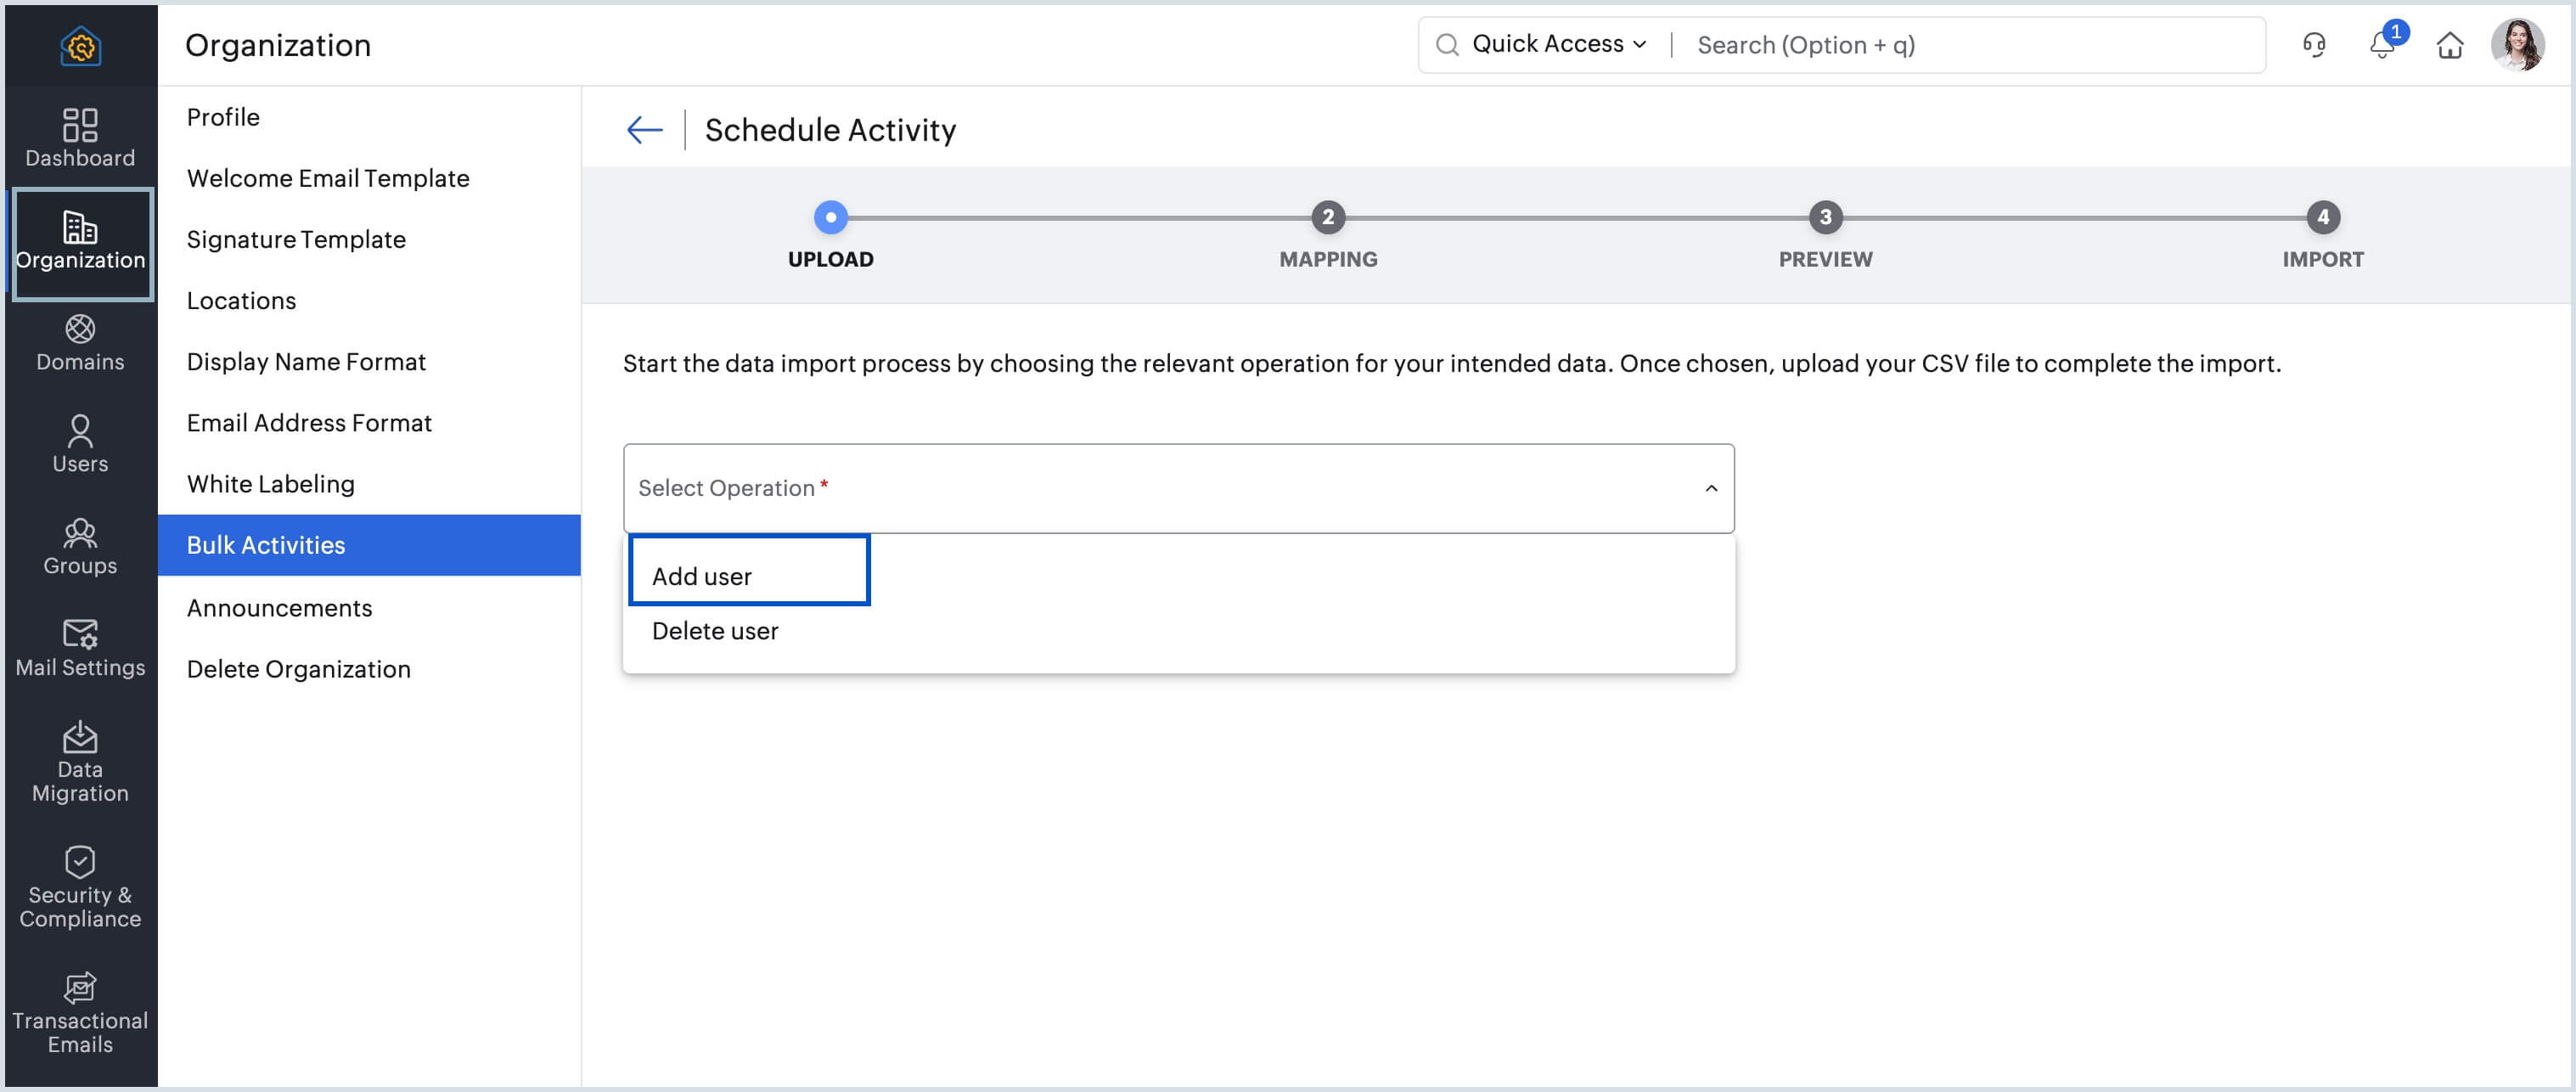
- In the Organization menu, select Bulk Activities.
- Click the +Schedule new activity button from the top menu.
- Select Add user from the Select Operation drop-down.
- Before you add users in bulk, make sure you have enough licenses. Learn more about the steps to add a new license.
- If your organization is on the Mail Flexible plan, the Dynamic Mapping dialog box appears when you select the Add user operation. Learn more about Dynamic Mapping.
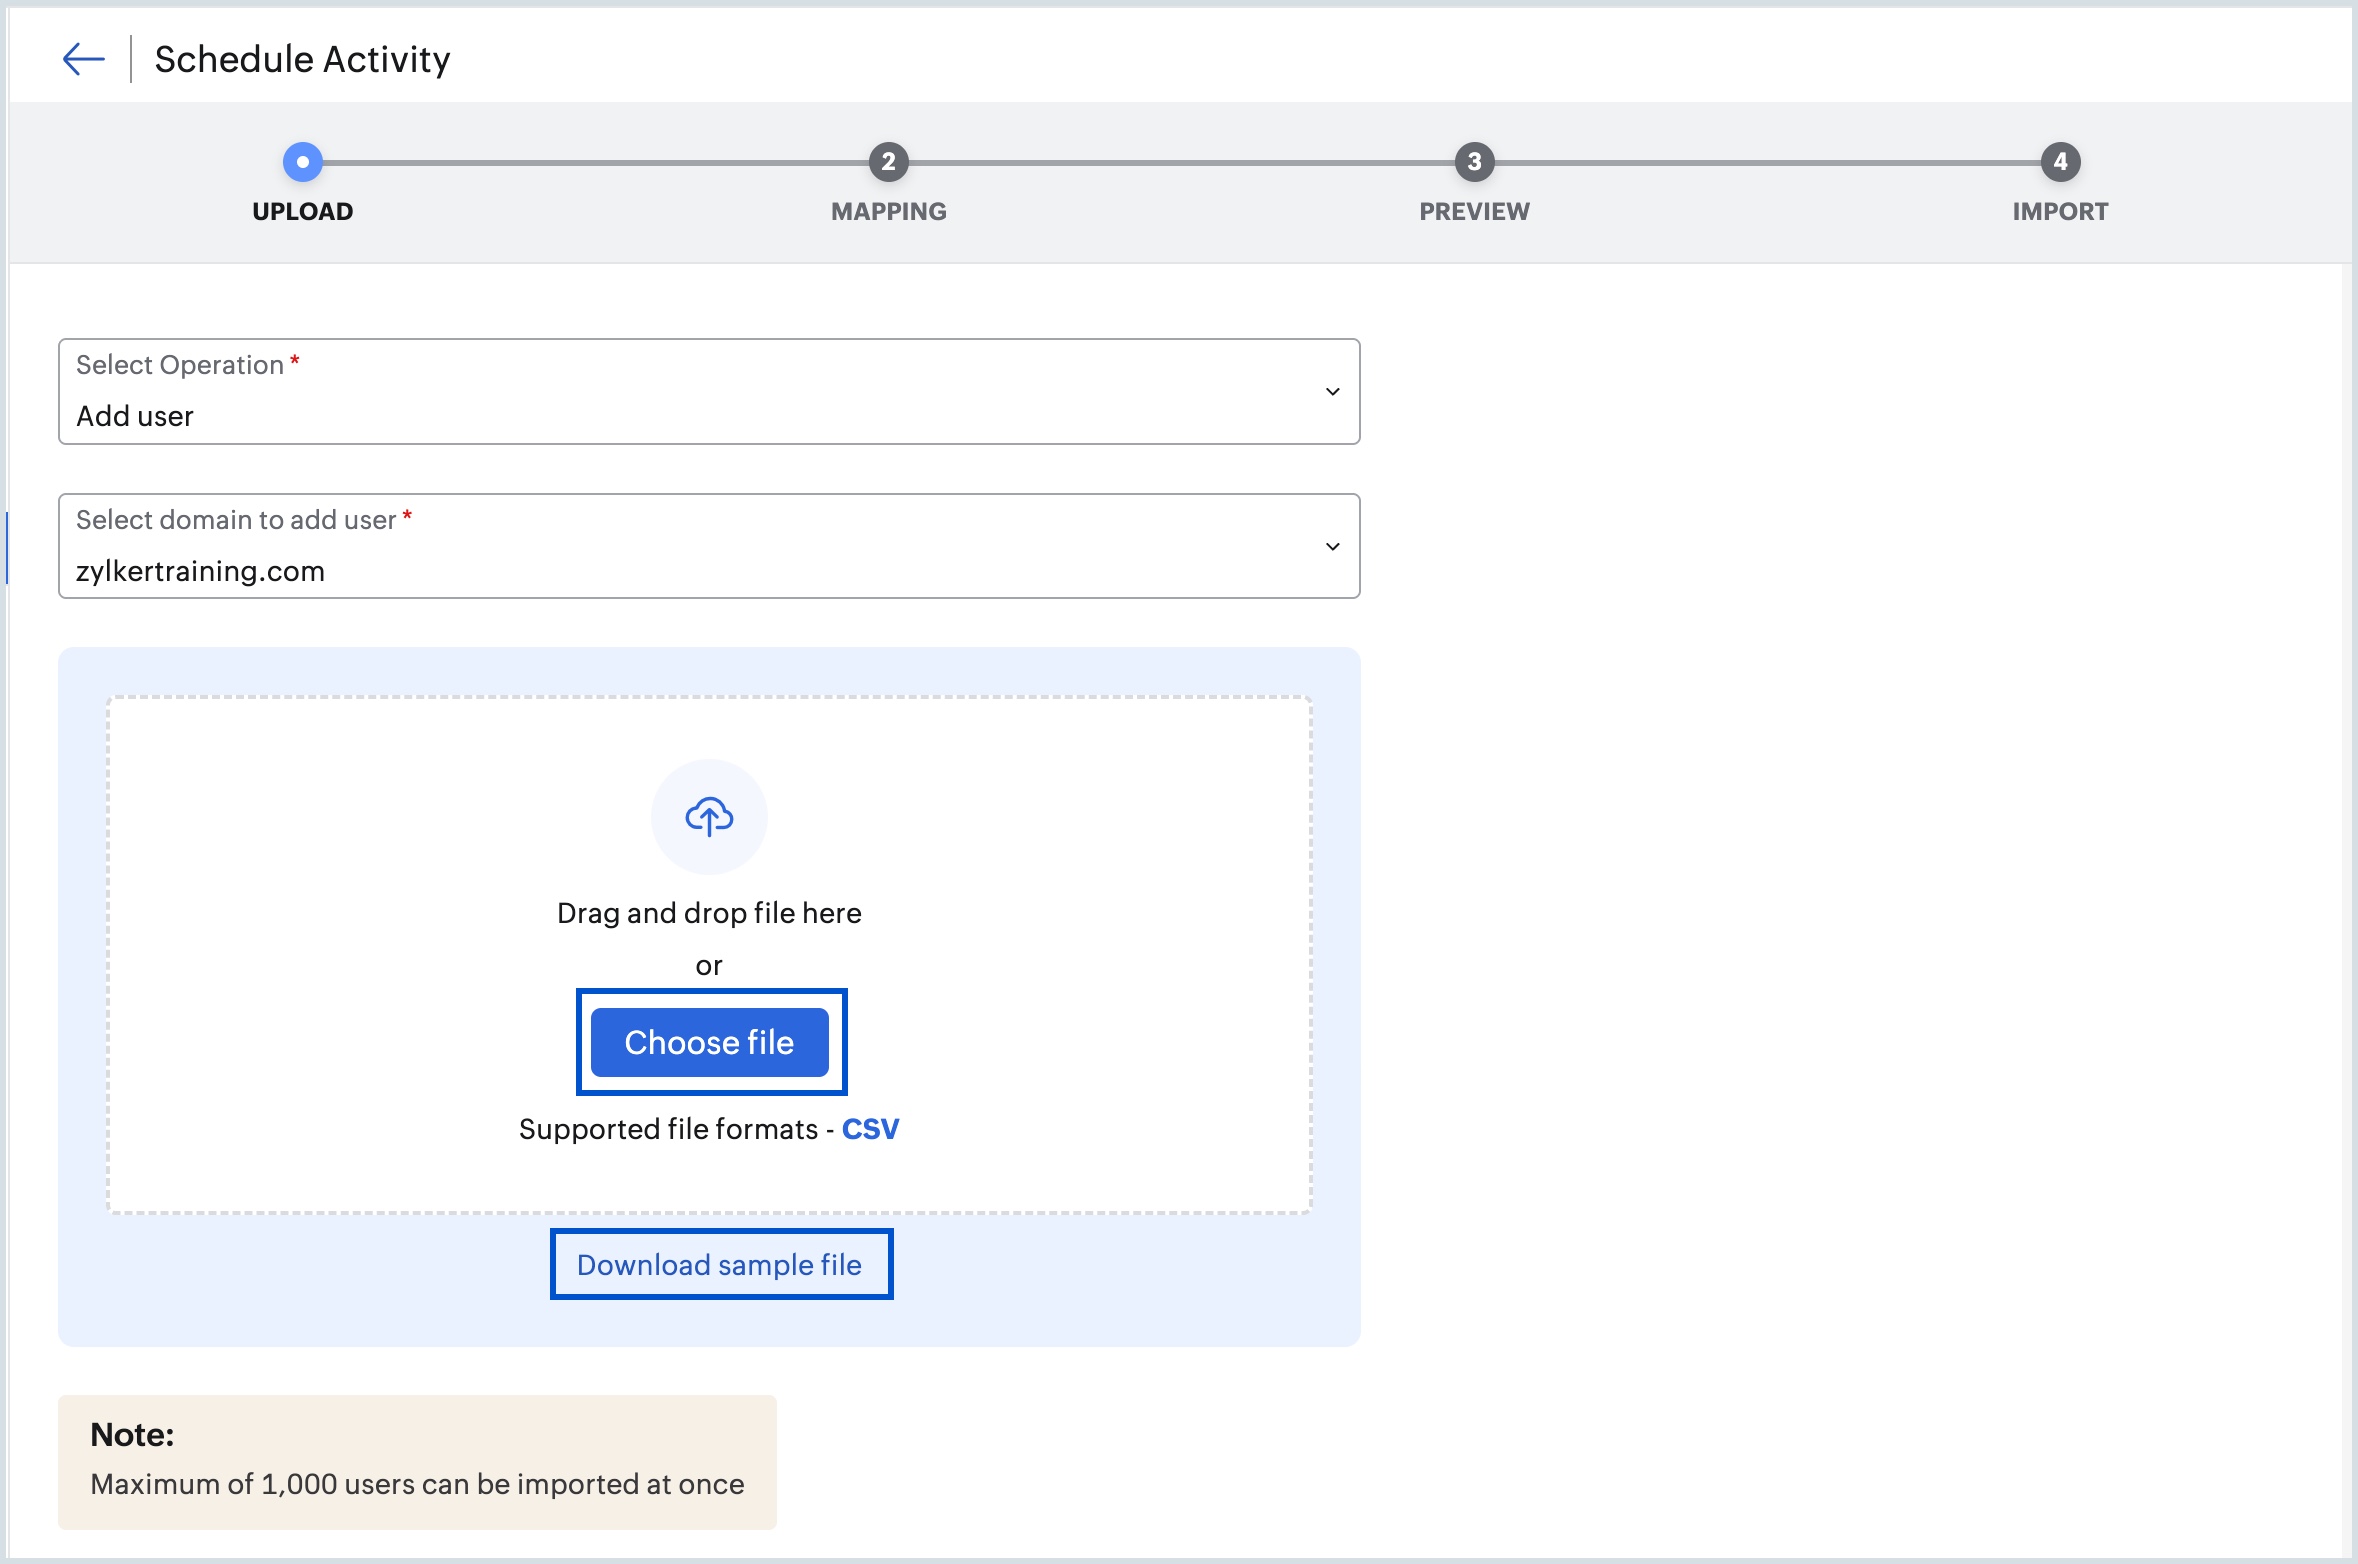
- Choose the domain to add the user from the Select domain to add user drop-down.
Click the Choose file button and upload the .csv file containing the necessary details to perform the chosen bulk action.
Note:
- You can import a maximum of 1000 entries via CSV file at once in the mentioned bulk actions.
- Download the sample CSV file containing default headers and placeholders to view the correct format for entering information needed to add users in bulk.
- The admin can map only the column headers provided in the downloaded sample CSV file, as these are the only supported headers for user import. Custom headers or additional columns cannot be added.
- Add user bulk activity is available only for organizations that use one of our paid plans.
- On the Mapping page, you can rearrange the headers as needed between the following fields:
- Supported Fields - Displays the default headers. The supported fields include both mandatory and non-mandatory headers.
- Headers in CSV file - Contains the headers from the CSV file you uploaded.
For example, if your CSV lists the Email Address under Login Username, FirstName under Name, and Password under Password, these fields will be listed under Headers in CSVfile.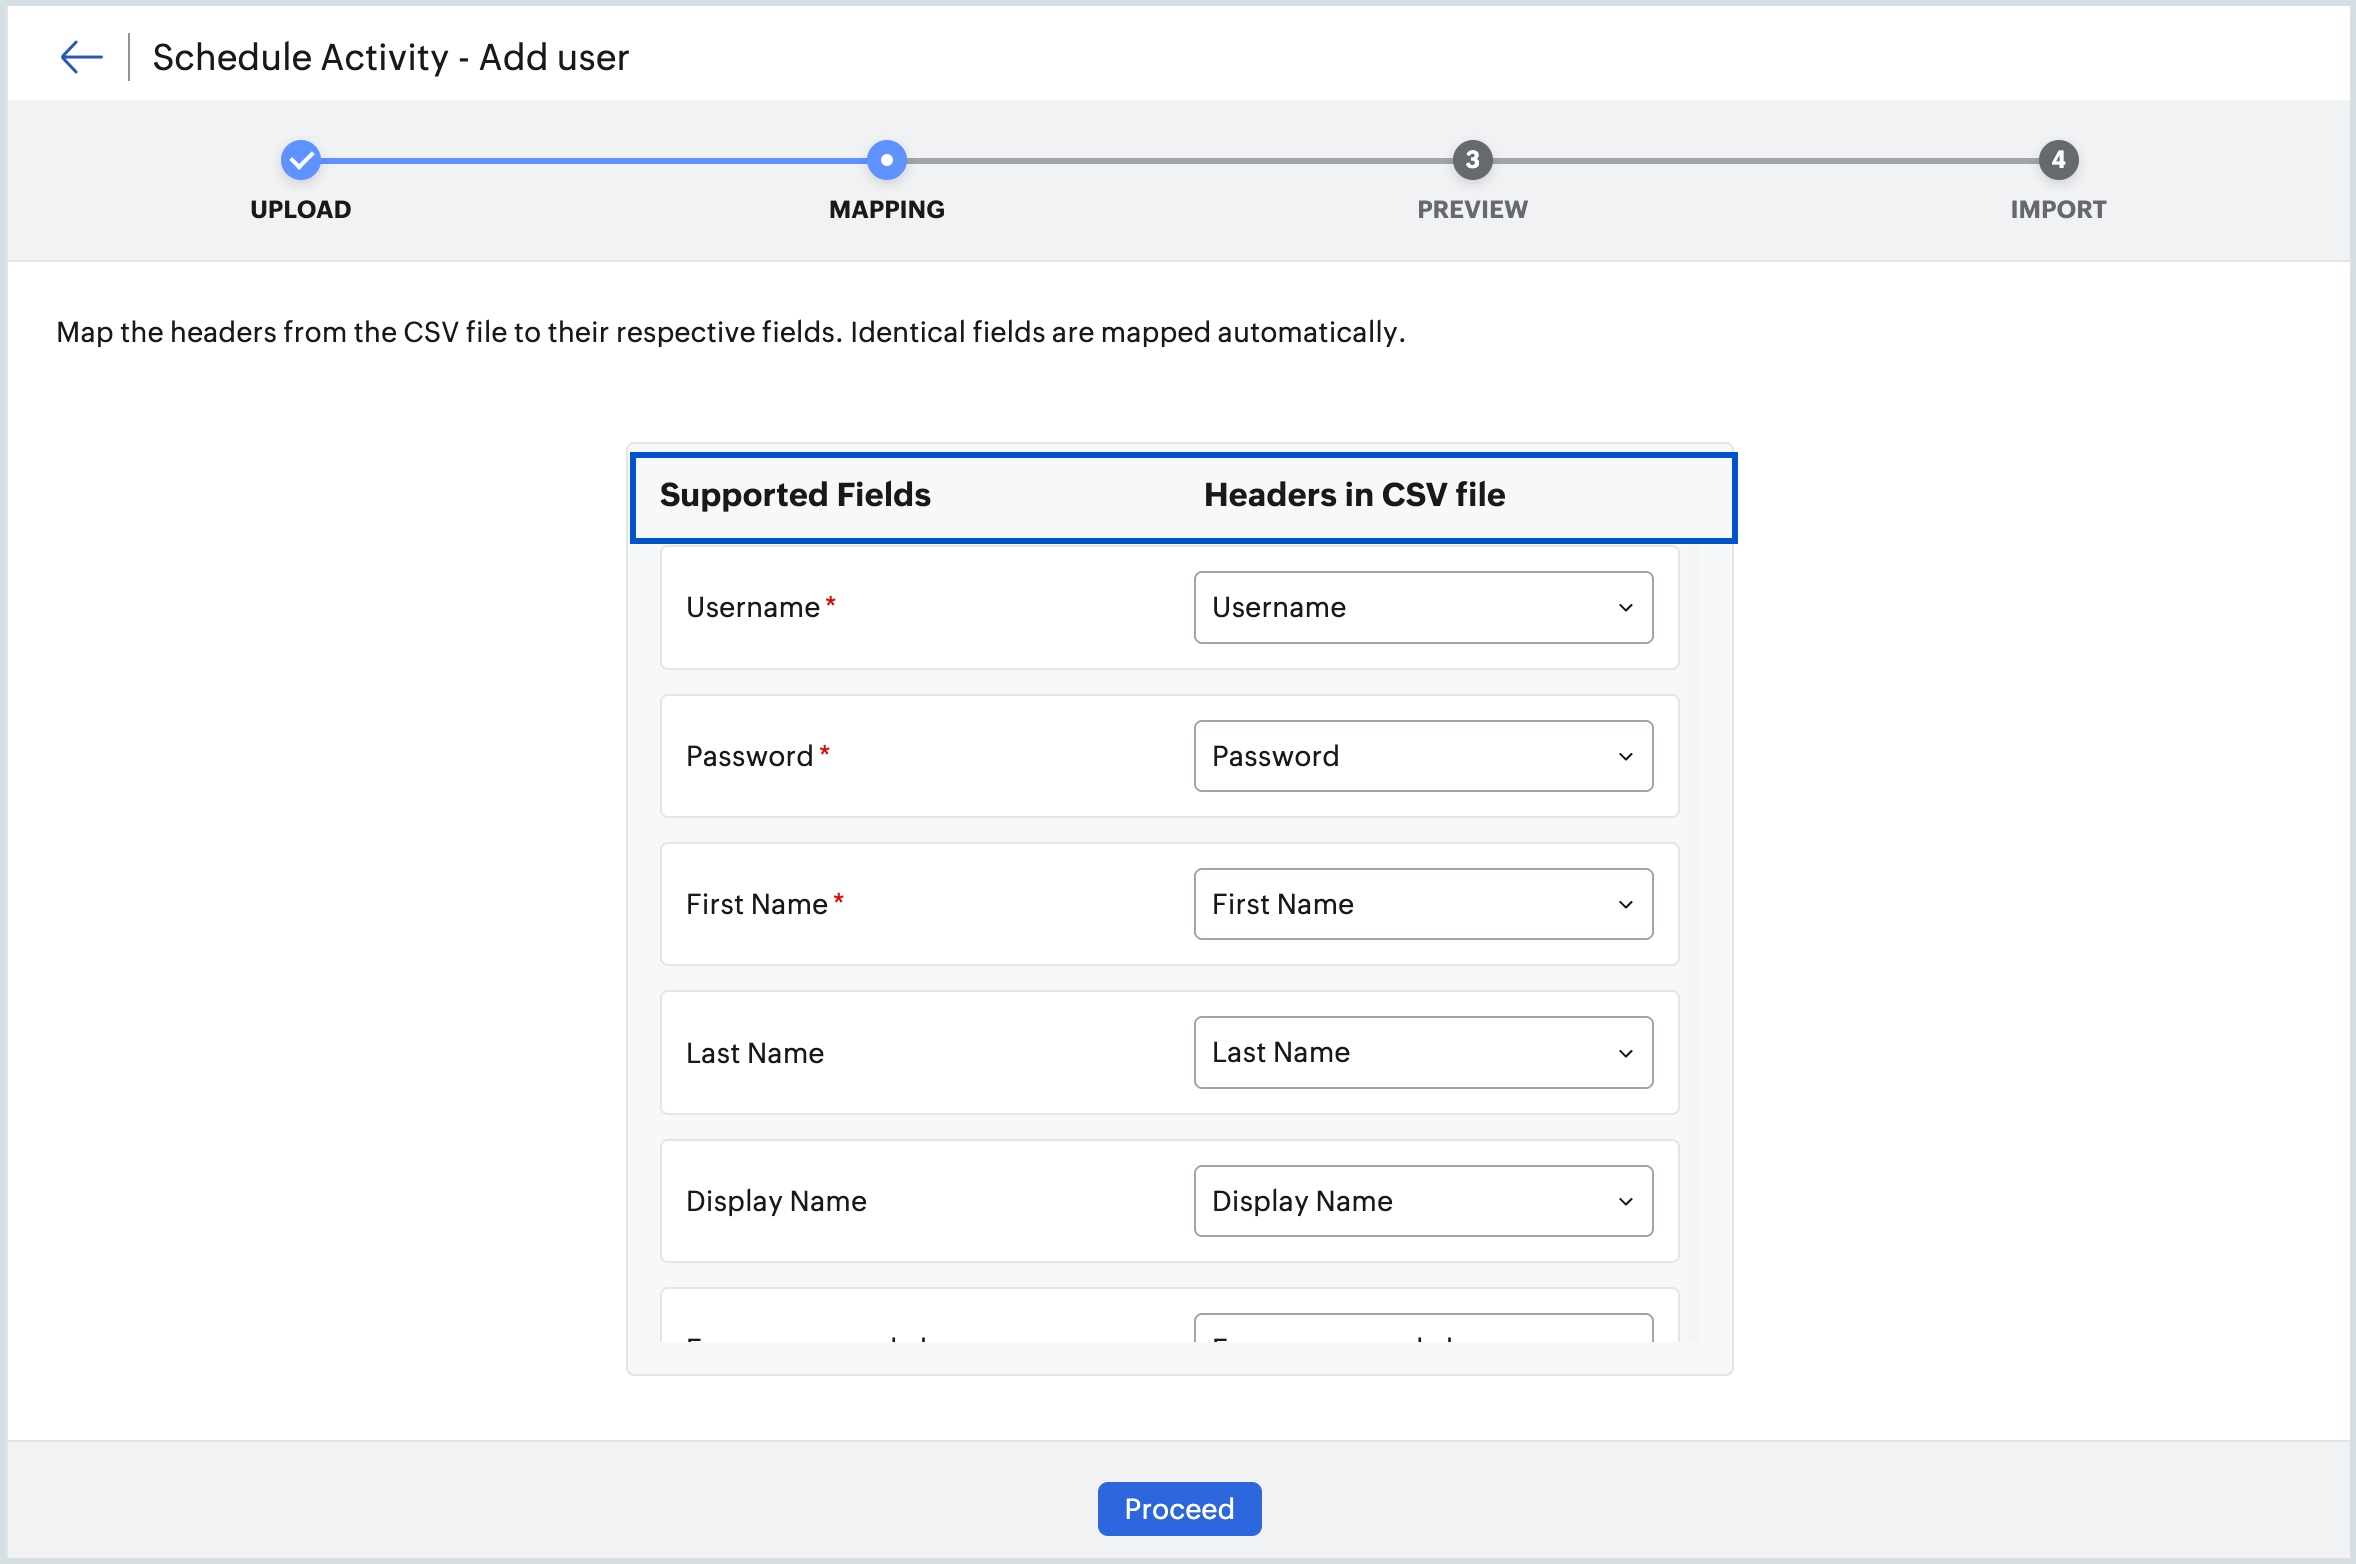
- Select the appropriate option from the drop-down menu under Headersin CSV file to map it to the corresponding field in Supported Fields.
- To revert the mapping assigned to a header, click the Unmapped option from the drop-down menu.
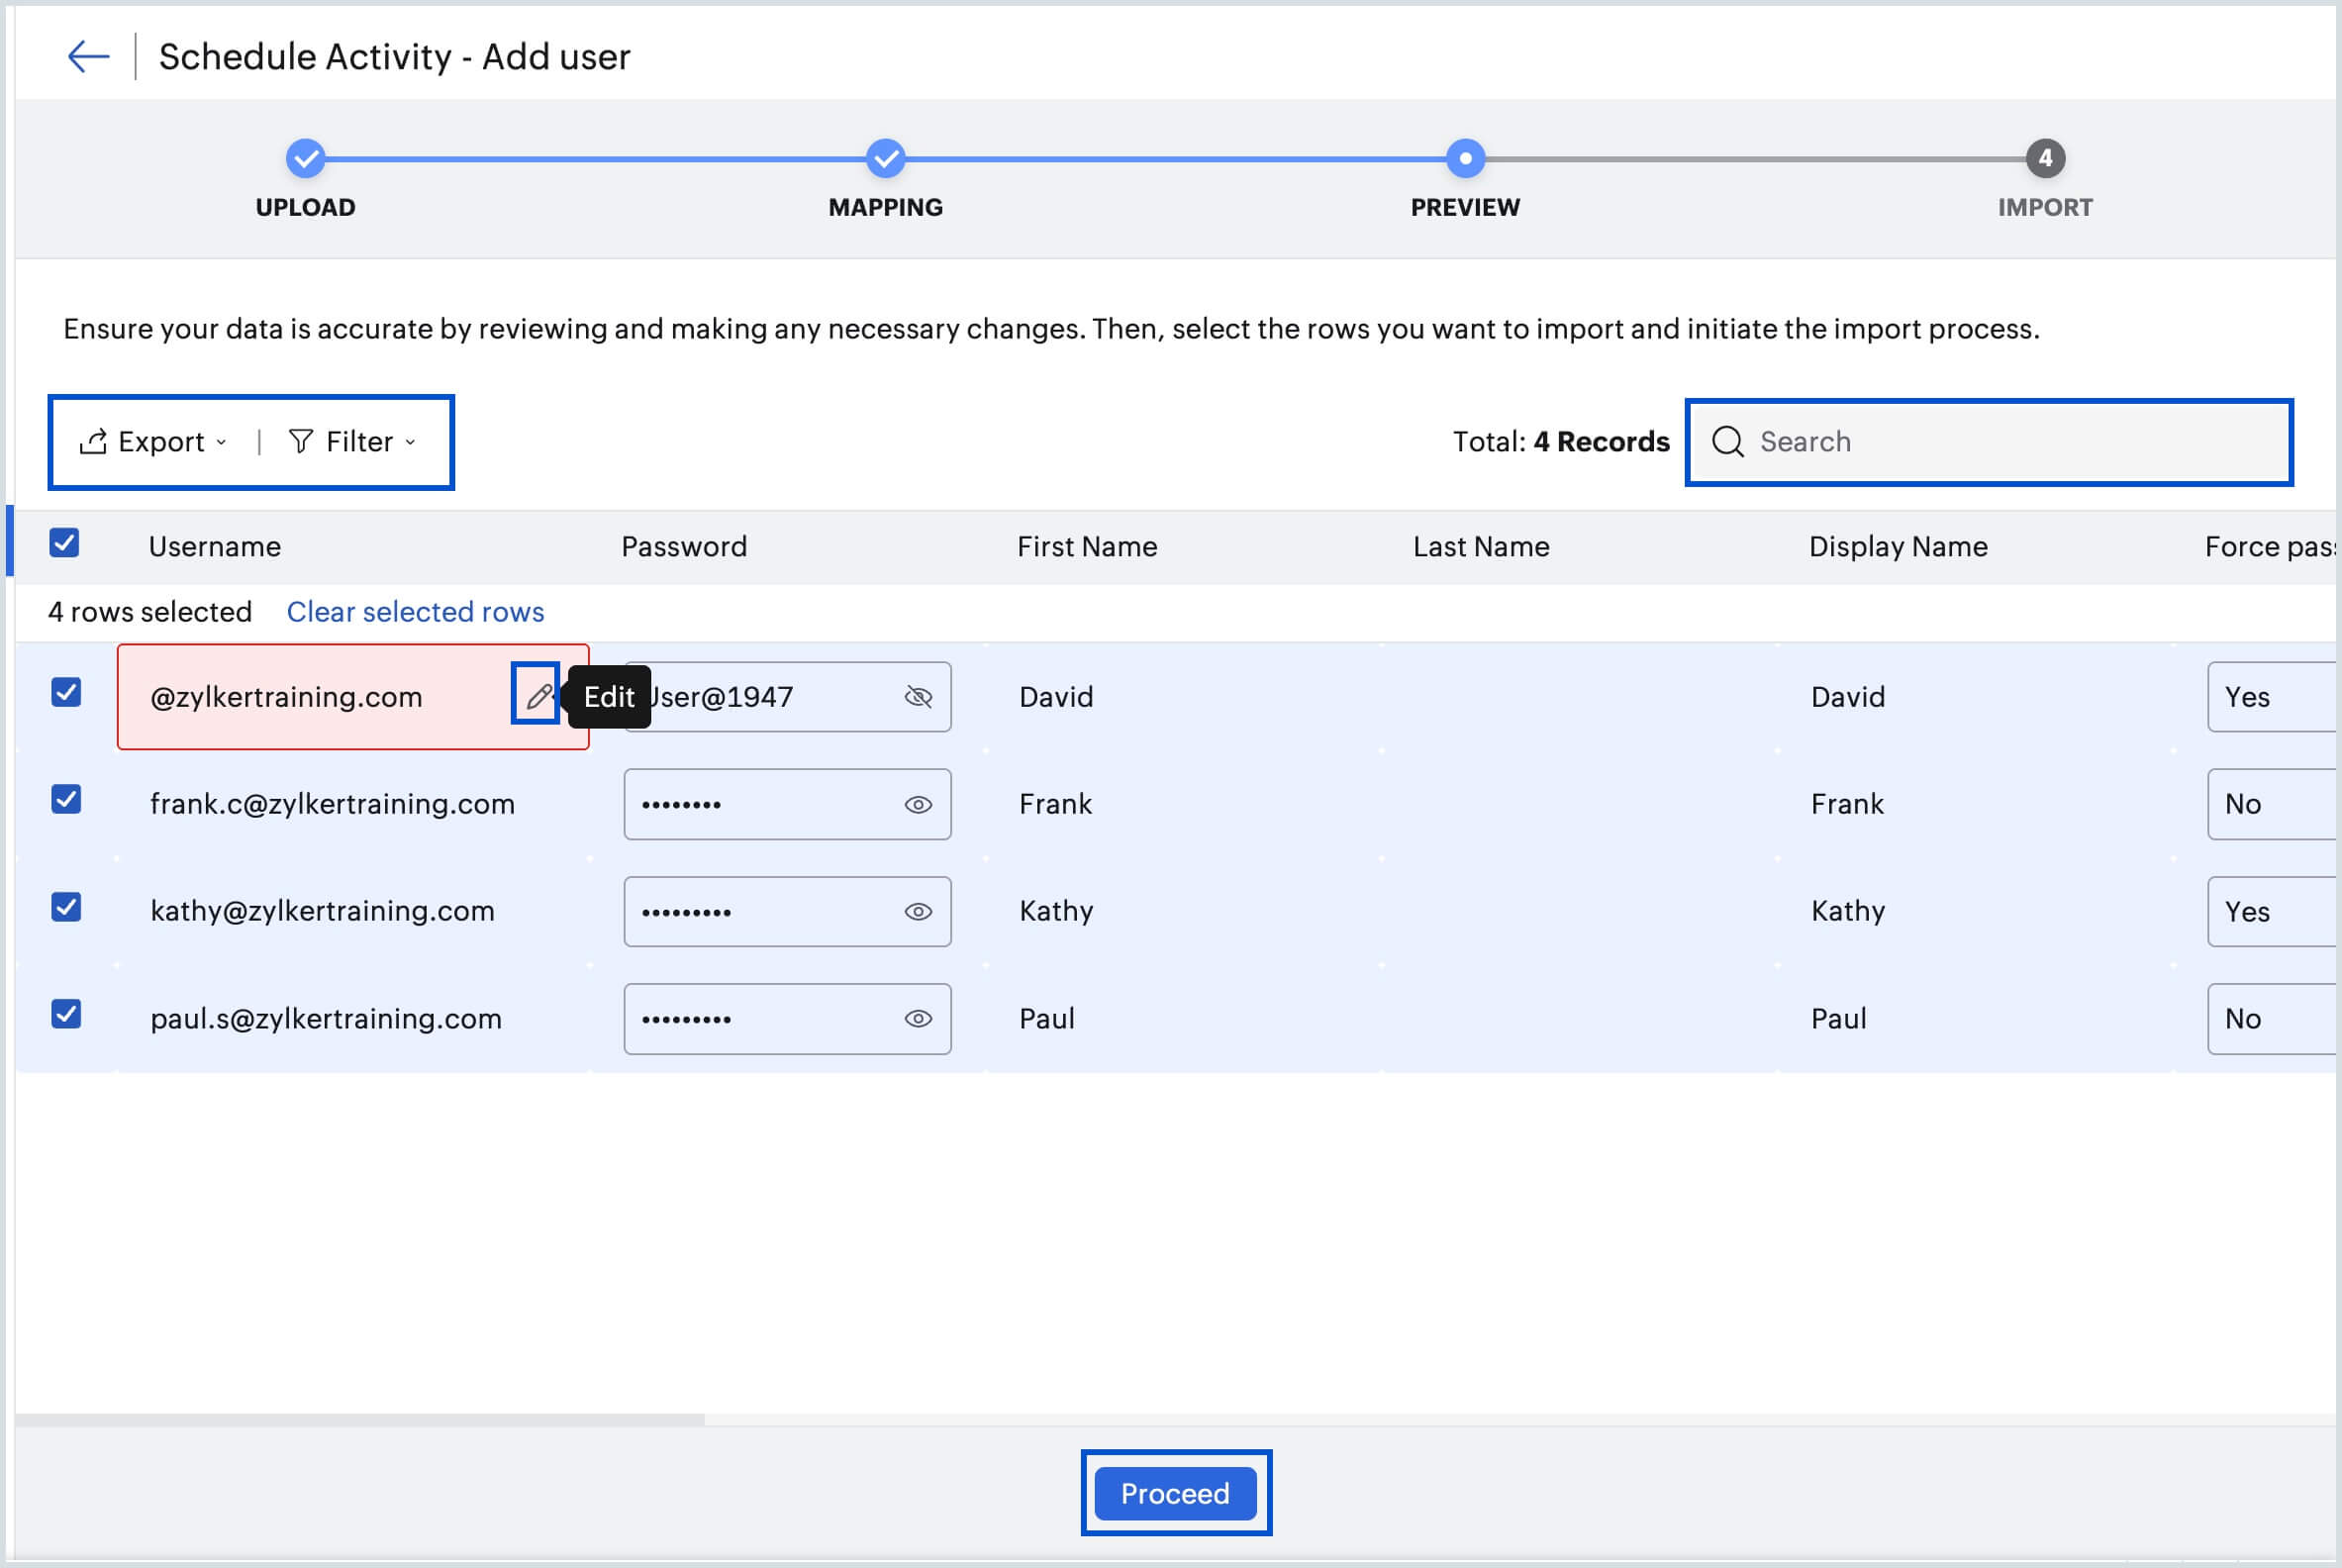
- Once done, click Proceed. All the details listed in your CSV file will be displayed for you to carefully review or update on the Preview Page.
- Hover over the values that are highlighted in red and click the Edit icon to enter the correct value. You can also make use of the Export, Filter, and Search options to export details, filter the list, and search specific users.
- Once done, select the rows that you want to import from the list and click Proceed.
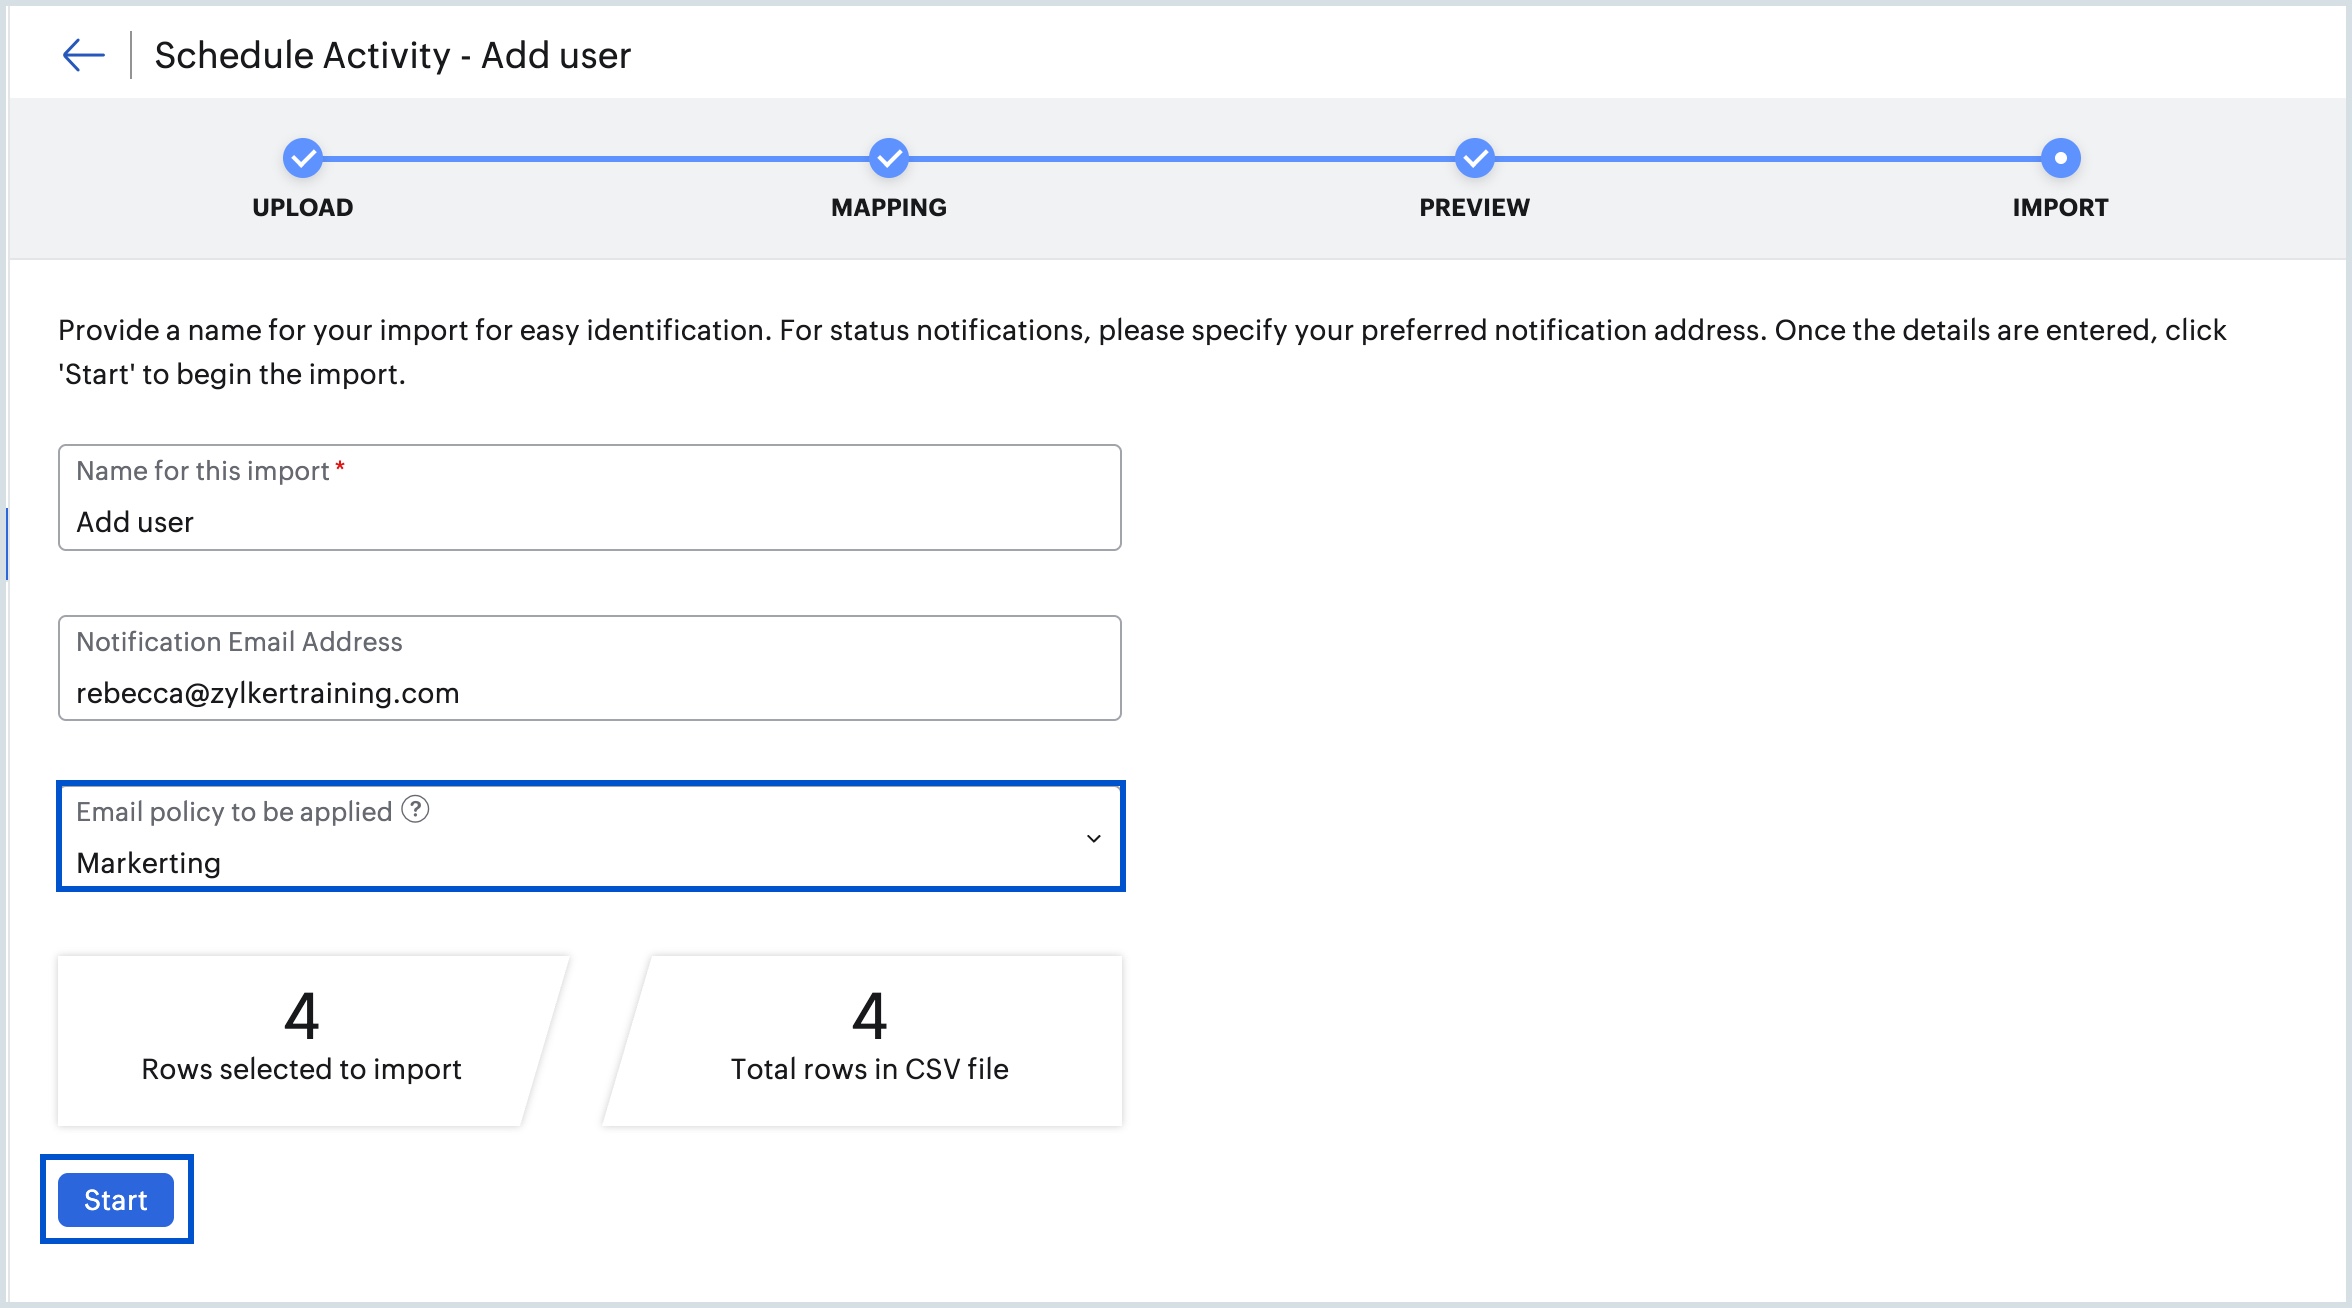
- In the Import page, enter a Name and your preferred Notification Email Address for your import.
- Select the desired email policy to be appplied for the users from the Email policy to be applied drop-down. All users added will be automatically included under the selected email policy in this step.
- After setting up your import preferences, click Start.
- Click the Proceed button and verify your identity to confirm your action.
- Once verified, the import process will begin.
The import status page will appear, displaying whether the import is in progress or has been completed successfully, along with the number of successful and failed actions. If the status doesn't refresh automatically, you can click the Refresh icon.
Below, you'll find a detailed list of successful and failed actions for each individual user. If the specified bulk action can't be processed for certain users, they'll be marked as Failed under the status column and the reason for failure will be displayed. Once the import process is completed, an email notification will be sent to the provided email address.
Dynamic mapping in add user bulk activity
The Dynamic Mapping option in the Add user operation lets you populate the fields of your CSV file with values chosen from the drop-down, instead of entering each value manually.
Follow the steps mentioned below to perform dynamic mapping:
- Select the bulk operation as Add user in the Schedule Activity section.
- Choose the domain to add the user from the Select domain to add user drop-down.
- Download the sample CSV file and save it to your system.
Choose the desired field name from the Select Field drop-down in the Dynamic Mapping dialog box.
Note:
Plan Type field is available only for organizations that are part of Mail Flexible Plan.- Select the required field from the Select Field drop-down. The values available for that field are then displayed below, and you can select the one you need.
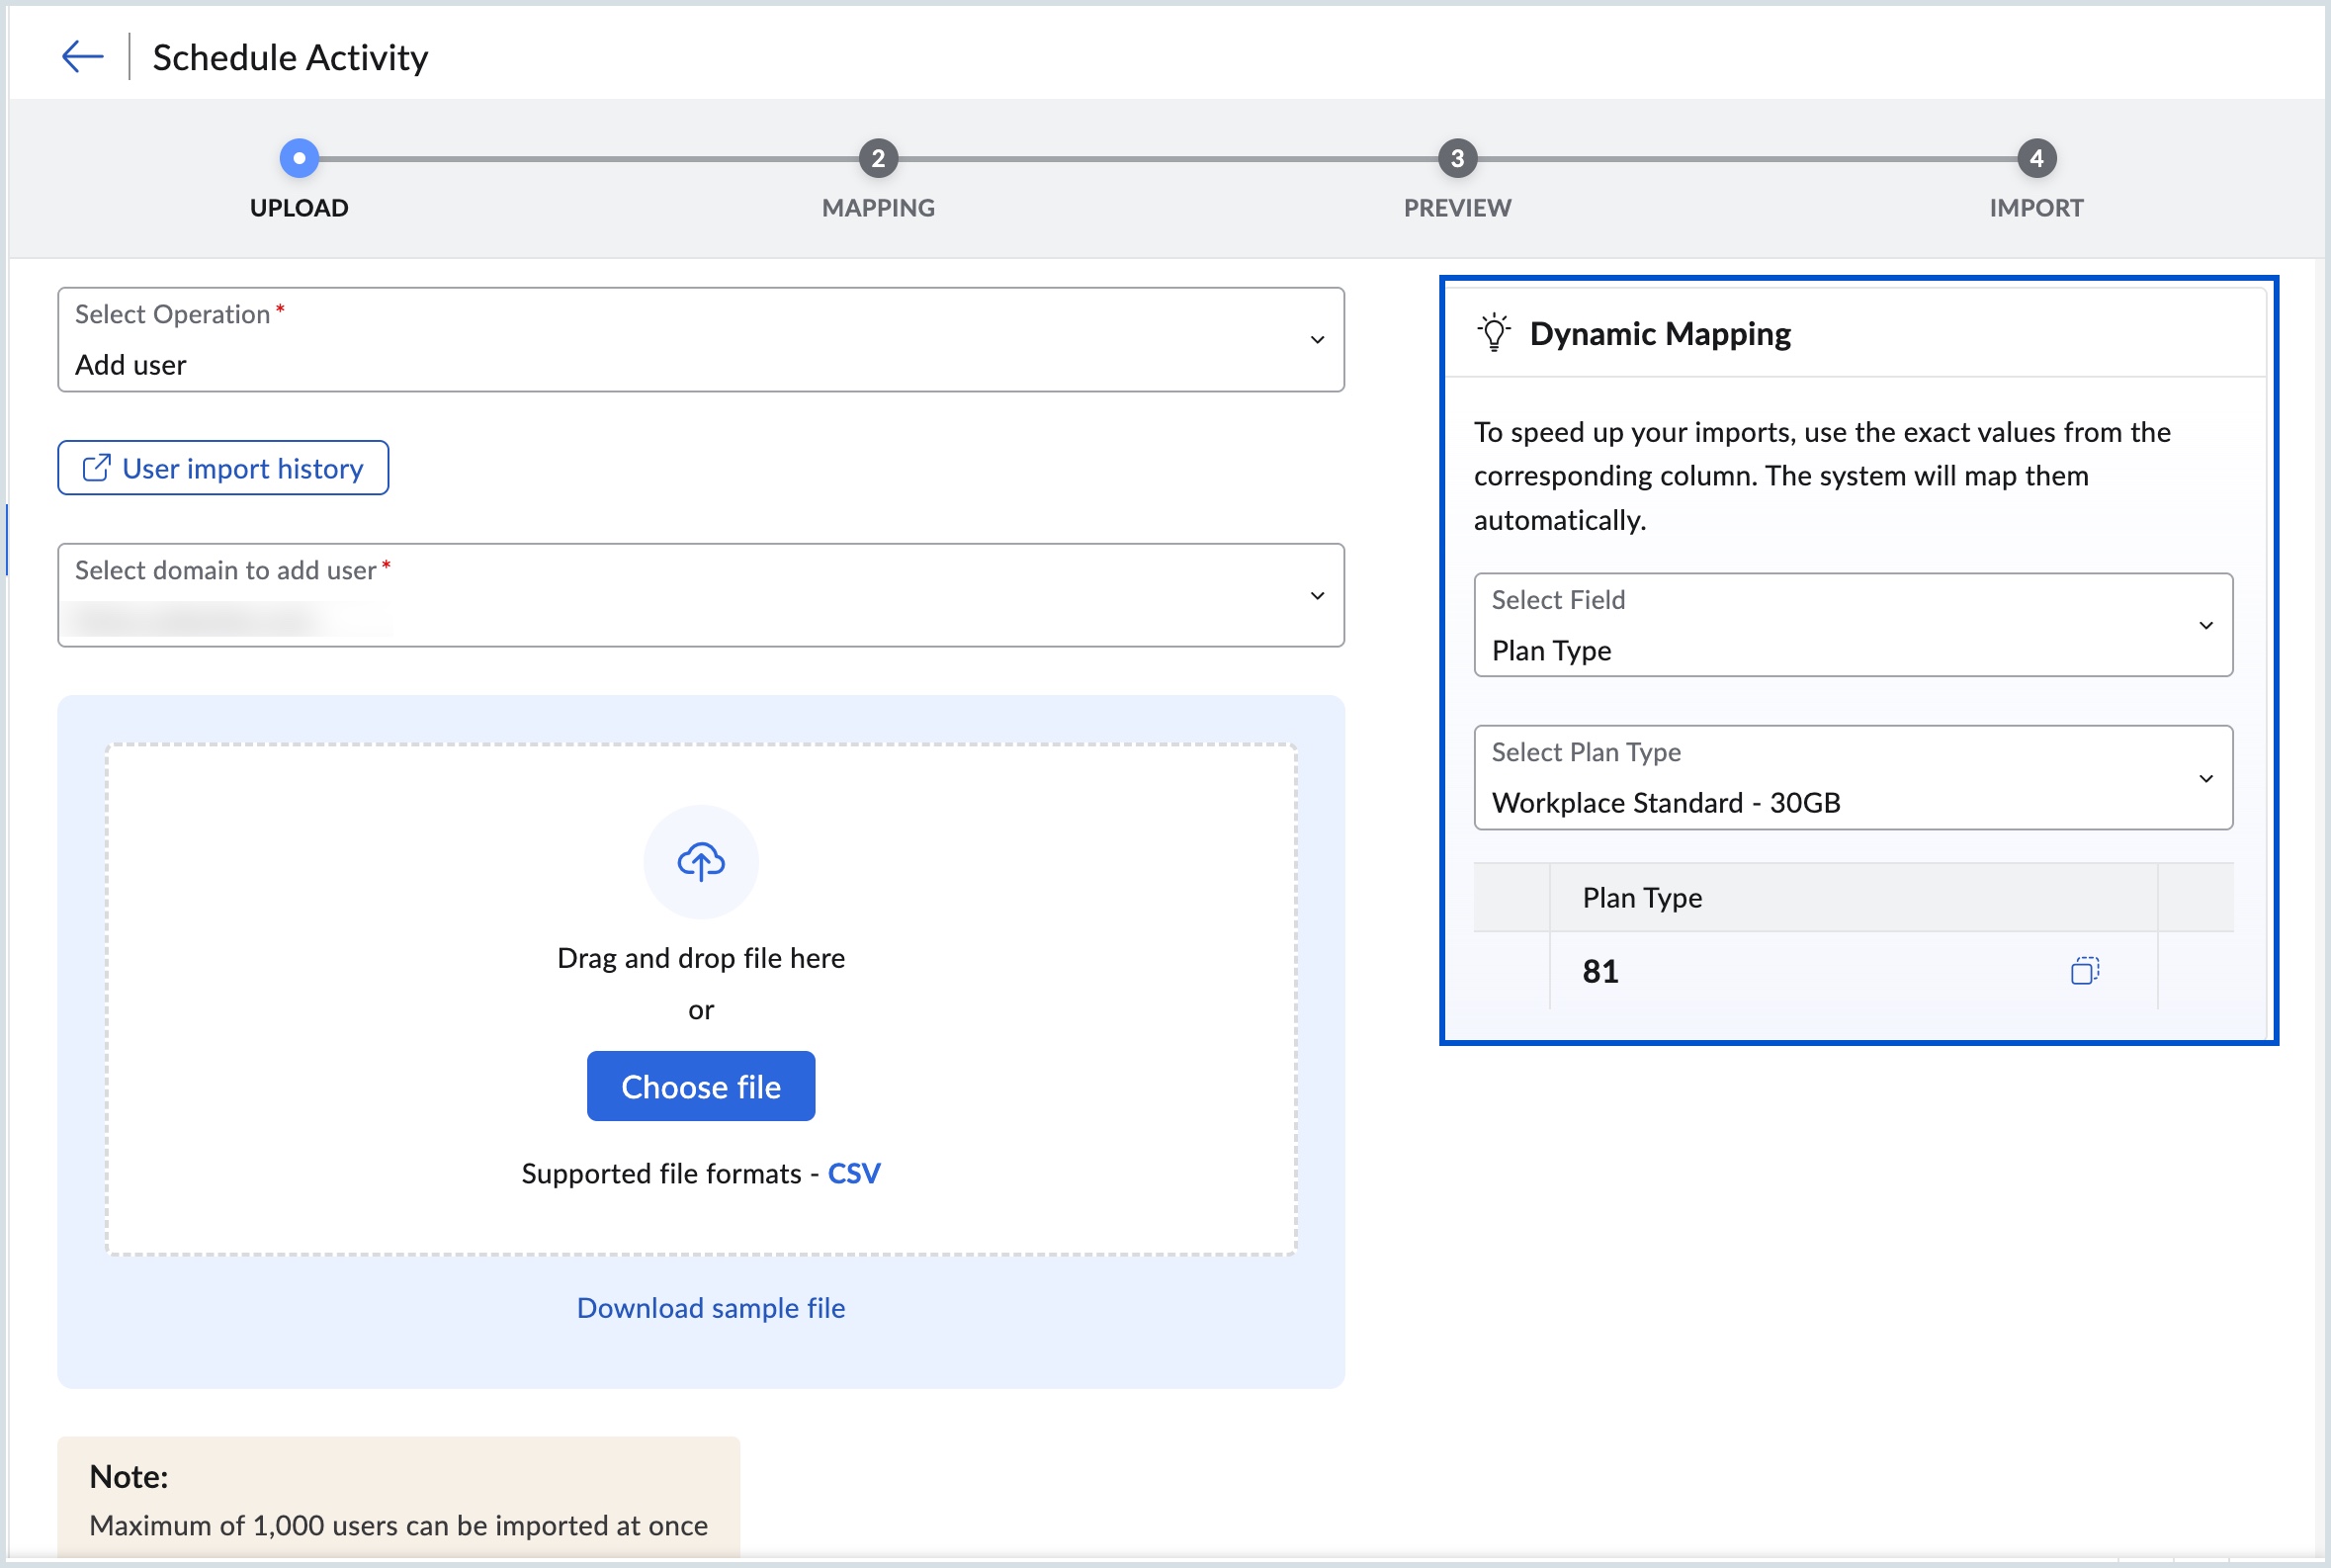
- Copy the number displayed and paste it into the desired column of the downloaded CSV file, then save it.
- Click Choose file and select the updated CSV file.
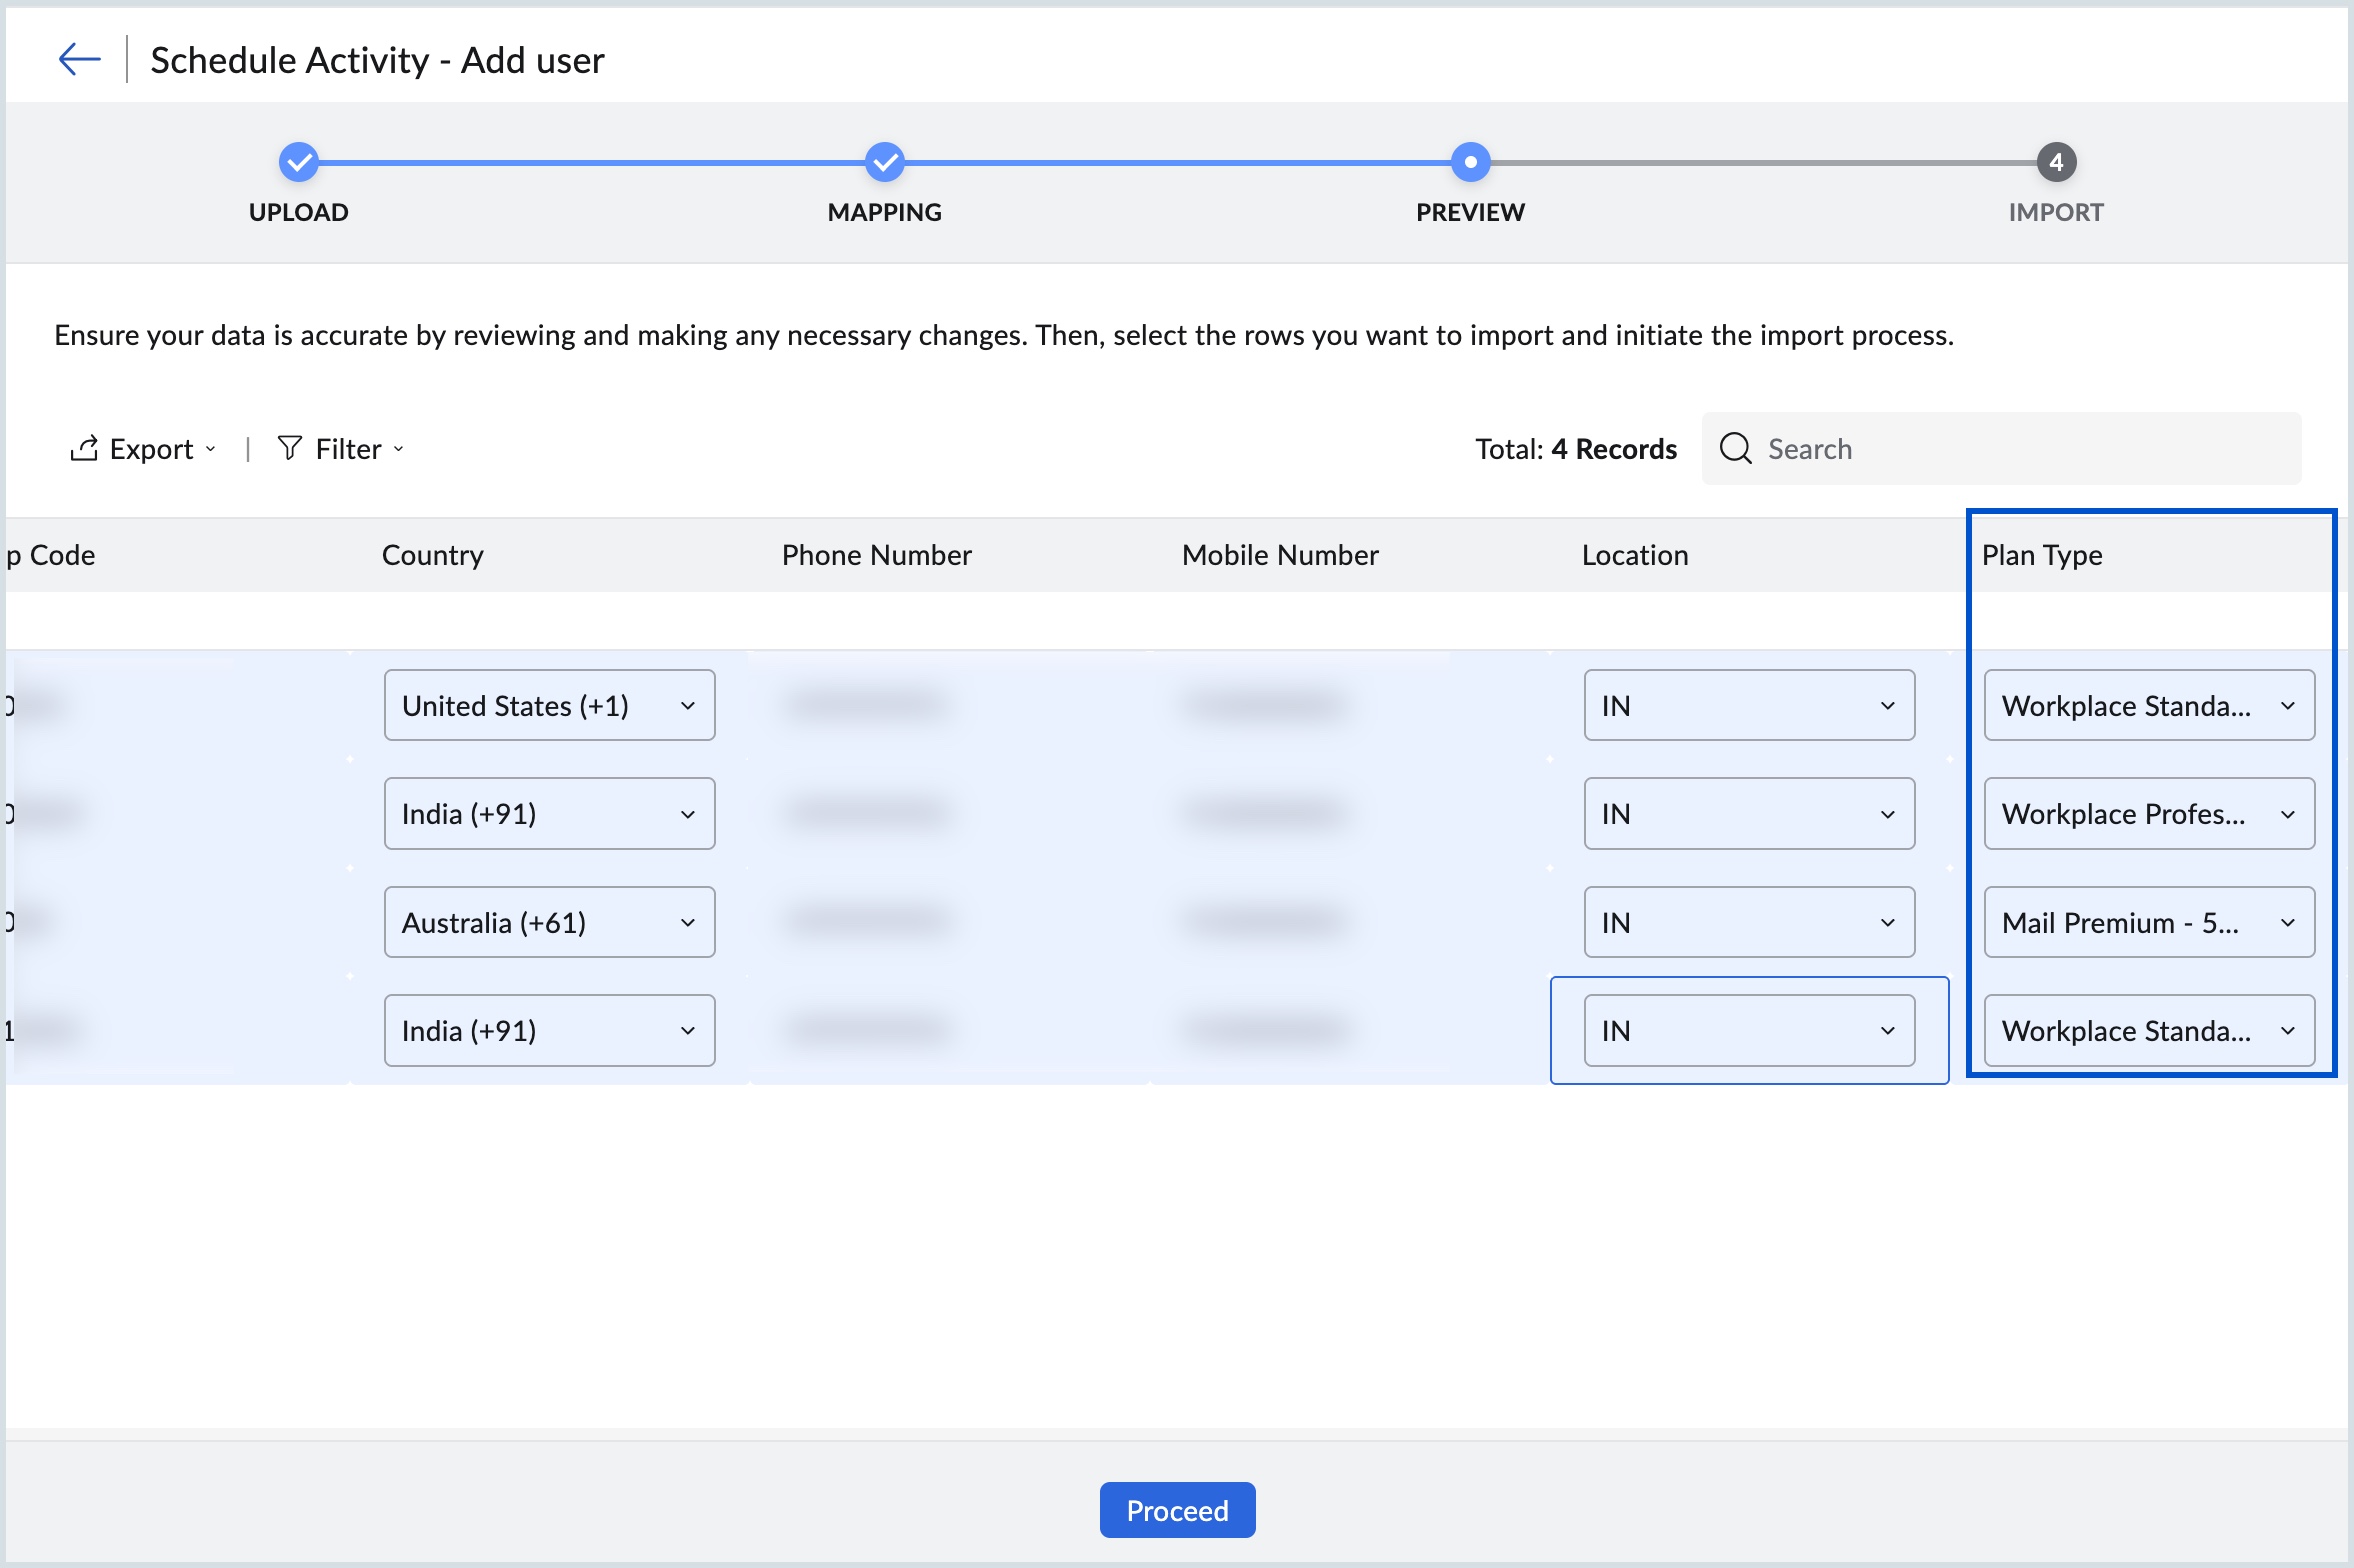
- On the preview page, the chosen field is mapped automatically along with the other fields in the CSV file.
- Proceed with the steps mentioned in the bulk activity to complete the import operation.
View user import history
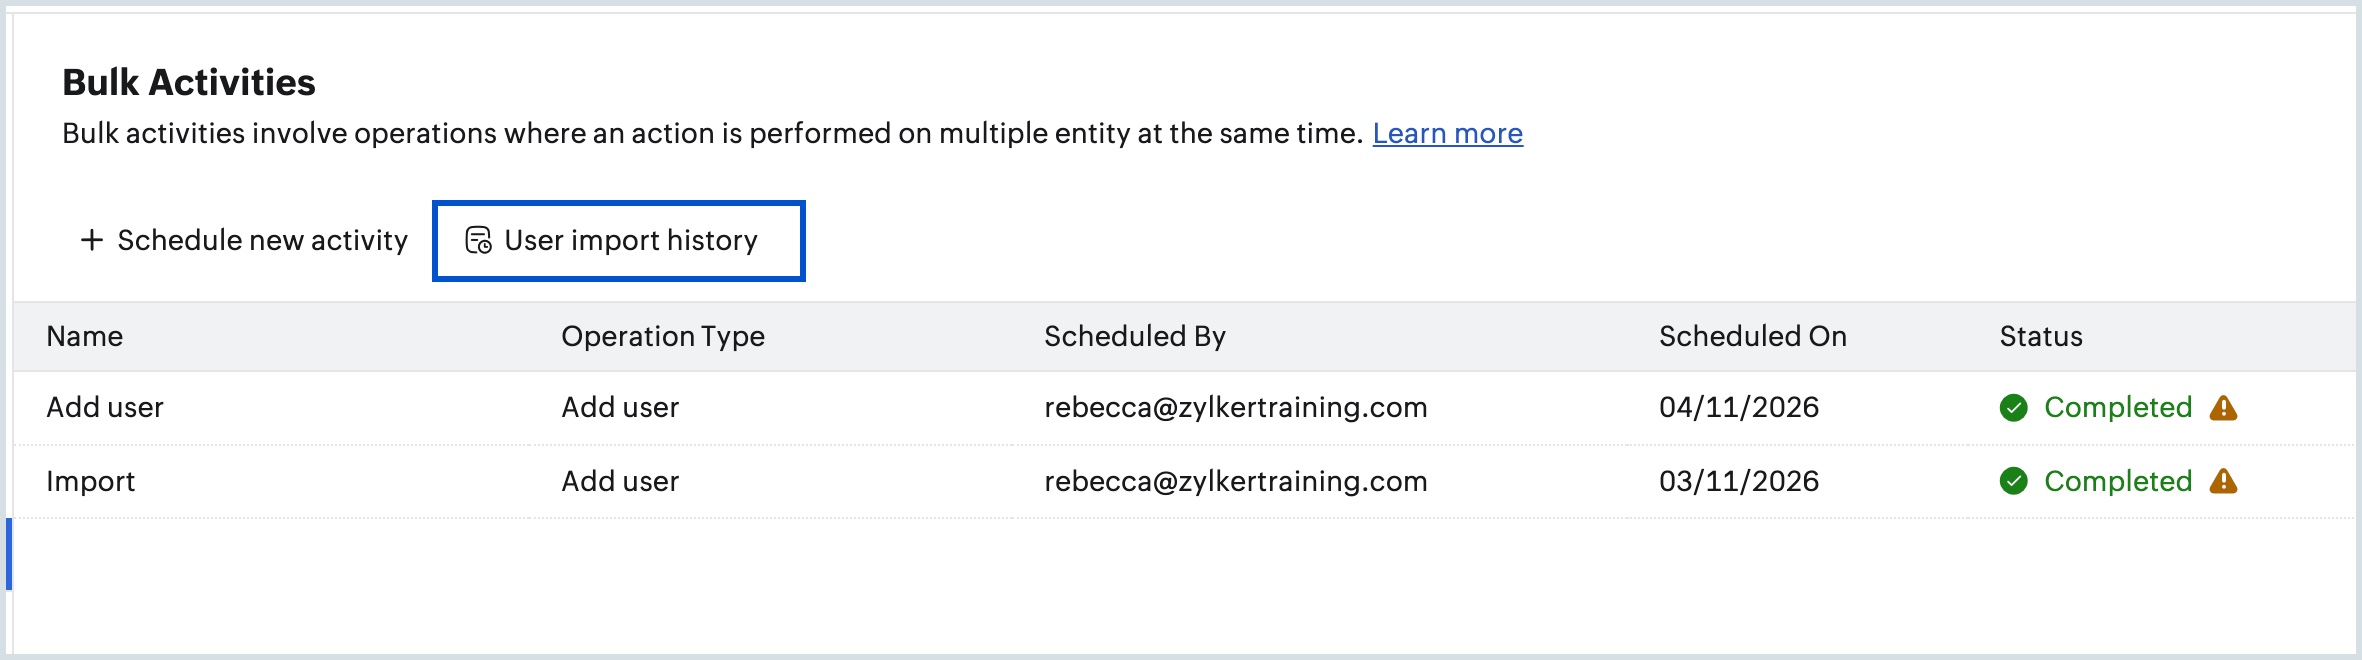
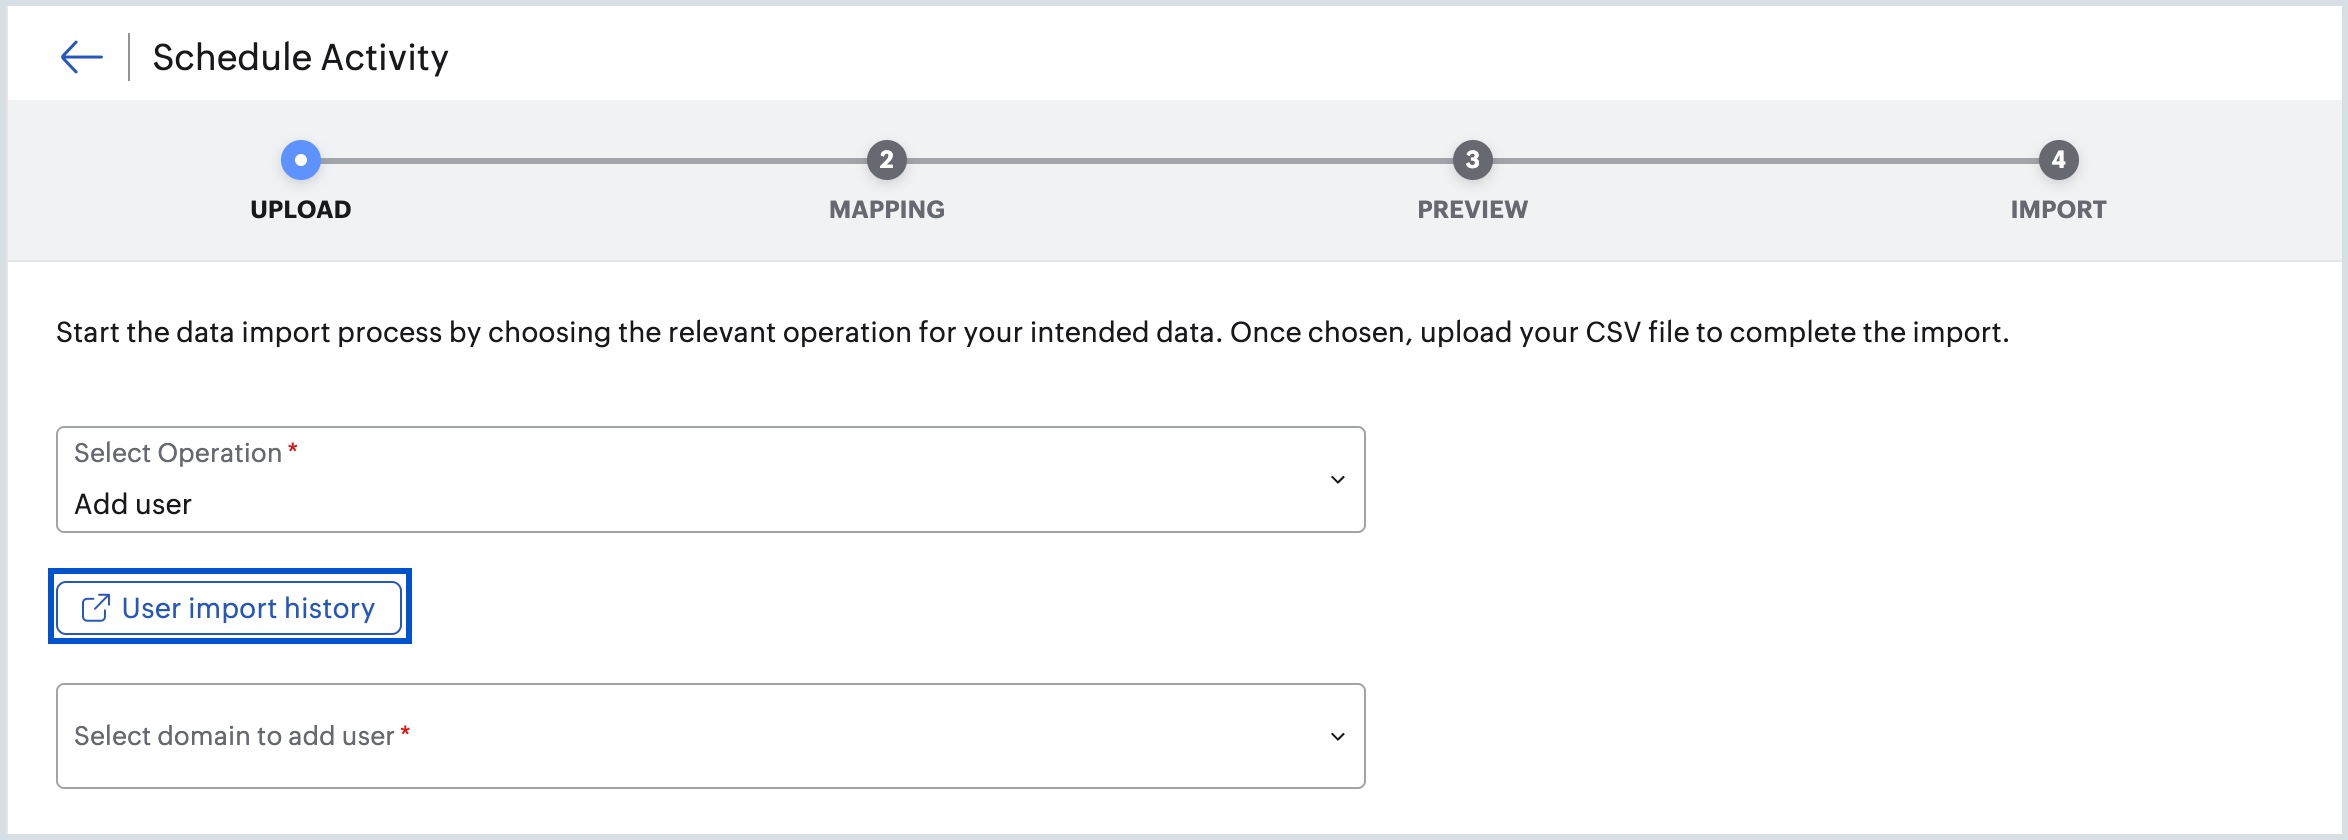
You can view the details of your user imports, including the import status and user details, in User import history.
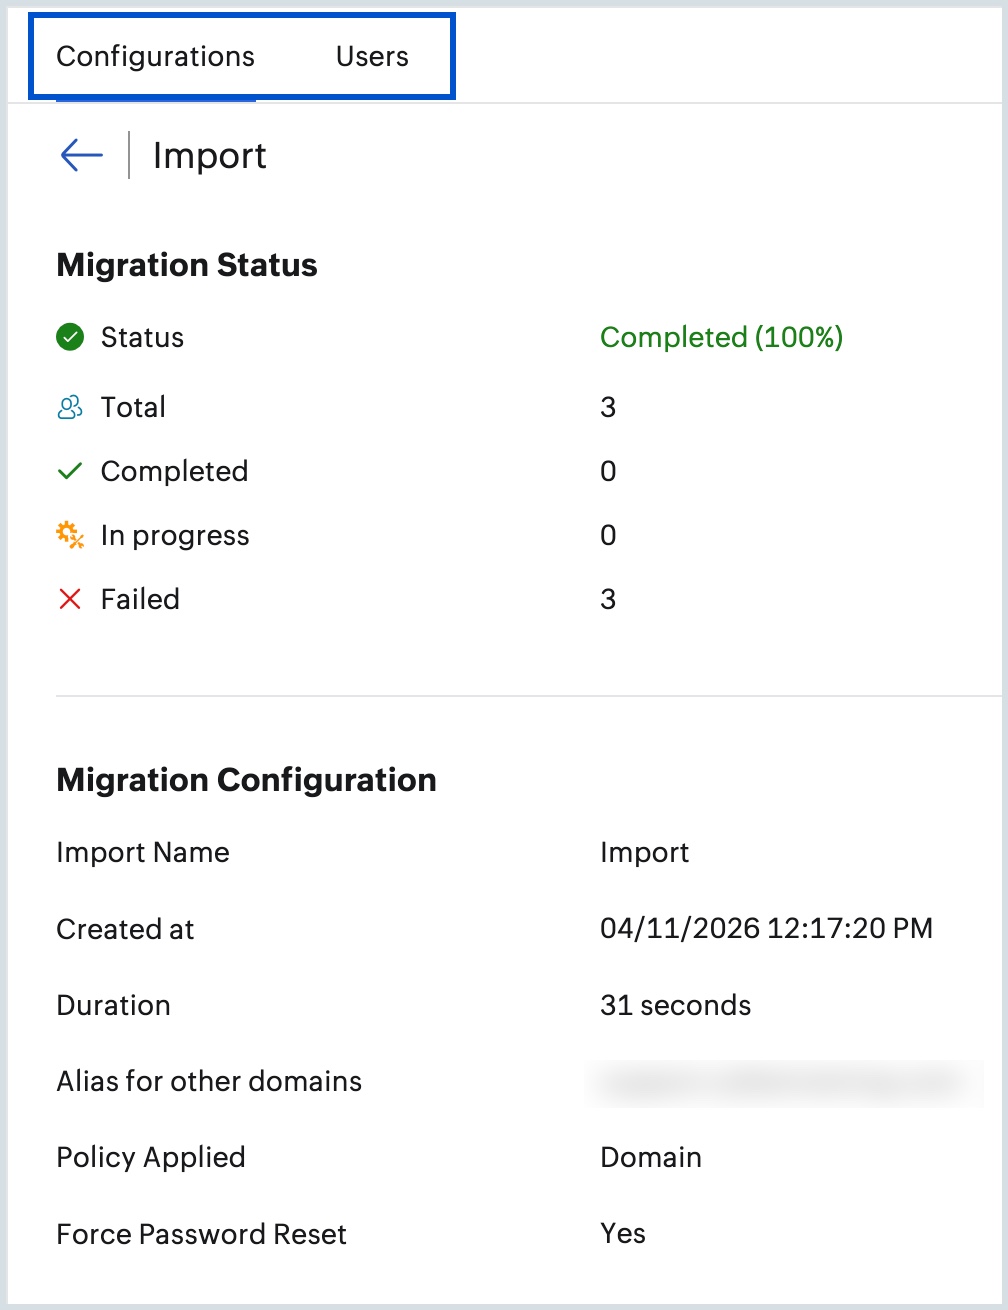
You can access it in either of these ways:
- Select User import history next to the +Schedule new activity in the Bulk Activities section.
- Click the User import history icon below the Select Operation drop-down in the Schedule Activity window.
Note:
The User import history shows the imports made in the last 90 days.
Steps to bulk delete users from Zoho Mail
- Log in to Zoho Mail Admin Console.
- In the Organization menu, select Bulk Activities.
- Click the Schedule new activity button from the top menu.
- Select Delete user from the Select Operation drop-down.
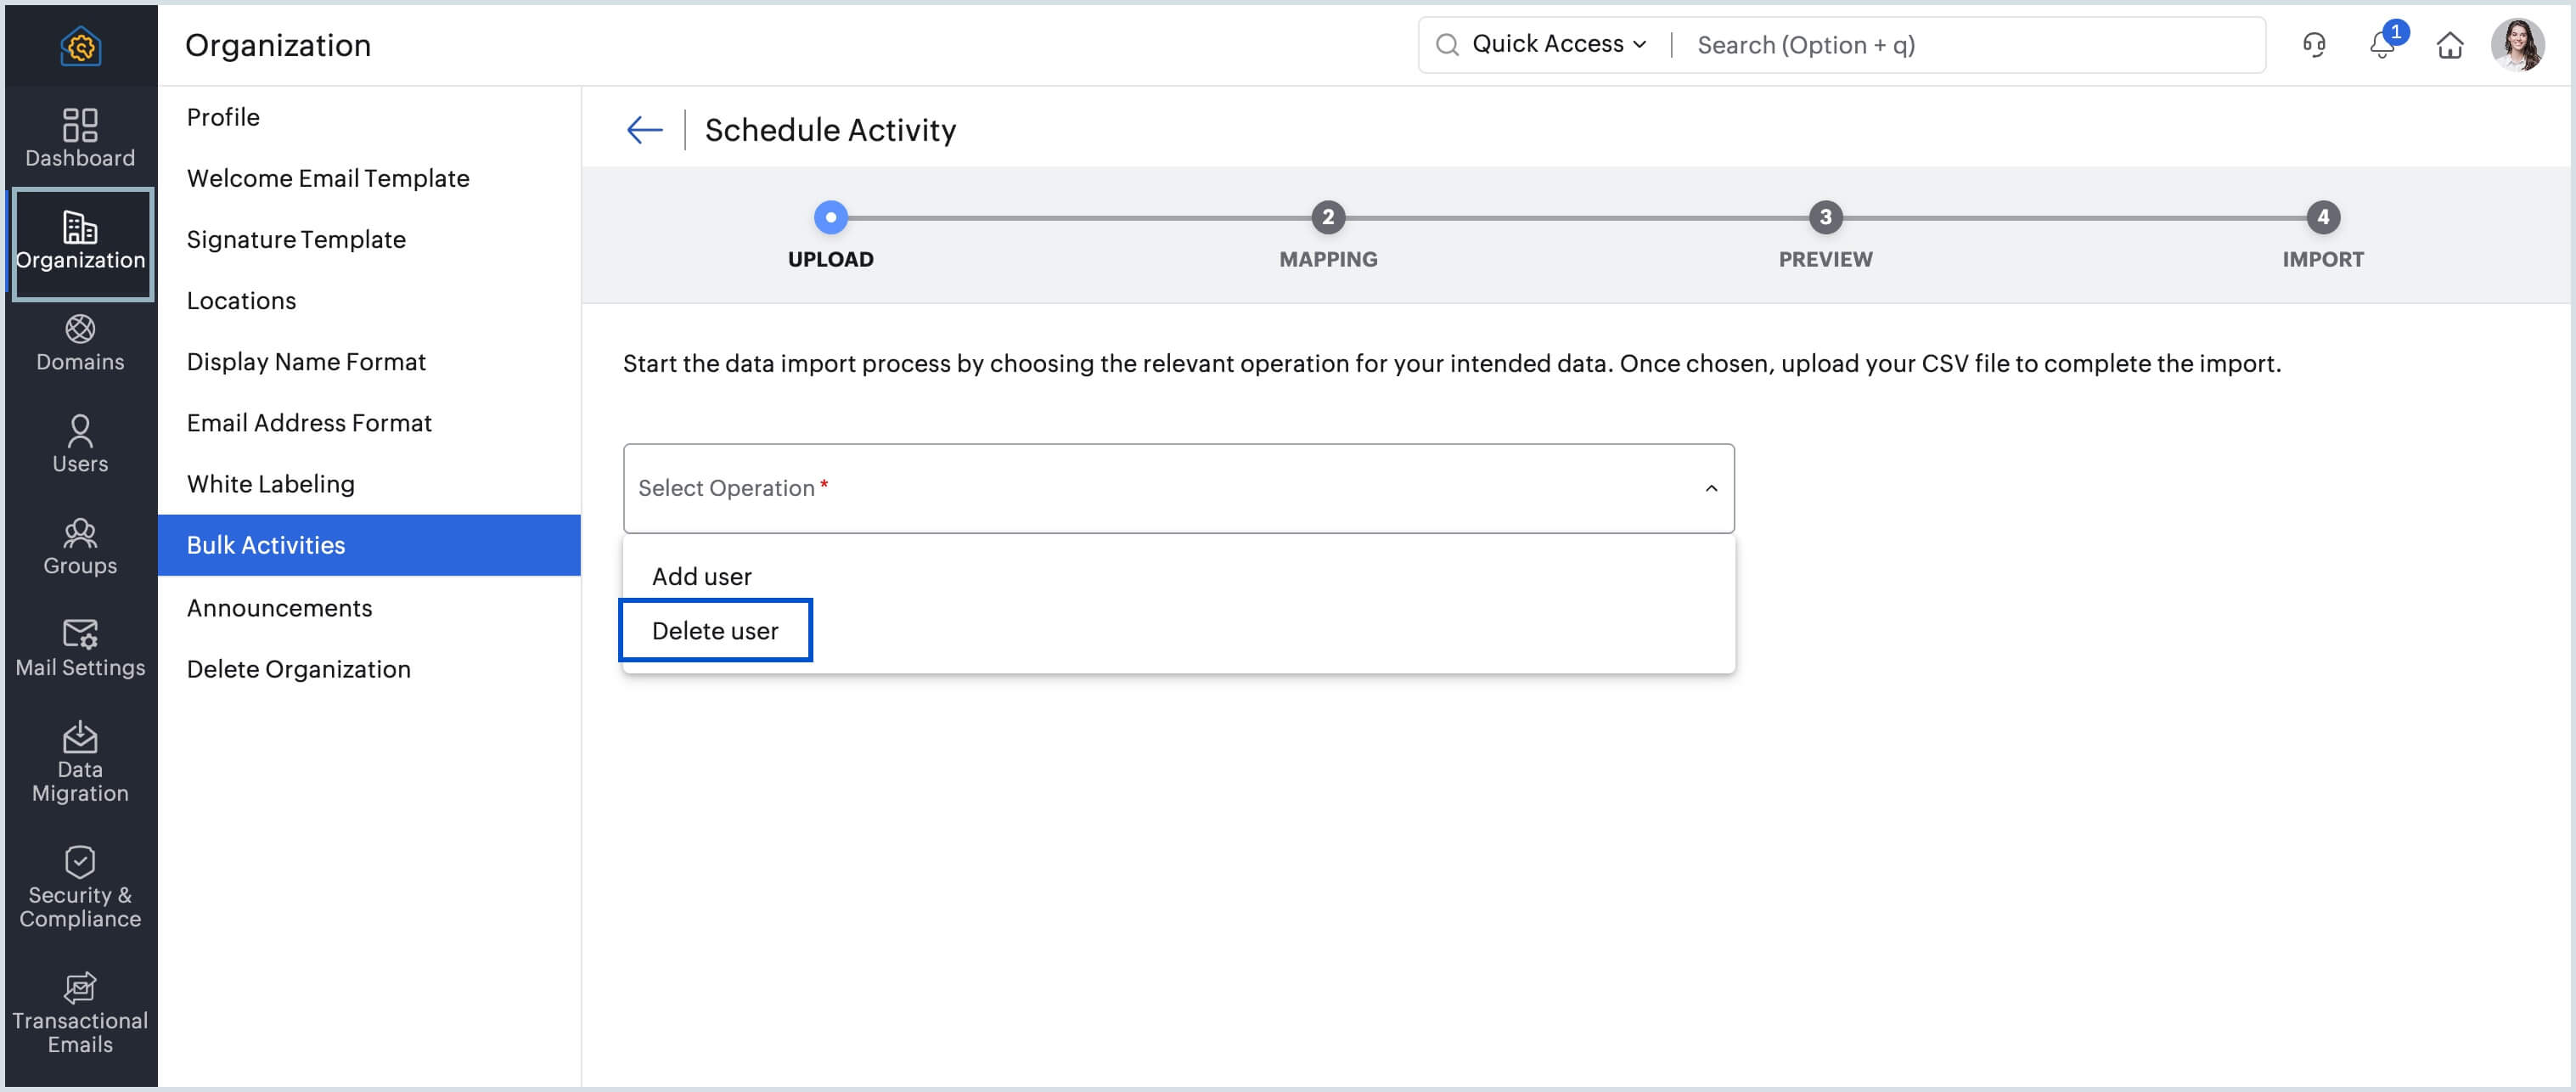
Click the Choose file button and upload the .csv file containing the necessary details to perform the chosen bulk action.
Note:
- You can import a maximum of 1000 entries via CSV file at once in the mentioned bulk actions.
- Download the sample CSV file containing default headers and placeholders to view the correct format for entering information needed to delete users in bulk.
- The admin can map only the column headers provided in the downloaded sample CSV file, as these are the only supported headers for user import. Custom headers or additional columns cannot be added.
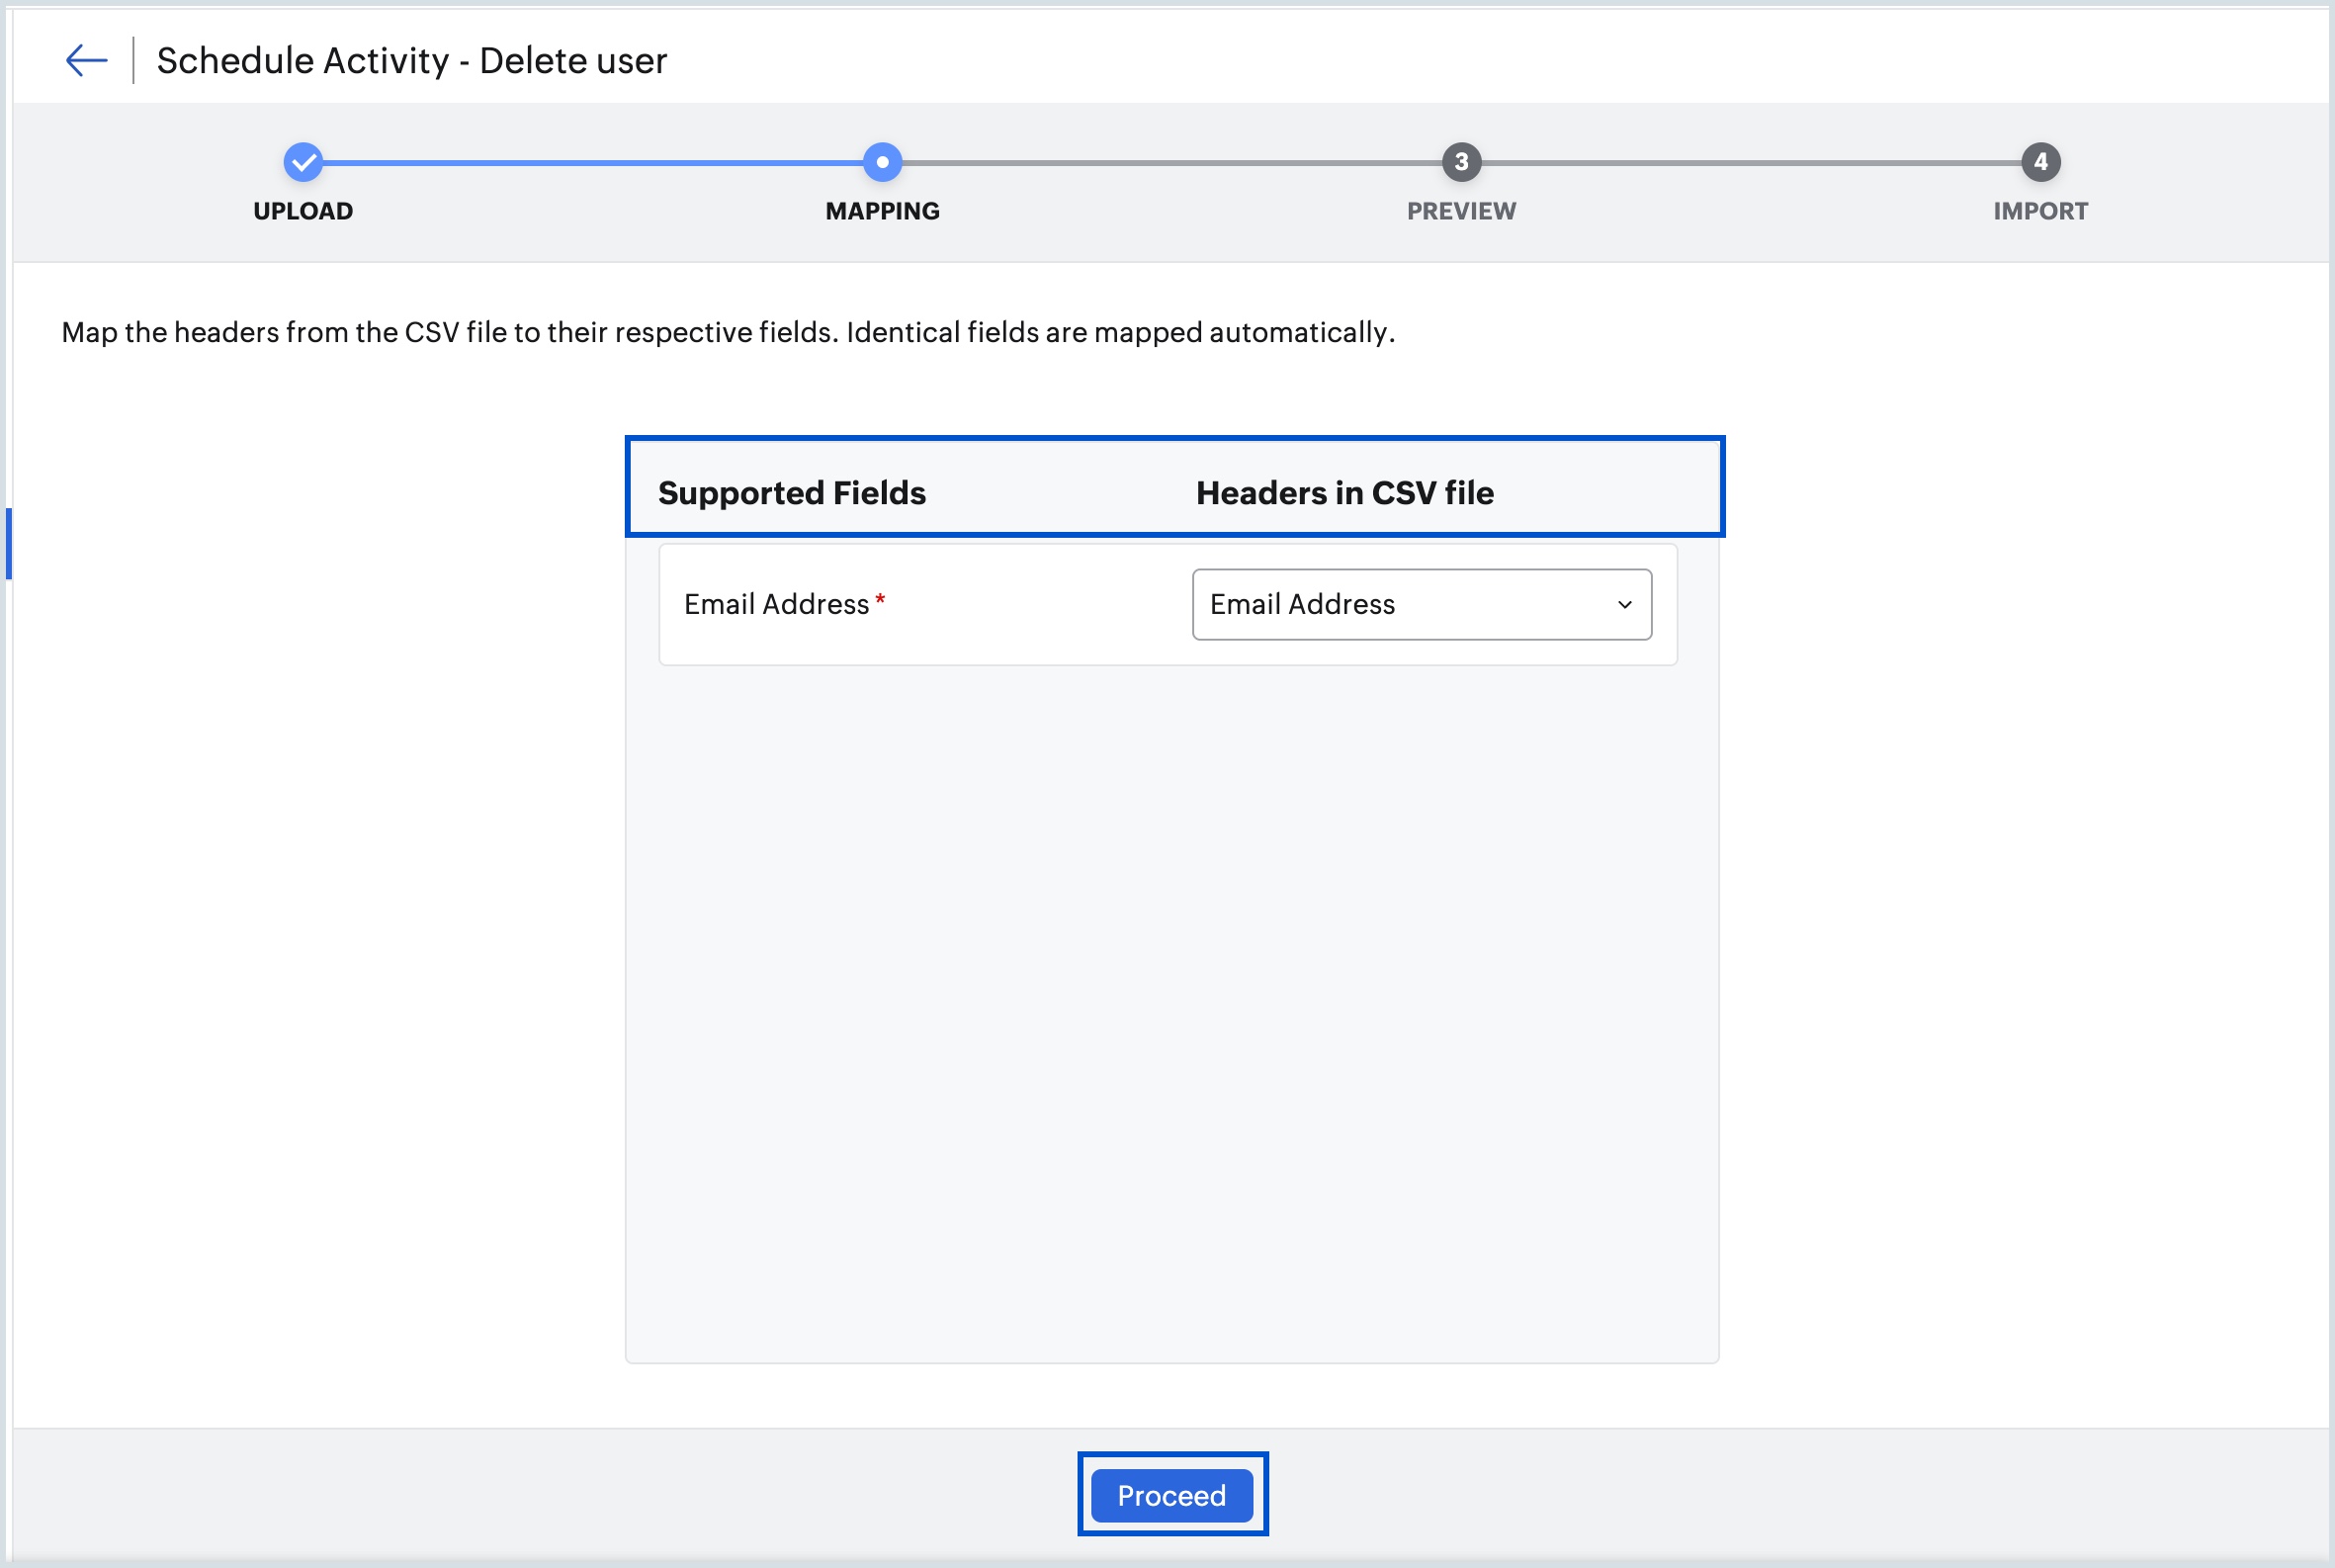
- On the Mapping page, the header in the CSV file (Email Address)is mapped across the respective supported fields column.
- To revert the mapping assigned to a header, click the Unmapped option from the drop-down menu.
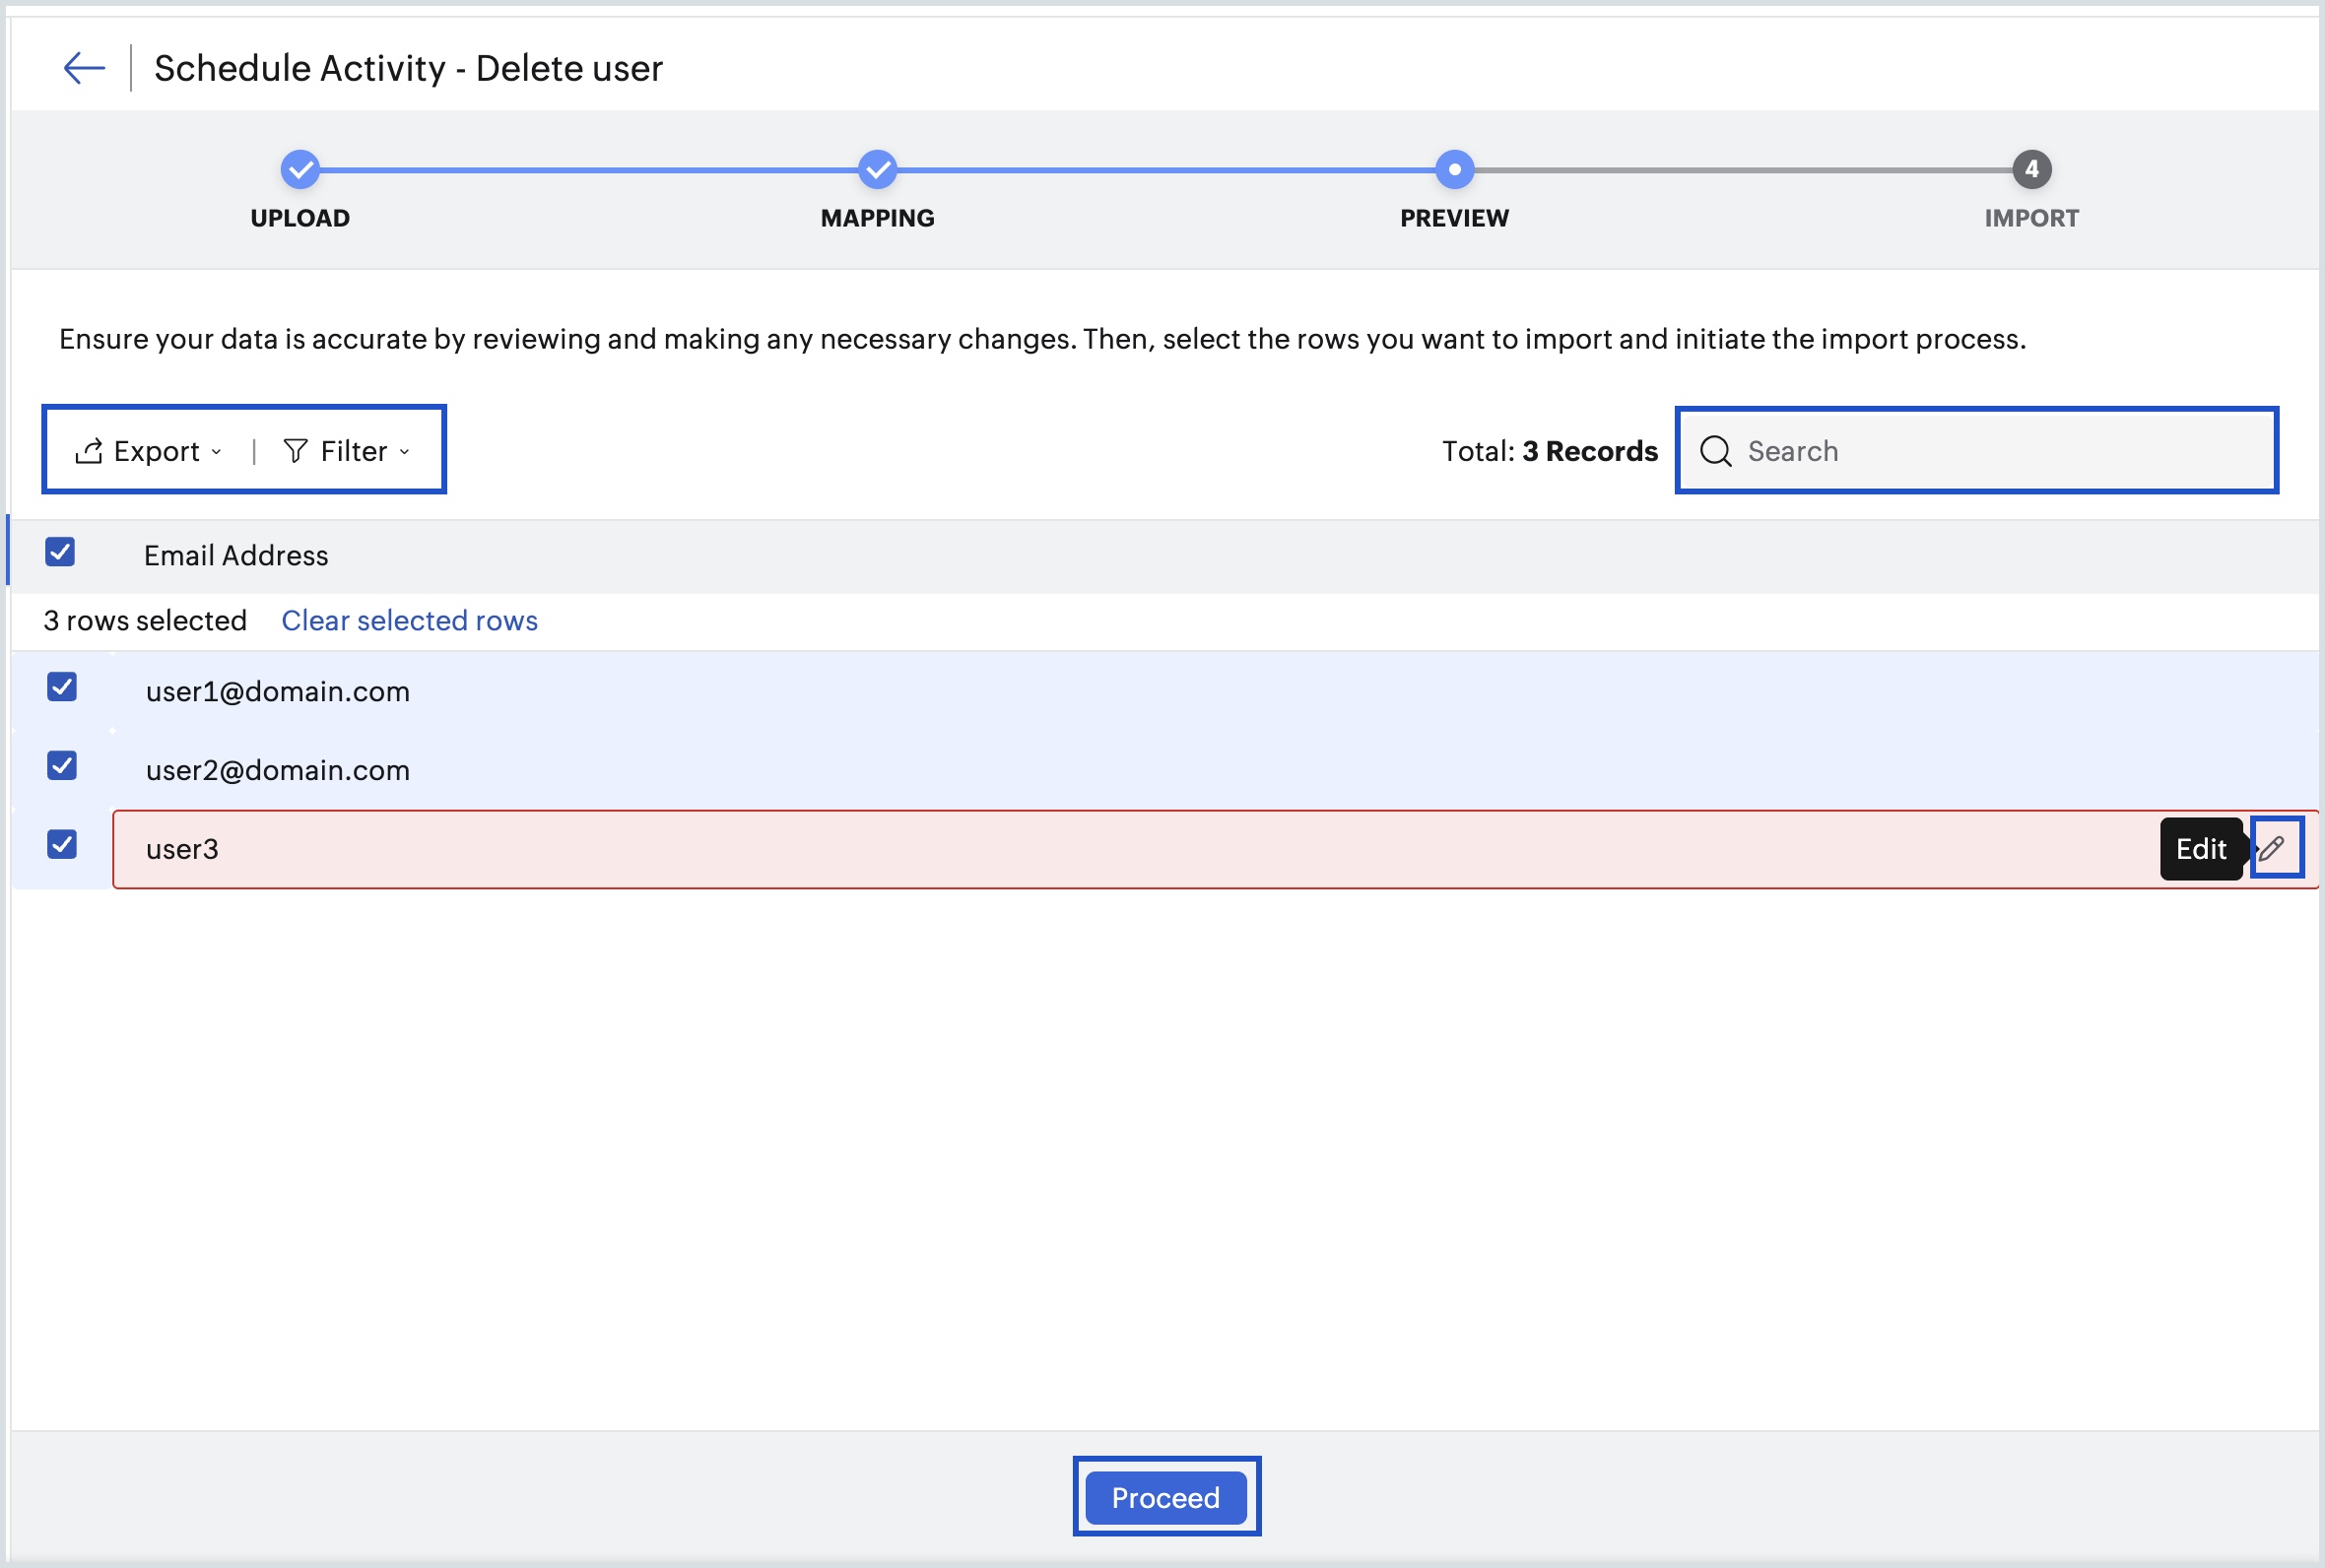
- Once done, click Proceed. All the details listed in your CSV file will be displayed for you to carefully review or update on the Preview Page.
- Hover over the values that are highlighted in red and click the Edit icon to enter the correct value. You can also make use of the Export, Filter, and Search options to export details, filter the list, and search specific users.
- Once done, select the rows that you want to import from the list and click Proceed.
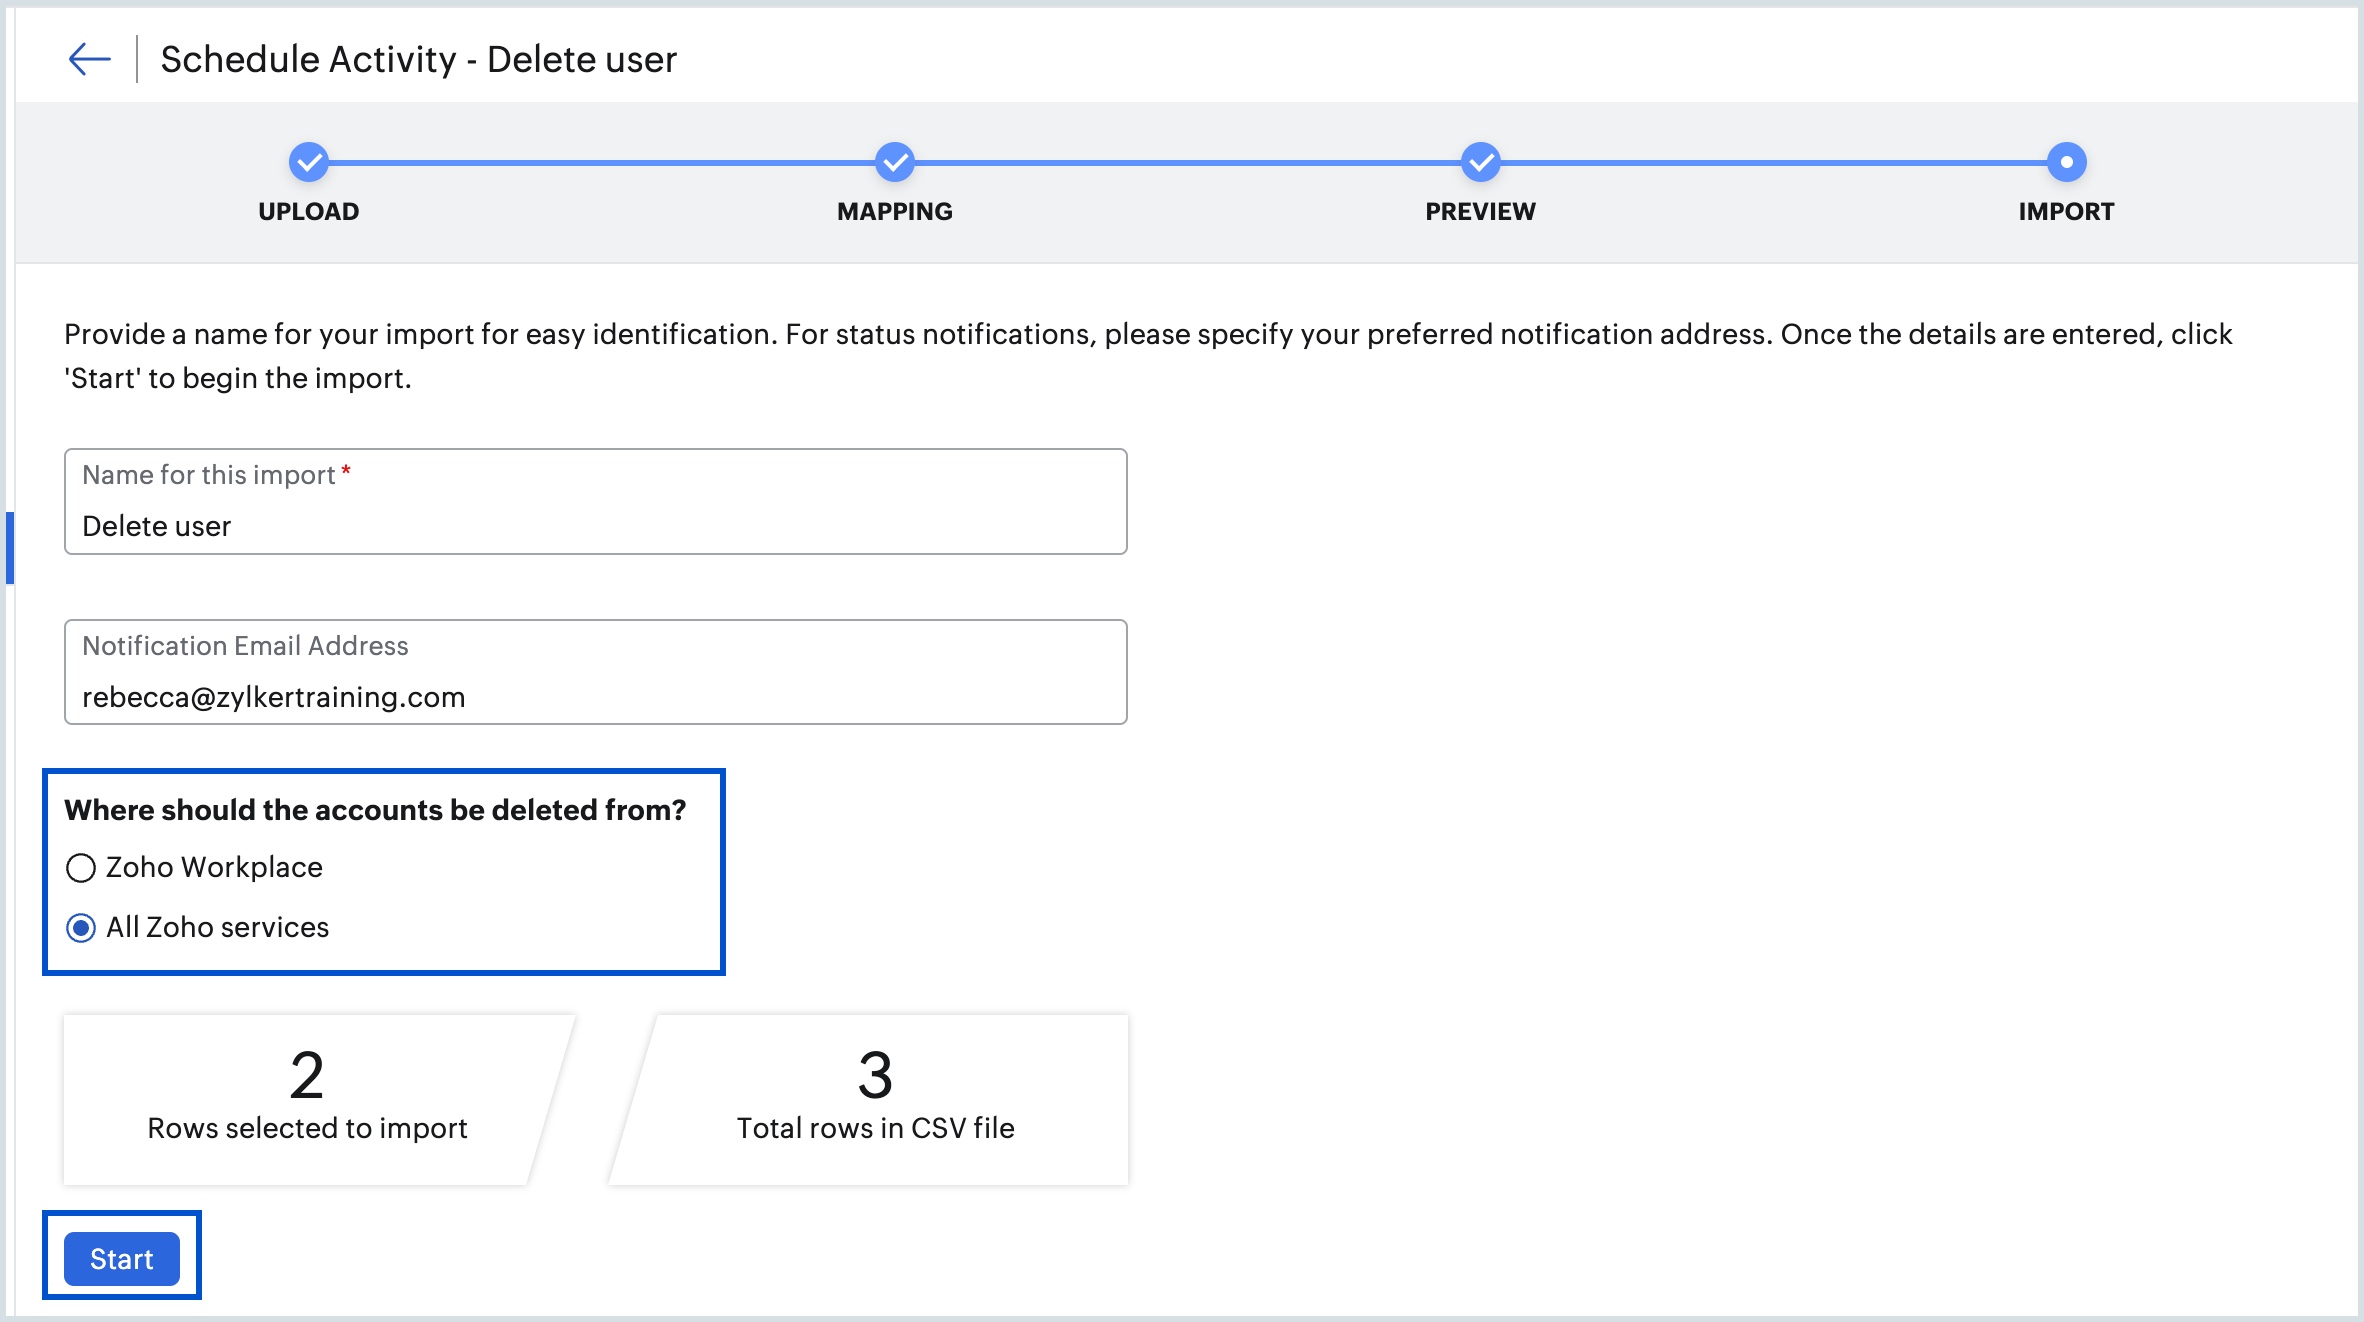
- In the Import page, enter a Name and your preferred Notification Email Address for your import.
- Select either Zoho Workplace or All Zoho services under Where should the accounts be deleted from? option to remove the selected users.
- After setting up your import preferences, click Start.
- Click the Proceed button and verify your identity to confirm your action.
- Once verified, the import process will begin.
Note:
- Every time you perform a bulk action, it is mandatory to re-authenticate your session using the MFA (Multi-Factor Authentication) method configured on your account for security purposes.
- If you do not have MFA configured for your account, you will be prompted to re-authenticate your session using your account password in a new tab or window, depending on your browser preference.
- It’s essential to keep your account credentials secure and up to date to facilitate smooth execution of bulk operations.