Migrating emails from the existing email service to Zoho Mail
Table of Contents
Configuration details needed before migration:
For both POP/ IMAP Migration, the following details are required.
- Name of the Server - Hostname of the IMAP Server or the POP Server from which the migration needs to be initiated
- Server Port - The supported server ports are SSL and Non-SSL
- Supported ports for IMAP - 143 (Non-SSL), 993 (SSL)
- Supported ports for POP - 110 (Non-SSL), 995 (SSL)
- SSL Type - Only Trusted Certificates are supported. Self Signed SSL certificates are not supported due to security reasons.
- Migration Protocol - Choose if your migration protocol is POP or IMAP.
- Maximum Connection Limit - The maximum connection limit is the number of maximum connections accepted by the server at a given time. For example, if you provide 5 as the maximum connection limit when the migration is started, the migration process will be started simultaneously for 5 users. The migration process will be faster when parallel migrations are happening between the servers.
- Path Prefix - Some IMAP servers expect the PATH Prefix details for connecting and retrieving emails via IMAP.
Adding the POP/IMAP Migration:
Adding server details for POP/IMAP migration:
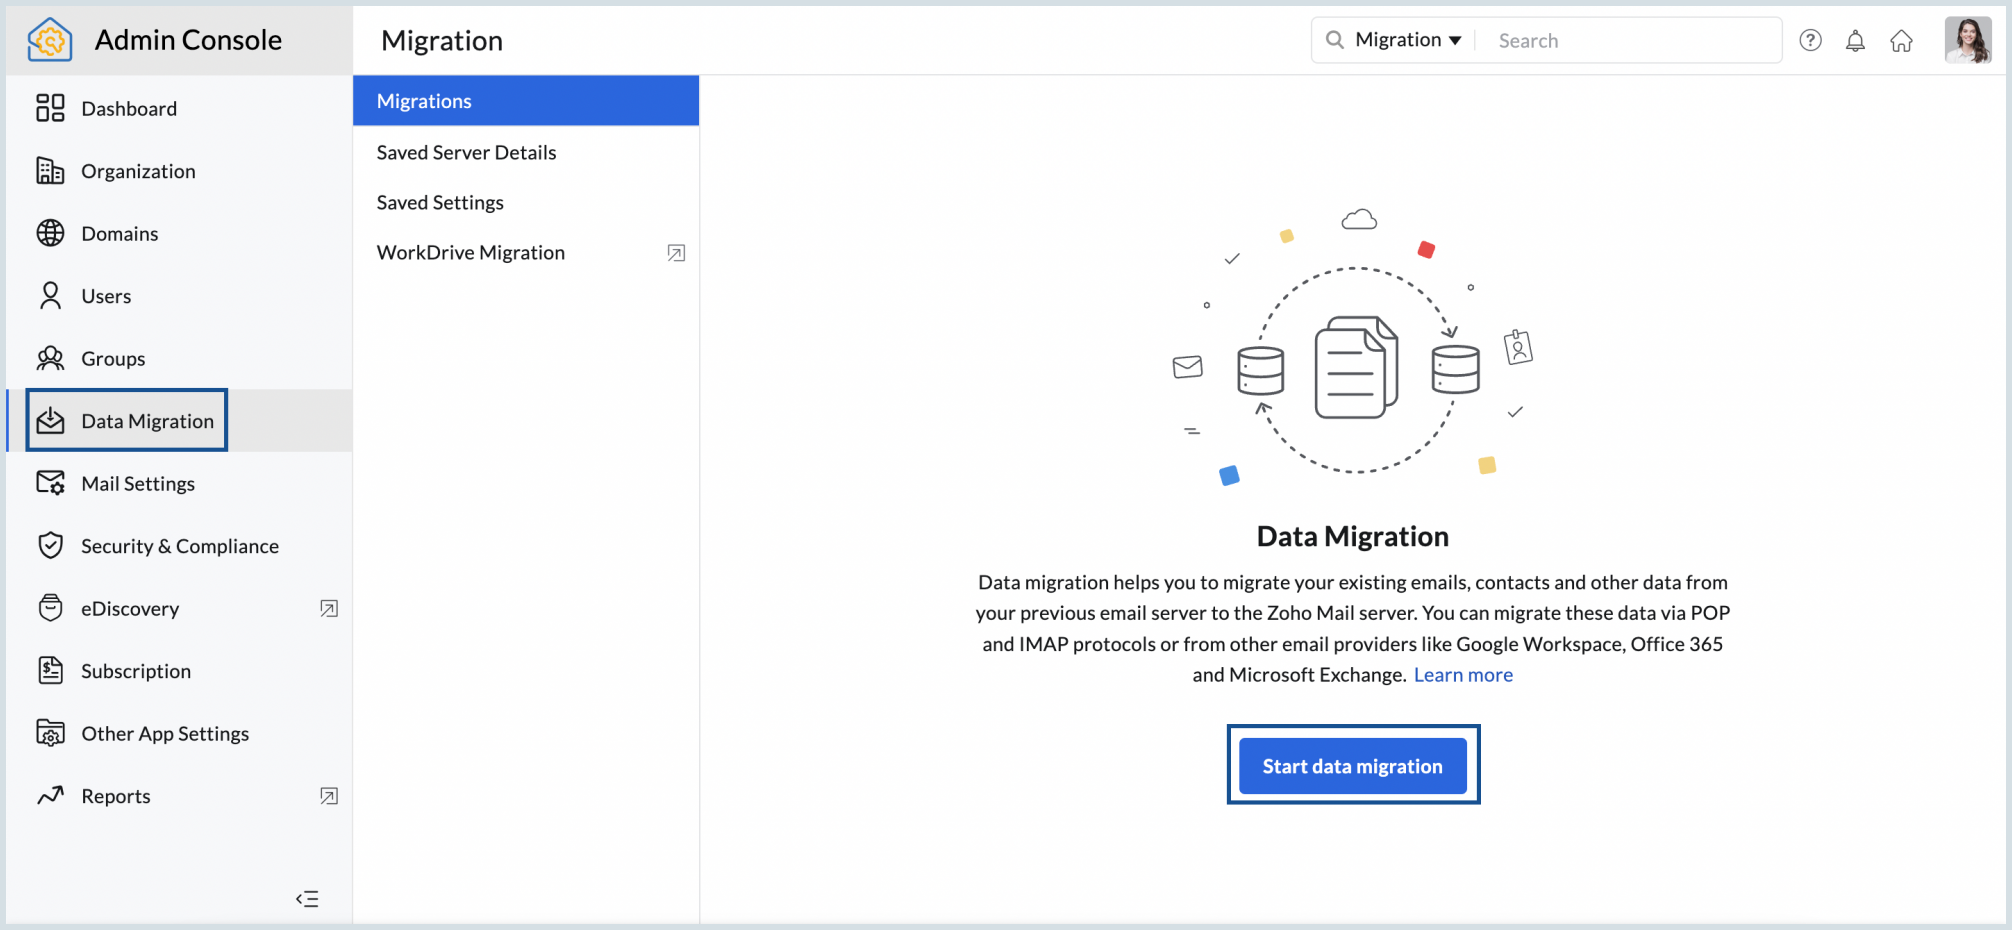
- Log in to Zoho Mail Admin Console.
- Choose Data Migration from the left menu.
- Under Migrations, click on Start Migration for the first migration and click Create for subsequent migrations.
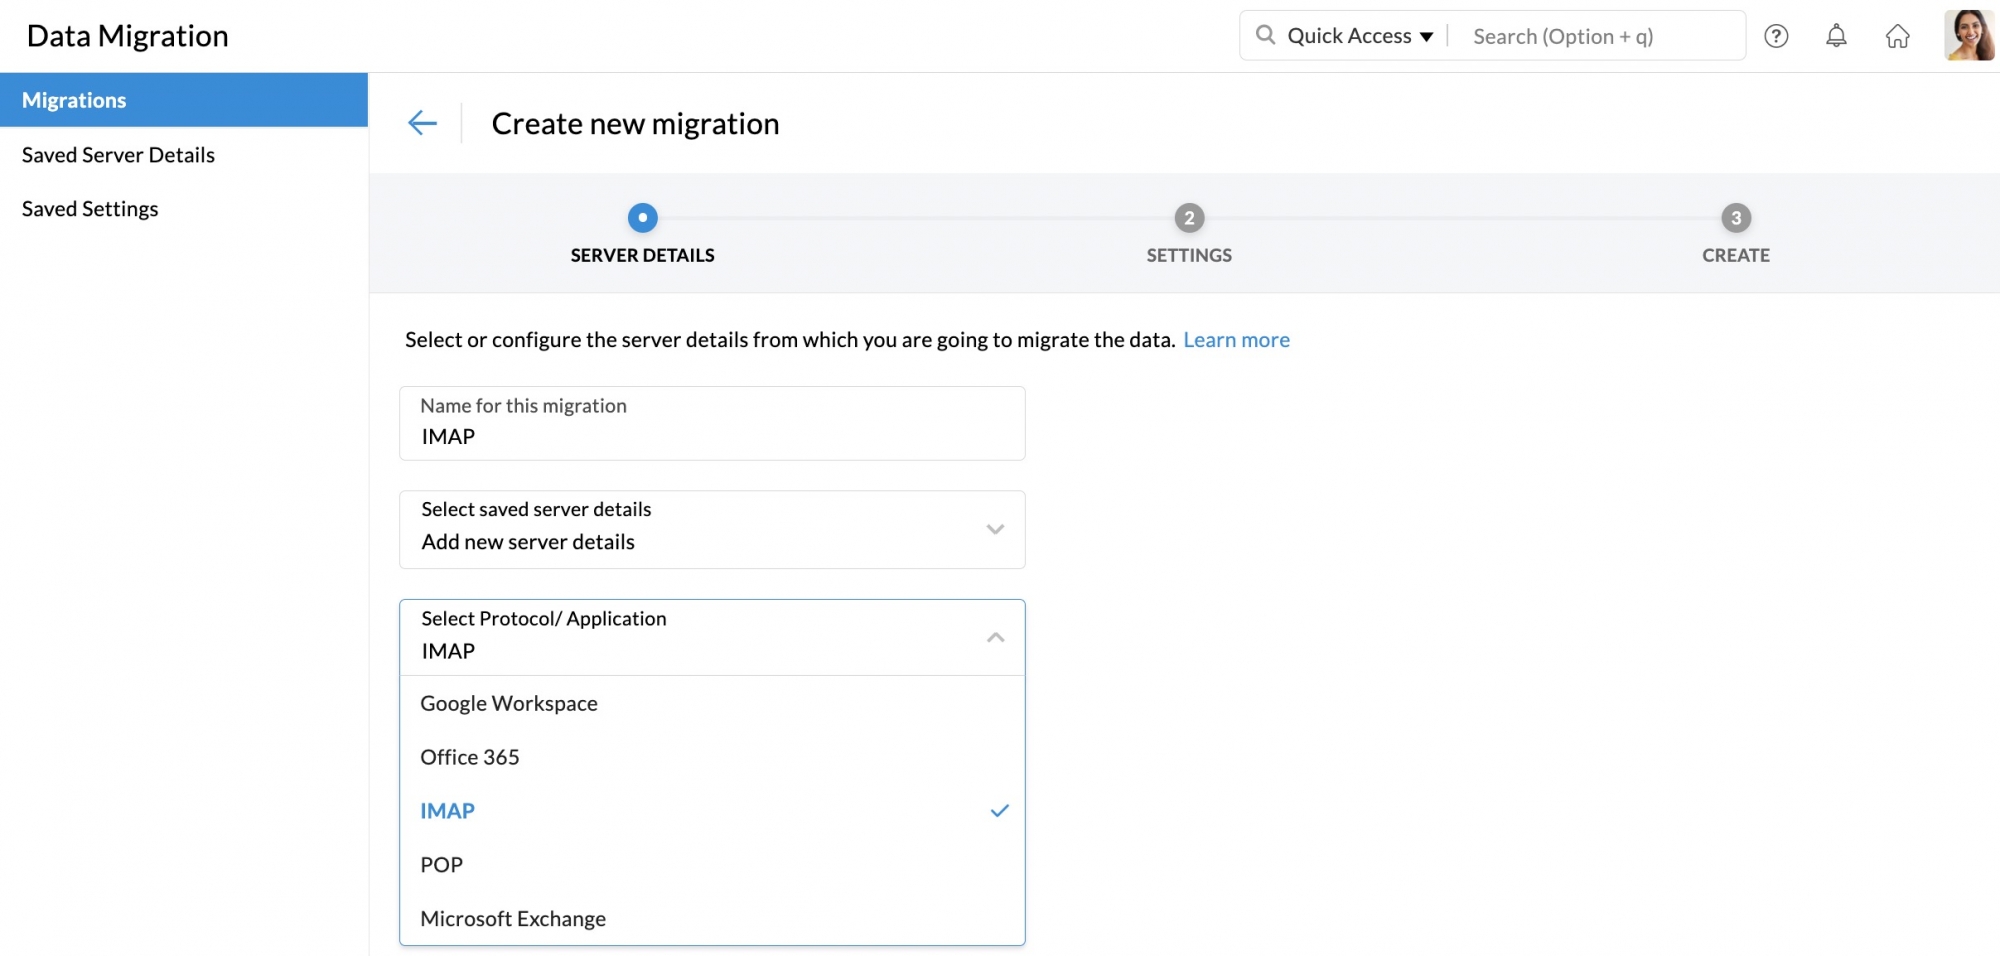
- Enter a name for the server configuration, for your reference.
- In the Select saved server details drop-down, choose to Add new server details.
- In the Select Protocol/Application dropdown menu, choose either POP or IMAP.
- If you have chosen POP, skip to this step. Follow the below step for IMAP:
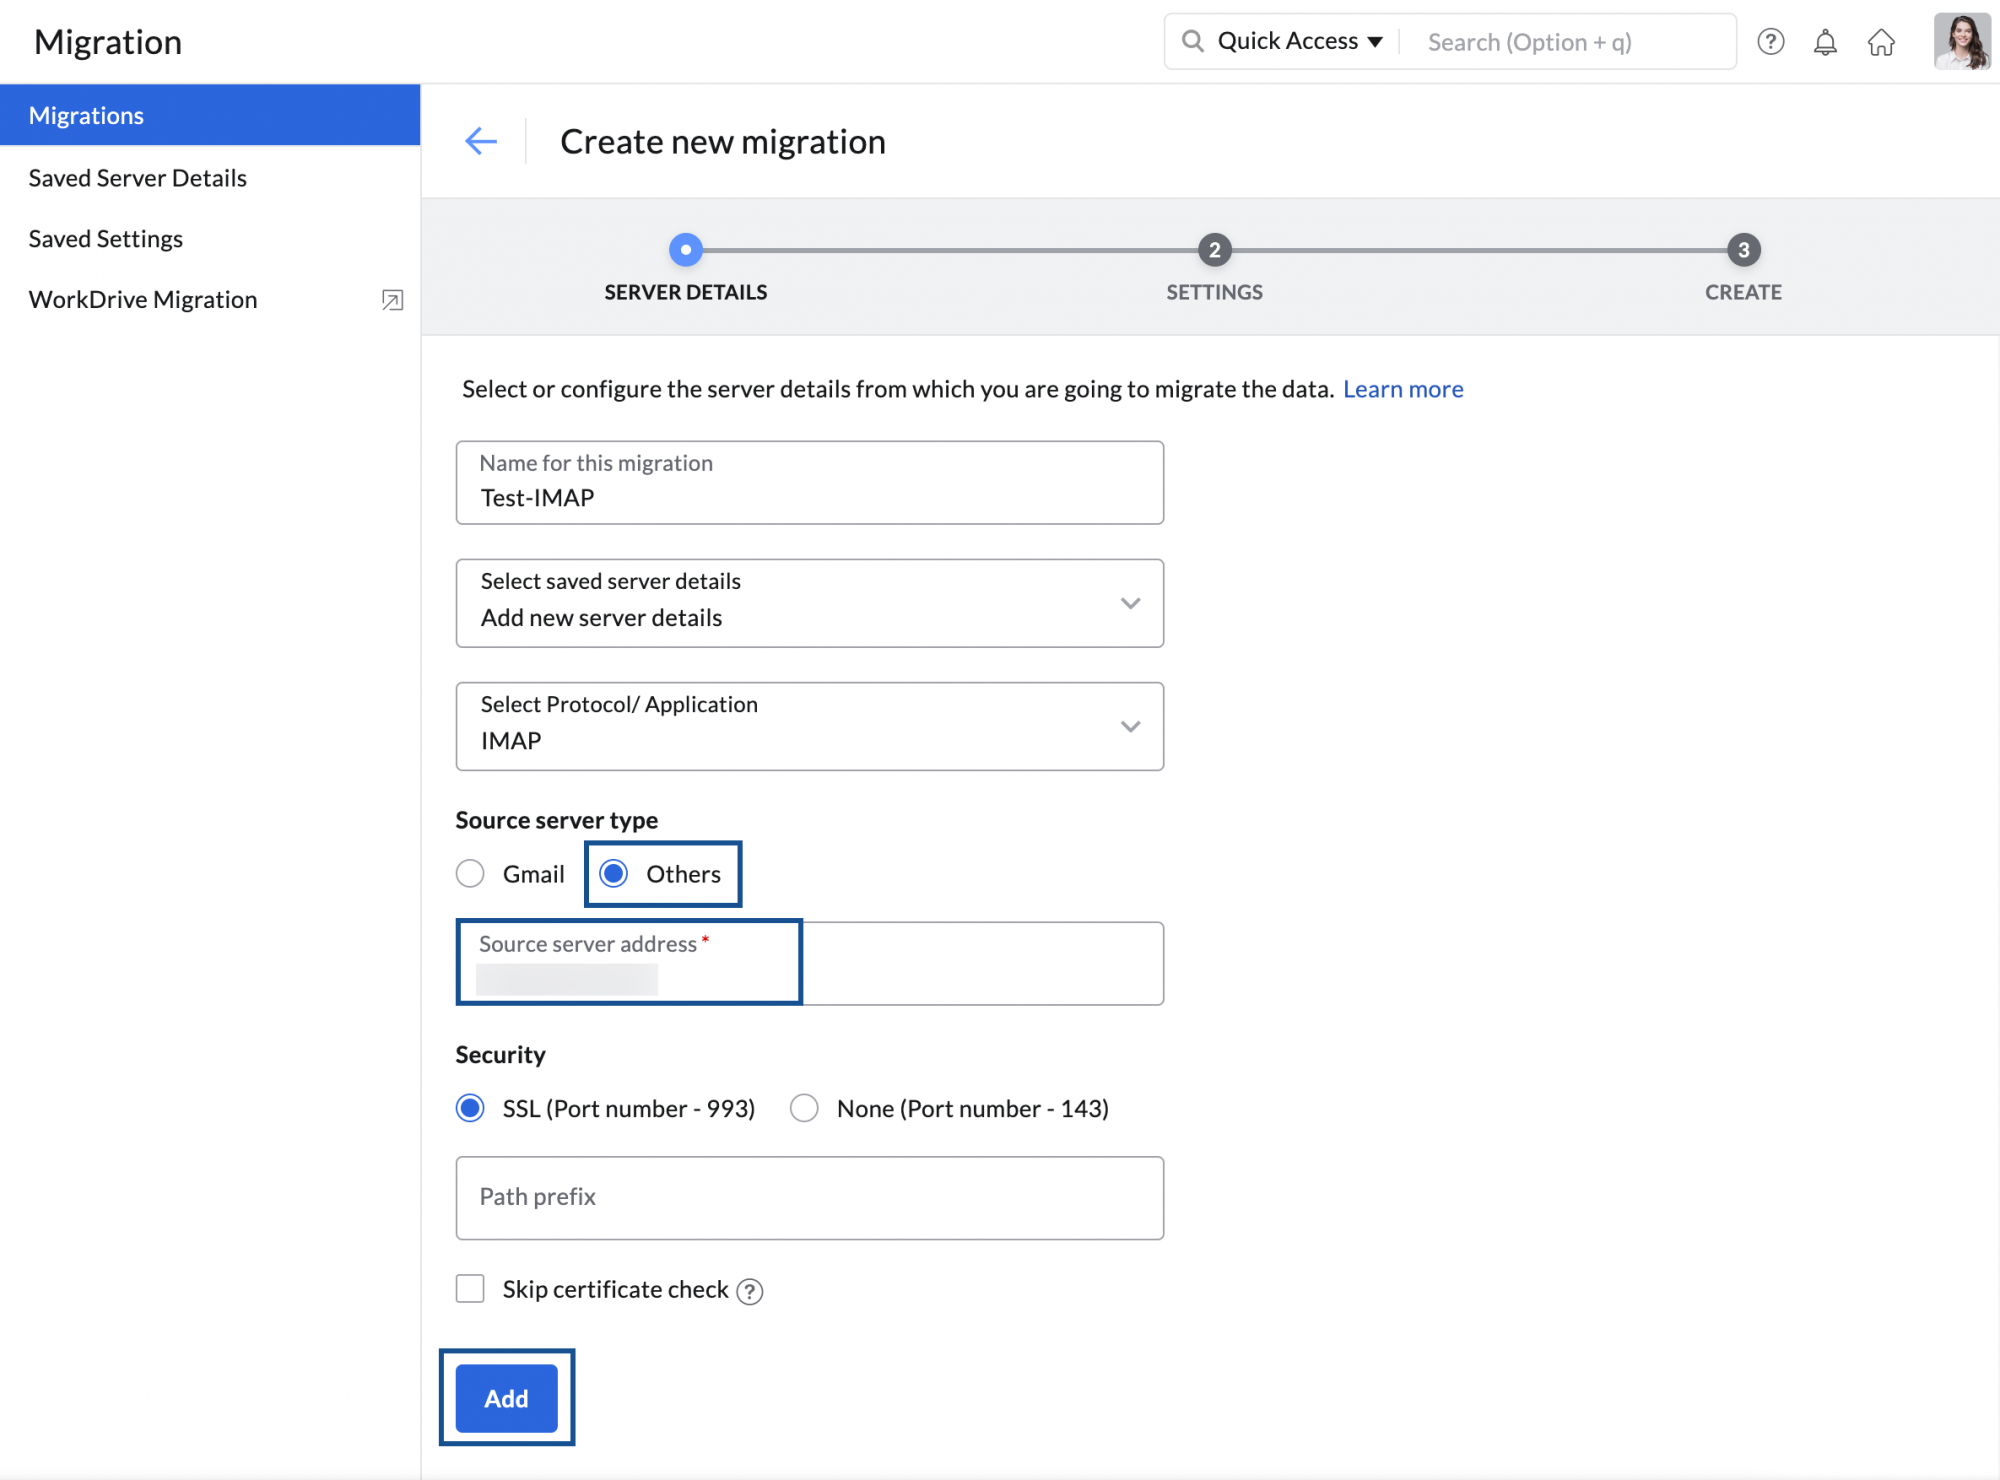
- Select Others for the Source server type.
- Enter the source server address.
- If your source server recommends Port Number 993, choose SSL under Security, if it is 143, choose None.
- Enter the Path prefix, if your source server mandates it.
- If you wish to proceed without the SSL certificate check, select the Skip certificate check checkbox, and click Add.
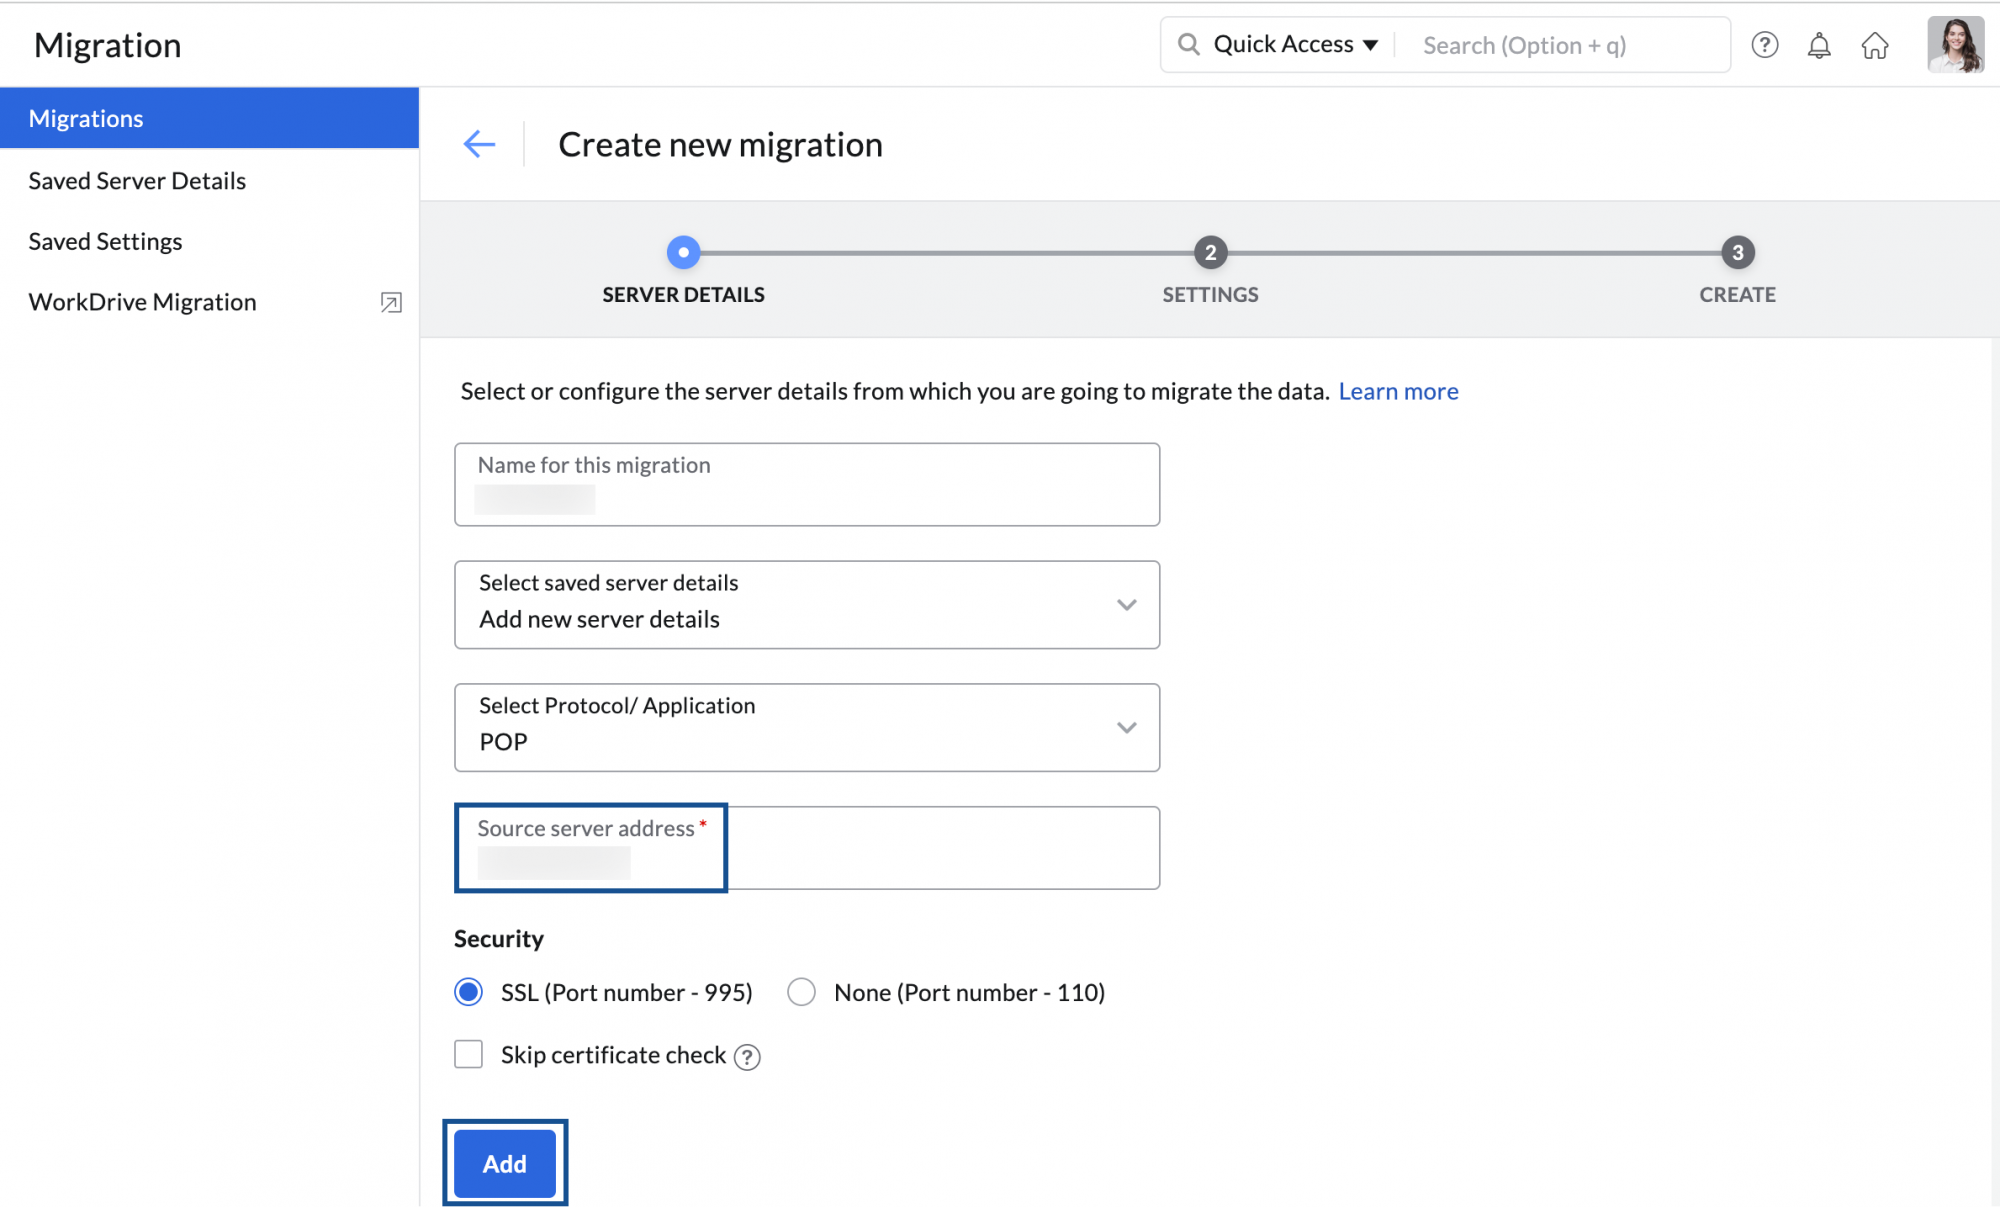
- If you chose POP, follow the below instructions:
- Enter the name of the configuration, for your reference.
- Enter the address of the server you are migrating from in your Source server address field.
- If your source server recommends Port Number 995, choose SSL under Security, if it is 110, choose None.
- If you are willing to proceed without the SSL certificate check, select the Skip certificate check checkbox, and click Add.
The server details you added will be saved on the Saved Server Details page, and you can use it for performing other migrations just by picking it from the dropdown.
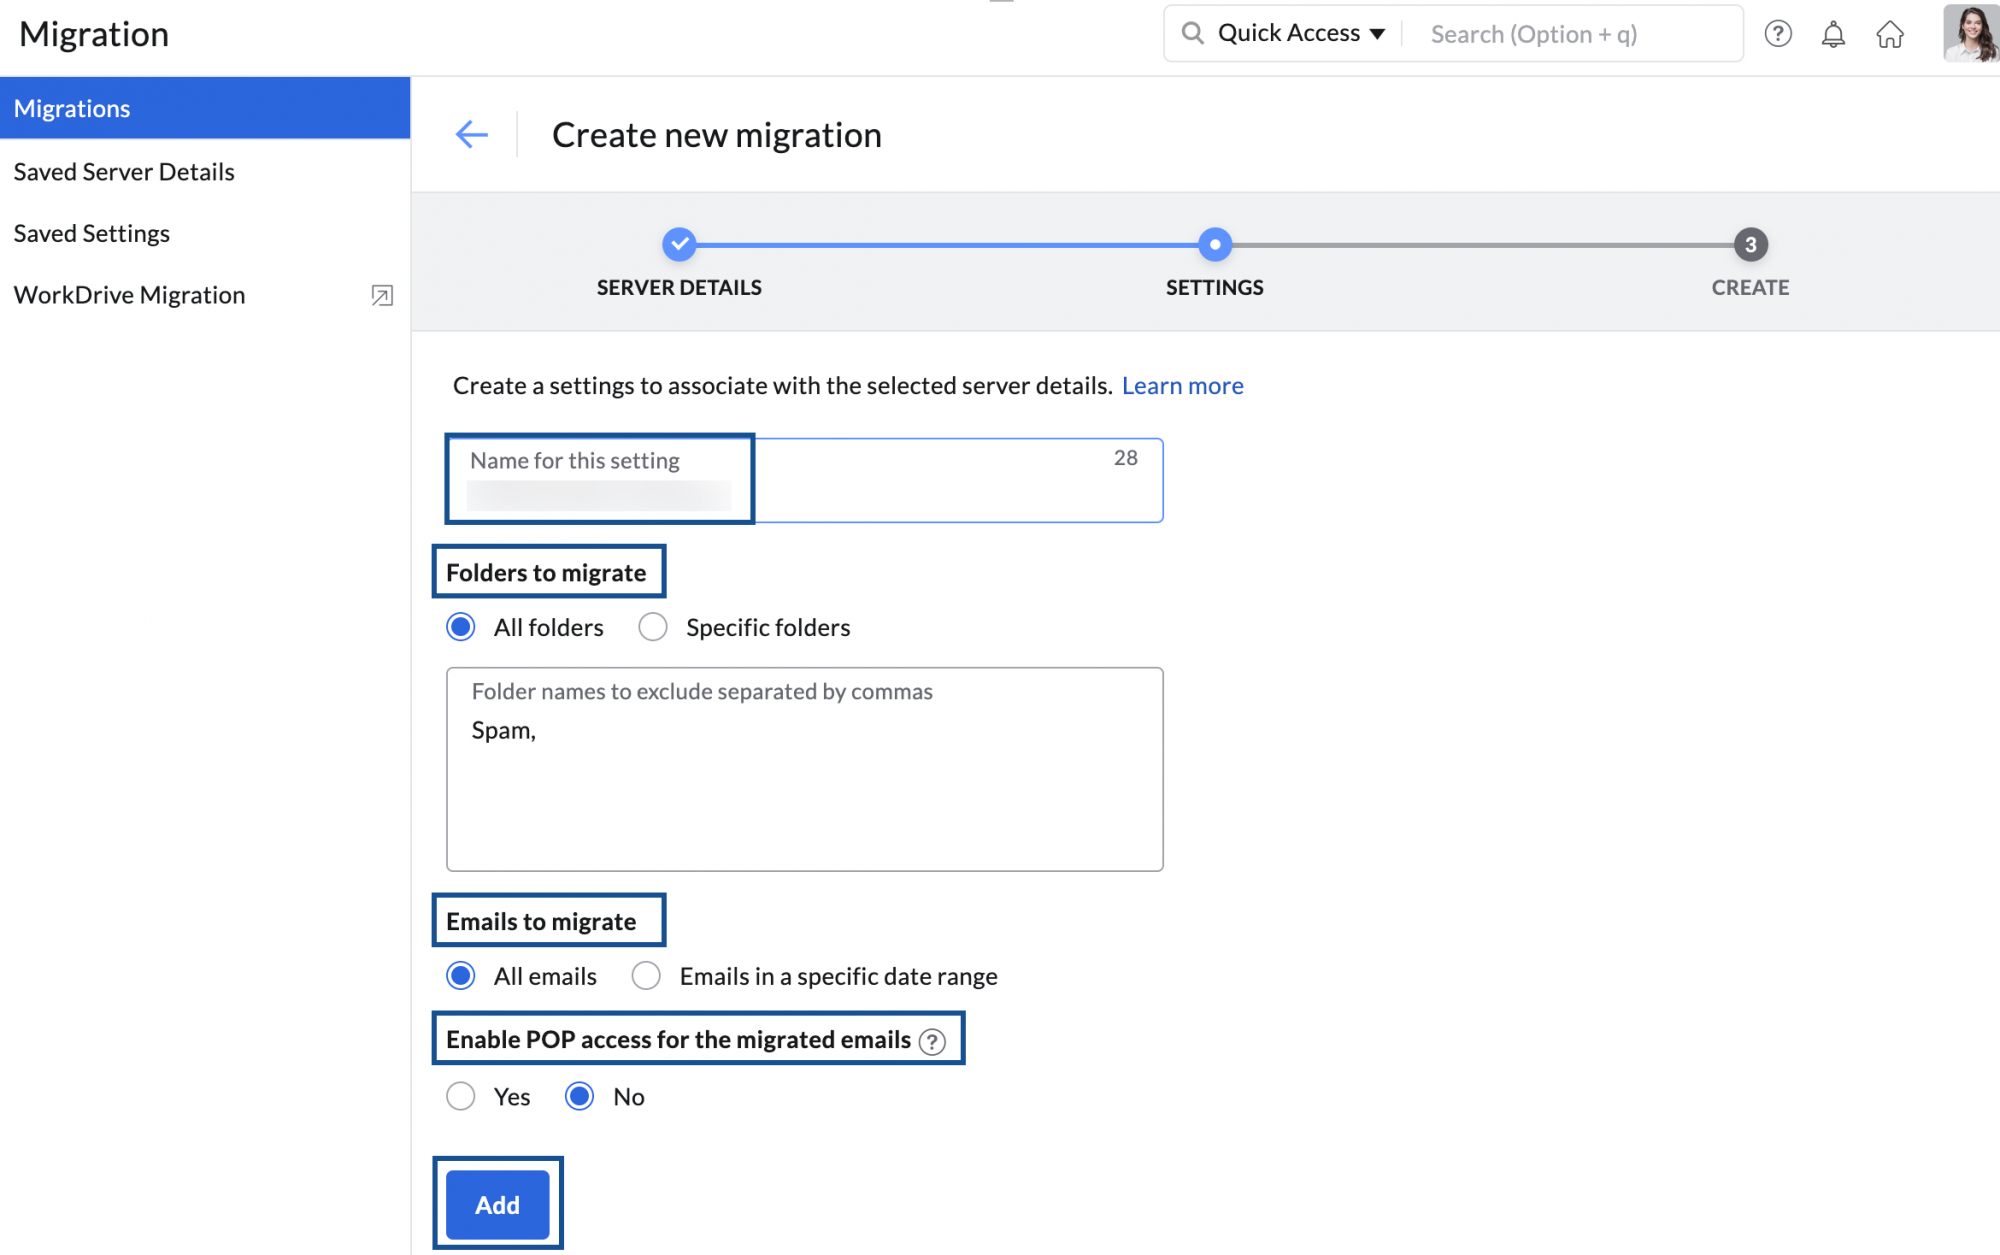
Adding the settings for POP/IMAP migration:
- In the next step, you will have to customize the settings for this migration.
- If you have chosen POP, skip this step. Follow the below instructions for IMAP:
- Enter a name for this setting, for your reference.
- Under Folders to migrate, you can choose either the All folders or Specific folders.
- If you choose the All folders option, you can choose to skip any folders during migration using the Exclude Folder List option.
- The skip folders option will be handy when the admin reruns migrations for the same set of users for some new emails or missed emails. Enter the names of the folders within double quotes ("Folder1"), in which case only that folder will be excluded. If you want all subfolders under a parent folder to be migrated enter the folder name followed by /* within double quotes ("Folder1/*"). For detailed information on the convention, refer here.
- If you choose the Specific folders option, you can specify the folders that need to be included in the Include Folder List.
- In the Include Folder List, enter the names of the folders within double quotes ("Folder1"), in which case only that folder will be included. If you want all subfolders under a parent folder to be migrated enter the folder name followed by /* within double quotes ("Folder1/*"). For detailed information on the convention, refer here.
- Under Emails to migrate, select whether you want to migrate all the emails or the emails that you have received after a specific date.
- In Enable POP access for the migrated emails, select Yes if you want your users to view the migrated emails when the account is configured as POP in other email clients. Otherwise, select No.
- Click Add and proceed to Create migration.
If you have enabled multiple authentication methods, select one of the Preferred Authentication Type that suits your organization's needs:
Note:
- The Preferred Authentication Type options will be rolled out in a phased manner and be available only to the organizations who have availed of one of our paid plans.
- If you want the option enabled for your organization, please reach out to us at support@zohomail.com.
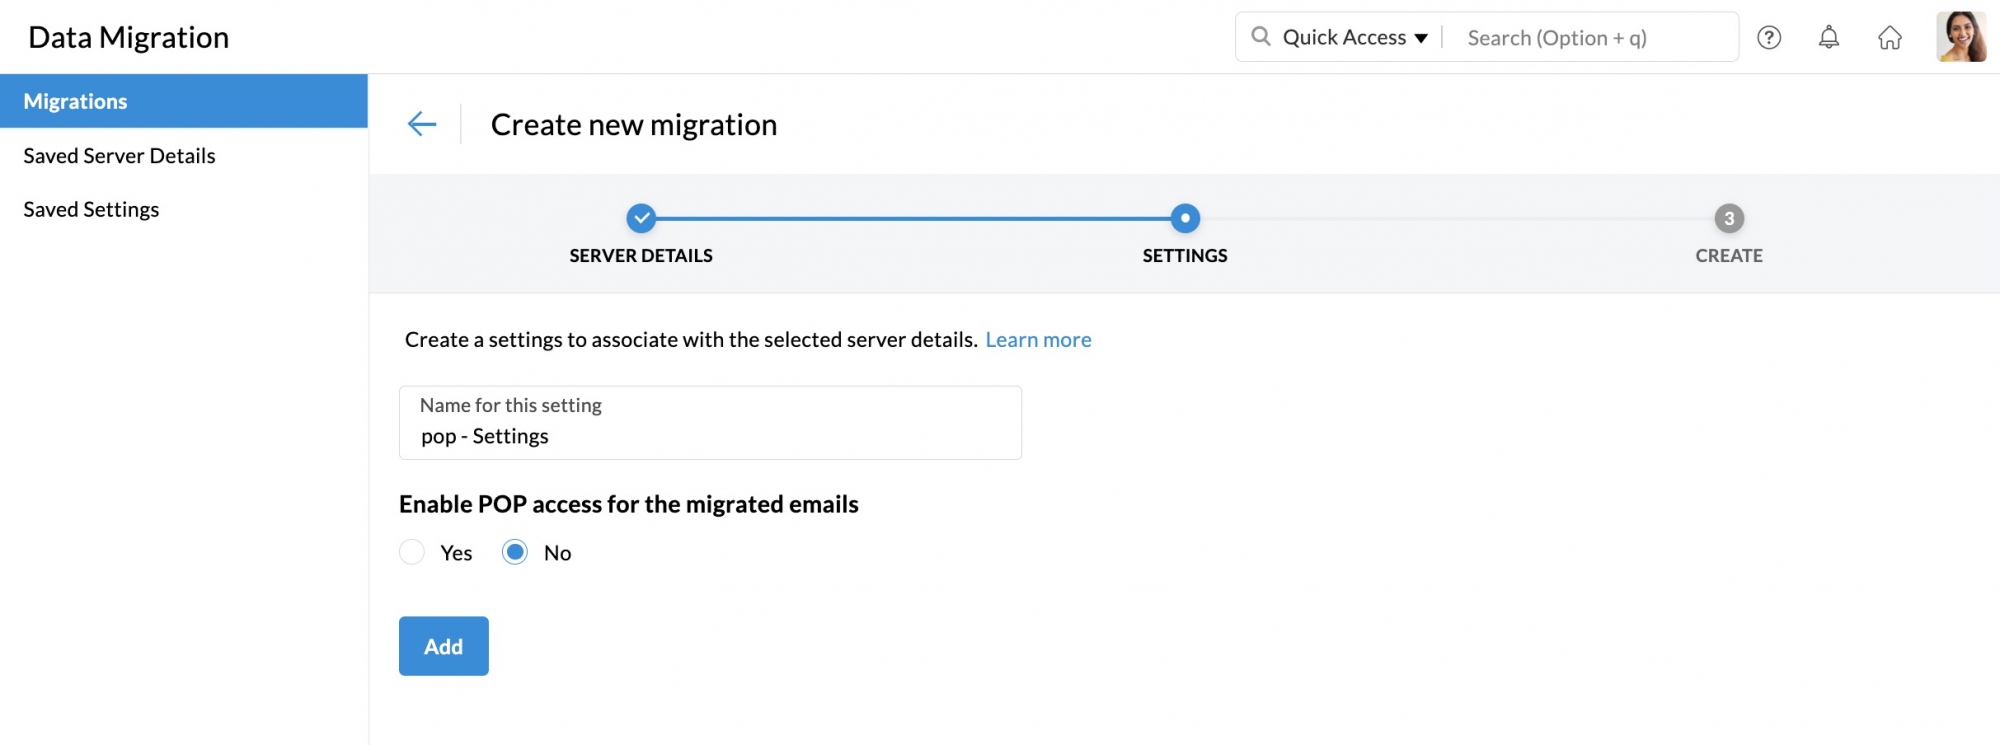
- If you have chosen POP, follow the below instructions:
- Enter a name for this setting, for your reference.
- In Enable POP access for the migrated emails, select Yes if you want your users to view the migrated emails when the account is configured as POP in other email clients. Otherwise, select No.
- Finally, click Add and proceed to Create migration.
Enter user password manually
This is the default authentication type that you were using before introducing the Preferred Authentication Type feature. If you want to migrate data using this method, click Add and proceed to the CREATE migration step.
At the time of user addition, admins must enter the user's Source email address, the user's Source password and then select the Destination email address.
Each user supplies their password
Each user supplies their password authentication does not require any action from the admin at the time of server settings configuration. If you want to migrate data using this method, simply click Add and proceed to the CREATE migration step.
When you add a user, an auto-generated email with a link will be sent to the user's source account. Users must log in to their Zoho account before accessing the link in the email. Once the user is logged in to the Zoho account, they can select the link from their email and enter their password. The user-entered password is encrypted and the admin will not be able to see the actual password.
The Password Supplied column on the Users page will indicate No till the time a user provides his/her password. Once the user provides the password, the Password Supplied field changes to Yes.
The settings you added will be saved on the Saved Settings page, and you can use it for performing other migrations just by picking it from the dropdown.
Convention for mentioning folders:
- In case you want to mention a specific parent folder (E.g. Reports), enter it as "Reports".
- In case there are multiple subfolders under Reports and you want to mention all the subfolders, enter it as "Reports/*"
- In case there exists a subfolder under Reports named 2016, and you want to mention this particular subfolder, enter it like this - "Reports/2016".
- If you want all the subfolders under Inbox, only the Marketing folder without the subfolders, and a specific subfolder, 2012, alone under the Sales Reports folder to be mentioned, you will have to type the Folder List like this - "Inbox/*", "Marketing", "Sales Reports/2012".
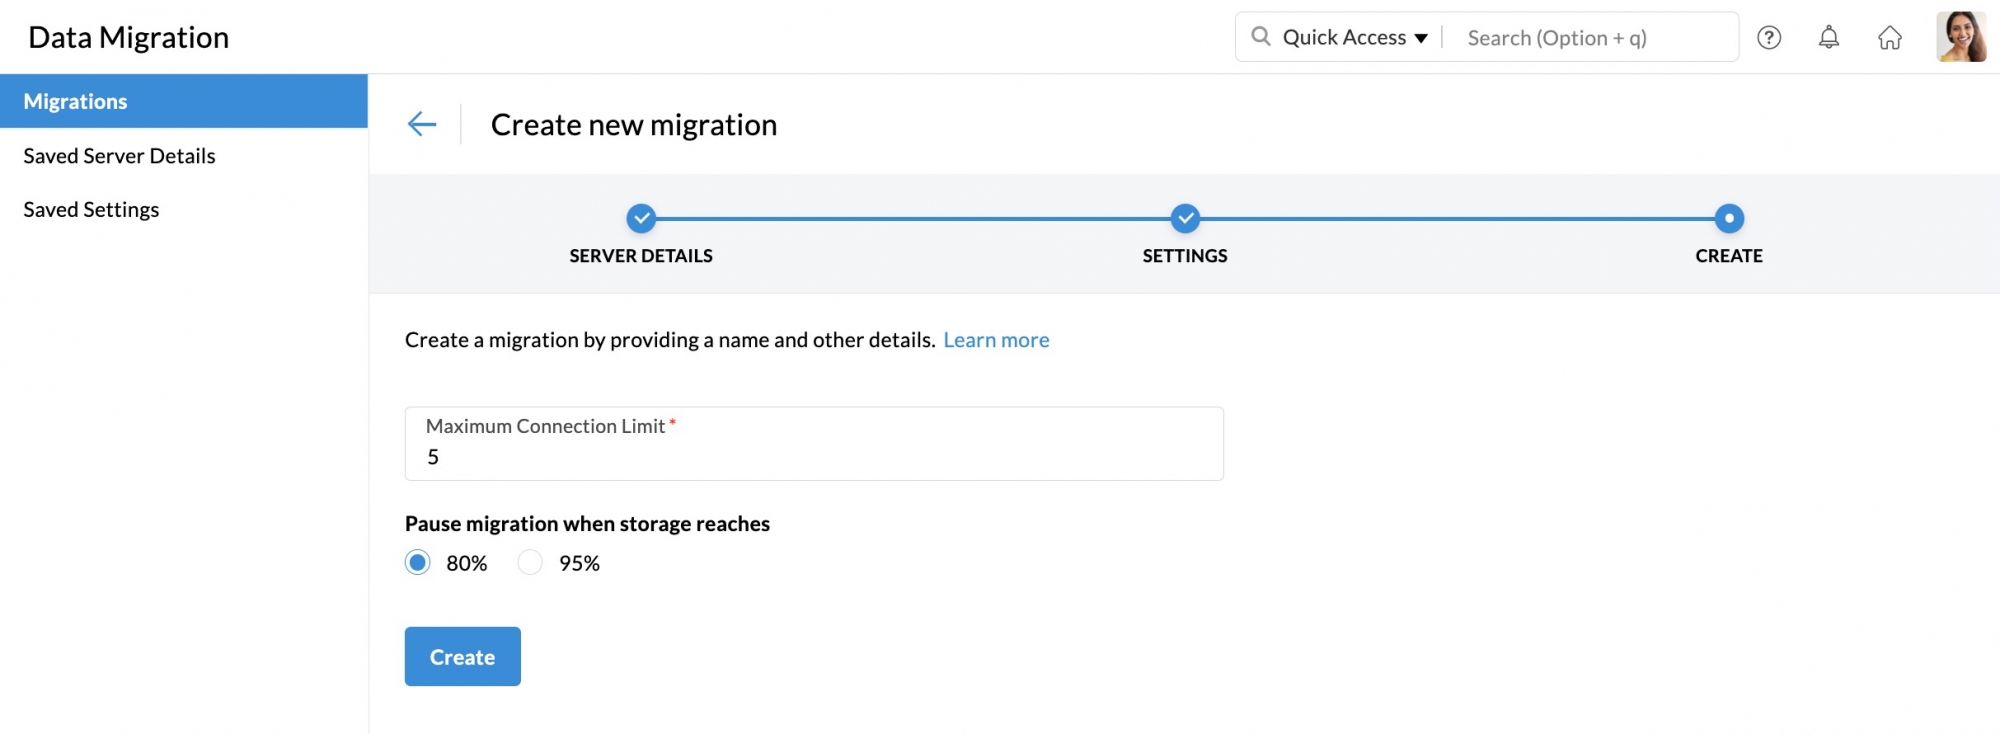
Creating a new migration:
- Enter a Maximum Connection Limit. Click here to know about the maximum connection limit.
- Select whether you would like to pause the migration when the storage reaches 80% or 95%, and finally click Create.
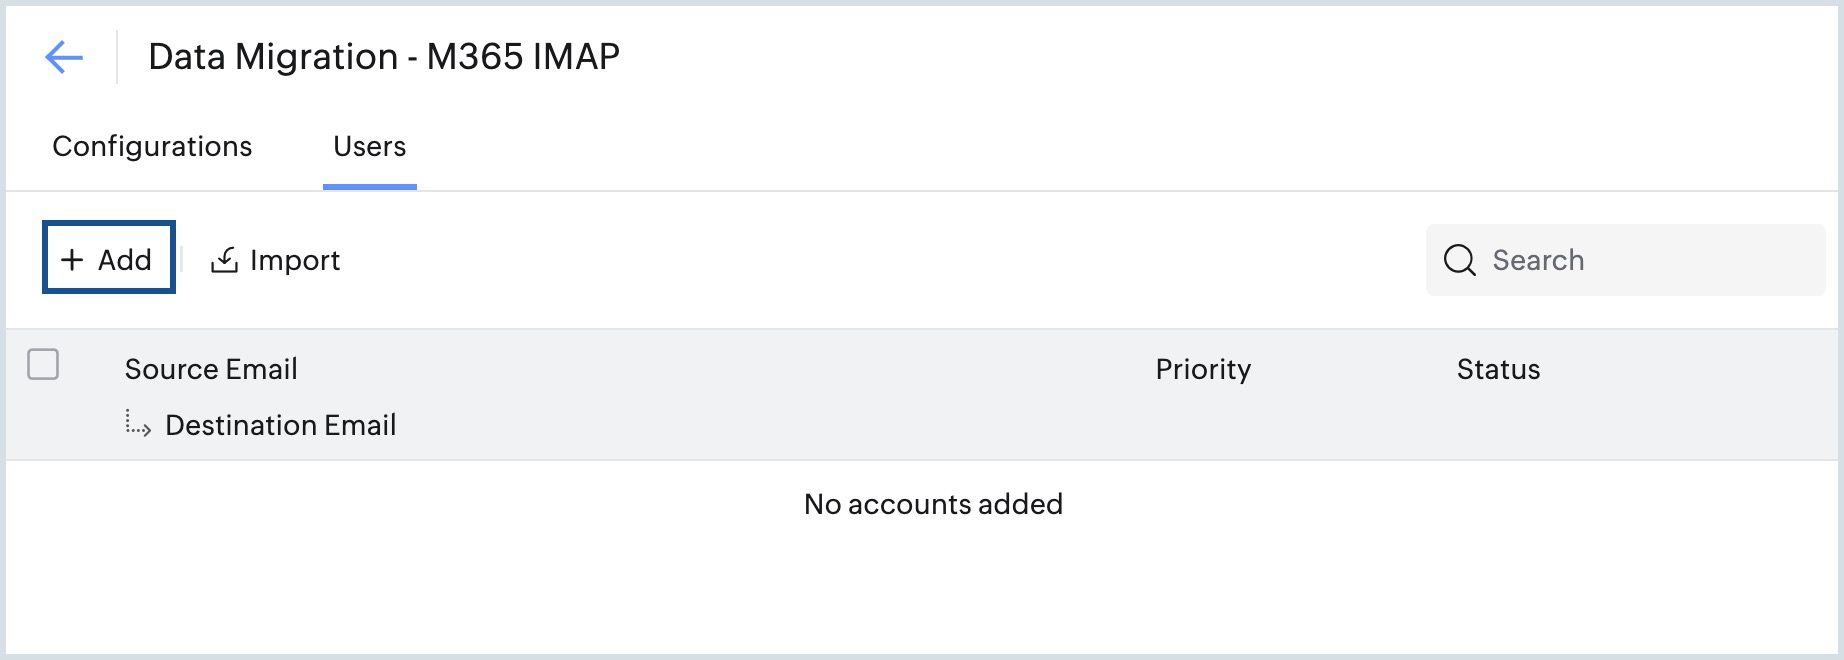
Adding user details for POP/IMAP migration:
Zoho Mail provides two options to add user accounts for migration. They include:
- Manual user addition
- Import bulk users through the CSV option
Manual User Addition:
The procedure to add users for migration differs based on the preferred authentication type that you select. Follow the procedure that is applicable for your migration type:
Enter User Password Manually
- From the Migration list, select the migration to which you want to add the source and destination user account details.
- Click Add to add the account details manually.
- Enter the Source user name, Source password and Select the destination email address.
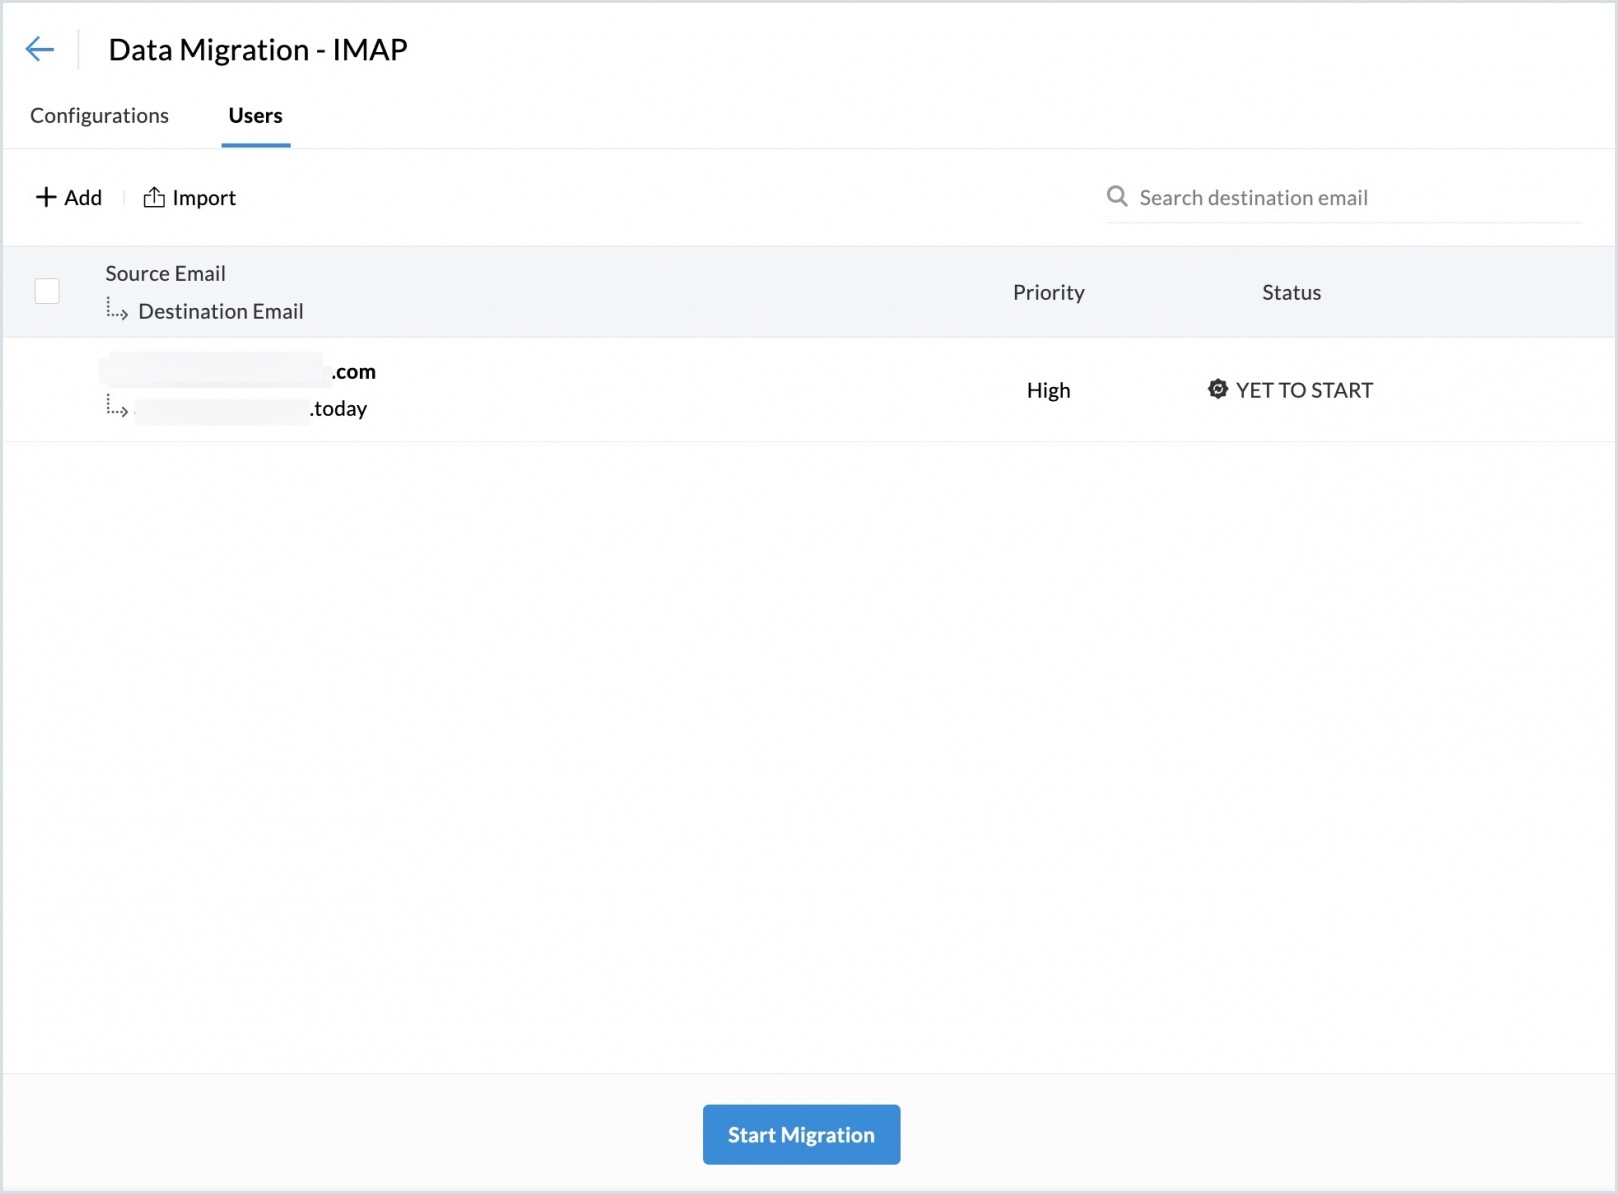
- Choose the priority for the migration and click Add. The user gets added successfully.
- Proceed to the Start Migration step.
Repeat the steps to add the required users for migration.
Each User Supply Password
- From the Migration list, select the migration to which you want to add the source and destination user account details.
- Click Add to add the account details manually.
- Enter the Source user name and Select the destination email address. An auto-generated email is sent to the user to request their password.
A Password Supplied column indicates whether the user had provided their password or not. - Choose the priority for the migration and click Add. The user gets added successfully.
- Proceed to the Start Migration step.
Repeat the steps to add the required users for migration.
Steps to Import users from CSV file:
Instead of manually adding the users for migration, you can also add the user details to an excel sheet, save it as a CSV file and upload it. The user accounts mentioned in the CSV will be uploaded for migration.
Note:
Bulk user addition via CSV option is currently available only for the general authentication method (Enter user password manually).
- From the Migration list, select the migration to which you want to add the source and destination user account details.
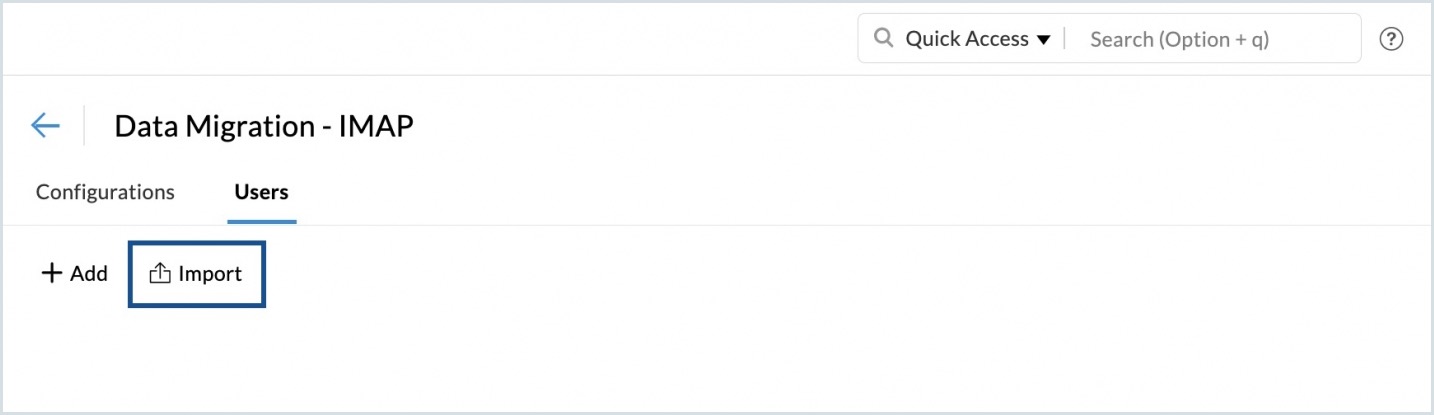
- Click Import to upload the user accounts using a CSV file.
- The format for entering the User Details in the CSV file can be found in the sample file attached in the popup.
- Once you have prepared your CSV file, click Browse Files, and choose the CSV file that you would like to import.
- A preview of all the users in the CSV file, along with details about whether they were imported or not will be shown on screen.
Note:
- The source account and the destination account details should mandatorily be entered in the CSV file.
- Sometimes, there might be an issue with authenticating your source account due to various reasons. For more details, follow this help page.
Starting the migration process
Once you have added the user accounts for the migration, you can start the migration. Ensure that the source passwords are not changed after adding the users for migration. The password should be the same until the entire migration process is completed.
Click the Start Migration button after adding the users. If you have navigated out of the page where you added the users, select the migration that you want to start from this page, and click Start Migration.
Note:
Below are a few exceptions for the Password supply by users authentication type:
- The Password supplied column must be Yes before you click Start Migration.
- If the Password supplied column displays No, it means that the user did not provide their password. Hover over the respective user and click the Resend button to send an email once again.
- If the migration fails, one of the reasons could be password validation failure. In such cases, you must follow these steps and add a new migration. When you add the user, the Password supplied column will display Yes. Hover over the user and click the Reconfirm button to send an email once again to the corresponding user.
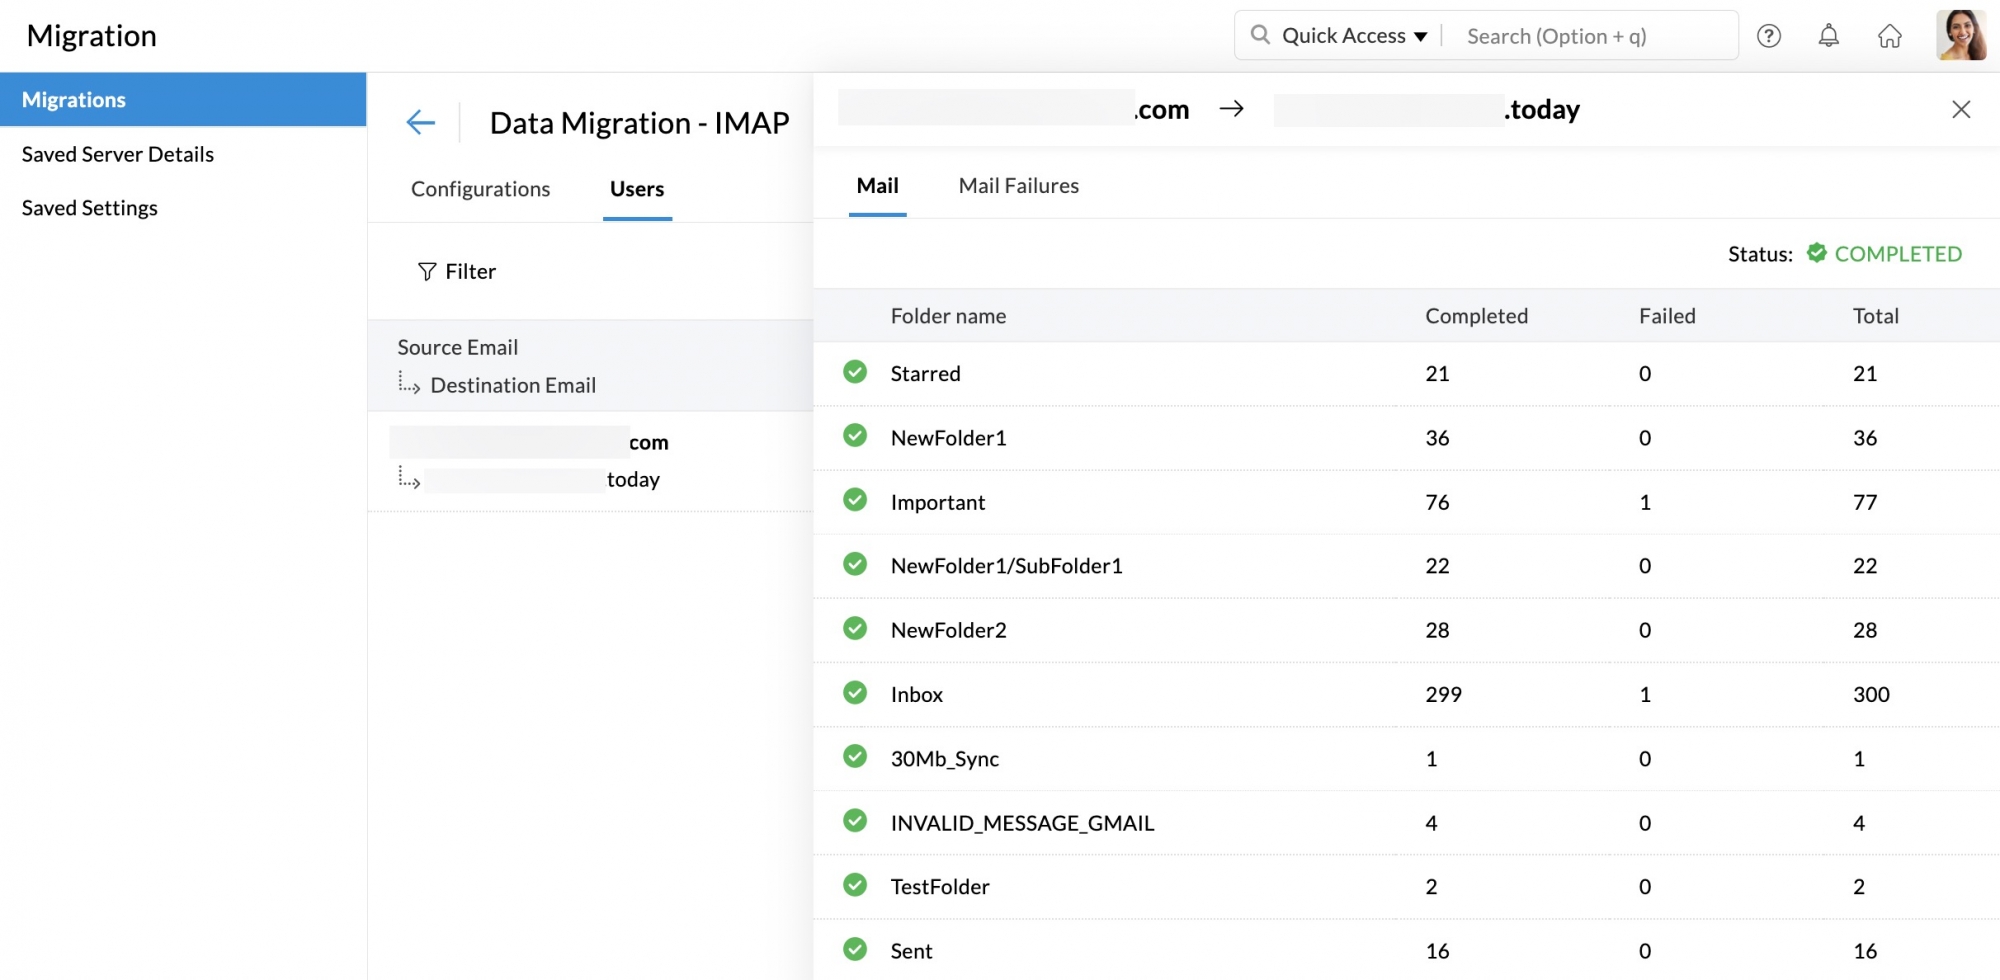
- You can view the progress and statistics regarding the migration on the same page.
- Detailed statistics regarding each user's migration can be viewed by clicking on their email address on the migration progress page.
- For mail migration, detailed reports along with folder information will be available.
- Click Mail Failures to view the detailed information about the folder-wise migration details.
For more information on reasons for migration failure, follow this help page.
Note:
Suspension of Migration
During the process of migration, if the size of the emails migrated in the account, exceeds the allowed storage, the incoming emails may get blocked. Hence to avoid this, if the account reaches the allowed storage, as selected by you, the migration gets suspended (paused) temporarily. You can create more space either by deleting some of the old or unwanted emails in your previous account or by purchasing additional storage for your Zoho account.
Once you are confident that the account has enough space, you can resume the migration.
Related Pages
Migration from G Suite | Exchange Migration | Migration from Office 365