Mail Options
Zoho Mail provides several options that might be necessary for troubleshooting or to sort out other issues such as an improper rendition of the email. These options include provisions to get the headers of the email, solution for a garbled message, saving the email, and printing out the email.
Table of Contents
View Email Headers
Email Message Headers are present in all the emails you send and receive via the internet. They have uniquely identifiable message ids, the sender, recipients, and the subject information and also present various diagnostic information which is useful for spam identification, message hops, delays and so on.
Steps to get the headers of an email in Zoho Mail:
- Login to your Zoho Mail account.
- Open the email whose headers you would like to view.
- Click the More Actions drop-down on the right corner of the email.
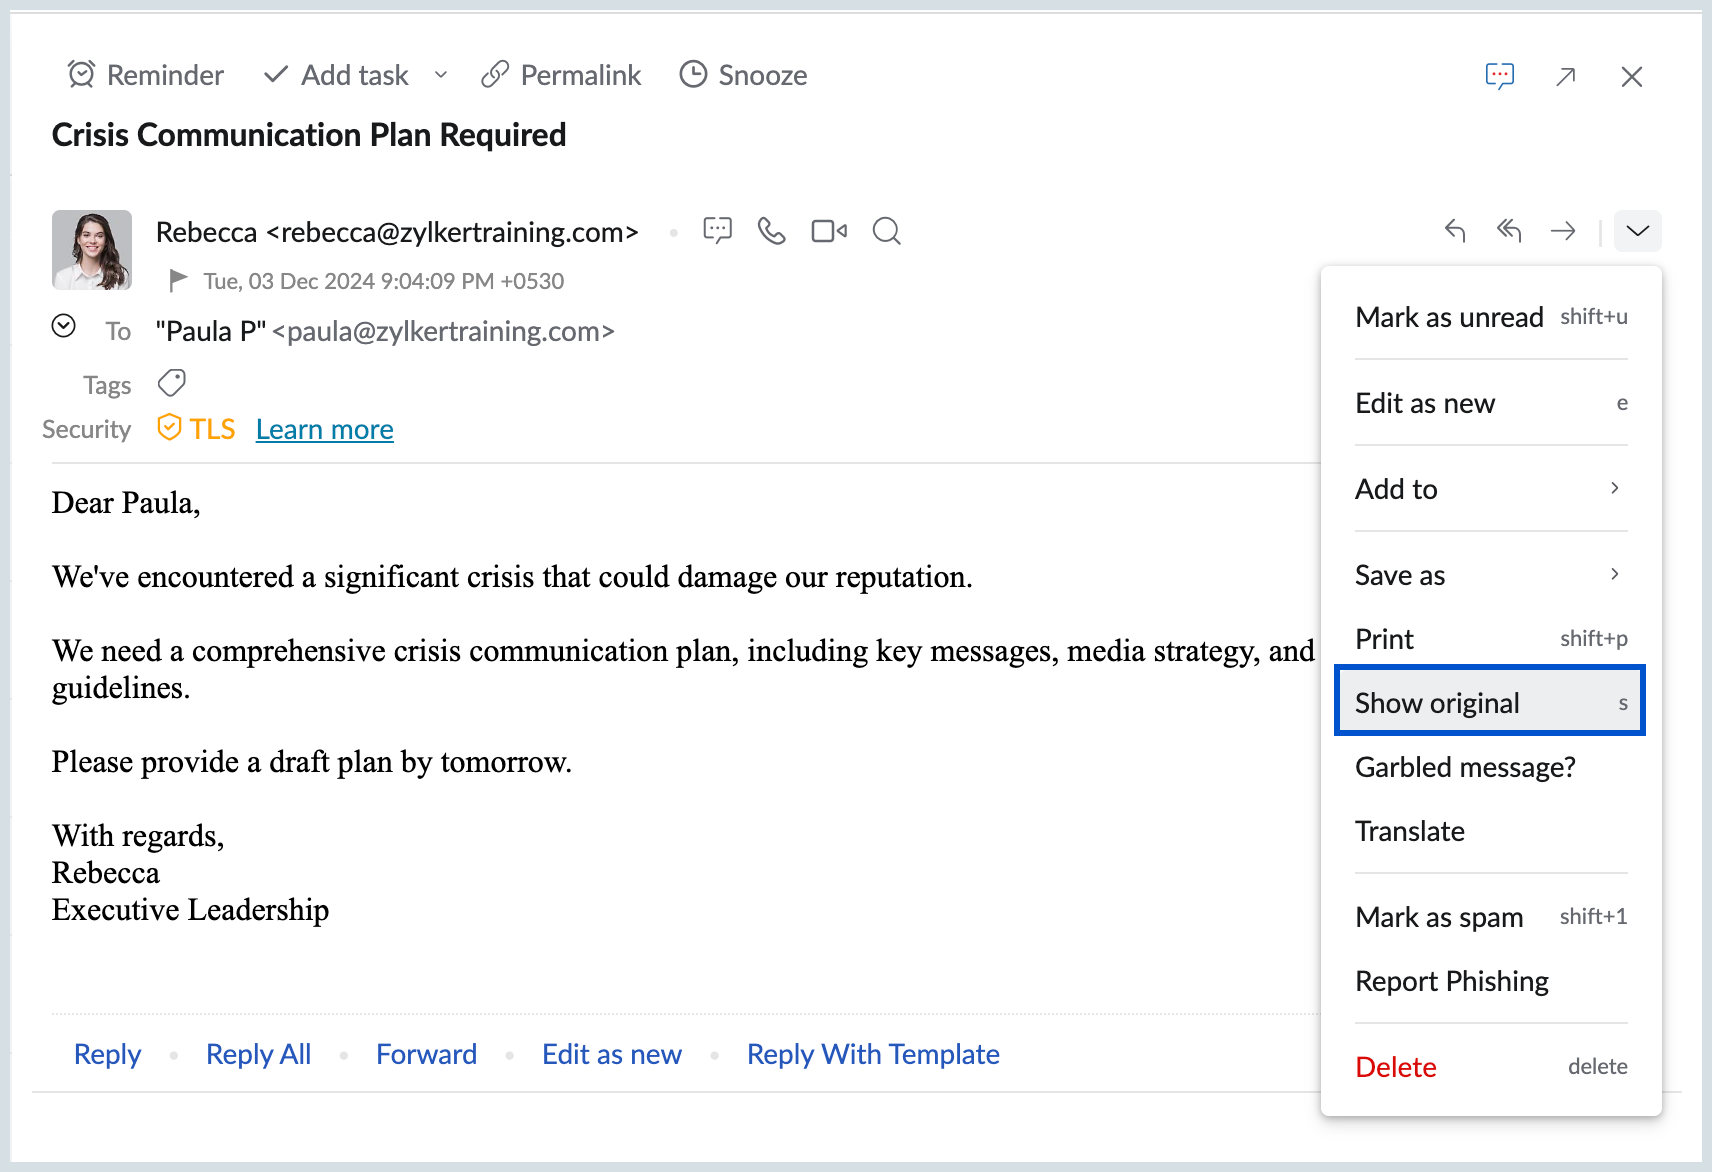
- Choose the Show Original option.
- With the message header details, you will also be able to see several options in the new window.
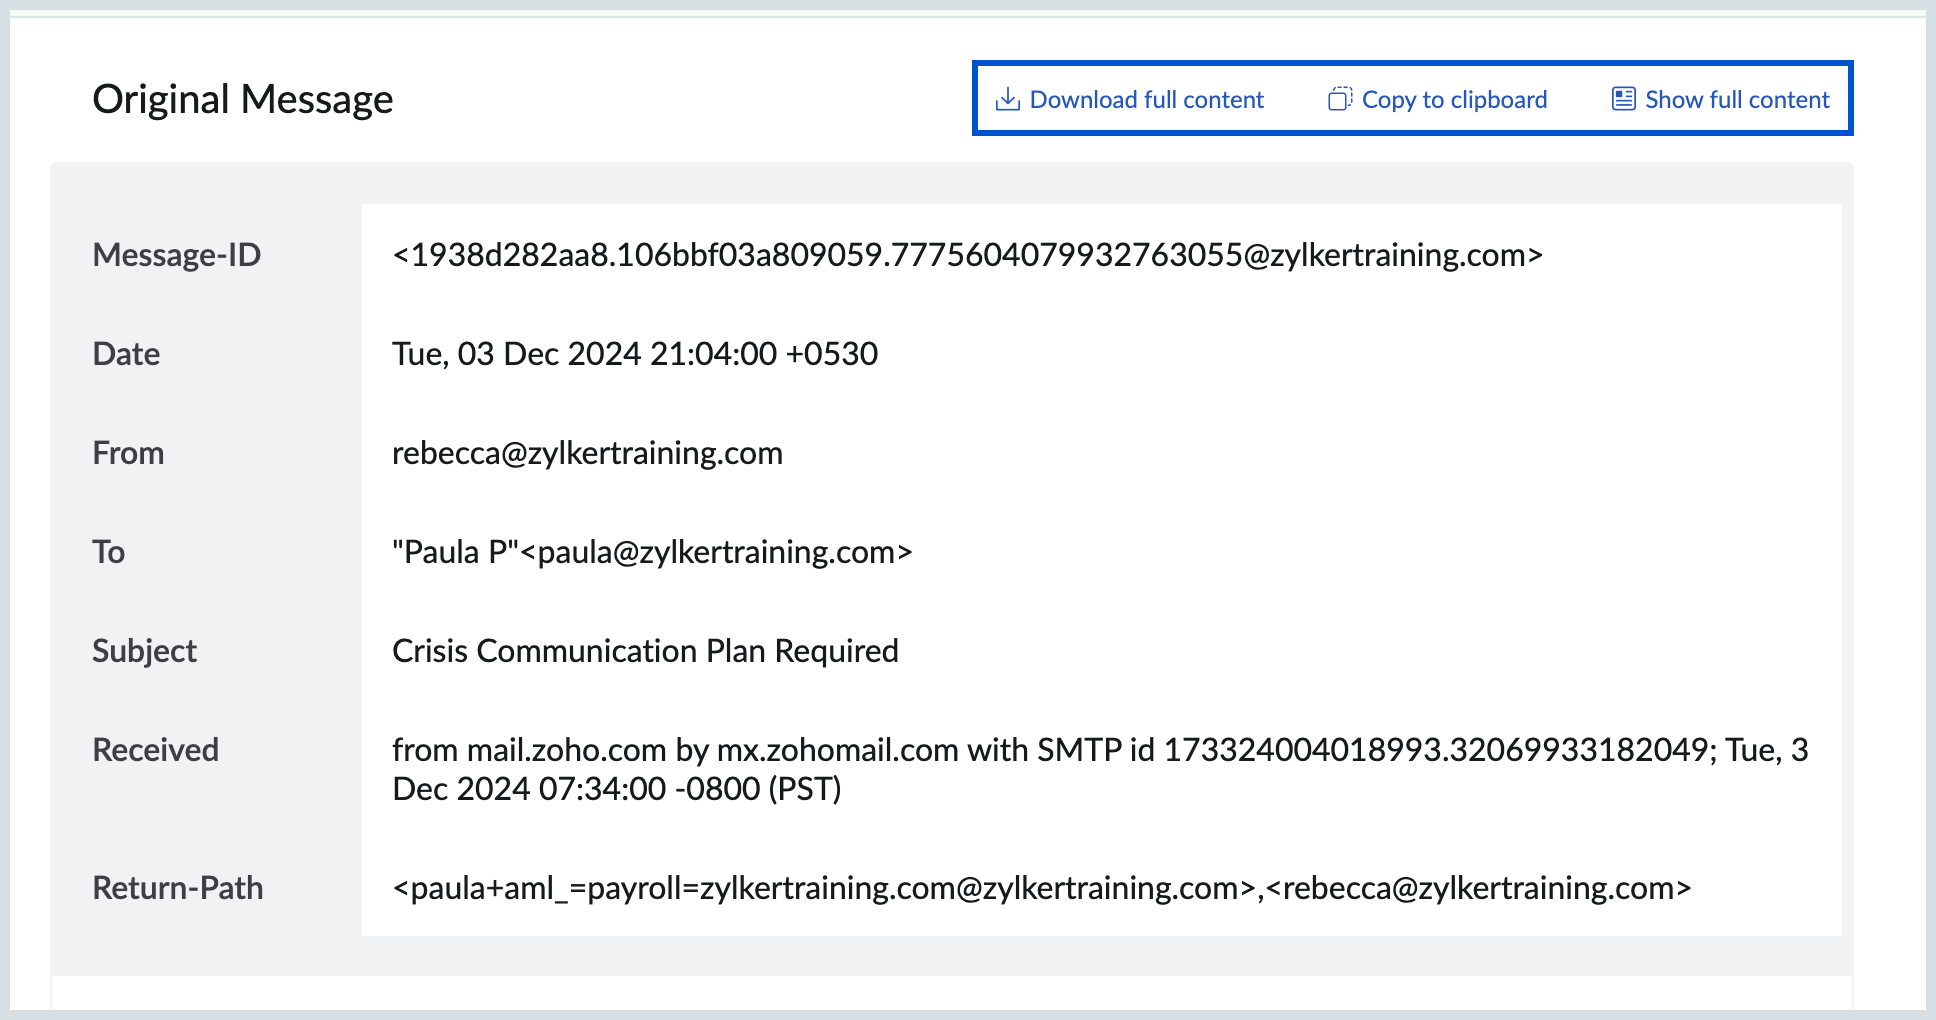
- In case you want to download the headers, click the Download Full Content option. The message headers will be downloaded and saved to your system as a .txt file.
- You can also choose to copy the header content by making use of the Copy to clipboard option.
- Initially only the major header details such as Return Path, authentication Details etc. will be displayed. To view the entire HTML source of the formatted email, click the Show Full Content option.
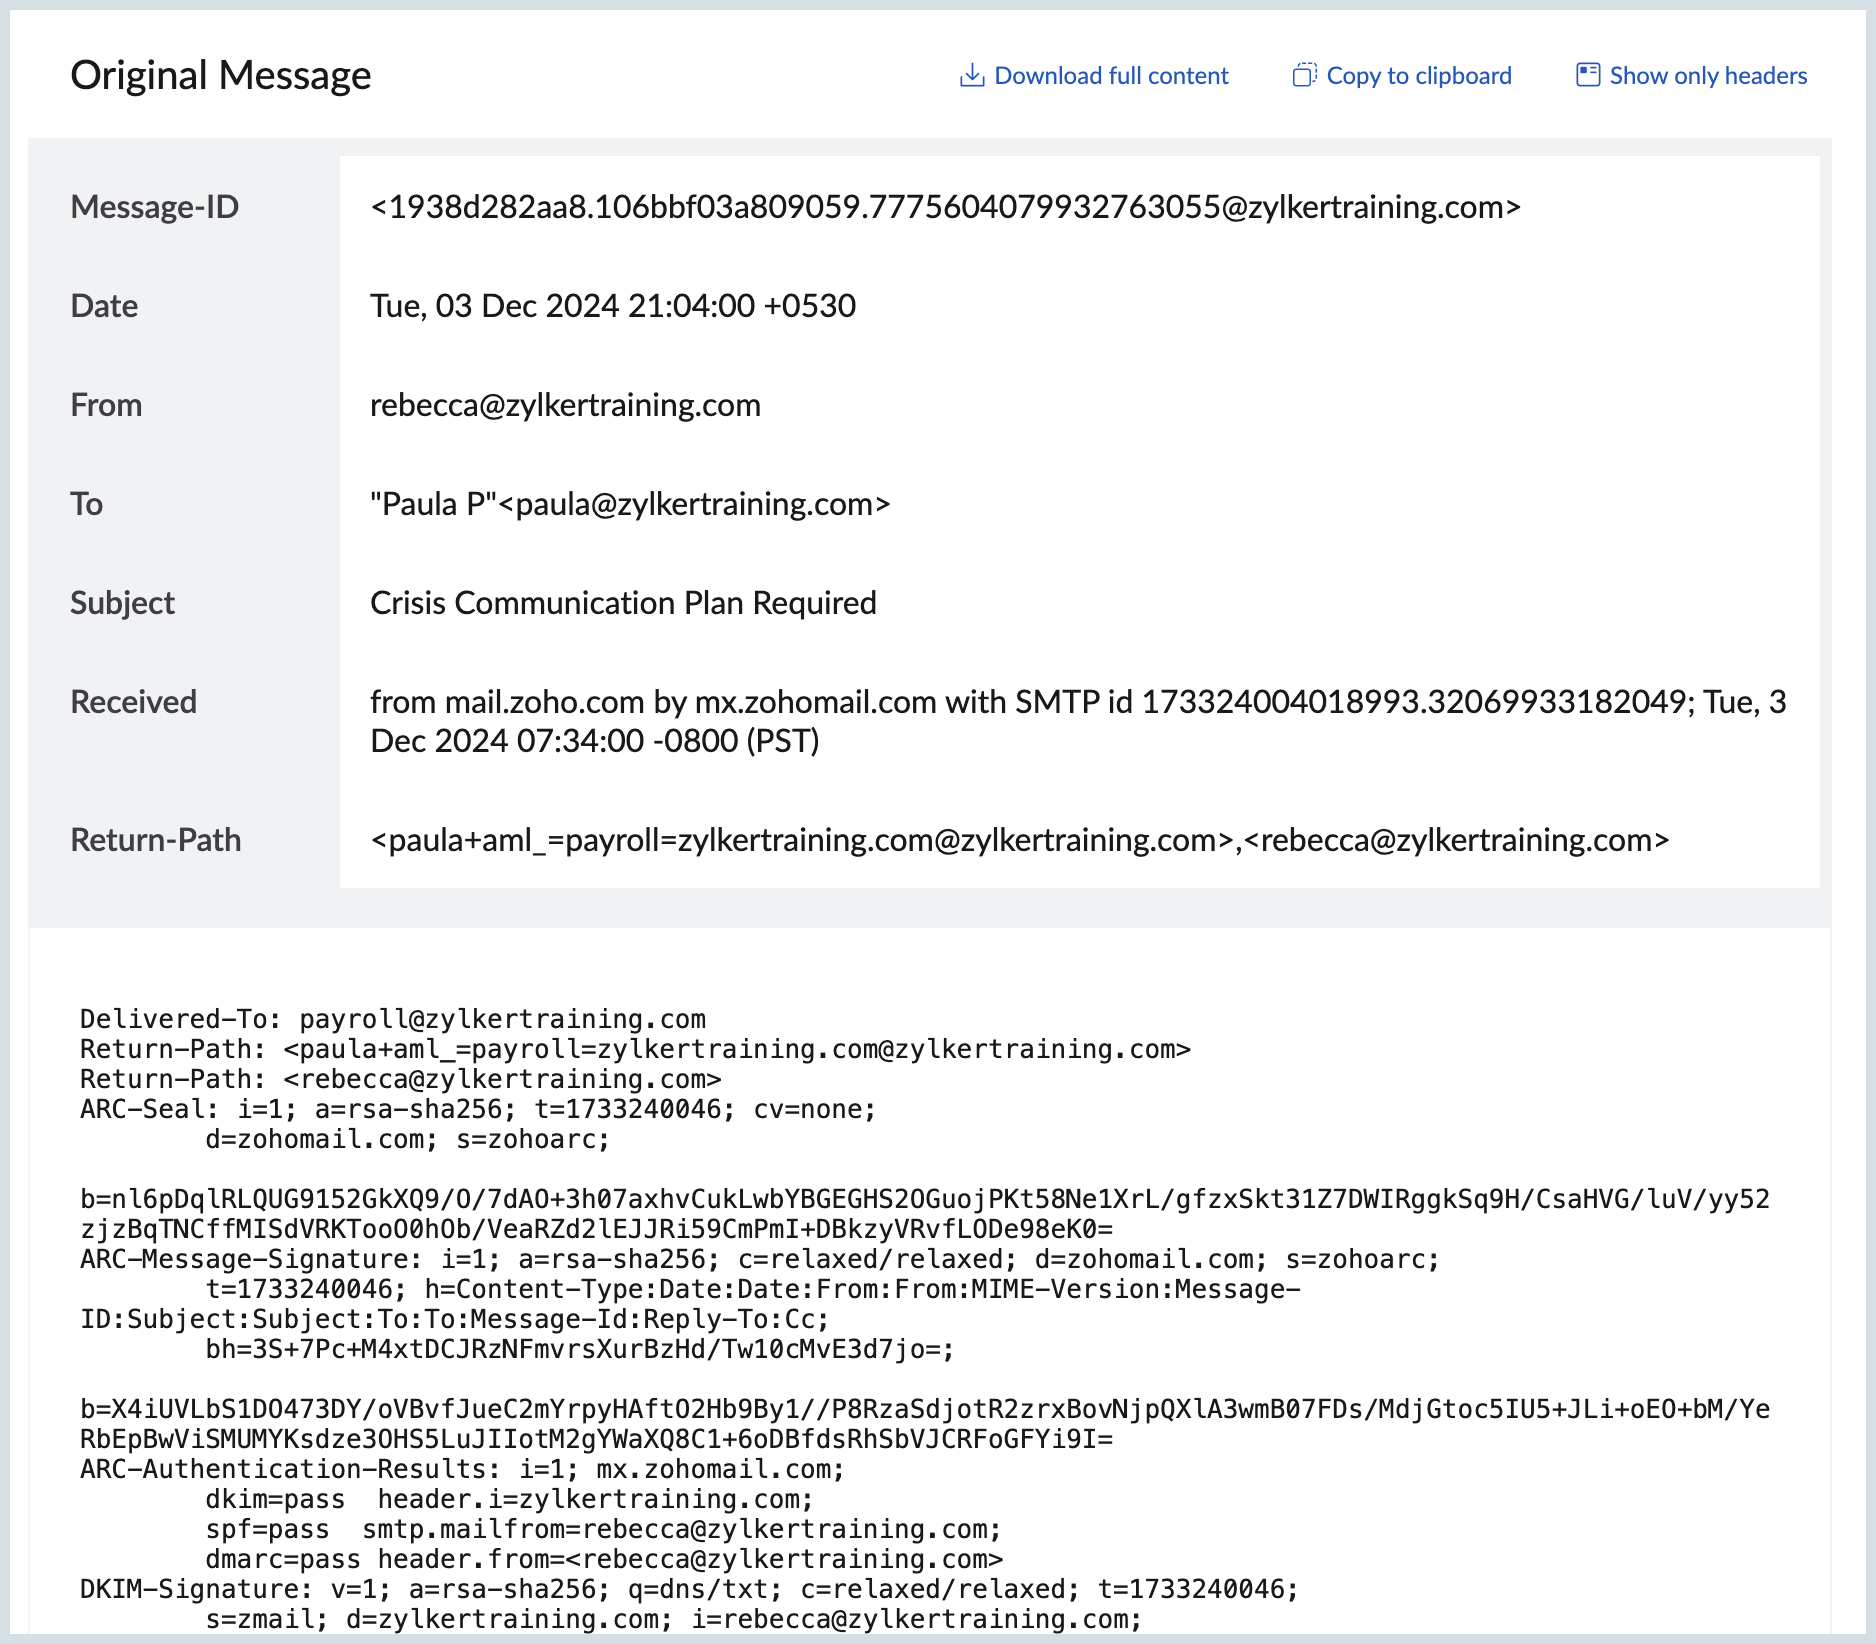
Generally, if you are having issues in email sending or receiving, you will need to send the headers of the email. In case you have trouble with the way the email is displayed, then you need to send the entire source of the email. The step by step instructions to get the email headers from various email clients are available in this third party help link.
Getting the Message ID of emails:
- Login to your Zoho Mail account.
- Locate the email whose Message ID you would like to view.
- Right click on the email and select the Open in new Window option.
- In the URL of the New Window, locate the msgId=xxxxxxxxxxxxxxxxxxx part.
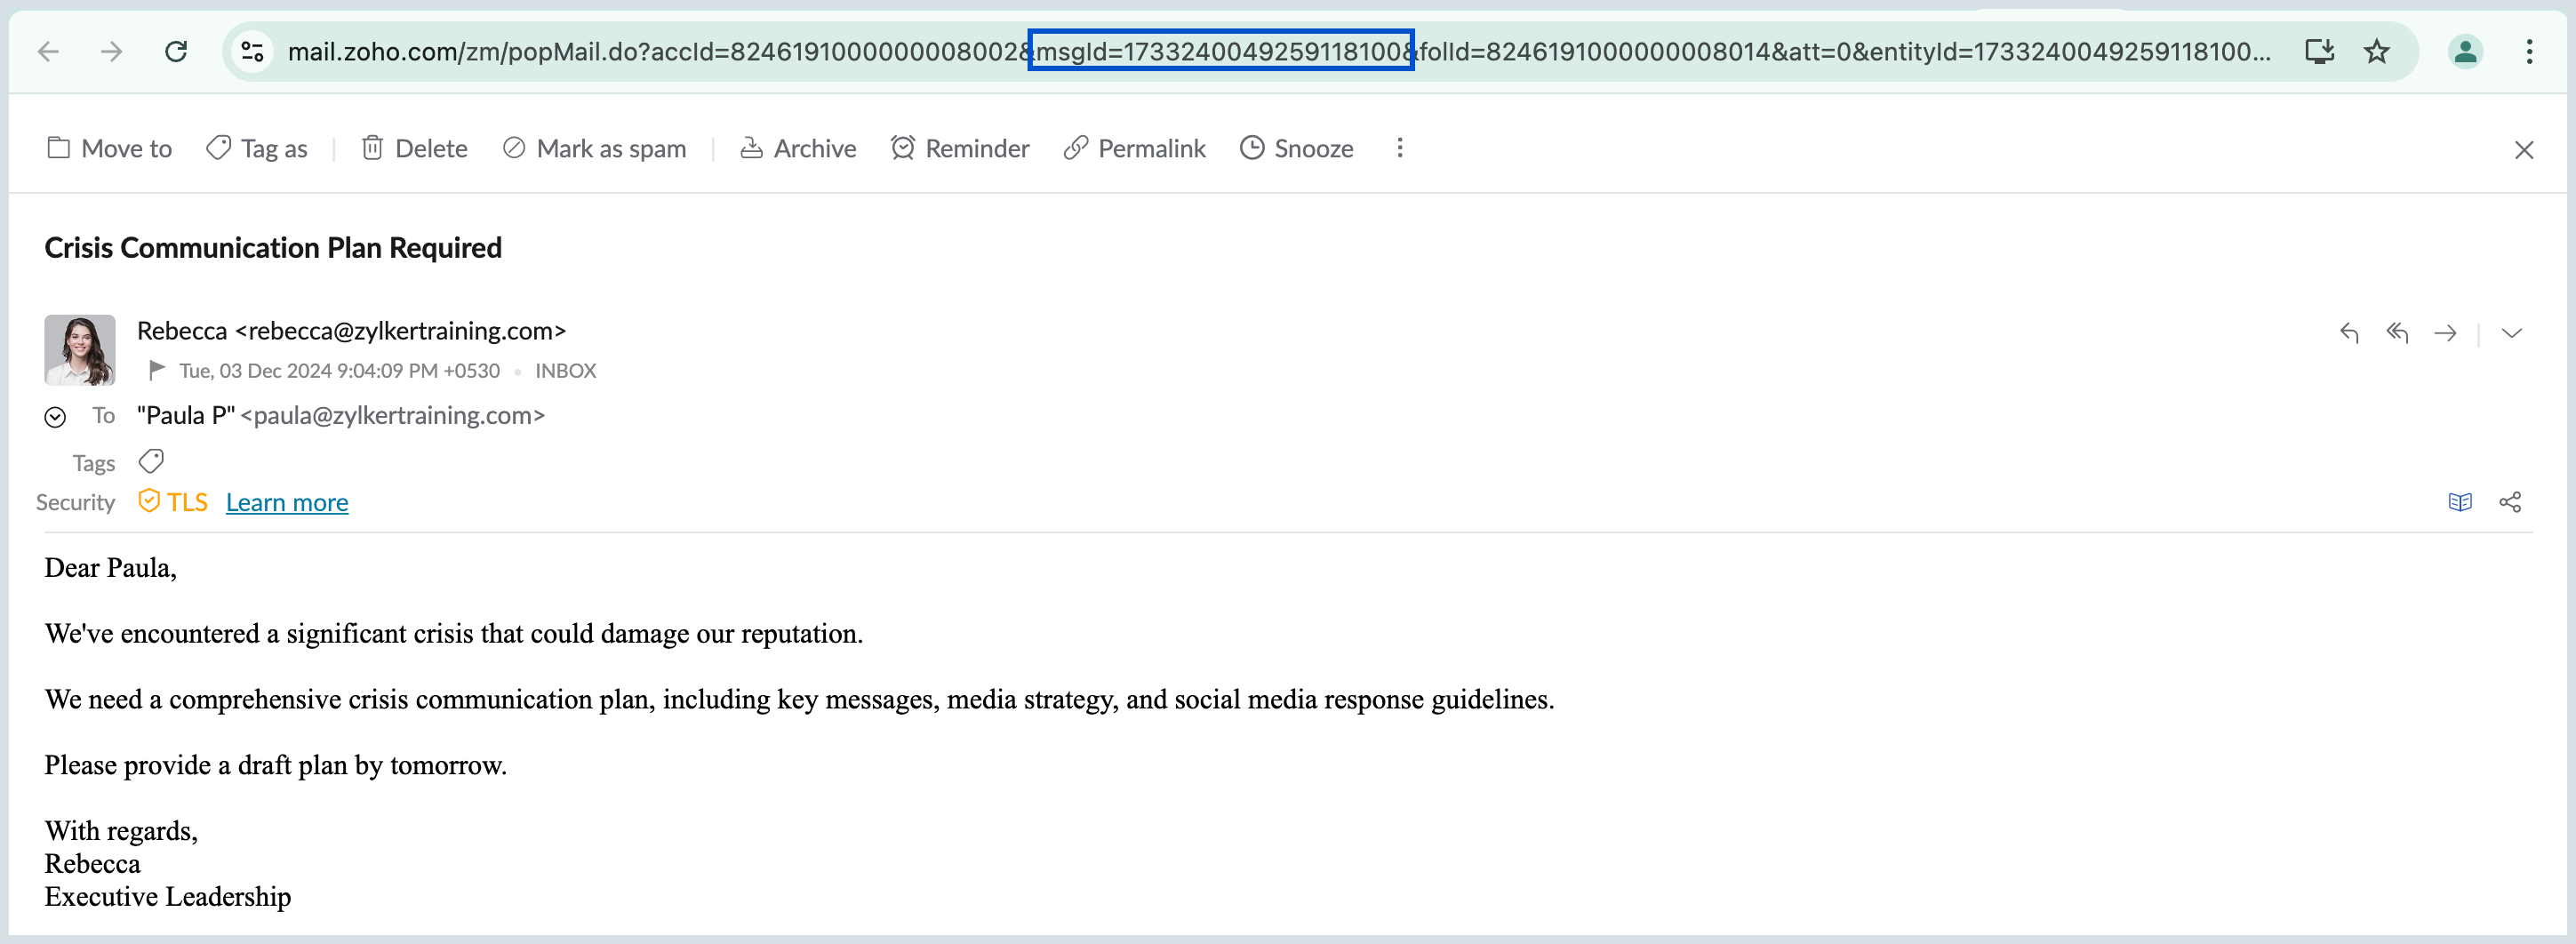
- The series of numbers that follow the "msgId=" part of the URL, will be the Message ID of your email.
Print Email
You can easily print both an individual email or the entire email conversation in a single click. When printing a email conversation, Zoho Mail allows you to print up to the first 100 emails in the conversation thread. Follow the steps mentioned below to print emails:
- Log into your Zoho Mail account.
- Navigate to the email or the email thread that you want to print.
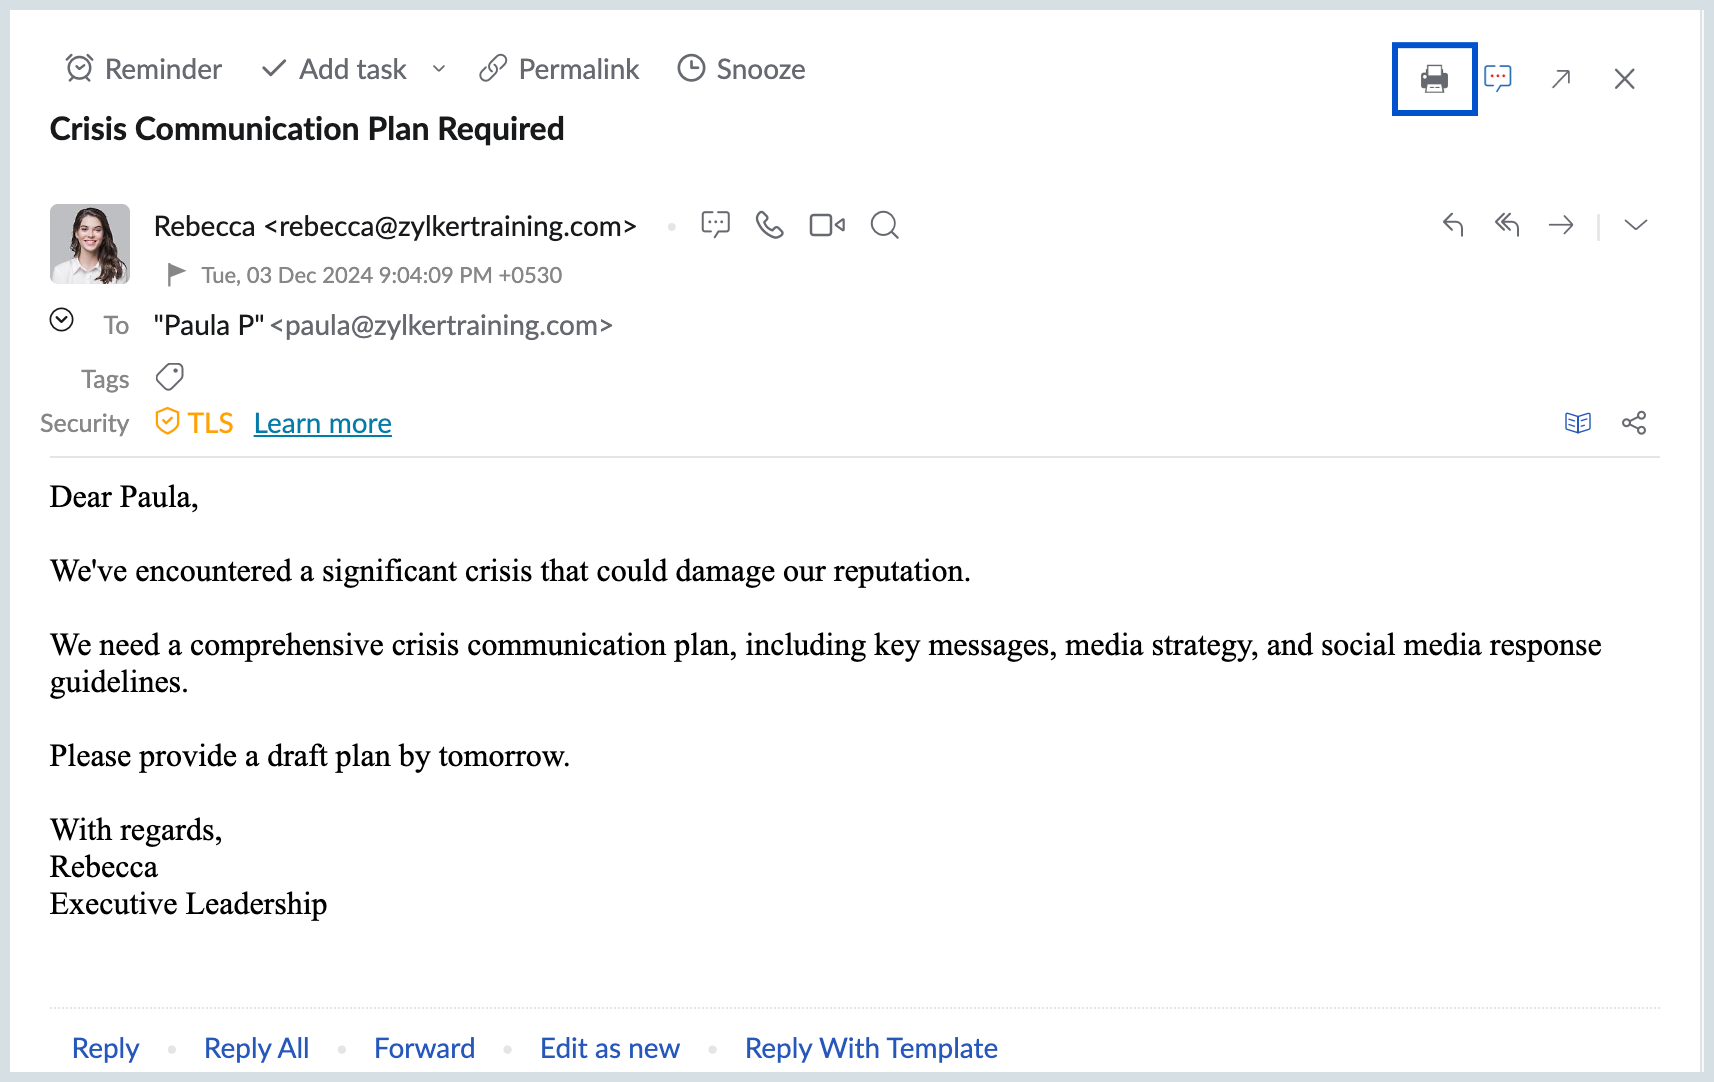
Click on the Print option next to the chat about this email option, which will allow you to print the content.
Note:
When printing a single email, the icon will appear as Print. However, when printing an email conversation with over 100 emails, the icon will be displayed as Print the first 100 emails in this conversation.

- The printable format of the email will open in a new window. Click the Print icon again to print the email.
- A print email pop-up willl appear. Choose your preferred print destination(format), pages, layout and enter other additional details in more settings.
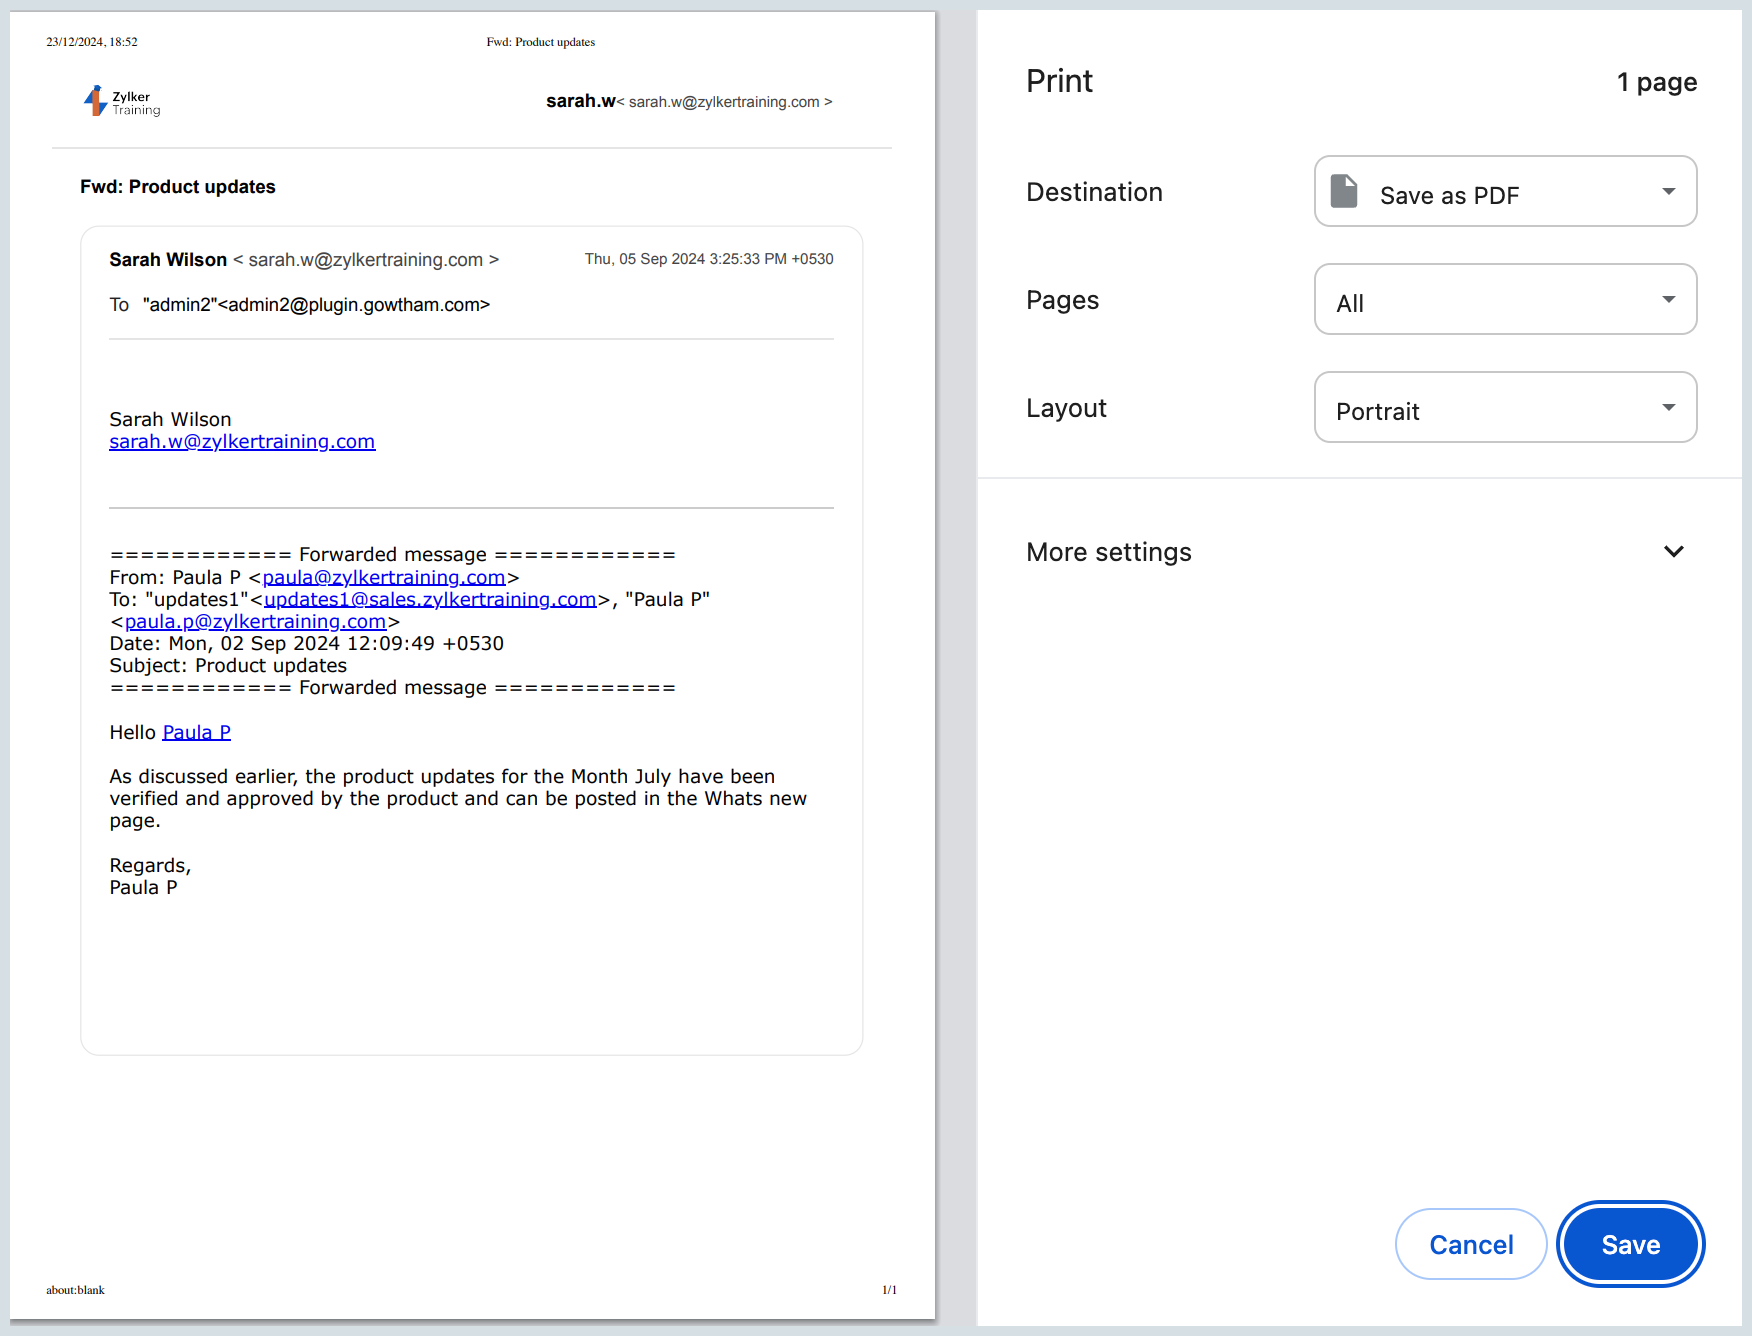
- Click Save and choose a destination in your Local desktop for the emails for the printed emails to get saved.
Note:
- Currently, the print option is only available on the Zoho Mail web version.
- More than 100 emails in a conversation thread cannot be printed.
Save Email
You can save the email for future reference in HTML or EML format. While reading your email, click the More Options drop-down, select Save as and choose the preferred format to save the email.
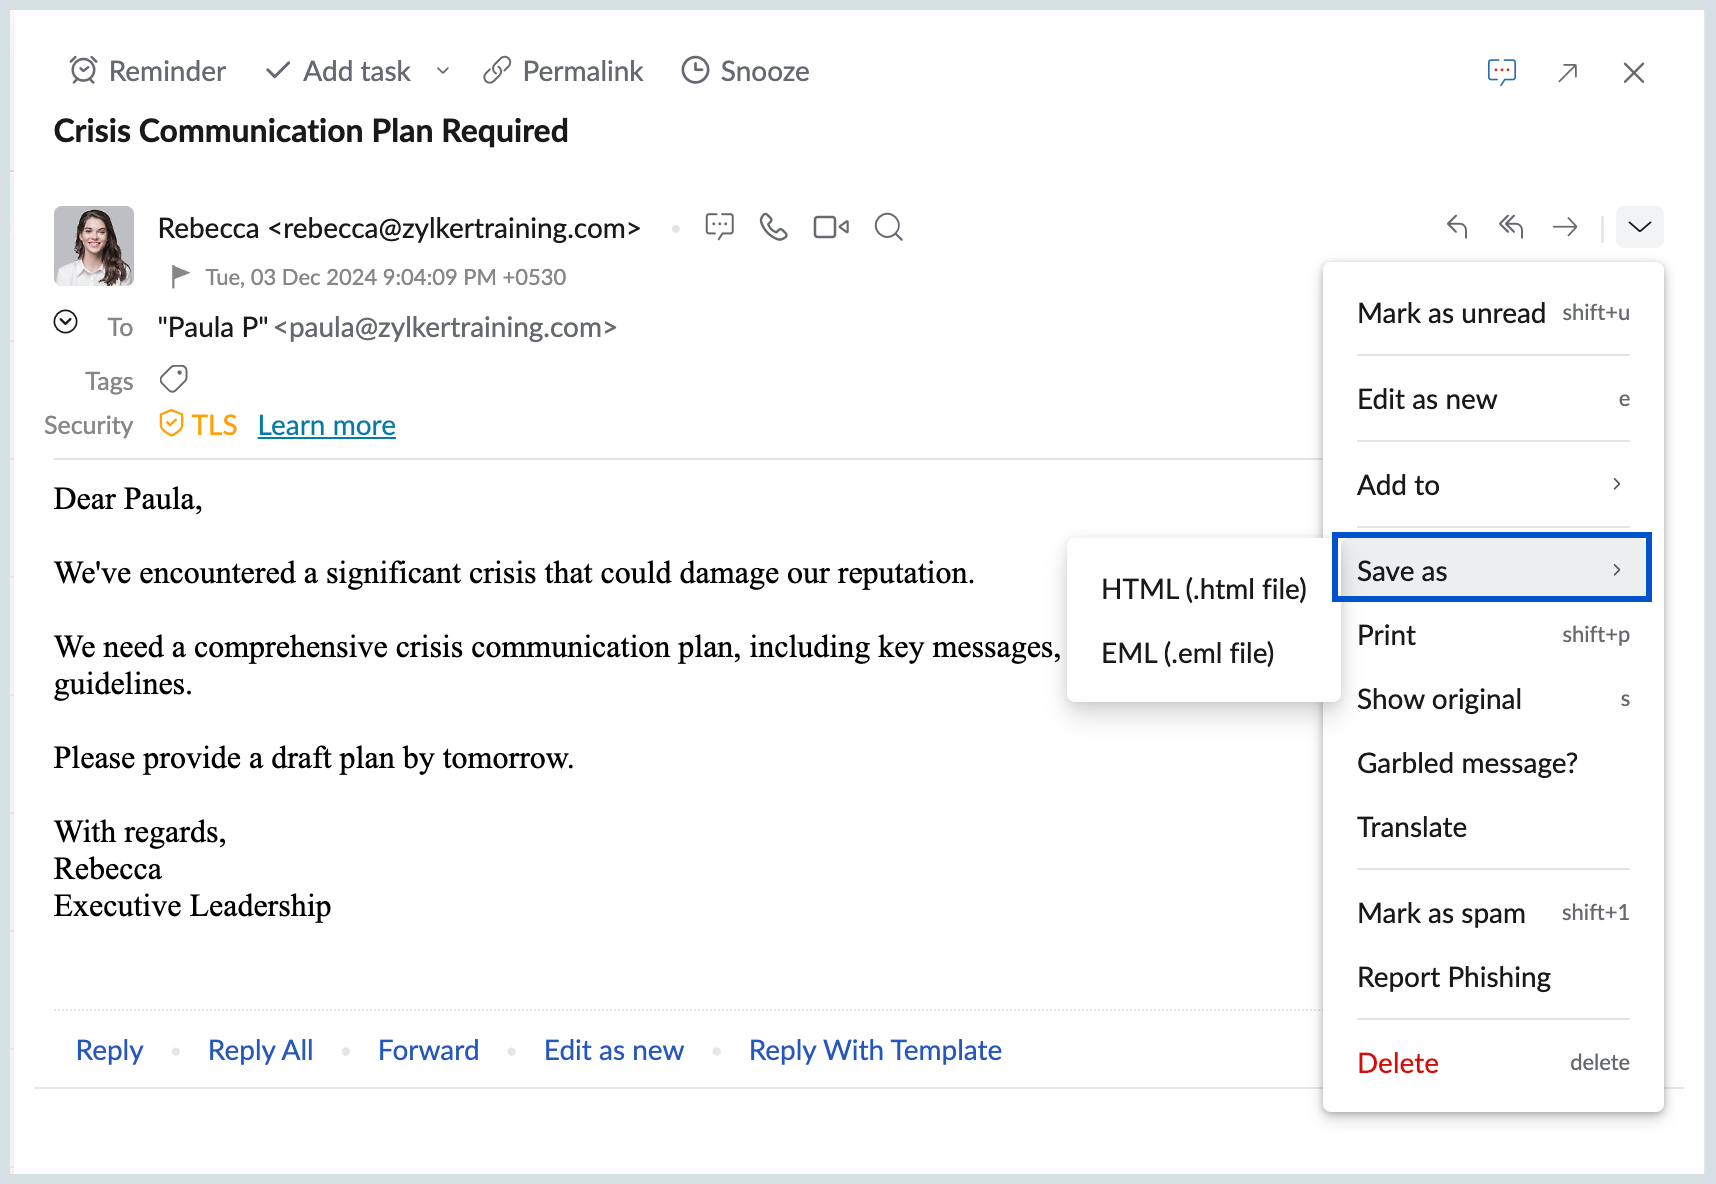
If you save the email in the HTML format, only the content of the email will be saved. In this case, if you want the sender/ subject details, use the export option from the Settings. However, if the email is saved in the EML format the whole message will be saved including attachments.
Distorted or Garbled Messages
When you receive an email, the email content has the 'encoding' details using which the email will be decoded and displayed in Zoho Mail in a readable format. UTF-8 encoding is adopted as universal encoding and can be used to display multiple languages across browsers, and without any issues in the readability of emails.
In some cases, the email content may have certain character codes, that are not supported in the 'encoding' details provided in the email. Hence such content may appear Garbled when viewing the message. This often occurs when you have a chain of emails in the same thread, with different character encoding values.
You can use the 'View Garbled Message' Option, to open the particular email in a new window, and choose a suitable encoding method from the browser.
- Open the email which appears to be garbled.
- Select Garbled Message? from the More Options drop down.
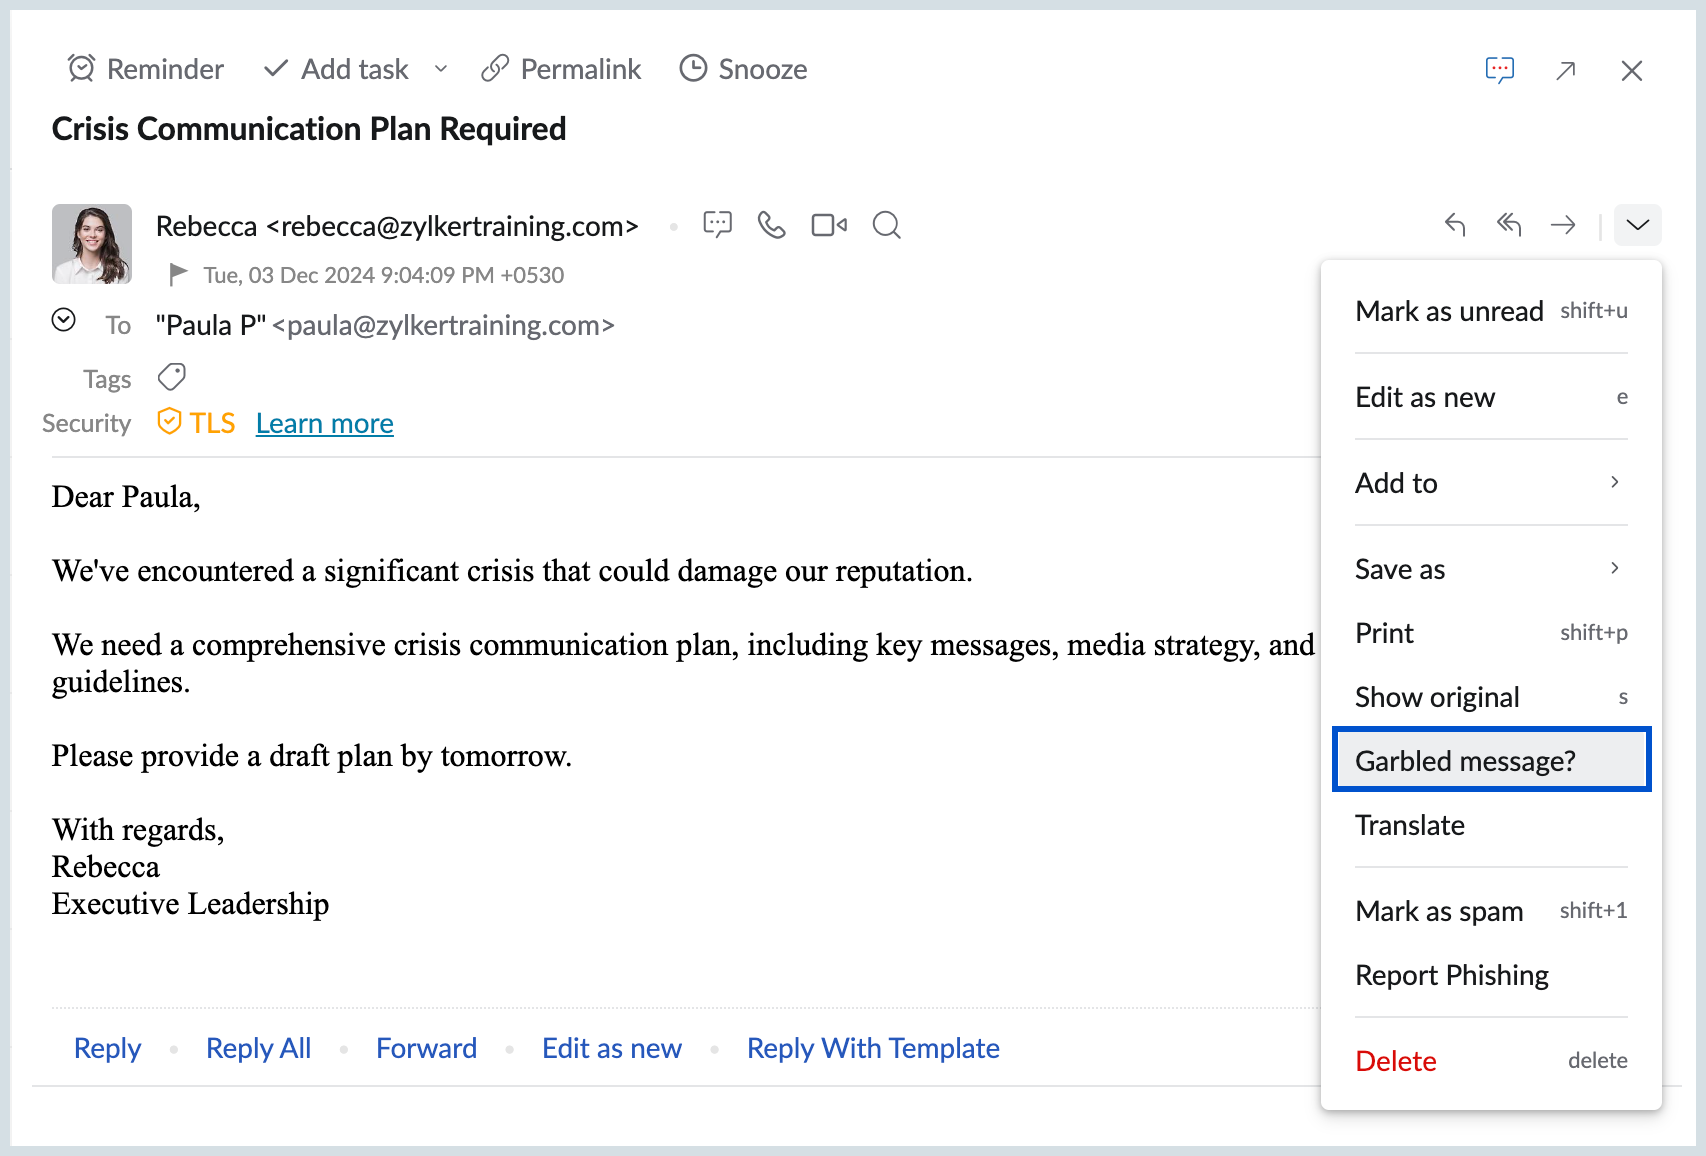
- The message will open in a new browser window.
- Select Encoding from the View menu in the browser toolbar.
- From the list, select an encoding method appropriate for the language in which you think that this message is written.
- The message would display properly on selecting the correct encoding.
- If you still have issues in the display of the email, contact Zoho Mail Support with your email headers.
Note:
- Different browsers have different menu name or items for encoding. Internet Explorer displays the item as 'Character Encoding', Safari displays it as 'Text Encoding' etc. Select the appropriate item as per the browser you use.
- Chrome, by default tries to identify the encoding method and display the email content. Hence, you'll not be having the manual method in Chrome. If you receive a Garbled/ Distorted email and are not being able to view it properly, try accessing your email account from a different browser or use any Encoding extensions from the Chrome Store to view the message.
- You will not be able to view this option in Mail-Desktop Lite application also, since it is a Progressive Web Application built over Chrome. In this case we recommend you to access the email from any other web browser and view the content.
Block/Unblock users
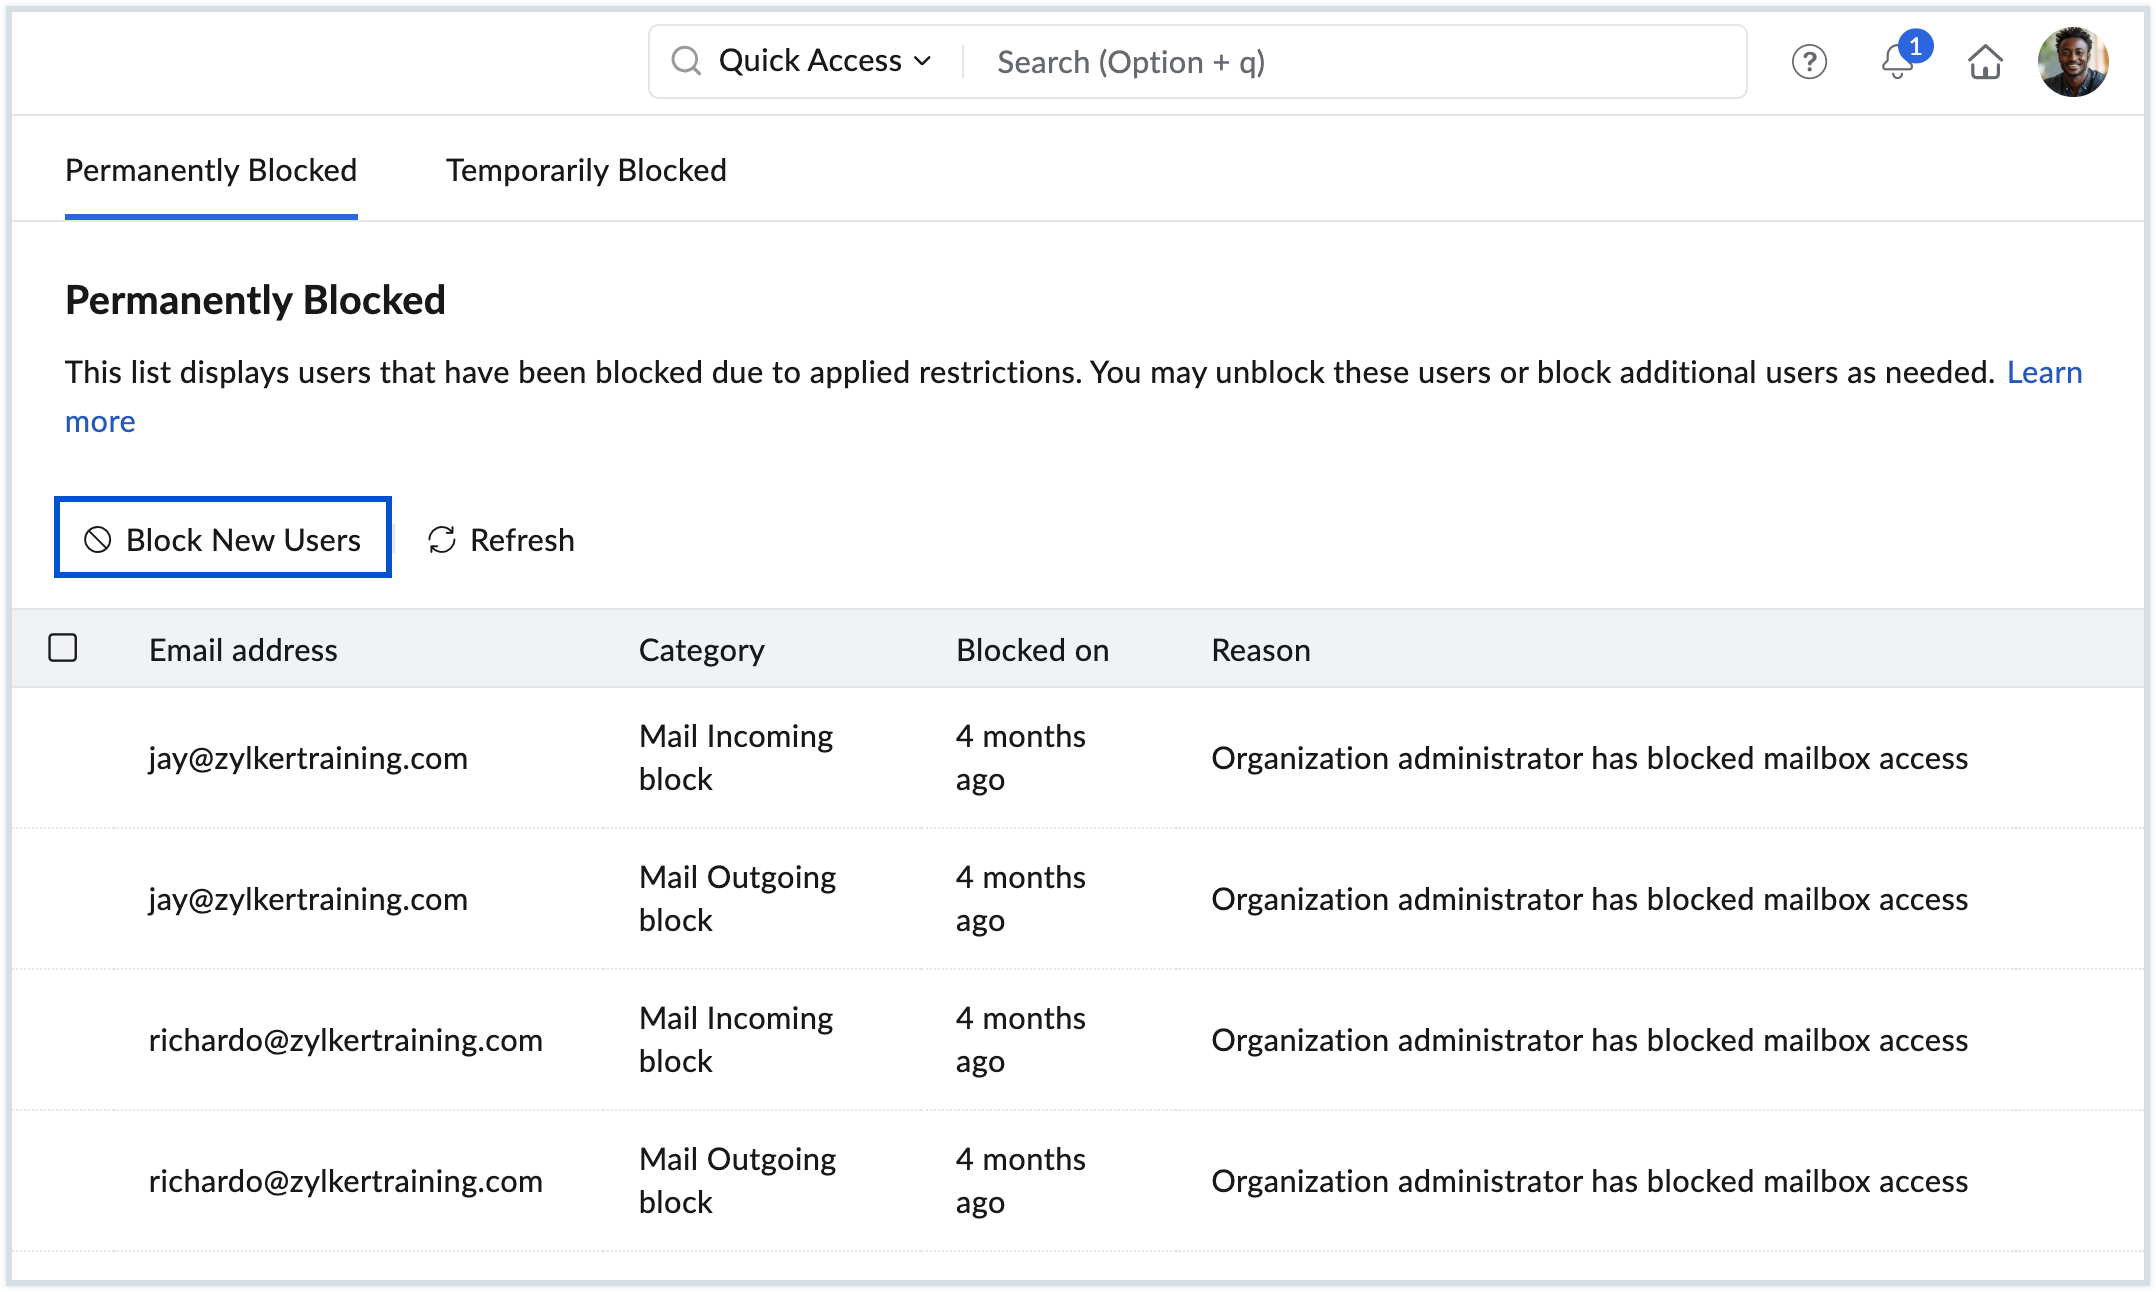
You can now block users in Zoho Mail if any user spams you repeatedly or seems untrustworthy. You can also unblock them in the future. This 'block-unblock' feature gives you additional control over your inbox and increases security.
Block a user
- Login to Zoho Mail.
- Click on the email whose sender you wish to block and reject future emails.
- You can block users in a couple of ways.
- In the preview pane, click on More Actions icon. A drop-down window appears listing multiple options.
- Click on their user name. A list of options appears below the name.
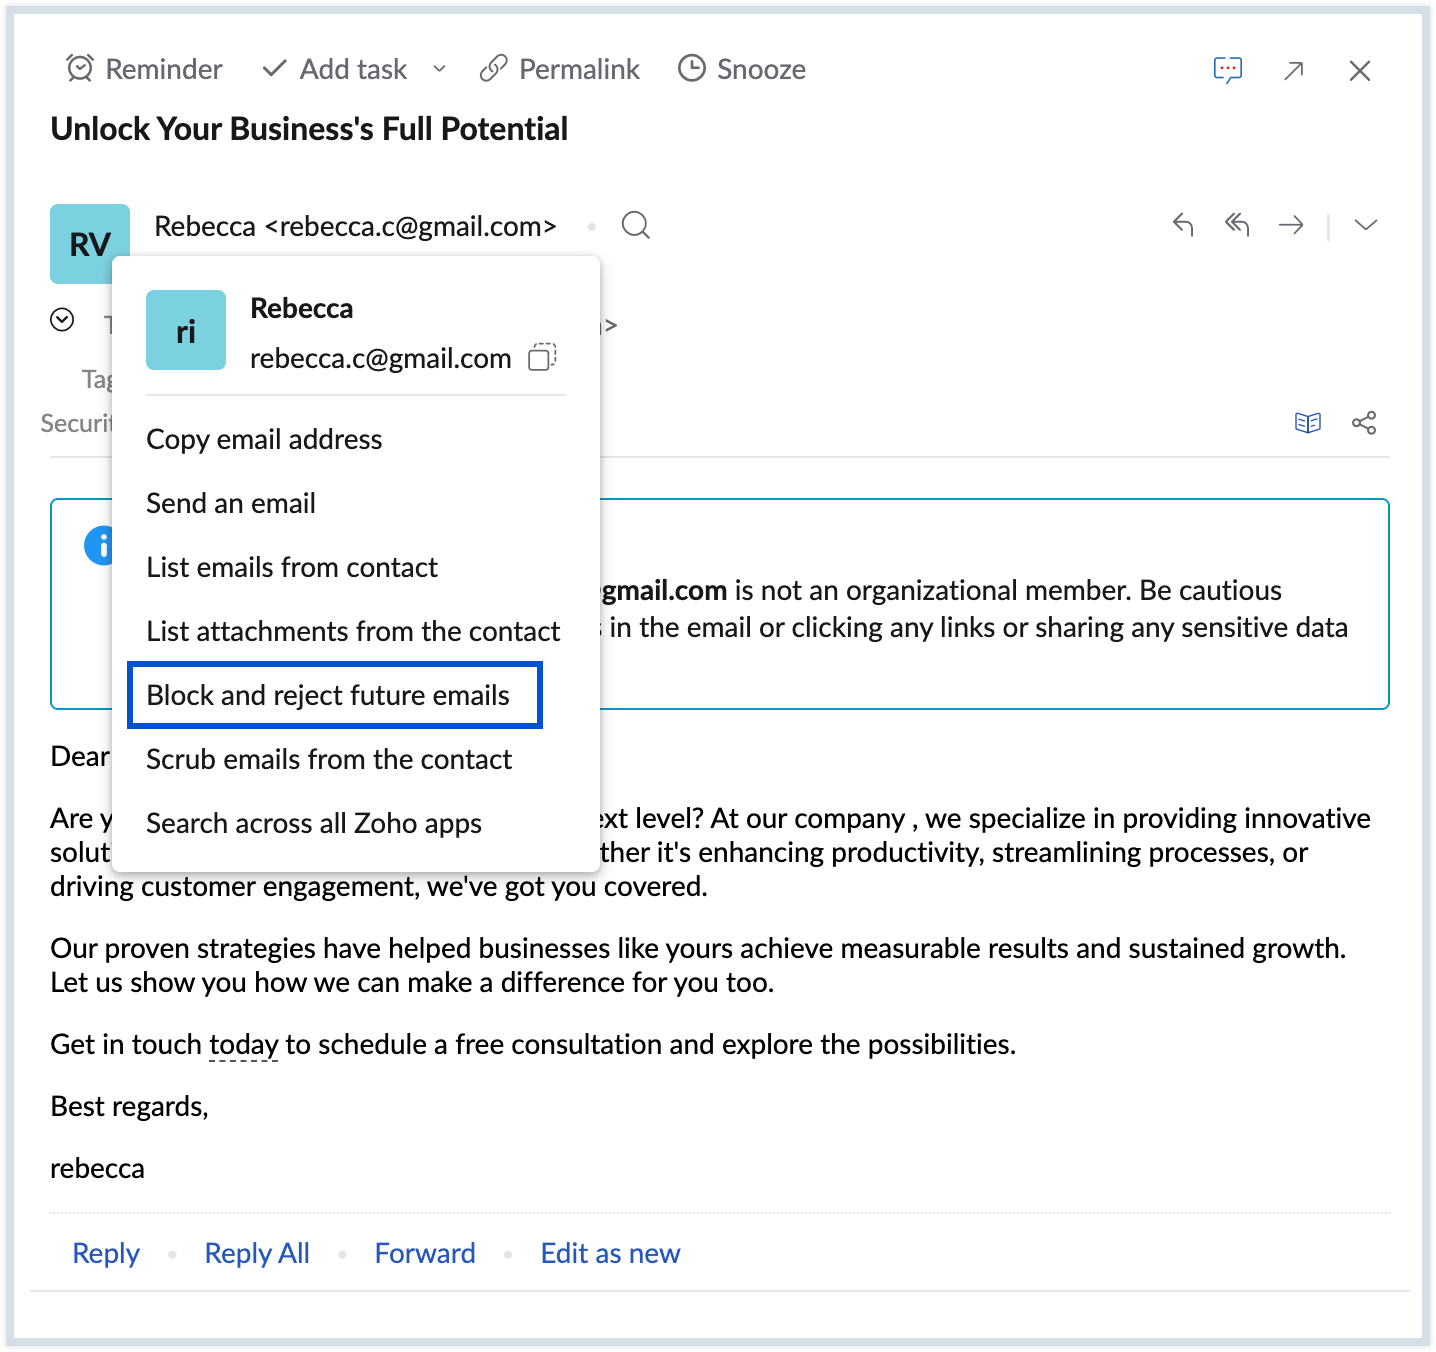
- In the preview pane, click on More Actions icon. A drop-down window appears listing multiple options.
- Click Block and reject future emails from the drop-down list.
Once you block a user, the particular email gets sent to the Spam folder. The user's email address gets stored in the Rejected List and all their future emails will be bounced back to them.
Unblock users
You can unblock a user at any time should you change your mind.
If you wish to instantly unblock a user- for example, you might have accidentally blocked them- click on their username or More Actions icon in the email preview pane (the email will be available to preview until you close it) and select Unblock user. You can also unblock users by identifying the email that got sent to the Spam folder and click on their username or More Actions icon in the email preview pane and select Unblock user. To unblock users after a certain period,
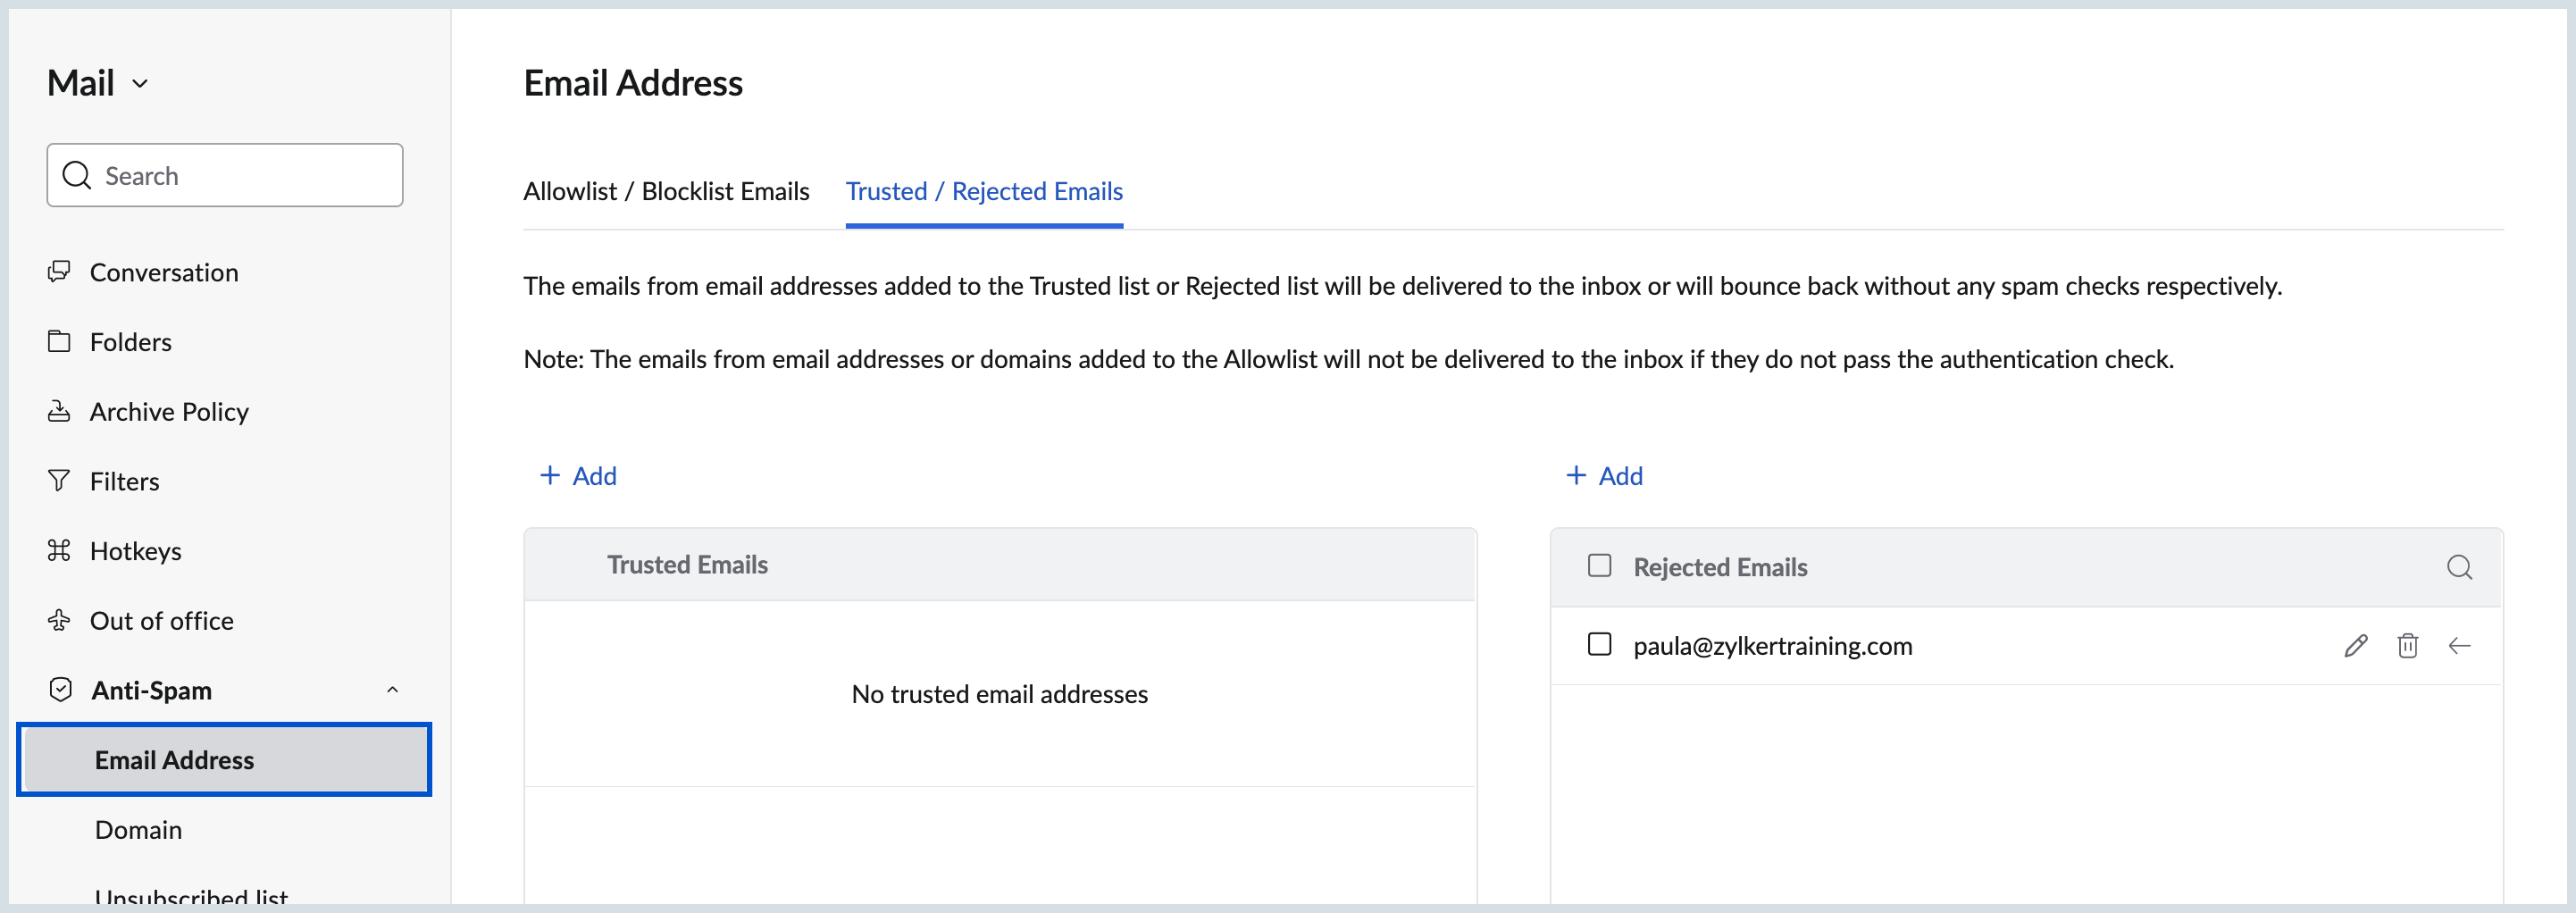
- Go to the Anti-Spam list settings. For more details about the Anti-Spam list settings refer to this help page.
- Select Trusted/Rejected emails under the Email address tab.
- In the Rejected Emails segment select the users you wish to unblock by clicking on the checkboxes next to their email addresses.
- Delete the email addresses to unblock the users by clicking the Delete icon.
Note:
The Block user option will not be available for users within the same organization.